Register your Information for Free Stone Samples Sent Express to You!

How to Maintain Stone Paving in Australia: Weatherproof Tips That Work

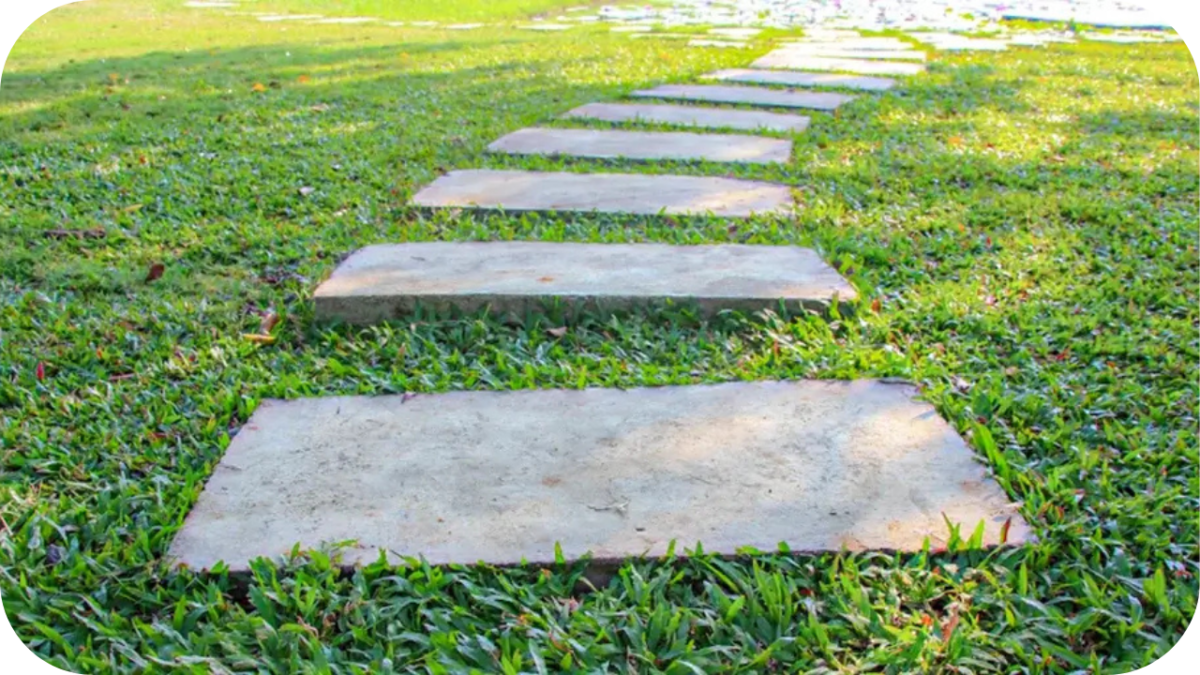
Stone paving looks stunning when freshly laid, but Australia’s harsh sun, sudden downpours, and coastal air can wear it down fast if you’re not careful. 

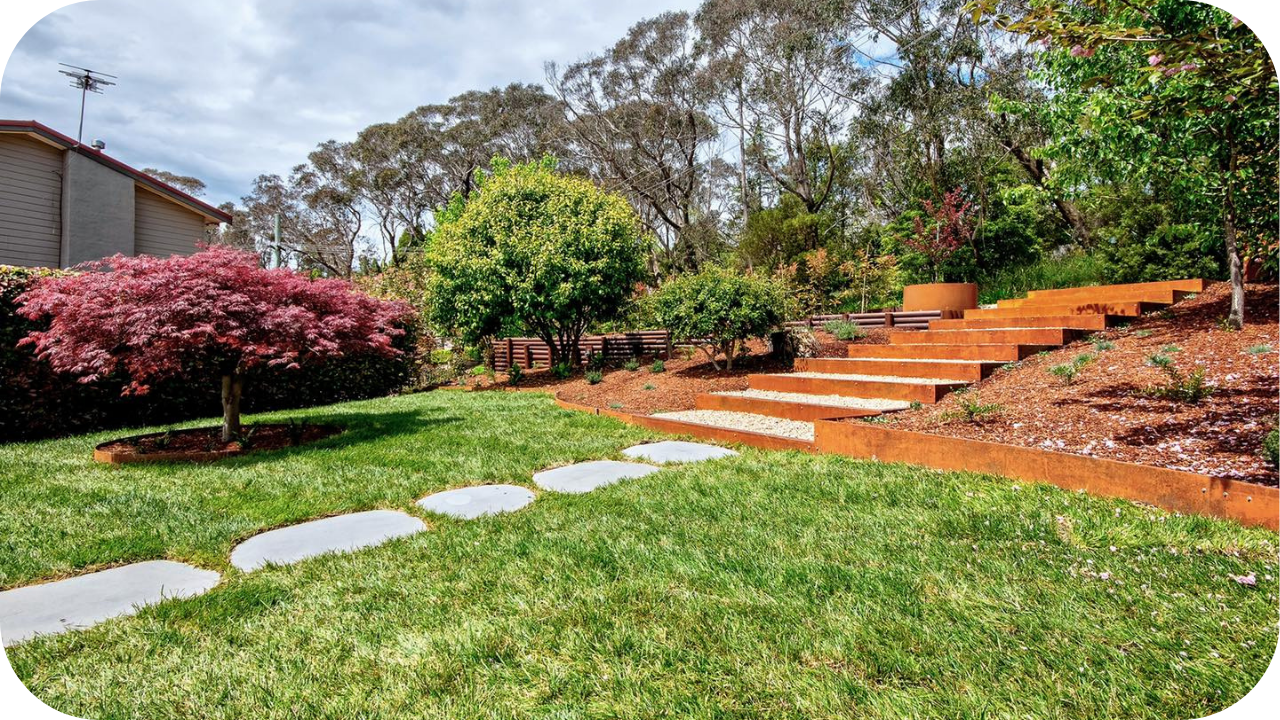
Whether it’s a sandstone courtyard in Sydney or a bluestone path in Melbourne, keeping your pavers in top nick isn’t just about looks, it’s about longevity. The good news? A few smart maintenance habits can save you thousands in repairs. Let’s walk through the essentials every homeowner should know.

1. Clean Regularly to Avoid Buildup

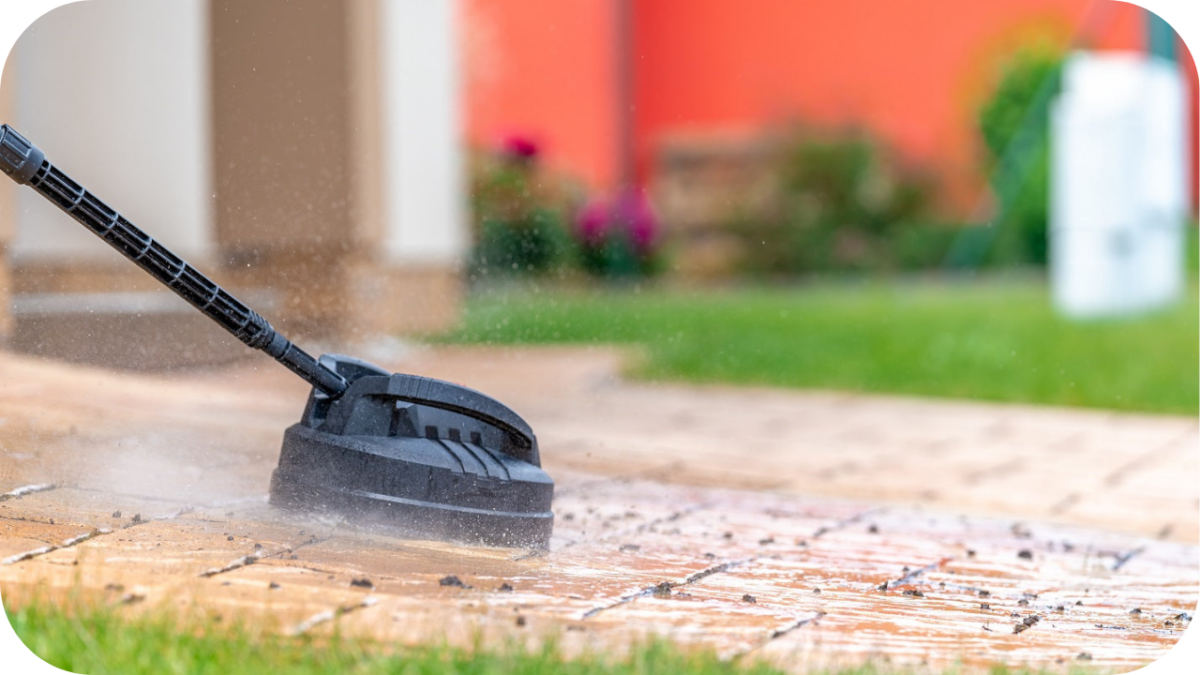
Regular cleaning is the first and most important step in keeping your stone paving looking its best. In Australia’s outdoors, leaves, dirt, and dust build up quickly, especially after windy days or storms. Left unattended, that debris can trap moisture and lead to stains, mould, or moss, particularly on porous stones like sandstone and limestone.

Use a soft-bristled broom to sweep your paving weekly and a low-pressure hose to rinse off grime. For deeper cleans, stick to pH-neutral detergents that won’t strip the stone’s natural finish. Avoid harsh chemicals like bleach or acidic cleaners, which can etch and dull the surface over time.

It’s also wise to steer clear of high-pressure washers unless you know your stone can handle it, too much force can chip edges or wear away sealant. A little elbow grease and gentle care go a long way toward keeping things fresh and tidy.

2. Reseal Periodically to Block Moisture and UV

Reseal Periodically to Block Moisture and UV

Australia’s intense sun doesn’t just warm your patio, it slowly fades the natural colours in your stone. Add in heavy rain, morning dew, or coastal salt spray, and you’ve got the perfect recipe for staining, mould growth, or salt efflorescence. That’s where resealing comes in.

A good quality stone sealant acts like sunscreen and waterproofing combined. It helps protect the surface from UV rays, repels water, and makes cleaning much easier. For high-traffic areas or porous stones like travertine and limestone, resealing every 1–2 years is a safe bet. Denser stones like granite or quartzite can go a bit longer, around every 3 years.

You’ll know it’s time when water stops beading on the surface or when stains start soaking in more easily. Always clean thoroughly before resealing, and choose a sealant suitable for outdoor Australian conditions, especially one that offers UV resistance and breathability.

3. Tackle Stains Promptly

Spills happen, whether it’s red wine at a backyard BBQ, oil from the grill, or rust from outdoor furniture. But when it comes to natural stone, timing is everything. The longer a stain sits, the deeper it seeps into the surface, especially on porous stones like sandstone, limestone, or marble.

Act quickly by blotting (not scrubbing) the area with a clean cloth. Then reach for a stone-safe cleaner, look for products specifically labelled for natural stone, as these are pH-neutral and won’t degrade the surface. Steer clear of acidic cleaners like vinegar or lemon juice, which can cause permanent etching, particularly on limestone and marble.

For stubborn marks like rust, a poultice made from a specialised rust remover and an absorbent powder can help draw it out without damaging the stone. The key is to always check your cleaner’s compatibility first and test it in a small, hidden spot before going all in.

4. Choose the Right Cleaning Tools

Choose the Right Cleaning Tools

Using the wrong cleaning gear can do more harm than good, even if your stone looks tough. Natural stone surfaces need a gentle approach, especially when dealing with softer varieties like travertine or sandstone.

Stick to non-metallic brushes or soft scrubbing pads that won’t scratch or wear down the stone’s surface. When it comes to cleaning products, always go for a pH-neutral solution designed for natural stone. These cleaners lift grime without reacting chemically with the stone itself.

Avoid harsh chemicals like bleach, ammonia, or vinegar. Although they may work well on tiles or concrete, they can strip sealants, discolour the surface, or cause etching. This is particularly risky with calcium-based stones like limestone and marble.

If you’re unsure, test any product or tool in a discreet corner before applying it across your paved area. When in doubt, less is more; gentle, regular care always wins out over heavy-duty fixes later.

5. Prevent Weeds and Ants in the Joints

Weeds sprouting between your pavers and ants building nests beneath them can quickly ruin the look and structure of your paved space. The good news? A bit of preventative maintenance goes a long way.

Start by brushing in polymeric sand or a quality jointing compound between your pavers. These products harden slightly when set, locking out weeds and deterring ants from digging through. Over time, weather and foot traffic can wear them down, so it’s worth topping them up every year or two, especially in high-use areas.

Drainage plays a big role, too. If water tends to pool or sit in joints, it creates the ideal environment for weeds to thrive. Make sure your paving slopes slightly away from buildings and drains freely after rain. The combination of tight joints and good runoff keeps your paved area cleaner, safer, and far less inviting to nature’s little invaders.

6. Protect Paving from Furniture Damage

 Protect Paving from Furniture Damage

Outdoor furniture looks great on stone paving until it starts leaving behind scratches, rust marks, or worn patches. The everyday drag of chair legs, especially during gatherings or rearranging, can scuff the surface over time. To avoid this, fit your furniture with non-rubber leg caps or gliders made from plastic, felt, or Teflon. 

Rubber may seem safe, but in hot Aussie weather, it can break down and leave stubborn black stains on natural stone. Always lift, never drag, when moving heavy tables, lounges, or barbecues. For added protection, place rugs or outdoor mats in high-traffic areas like under dining sets or seating arrangements. 

Just make sure they’re breathable and quick-drying to avoid trapping moisture underneath. These simple precautions can help preserve the clean, unblemished look of your stone, so your paving stays as polished as your patio style.

7. Watch for Salt or Pool Chemical Exposure

If your stone paving sits near a pool or along the coast, it’s under extra pressure. Salt from the ocean breeze or chlorine from pool splashes can break down sealants, cause discolouration, or even lead to surface erosion over time.

To stay ahead of the damage, give your paving a light rinse with fresh water every week, especially during summer when exposure is highest. This simple step helps wash away salt and chemicals before they start seeping in.

It’s also worth investing in a high-quality, salt-resistant sealant. These are designed to create a stronger barrier against corrosive elements without compromising the stone’s breathability. Reapply as recommended for your specific stone type and conditions, usually every 1–2 years for poolside or seaside locations.

Regular upkeep here isn’t just for looks. It protects your investment and keeps your stone paving strong and vibrant, even in the toughest Aussie environments.

8. Inspect for Damage After Extreme Weather

Inspect for Damage After Extreme Weather

Australia’s weather can turn on a dime, from torrential rain to scorching heat in a matter of days. While your stone paving is built tough, extreme conditions can still take a toll. After major storms or prolonged heat waves, it’s wise to give your paved areas a once-over.

Look out for signs of movement like uneven surfaces, widened joints, or loose pavers. Heavy rain can wash away bedding sand and cause minor sinking, while extreme heat may cause expansion that loosens the joints. If left unchecked, these small issues can quickly turn into trip hazards or larger structural problems.

If caught early, the fix is often simple: a quick rebedding, joint refill, or spot reseal might be all that’s needed. Regular inspections after wild weather not only maintain the safety and appearance of your paving but also help you avoid the headaches and costs of major repairs down the track.

Bonus Tip: One Size Doesn’t Fit All, Know Your Stone

Different stones react differently to Australia’s wild weather, and treating them all the same can lead to early wear or costly damage. Knowing what you’re working with means you can tailor your maintenance and get the best out of your paving.

  • Bluestone: Naturally durable with a clean, modern look. But over time, UV exposure can cause fading. Reseal every 1–2 years to preserve colour and protect against surface wear.
  • Quartzite: Hard and highly stain-resistant, ideal for outdoor spaces. However, it can still absorb moisture. Apply a breathable sealant to guard against water damage and help with easier cleaning.
  • Limestone: Softer and more porous, it’s easily marked by acidic cleaners and harsh scrubbing. Use gentle, pH-neutral products and seal frequently for added protection.
  • Travertine: Beautiful but thirsty, it absorbs liquids fast. Clean spills immediately and seal well to prevent staining and discolouration.

By matching your maintenance to the specific stone, you extend its life, preserve its natural beauty, and avoid unnecessary repairs. Treat it right, and it’ll stand up to the Aussie elements for years to come.

Keep It Beautiful Year-Round

A little regular care goes a long way when it comes to stone paving. Small steps make a big difference, from cleaning and sealing to watching for wear after wild weather. By matching your maintenance to your stone type, you’ll keep it looking sharp and lasting longer.

For quality natural stone built for Australian conditions and expert advice to match, visit Splendour in Stone. We’re here to help you get the most out of every paved surface.

Bluestone Steppers: A Stylish Solution for Modern Garden Paths

Bluestone steppers offer the perfect blend of style and durability for modern garden paths. Their natural texture and rich colour create a timeless, elegant look that complements any outdoor space. 

Resistant to weather and wear, these stones require minimal maintenance while adding a sophisticated touch to your garden design. Whether you want a sleek contemporary path or a rustic natural feel, bluestone steppers provide a versatile and eco-friendly solution. 

Transform your garden walkway into a stunning feature with bluestone’s enduring beauty and practical benefits.

What Are Bluestone Steppers?

Bluestone steppers are flat, natural stone slabs known for their blue-grey colour and durability. Used as individual stepping stones in garden paths, they create elegant walkways with gaps that allow grass, gravel or plants to grow between. 

This offers a natural, seamless look that blends into any landscape. Unlike continuous paving, steppers provide a flexible and eco-friendly solution with minimal maintenance. Their textured surface ensures stability underfoot, while their weather resistance makes them long-lasting. 

Whether aiming for a modern or rustic aesthetic, bluestone steppers deliver both beauty and practicality, making them ideal for stylish and functional outdoor spaces.

Benefits of Using Bluestone Steppers in Garden Design

Benefits of Using Bluestone Steppers in Garden Design

Bluestone steppers combine natural beauty and lasting strength, making them an ideal choice to elevate any garden path. Here is what makes them so special:

1. Elegant Garden Appeal

With rich blue-grey tones and organic texture, bluestone brings timeless beauty to any outdoor space. It suits both modern and traditional garden designs, adding a refined, cohesive visual touch.

2. Easy to Maintain

These steppers require little upkeep to stay looking great. A simple occasional clean is enough, making them an ideal choice for low-maintenance gardens and busy homeowners.

3. Sustainable and Natural

Quarried from natural stone, bluestone is an eco-friendly choice. It blends beautifully into the environment while offering a more sustainable alternative to manufactured paving materials.

4. Fits Any Garden Style

Bluestone steppers work well in all kinds of landscapes, from contemporary courtyards to rustic garden paths. Their adaptability allows for creative layouts and seamless design integration.

5. Comfortable in Heat

Thanks to its natural thermal resistance, bluestone remains cool underfoot even on hot days. It’s perfect for barefoot walking in summer and ideal for sun-exposed garden areas.

6. Adds Property Value

Installing bluestone steppers enhances your outdoor space visually and functionally. This improvement can boost property appeal and increase home value with its premium, professional finish.

Design Ideas for Modern Garden Paths Using Bluestone Steppers

Design Ideas for Modern Garden Paths Using Bluestone Steppers

Creative design ideas for using bluestone steppers to craft garden paths that combine elegance, functionality, and natural charm perfectly:

1. Creative Layouts for Bluestone Steppers

Using bluestone steppers, you can create a variety of eye-catching layouts to suit your garden’s style. Popular options include evenly spaced stepping stones for a clean, minimal look or irregular, organic patterns that mimic natural pathways. 

Experimenting with shapes and distances between stones can add movement and visual interest, guiding visitors through your garden in a thoughtful, inviting way.

2. Combining Bluestone with Complementary Materials

Pairing bluestone steppers with other landscaping elements can elevate your garden path’s aesthetic. Consider surrounding the stones with gravel, river pebbles, or mulch to create contrast and texture. Planting low-growing ground covers or moss between the stones softens the hardscape and adds natural greenery, enhancing the path’s integration into your garden.

3. Integrating Lighting for Ambience and Safety

Incorporating subtle lighting along or beneath bluestone steppers can transform your garden path after dark. Solar or LED pathway lights highlight the stones’ natural texture and colour while improving safety. Lighting creates an inviting atmosphere for evening strolls, making your garden path a standout feature at all hours.

4. Using Bluestone Steppers in Small or Narrow Spaces

Bluestone steppers are ideal for narrow or compact garden areas where traditional paving may feel overwhelming. Their modular nature allows for flexible placement, creating functional walkways without sacrificing style. This adaptability makes them perfect for courtyard gardens, side yards, or leading up to garden features like seating areas or water elements.

5. Incorporating Native Plants Alongside Bluestone Paths

Enhance the natural appeal of your bluestone garden path by planting native species alongside it. Drought-tolerant grasses, succulents, or flowering shrubs create a sustainable, low-maintenance landscape that complements the earthy tones of bluestone. This combination supports local wildlife and adds seasonal colour and texture.

How to Install Bluestone Steppers: Step-by-Step Guide

How to Install Bluestone Steppers: Step-by-Step Guide

Follow these simple steps to install bluestone steppers correctly, ensuring a durable, level, and visually appealing garden path:

STEP 1. Prepare the Site

Start by clearing the pathway area of grass, weeds, and debris. Use a spade or shovel to dig down about 10-15cm, ensuring the ground is level and free from loose soil. Proper site preparation is key for a stable and long-lasting garden path.

STEP 2. Lay a Stable Base

Add a layer of compacted gravel or crushed stone approximately 5-10cm thick. This base improves drainage and prevents the bluestone steppers from shifting over time. A tamper or plate compactor is used to firmly compact the base material.

STEP 3. Add a Sand Layer

Spread a 2-3cm layer of coarse sand evenly over the gravel base. This layer allows you to adjust the height and level of each bluestone stepper for a smooth, even surface. Use a screed board to level the sand.

STEP 4. Position the Bluestone Steppers

Carefully place each bluestone stepper on the prepared base, maintaining your desired spacing and pattern. Tap gently with a rubber mallet to secure them in place, ensuring each stone is level and stable.

STEP 5. Fill the Gaps

Fill the spaces between the bluestone steppers with sand, gravel, or soil depending on your garden style. For a natural look, add low-growing ground cover or moss between the stones to soften edges and prevent weed growth.

STEP 6. Final Checks and Maintenance

Inspect the path for any uneven stones and adjust as necessary. Regularly check for settling or shifting, especially after heavy rain, and replenish the base or filler material to maintain stability and appearance.

Maintenance Tips to Keep Bluestone Steppers Looking New

Maintenance Tips to Keep Bluestone Steppers Looking New

The following bluestone maintenance tips can preserve the natural beauty and durability of your steps for years to come:

  • Regular Cleaning: Sweep away dirt and debris frequently to prevent staining and surface buildup.
  • Gentle Washing: Use a garden hose and mild detergent or pH-neutral stone cleaner to wash stones periodically.
  • Avoid Harsh Chemicals: Avoid acidic or bleach-based cleaners, which can damage the stone’s surface and sealant.
  • Sealing: Apply a high-quality stone sealant every 1–2 years to protect against moisture and stains.
  • Weed Control: Remove weeds or moss growing between stones to maintain a neat appearance and prevent damage.
  • Address Stains Quickly: Clean spills promptly, especially from organic matter like leaves or bird droppings.
  • Inspect for Damage: Check stones regularly for cracks or looseness and repair as needed to prevent further issues.

Comparing Bluestone Steppers to Other Garden Path Materials

Understanding the key differences helps you choose the perfect material that balances style, durability, and maintenance for your garden. Let’s unfold them below:

FeatureBluestone SteppersConcrete PaversGravelBrickTimber
DurabilityHighly durable, weather-resistantDurable but can crack over timeLow durability, shifts easilyDurable but can chip or crackProne to rot and decay
Aesthetic AppealNatural, elegant, timelessUniform, modern lookCasual, rusticClassic, traditionalWarm, natural but ages quickly
MaintenanceLow; occasional cleaning & sealingModerate; may need sealingHigh; regular raking requiredModerate; occasional cleaningHigh; requires treatment
Installation EaseModerate; needs base prepModerate; requires base prepEasy; simple to spreadModerate; requires base prepEasy to install
CostHigher initial costModerateLowModerateVariable, often moderate
Eco-FriendlinessNatural stone, eco-friendlyManufactured, less eco-friendlyNatural, eco-friendlyManufacturedNatural but less durable
Heat ResistanceStays cool in sunCan get hotVariesCan get hotCan warp or crack

Why Buy Bluestone Steppers From Splendour In Stone

Why Buy Bluestone Steppers From Splendour In Stone

Looking for bluestone steppers that combine unmatched quality, stunning aesthetics, and lasting durability? Here is why Splendour In Stone is a go-to:

  • Unmatched Aesthetic Appeal: Splendour In Stone’s Bluestone Steppers boast a rich blue-grey hue and fine-grained texture, adding a touch of elegance to any garden path or patio. Each piece is unique, ensuring a bespoke look that enhances your landscape’s beauty.
  • Exceptional Durability: Crafted from one of the hardest natural stones, these steppers are designed to withstand heavy foot traffic and harsh weather conditions. Their dense composition resists cracking and fading, ensuring longevity and maintaining their pristine appearance over time.
  • Low Maintenance: Bluestone’s natural resistance to stains, mould, and mildew makes it easy to maintain. Regular sweeping and occasional washing with mild detergent are typically sufficient to keep your steppers looking new.
  • Versatility in Design: Available in various finishes, including honed, sawn, flamed, and natural cleft, Bluestone Steppers can complement any design style, from modern minimalist to rustic charm. Their adaptability allows for creative layouts, enhancing the overall aesthetic of your outdoor space.
  • Eco-Friendly Choice: As a natural material, bluestone has a minimal environmental impact. Its durability reduces the need for frequent replacements, contributing to sustainability. Additionally, its thermal properties help in maintaining cooler outdoor temperatures, reducing the urban heat island effect. 

Elevate Your Garden with Stylish Bluestone Steppers

Elevate your garden’s style and functionality with the timeless beauty and durability of bluestone steppers. Their natural elegance and low-maintenance qualities make them the perfect choice for modern garden paths. 

When selecting quality bluestone steppers, trust Splendour In Stone, Australia’s leading supplier of premium natural stone. Their extensive range, expert guidance, and commitment to excellence ensure your outdoor space achieves both aesthetic appeal and lasting performance. Transform your garden with Splendour In Stone today.

Rustic Sandstone Cladding for a Warm, Earthy Exterior Finish

Rustic sandstone cladding brings a natural warmth and earthy character to any exterior. Its unique textures and rich tones create an inviting, timeless finish that complements various architectural styles. 

Durable and eco-friendly, sandstone cladding is an excellent choice for homeowners seeking a blend of beauty and resilience. 

This article explores the benefits, design ideas, installation, and maintenance of rustic sandstone cladding for your home’s exterior.

What Is Rustic Sandstone Cladding?

Rustic sandstone cladding is a natural stone veneer made from sandstone slabs or tiles that feature a rough, textured surface. This type of cladding highlights the stone’s natural variations, including its grain, colour, and imperfections, giving walls a warm, earthy, and timeless appearance. Ideal for both interior and exterior walls, rustic sandstone cladding adds character and durability while creating a cosy, natural aesthetic.

Its distinctive rough finish highlights the unique grains, colours, and imperfections of the sandstone, creating a warm and earthy look that blends seamlessly with outdoor and indoor environments. 

This type of cladding is popular for enhancing the character of feature walls, fireplaces, facades, and garden spaces. Beyond aesthetics, rustic sandstone cladding offers durability, weather resistance, and low maintenance, making it suitable for a variety of climates. 

Its natural appeal adds timeless charm and a tactile quality that modern interiors and exteriors often seek, making it a favourite choice for those wanting to introduce organic texture and visual interest to their spaces.

Benefits of Using Rustic Sandstone Cladding

Front porch with rustic sandstone cladding, warm lighting, and lush greenery creating an inviting, earthy entrance

Rustic sandstone cladding enhances your home with natural beauty and unmatched durability. Rustic sandstone cladding offers many advantages:

  • Natural Warmth: Its earthy tones and textured surface create a cosy, inviting façade that blends beautifully with natural surroundings.
  • Durability: Sandstone is highly resistant to weathering and withstands extreme climates, retaining its strength and appearance for years.
  • Low Maintenance: Requires minimal upkeep, just occasional cleaning and sealing to keep its natural charm intact.
  • Eco-Friendly: Sourced naturally, sandstone is sustainable and reduces environmental impact compared to manufactured materials.
  • Versatility: Easily complements both rustic and modern designs, offering flexibility in exterior aesthetics.
  • Thermal Regulation: Helps moderate temperature fluctuations, keeping interiors cooler in summer and warmer in winter.
  • Increased Property Value: Adds character and curb appeal that can boost your home’s market value.
  • Unique Texture and Colour: Each stone piece is one-of-a-kind, providing a distinctive look that mass-produced materials can’t replicate.
  • Fire Resistance: Natural stone offers excellent fire resistance, enhancing safety around your home.

Design Ideas for Rustic Sandstone Cladding on Exterior Walls

Outdoor garden wall and planter box made from rustic sandstone cladding, surrounded by tropical greenery and modern landscaping

Here are ways of using rustic sandstone cladding creatively to enhance your home’s exterior appeal:

Mix with Natural Materials

Combining rustic sandstone cladding with other natural elements like timber, brick, or metal creates a striking contrast that adds depth and texture to your exterior. 

This mix highlights the rugged beauty of sandstone while introducing warmth and variety, resulting in a balanced and visually engaging façade.

Feature Walls

Using sandstone cladding as a feature on key architectural elements, such as entrance façades or chimneys, draws the eye and adds character to your home. These focal points become stunning visual statements that elevate the overall aesthetic without overwhelming the design.

Varied Finishes

Blending different finishes, like rough-cut and smoother sandstone pieces, introduces dynamic textures to your exterior walls. This variation creates subtle shadow play and interest, making your cladding feel more organic and unique while showcasing the stone’s natural beauty.

Complement Landscaping

Selecting sandstone tones that harmonise with your garden’s plants and materials helps create a seamless transition between built and natural environments. 

Whether matching earthy garden colours or contrasting greenery, thoughtful colour coordination enhances your home’s outdoor appeal and cohesion.

Installation Process and Considerations

Hands placing sandstone cladding tiles on an exterior wall with visible mortar during installation process

Proper installation is essential for durable, long-lasting sandstone cladding. Follow these key steps to ensure a secure, weatherproof, and visually stunning exterior finish that stands the test of time:

Step 1: Prepare the Surface

Begin by ensuring the substrate or wall surface is clean, dry, and structurally sound. Any dirt, loose material, or moisture must be removed to provide a stable base for the sandstone cladding.

Step 2: Choose Fixing Method

Select the appropriate fixing technique based on your wall type. Mechanical fixing with anchors offers strong support for heavier stones, while adhesive bonding can be used for lighter applications or smoother surfaces.

Step 3: Implement Weatherproofing Measures

Install adequate drainage systems and apply sealing where necessary to prevent moisture buildup behind the cladding. Proper weatherproofing protects the stone and underlying structure from water damage and prolongs the lifespan of the installation.

Step 4: Hire Professional Installers

Consider engaging experienced professionals for the installation. Skilled installers ensure correct placement, consistent spacing, and proper sealing, helping you avoid common issues like uneven cladding or water infiltration.

Comparing Rustic Sandstone Cladding with Other Exterior Materials

FeatureRustic Sandstone CladdingBrickTimberManufactured Stone
AppearanceNatural, warm, texturedClassic, uniformNatural, warm but ages quicklyConsistent, versatile
DurabilityHigh, weather-resistantVery durableSusceptible to rotModerate to high
MaintenanceLow to moderateLowHigh, requires treatmentLow
CostModerate to highModerateVariableModerate
Eco-FriendlinessNatural, sustainableManufactured, less eco-friendlyNatural but resource-intensiveManufactured

Maintenance Tips for Long-Lasting Rustic Sandstone Cladding

Close-up of weathered rustic sandstone cladding in mixed earthy tones, showing texture and colour variation on an exterior wall

Keeping your rustic sandstone cladding in top condition ensures it maintains its natural beauty and durability for years to come. Follow these essential maintenance tips:

  • Regular Cleaning: Gently remove dirt, dust, and debris from the surface using a soft brush or a mild detergent solution. Avoid harsh scrubbing or abrasive tools that could damage the stone’s texture.
  • Sealing: Apply a high-quality stone sealant every 2–3 years. Sealing helps protect sandstone from stains, moisture penetration, and weathering, extending its lifespan and preserving colour vibrancy.
  • Inspect for Damage: Routinely check your cladding for cracks, chips, or loose stones. Early detection and timely repairs prevent further deterioration and costly restoration.
  • Prevent Algae and Moss Growth: Moist, shaded areas may encourage algae or moss growth. Use stone-safe cleaning agents to treat affected spots.
  • Avoid Harsh Chemicals: Avoid acidic or bleach-based cleaners, as they can erode the stone surface and degrade sealants.
  • Control Water Runoff: Ensure gutters and drainage systems direct water away from the cladding to reduce moisture exposure and minimise potential damage.
  • Protect from Impact: Avoid heavy impacts or abrasive contact with the cladding surface to prevent physical damage.
  • Address Efflorescence: If white powdery deposits appear, clean gently with recommended stone cleaners to remove salt buildup without harming the stone.

Why Buy Quality Rustic Sandstone Cladding From Splendour In Stone

Why Buy Quality Rustic Sandstone Cladding From Splendour In Stone

Choosing the right supplier for your rustic sandstone cladding is crucial to achieving a stunning, durable exterior finish. Splendour In Stone stands out as a trusted leader in natural stone supply, offering premium quality sandstone that brings warmth and character to any home.

At Splendour In Stone, every piece of rustic sandstone cladding is carefully selected for its unique texture, colour, and strength. Their extensive range features authentic stone sourced from reputable quarries, ensuring you receive natural variations and rich earthy tones that enhance your property’s aesthetic appeal.

Durability is a hallmark of Splendour In Stone’s products. Their sandstone cladding is known for its resilience to weather, wear, and aging, providing a long-lasting finish that requires minimal maintenance. This means your investment remains beautiful and functional for years, withstanding Australia’s diverse climate conditions.

Splendour In Stone also offers expert advice and personalised service to help you choose the perfect stone for your project. Their commitment to quality and customer satisfaction makes them a reliable partner for homeowners, builders, and designers alike.

For a natural, warm, and earthy exterior finish, trust Splendour In Stone to supply the finest rustic sandstone cladding tailored to your vision and needs.

Frequently Asked Questions (FAQs) about Rustic Sandstone Cladding

1. Can rustic sandstone cladding be used for interior walls?

Yes, it adds natural warmth and texture to interior features such as walls and fireplaces.

2. How thick is rustic sandstone cladding?

Typically between 20mm to 50mm, depending on style and installation method.

3. Is rustic sandstone suitable for wet climates?

Yes, sandstone is highly durable and performs well with proper sealing and drainage.

4. Does rustic sandstone require sealing?

Sealing is recommended to protect against stains and moisture but is not mandatory.

Conclusion

Rustic sandstone cladding offers a beautiful, durable way to give your home a warm, earthy exterior finish that stands the test of time. Its natural textures and rich tones create a welcoming atmosphere while providing lasting protection against the elements. 

For quality rustic sandstone and expert advice, consider trusted suppliers like Splendour In Stone to help transform your exterior with authentic stone beauty.

Stone Cladded Fireplace Request

At Splendour in Stone, we specialise in supplying and installing natural stone cladded fireplaces that bring warmth, beauty, and character to your home. Each piece is crafted with precision and presence, ensuring a timeless centrepiece built to last.

Planning a new fireplace or upgrading an existing one? Complete the form below and receive your personalised quote within 24 hours.
Share anything about your vision, home style, or needs
Important Installation Note
The fireplace unit must be installed prior to our stonework.
This ensures proper fitting and a seamless final result. If you need help coordinating this, we’re happy to assist. Just mention it in your message.
In SQM?

Please fill your details to download.


      Request Callback


        Enquiry Form


        Please fill your details to download.