Register your Information for Free Stone Samples Sent Express to You!

How Durable is Charlotte Sandstone? What You Need to Know Before Buying

Choosing the right stone for outdoor use is challenging. Durability and long-term performance often top the list of concerns, especially when harsh weather can quickly wear out lesser materials, resulting in costly repairs. 

Imagine a stone that not only withstands nature’s toughest tests but maintains its beauty year after year. Charlotte Sandstone, known for its remarkable strength and resilience, is that stone.

This versatile stone remains pristine through the most challenging conditions, making it a top choice for lasting outdoor projects. Are you curious about how it holds up over time? Let’s dive into the details.

How Durable is Charlotte Sandstone?

Charlotte Sandstone is highly durable and known for its excellent resistance to weathering and erosion. Its robust nature makes it suitable for outdoor applications, ensuring long-lasting performance. With proper maintenance, Charlotte Sandstone can withstand time, providing aesthetic appeal and structural integrity for years.

Factors Affecting Charlotte Sandstone’s Durability

How Durable is Charlotte Sandstone: Factors Affecting Charlotte Sandstone's Durability

Several factors affect the durability of Charlotte Sandstone, ensuring its long-lasting performance in various applications.

  • Composition: Charlotte Sandstone’s mineral composition plays a crucial role. A higher quartz content generally indicates better durability, as quartz is a complex and weather-resistant mineral.
  • Density and Porosity: The stone’s density and porosity significantly impact its resilience. Lower porosity means less water absorption, reducing the risk of freeze-thaw cycles and weathering. Denser stones are typically more robust and less prone to erosion.
  • Weather Conditions: Charlotte Sandstone’s exposure to weather conditions such as rain, wind, and temperature fluctuations can influence its durability. Regions with severe weather patterns may require additional maintenance to preserve the stone’s integrity.
  • Installation Quality: Proper installation techniques are vital. Poor installation can lead to structural weaknesses, reducing the stone’s lifespan. Ensuring correct sealing and jointing methods will enhance its durability.
  • Maintenance: Regular maintenance, including cleaning and sealing, is essential to protect Charlotte Sandstone from environmental damage. Proper care can significantly extend the stone’s life and maintain its appearance.

Performance in Different Environments

How Durable is Charlotte Sandstone: Performance in Different Environments

Charlotte Sandstone performs exceptionally well in various environments, making it a versatile choice for indoor and outdoor applications:
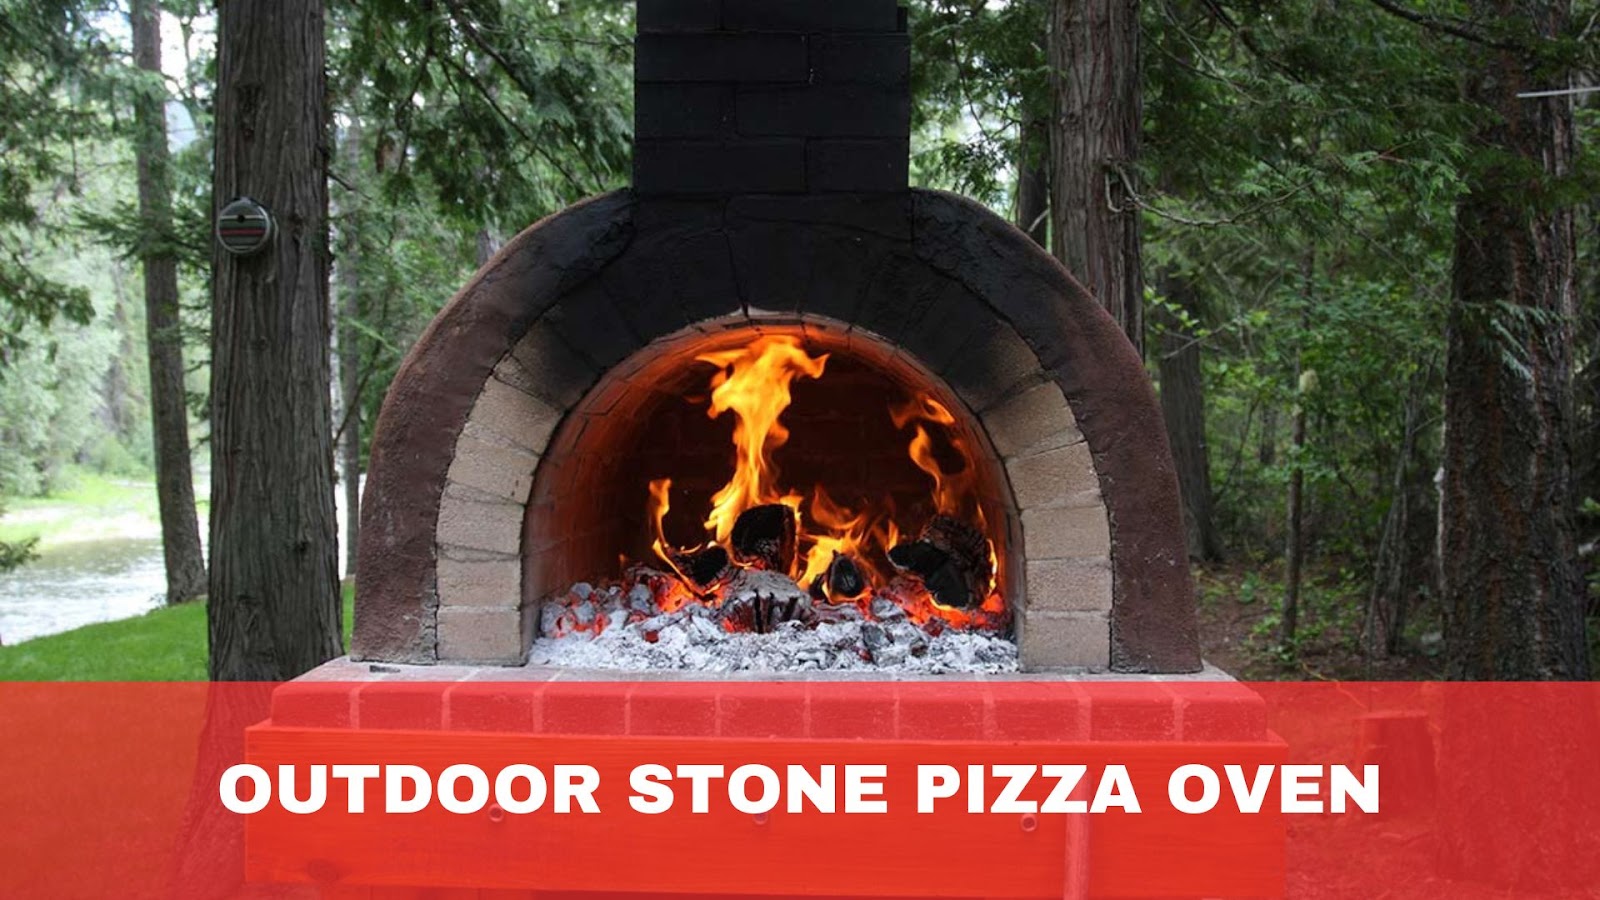
1. Outdoor Use

In exterior settings, Charlotte Sandstone demonstrates excellent resistance to weathering. Its low porosity minimises water absorption, significantly reducing the risk of freeze-thaw damage in colder climates. 

This feature ensures the stone remains structurally sound, even after years of exposure to moisture and freezing temperatures. Charlotte Sandstone’s robust nature makes it ideal for patios, pathways, and garden features, where it can withstand heavy foot traffic and varying weather conditions.

Its hard-wearing qualities also make it an excellent option for driveways and outdoor seating areas, providing durability without compromising natural beauty.

2. Coastal Areas

Charlotte Sandstone’s resilience to saltwater and wind erosion is particularly notable in seaside environments. Despite exposure to harsh coastal elements, its ability to maintain structural integrity and aesthetic appeal makes it a preferred choice for seaside constructions such as retaining walls, pier facades, and outdoor terraces. 

The stone’s low porosity means it absorbs less saltwater, reducing the risk of salt crystallisation, which can otherwise cause surface damage over time. 

This durability ensures that Charlotte Sandstone maintains its natural finish and texture, even in locations prone to constant sea spray and high winds.

3. Urban Settings

Charlotte Sandstone stands out in urban areas for its durability against pollution and acid rain, which can deteriorate other natural stones over time. Its resistance to chemical weathering ensures it remains in good condition even in heavily industrialised areas.

 As a result, it is often chosen for building facades, public monuments, and city squares where aesthetic longevity and low maintenance are essential.

Charlotte Sandstone’s natural appearance complements modern and historical architecture, making it a versatile option for urban landscaping, including benches, fountains, and walkways.

4. Indoor Applications

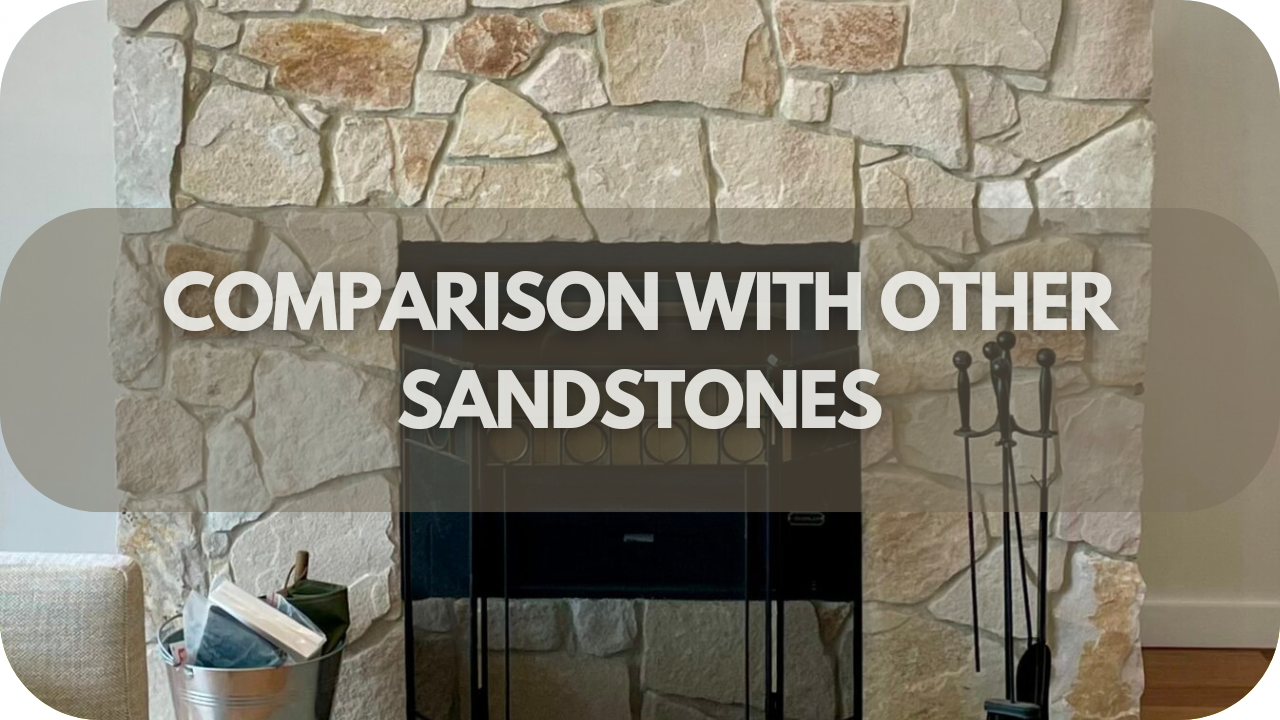
Indoors, Charlotte Sandstone retains its durability even when environmental factors are less of a concern. Its resistance to wear and tear makes it a suitable choice for flooring, wall cladding, and decorative features like fireplace surrounds and feature walls. 

The stone’s fine grain and elegant finish add a touch of sophistication to interior spaces, while its robust structure ensures it can handle the demands of high-traffic areas like hallways and living rooms.

Charlotte Sandstone requires minimal maintenance to maintain its natural beauty, making it a long-lasting and attractive choice for residential and commercial interiors.

Common Uses of Charlotte Sandstone

Common Uses of Charlotte Sandstone

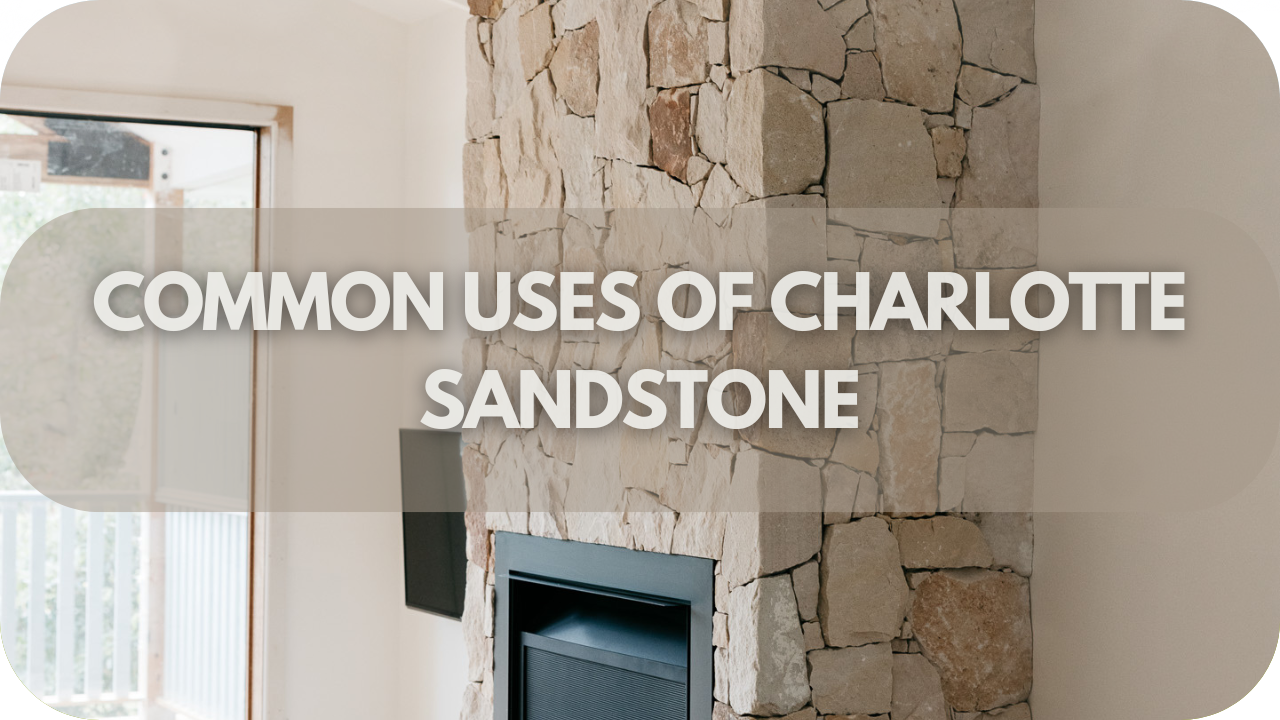
Charlotte Sandstone is widely valued for its durability and versatility, making it an excellent choice for various applications in construction and design, particularly in wall cladding and paving.

  • Wall Cladding: Charlotte Sandstone has many wall cladding benefits thanks to its aesthetic appeal and resilience. It enhances the buildings’ exterior and interior walls, providing a natural and timeless look while offering excellent protection against weather elements.
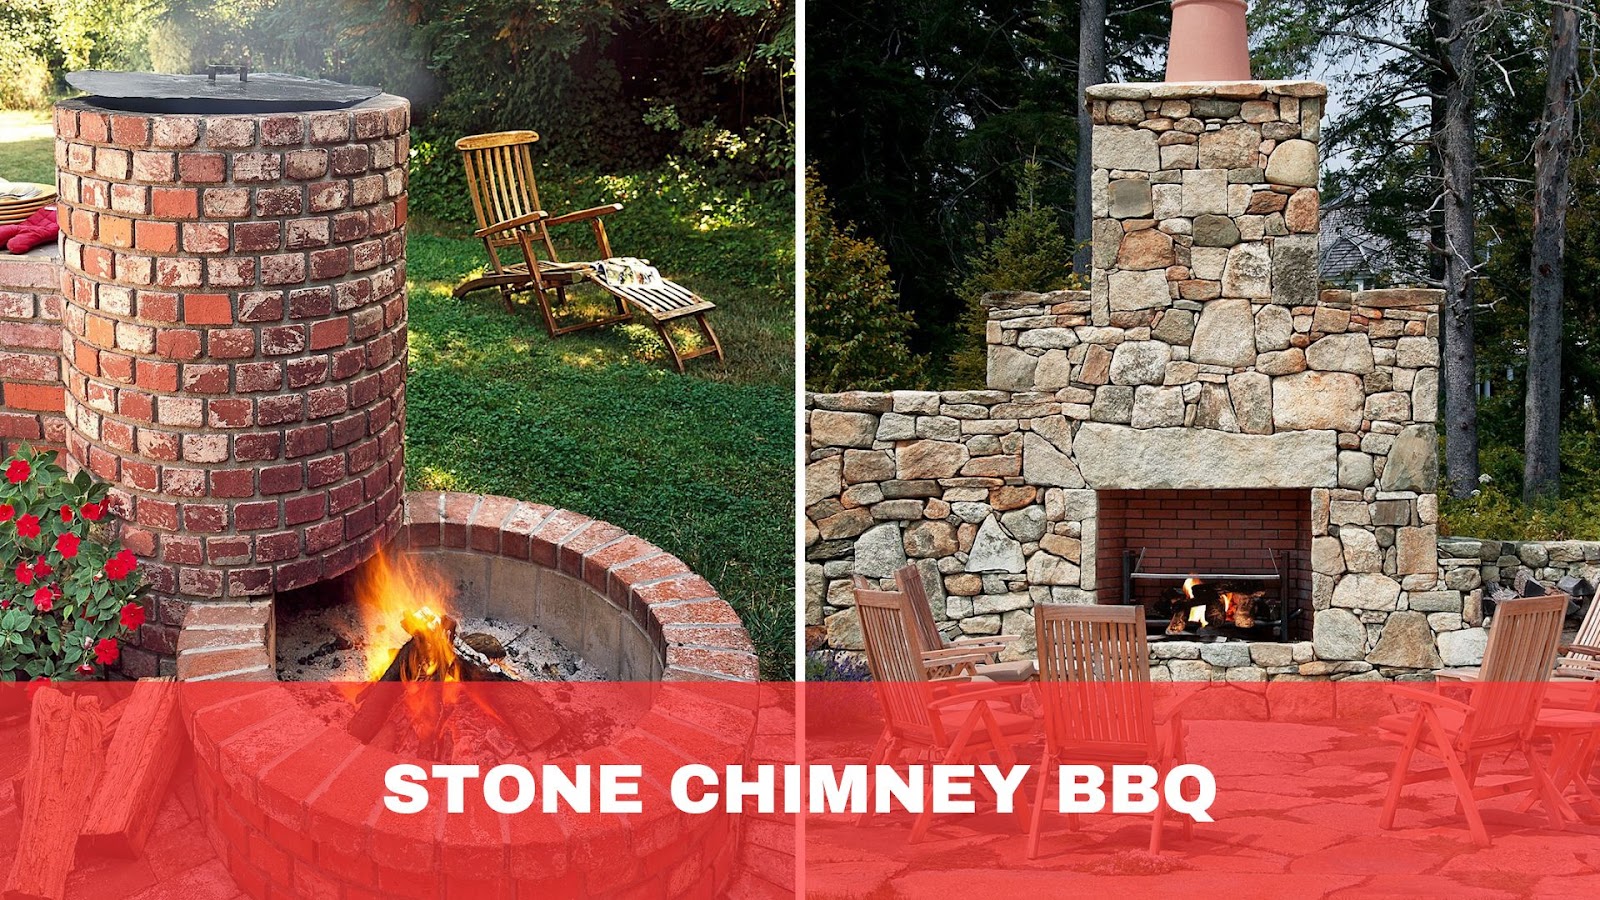
  • Paving: Charlotte Sandstone’s robustness and resistance to wear and tear make it ideal for paving applications. It is commonly used for pathways, patios, and driveways, where it can withstand heavy foot traffic and vehicular loads, maintaining its integrity and appearance over time.
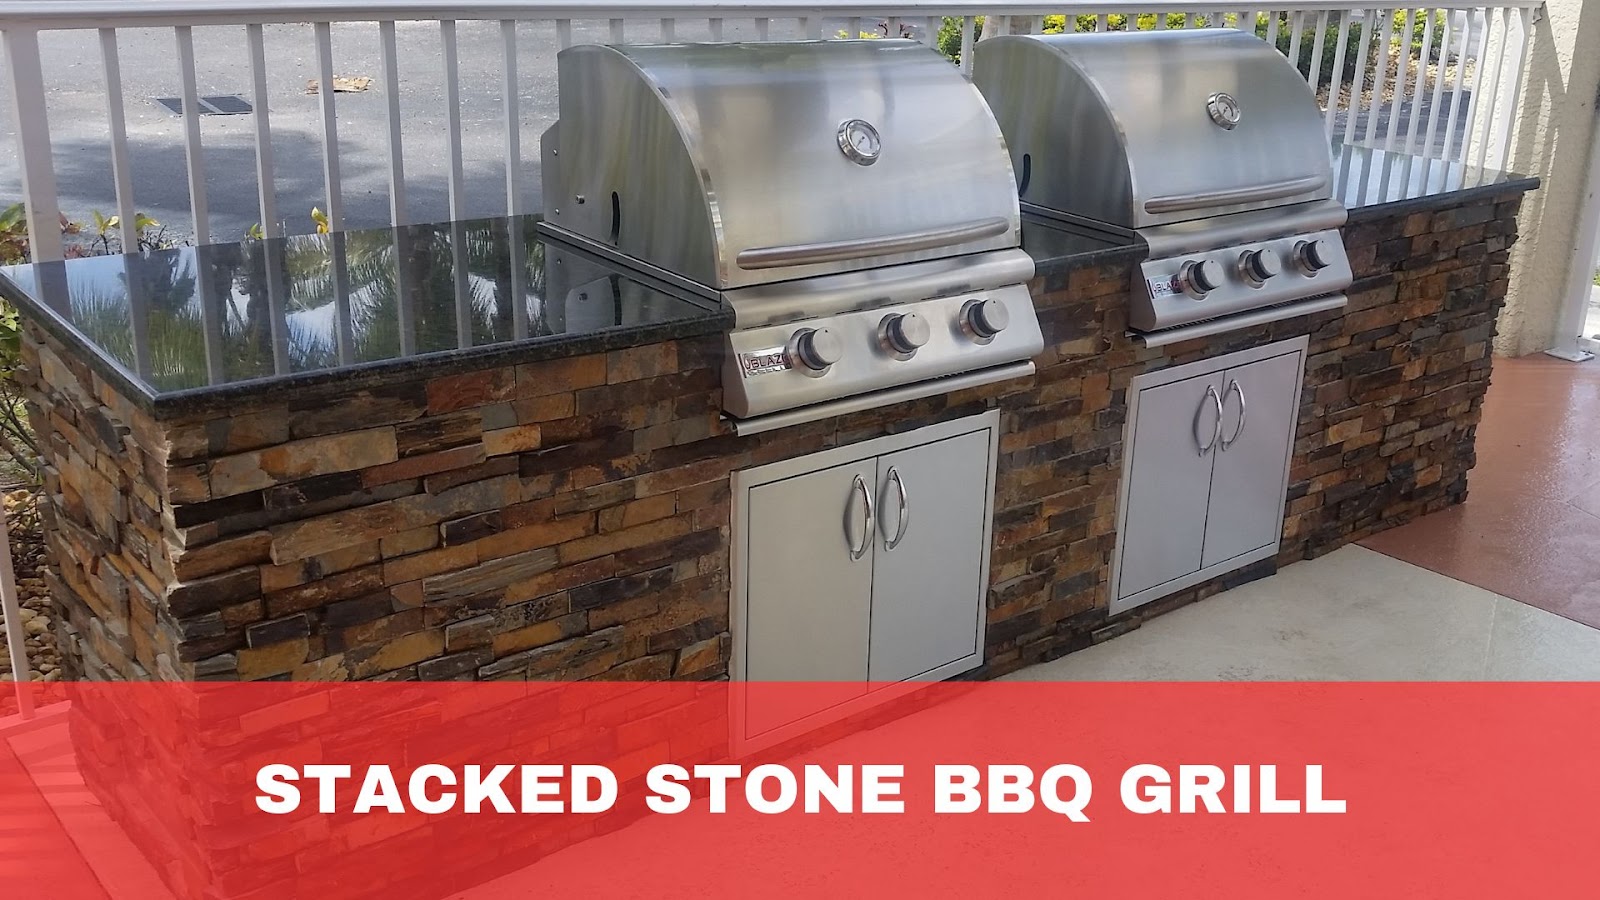
  • Landscaping: Charlotte Sandstone is used for various landscaping features beyond paving, including garden walls, steps, and edging. Its natural texture and durability make it suitable for visually appealing and long-lasting outdoor spaces.
  • Retaining Walls: Charlotte Sandstone’s strength and stability are advantageous for retaining walls. These walls serve a functional purpose in managing soil, preventing erosion, and adding an element of natural beauty to the landscape.
  • Interior Design: Indoors, Charlotte Sandstone is used for flooring, feature walls, and decorative accents. Its ability to withstand daily wear and tear while maintaining its beauty makes it a preferred material for high-traffic areas such as hallways, living rooms, and kitchens.
  • Monuments and Sculptures: Charlotte Sandstone’s workability and aesthetic qualities make it a preferred material for monuments and sculptures. Artists and architects value its ability to hold intricate details and its enduring charm.

Comparison with Other Sandstones

How Durable is Charlotte Sandstone: Comparison with Other Sandstones

When comparing Charlotte Sandstone to other sandstones, several factors highlight its superior durability and performance in various applications.

FeatureCharlotte SandstoneRoman, Stirling, Australiana, and Kimberley Sandstones
Composition and DensityHigher quartz content, lower porosity, enhanced strength, and resistance to weathering. Ideal for outdoor use.Higher porosity is more prone to water absorption, leading to quicker degradation through freeze-thaw cycles.
Weather ResistanceResilient against harsh weather, including rain, wind, and temperature fluctuations. Suitable for severe climates.It may require more frequent maintenance or replacement in harsh climates.
Aesthetic LongevityMaintains aesthetic appeal over time, resists staining and erosion, and is suitable for high-traffic or exposed areas.More prone to discolouration and erosion, which can detract from initial appearance over time.
VersatilitySuitable for various applications, including wall cladding, paving, sculptures, and monuments.Often limited to specific uses due to lower durability.
MaintenanceLower maintenance requirements due to environmental resistance reduce long-term upkeep costs.Requires more frequent cleaning and sealing, leading to higher maintenance efforts.

Maintenance and Care

How Durable is Charlotte Sandstone: Maintenance and Care

Proper maintenance and care are essential to maximise the durability and longevity of Charlotte Sandstone. Here are the key steps to ensure its optimal condition:

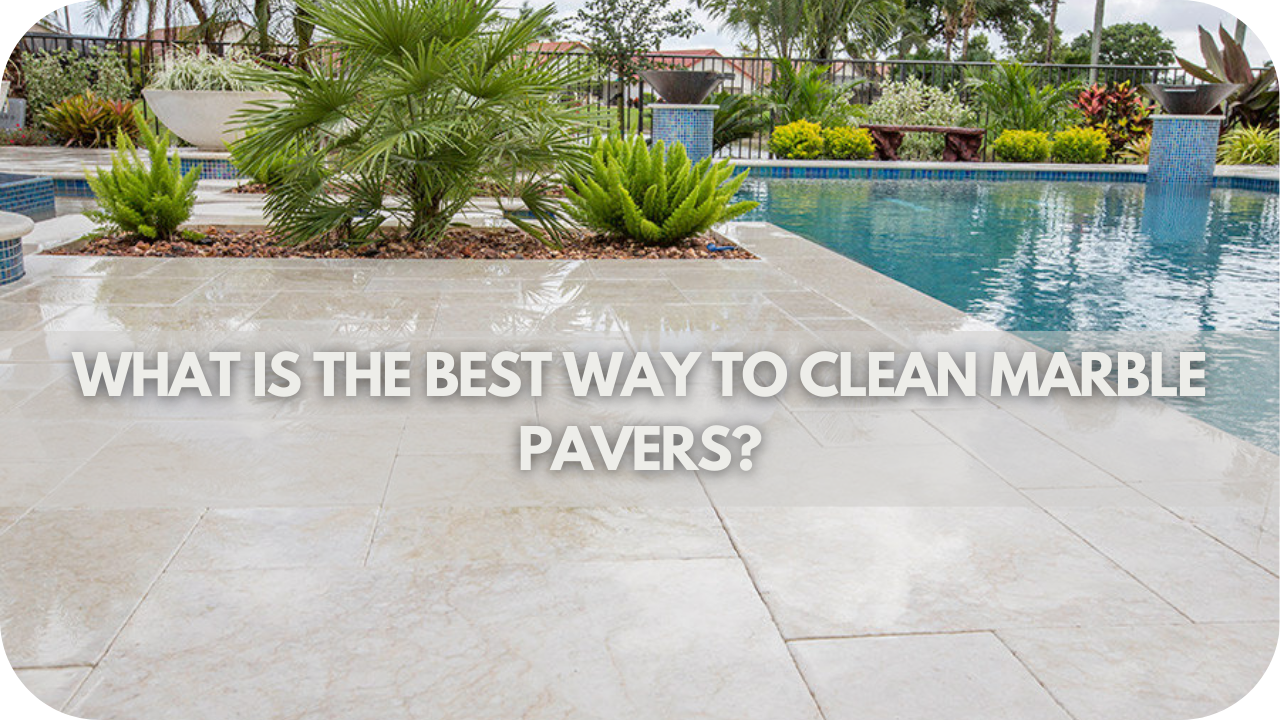
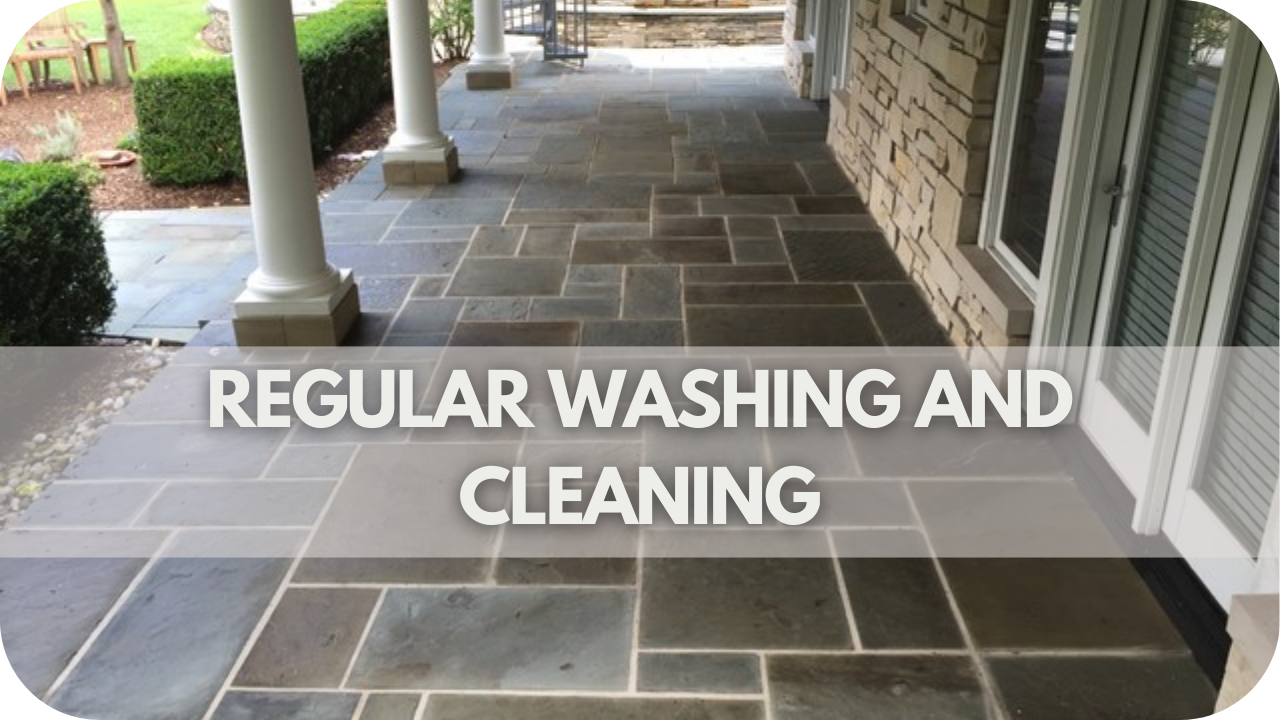
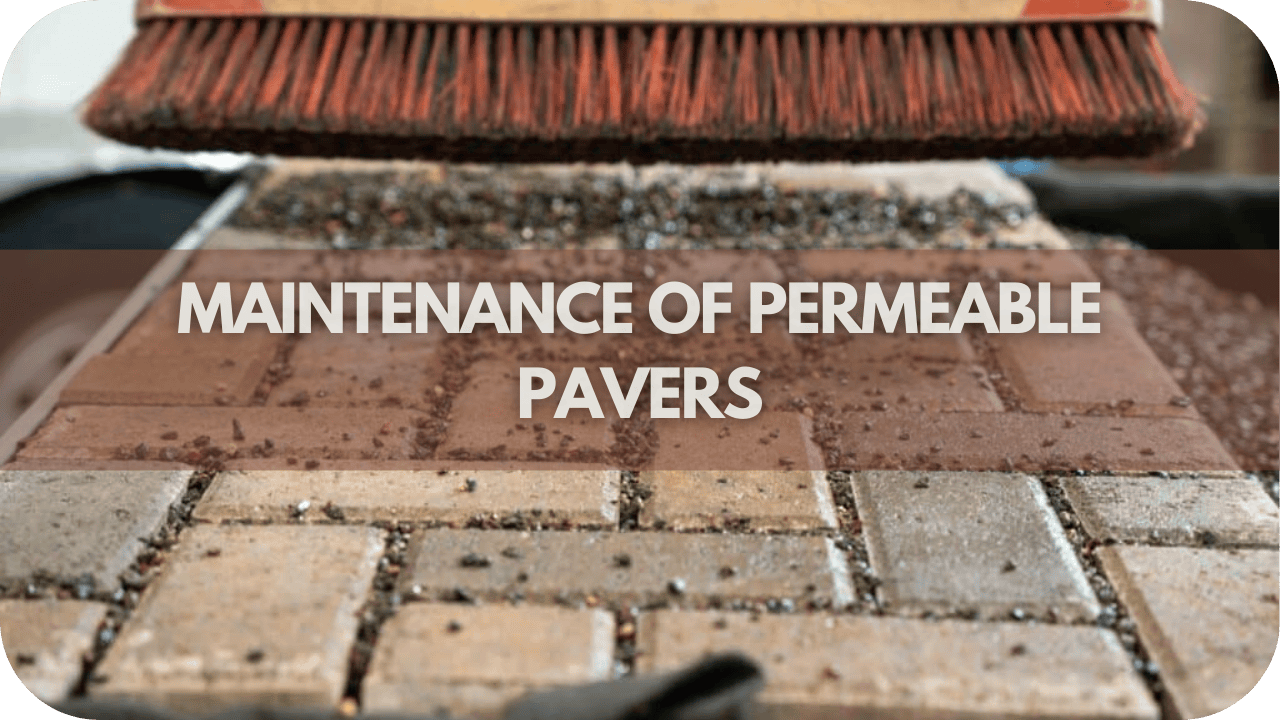
  • Regular Cleaning: Regular cleaning prevents dirt, moss, and algae build-up. Use a soft brush and mild detergent to clean the surface, avoiding harsh chemicals that can damage the stone. A pressure washer can be used for outdoor applications, but with caution to prevent surface erosion.
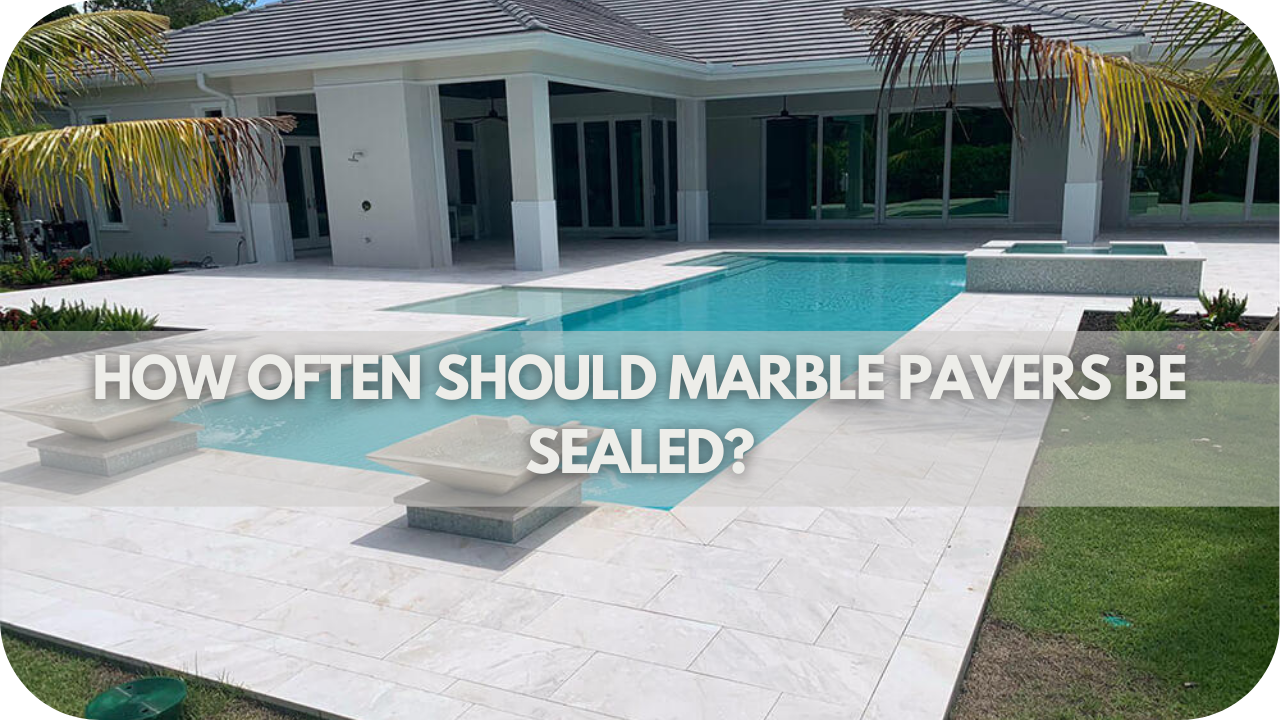
  • Sealing: A high-quality sealant can significantly enhance Charlotte Sandstone’s resistance to moisture and staining. Sealing the stone helps reduce porosity, prevent water absorption, and protect against freeze-thaw cycles. Re-seal the stone every few years or as recommended by the manufacturer.
  • Inspecting for Damage: Regularly inspect the stone for any signs of damage, such as cracks or chips. Early detection allows for timely repairs, preventing further deterioration. Use appropriate fillers or patching compounds to repair minor damages and maintain the stone’s integrity.
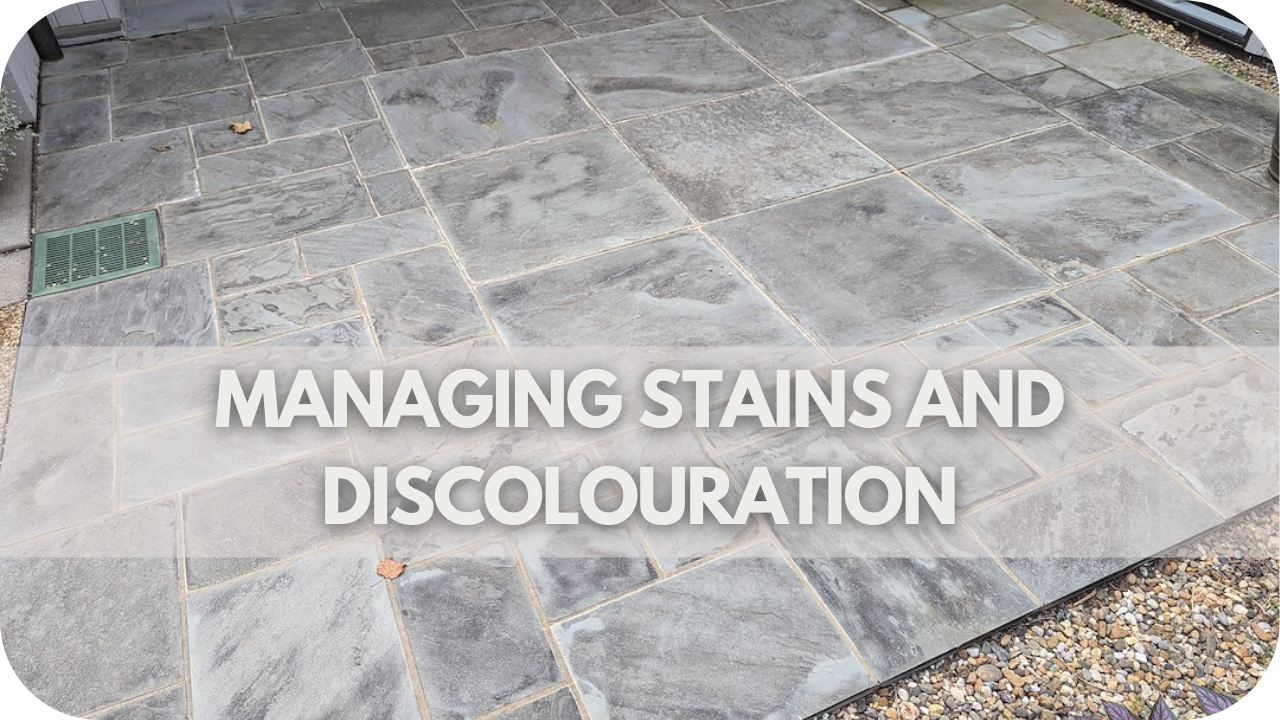
  • Preventing Stains: To prevent staining, promptly clean any spills, especially from acidic substances like vinegar or citrus juices, which can etch the stone. Mats or coasters can also help protect the stone from stains and scratches.
  • Avoiding Harsh Chemicals: Avoid using harsh chemicals, acidic cleaners, or abrasive tools on Charlotte Sandstone. These can cause surface damage and reduce the stone’s lifespan. Opt for pH-neutral cleaners specifically designed for natural stone.

Conclusion

Charlotte Sandstone stands out for its exceptional durability, low porosity, and resistance to weathering. Its versatility makes it ideal for various applications, from wall cladding to paving. 

Choose Charlotte Sandstone for your next project to enjoy long-lasting beauty and resilience. Contact us today to learn more about its benefits and to get started on your project.

How To Grow Moss Between Pavers

Frustrated by the barren gaps between your pavers, which lack charm and character? These empty spaces detract from the overall aesthetic appeal of your outdoor space, leaving it feeling incomplete and uninspired.

Enter the enchanting world of moss cultivation between pavers—a transformative solution. 

Delve into our comprehensive guide to discover the secrets of fostering lush, verdant moss carpets and elevating your outdoor oasis to new heights of natural beauty and tranquillity.

Step 1: Choose the Right Moss

Selecting the appropriate moss is crucial for achieving a lush, green appearance between pavers. 

A suitable moss can transform your outdoor space, adding charm and character while requiring minimal maintenance. Choosing moss varieties that thrive in your specific environment is essential to ensure success.

First, consider the climate and light conditions of your area. Mosses like Bryum argenteum (Silver Moss) and Hypnum cupressiforme (Cypress-leaved Plait Moss) are widespread, as they adapt well to various conditions. 

Silver Moss is known for its resilience in urban settings, while Cypress-leaved Plait Moss prefers shadier, moist areas and is excellent for creating a carpet-like effect.

Evaluate the moisture levels and pH of the soil between your pavers. Moss generally prefers acidic to neutral pH levels and constant moisture. Choose a drought-tolerant moss variety if your region is dry or the paver gaps lack shade.

Lastly, consider the aesthetic you wish to achieve. Mosses differ in texture and colour, from vibrant green to subtle grey-green hues. Select a moss variety that complements your landscape design to create a harmonious and visually appealing space.

Step 2: Select the Right Pavers

How To Grow Moss Between Pavers: Select the Right Pavers

Choosing the appropriate pavers is essential for successfully growing moss between them, as the paver material and design can significantly impact moss growth and overall aesthetic appeal. To create a harmonious blend of moss and pavers, consider the following factors:

Opt for porous materials like natural stone, concrete, or brick, which allow water to permeate and promote moss growth. Avoid non-porous materials, such as polished stone or ceramic, as they can hinder water absorption and create unfavourable conditions for moss.

Pavers with a rough or textured surface provide better anchorage for moss, enhancing its ability to adhere and thrive. Textured surfaces also create an organic appearance, complementing the natural look of moss.

Choose pavers in earth tones, such as grey, brown, or terracotta, which contrast beautifully with the vibrant green of moss. This contrast enhances the visual appeal of your pathway while maintaining a natural and cohesive look.

Consider using pavers with varied shapes and sizes to create interesting patterns that highlight the moss. Ensure the gaps between pavers are wide (typically 1-2 inches) to allow adequate space for moss to grow without overcrowding.

Step 3: Prepare the Site

Proper site preparation ensures moss thrives between pavers, providing a seamless and lush appearance. 

Begin by evaluating the existing paver layout and condition. Clear any debris, such as leaves, weeds, and dirt, from the gaps between the pavers, as these can inhibit moss growth and disrupt the aesthetic appeal.

Next, assess the paver alignment and ensure they are level and stable. Uneven pavers can create water drainage issues, making it difficult for moss to establish a consistent, healthy growth pattern. Adjust or re-level the paver heights if necessary to ensure a uniform surface.

The soil between the pavers should be amended to create optimal growing conditions for moss. By adding organic materials such as peat moss or compost, aim for a slightly acidic to neutral pH. These materials help maintain moisture and provide essential nutrients. 

Moisten the soil before introducing moss to ensure it has adequate water to establish itself. Moss requires consistent moisture, so consider regularly installing a drip irrigation system or hand-watering to maintain the ideal damp environment. 

These steps will create the perfect conditions for your moss to flourish and transform your outdoor space.

Step 4: Propagation Methods

How To Grow Moss Between Pavers: Propagation Methods

Several effective methods for propagating moss between pavers are suited to different needs and conditions. Understanding these techniques will help you achieve lush and even moss coverage.

Transplanting Moss Patches

One of the simplest methods is transplanting existing moss patches from other areas of your garden or a nursery. Carefully remove moss with a thin layer of soil attached and place it into the prepared gaps between pavers. 

Press down gently to ensure good contact with the substrate. This method provides immediate results and is ideal for small areas.

Moss Slurry Method

The moss slurry technique is excellent for larger areas or irregular spaces. To create a paste, blend fresh moss with water and a small amount of buttermilk or yoghurt. 

The buttermilk or yoghurt helps the moss adhere to surfaces and provides nutrients. Spread this mixture evenly in the paver gaps and ensure consistent moisture to facilitate growth.

Moss Spores

For those who prefer a more gradual approach, moss spores can be sown into the soil between pavers. Sprinkle the spores over the area and mist lightly with water. This method takes longer to establish but can result in a more natural appearance over time.

Each of these propagation methods has advantages, so choose the one that best suits your garden’s conditions and personal preferences.

Step 5: Plant Moss Between Pavers

How To Grow Moss Between Pavers: Plant Moss Between Pavers

Planting moss between pavers is a simple yet rewarding process that can enhance the beauty of your outdoor space. 

Begin by selecting healthy moss from your garden or a reputable nursery. Ensure the moss is moist and vibrant, indicating it is healthy and ready for transplantation.

To plant the moss, first prepare a moss slurry by blending the moss with water and a small amount of buttermilk or yoghurt. This mixture helps the moss adhere to the substrate and provides nutrients to encourage growth. 

Pour the slurry into the gaps between the pavers, ensuring it fills the spaces evenly. Alternatively, you can transplant moss directly by pressing small patches into the prepared soil between the pavers. Gently press the moss to ensure good contact with the soil, which is essential for root establishment.

After planting, mist the moss with water to maintain moisture levels. Moss thrives in consistently damp conditions, so it remains moist, especially during the initial establishment phase.

Until firmly rooted, avoid direct sunlight and foot traffic on the newly planted moss. With proper care, your moss will soon create a lush, green carpet between your pavers, enhancing your landscape’s natural beauty.

Step 6: Caring for Moss Between Pavers

Caring for moss between pavers is relatively straightforward but requires attention to specific maintenance tasks to ensure the moss remains healthy and vibrant over time.

  • Watering: Moss thrives in consistently moist conditions. Regularly mist the moss, especially during dry periods, to maintain adequate moisture levels. Avoid over-watering, which can lead to fungal growth or rot. A light, frequent misting is usually sufficient.
  • Light Conditions: Moss generally prefers shade or indirect light. Excessive sunlight can cause moss to dry out and become patchy. If your moss is in a sunny area, consider providing temporary shading or relocating it to a more shaded spot.
  • Weed Control: Keep the area between the pavers free from weeds and debris, which can compete with moss for nutrients and moisture. Gently remove weeds or use a hand tool to avoid disturbing the moss.
  • Cleaning: Occasionally clear away fallen leaves and debris that can smother the moss and impede its growth. Use a soft brush or broom to avoid damaging the moss.
  • Trimming: If moss begins to overgrow or encroach on surrounding areas, trim it back carefully to maintain a neat appearance and prevent it from spreading beyond desired limits.

Controlling Weeds and Competing Vegetation

Weeds and competing vegetation threaten the health and vitality of moss between pavers. Implement the following strategies to control weeds and maintain the integrity of your moss garden:

  • Manual Removal: Regularly inspect the moss for weeds and remove them by hand, ensuring minimal disturbance to the moss.
  • Mulching: Apply a layer of organic mulch, such as shredded bark or compost, between pavers to suppress weed growth and retain moisture in the soil.
  • Herbicides: Exercise caution when using herbicides near moss, as they can damage or kill the moss if not applied carefully. Opt for natural or organic herbicides that pose minimal risk to moss and other desirable plants.

Dealing with Moss Pests and Diseases

While moss is relatively resistant to pests and diseases, occasional issues may arise. Monitor closely for signs of pests or disease, such as discolouration, browning, or abnormal growth patterns. If problems occur, take the following steps:

  • Pest Management: Use environmentally friendly methods, such as handpicking or natural predators, to control pests such as slugs, snails, and aphids.
  • Disease Prevention: Maintain good airflow and drainage around the moss to prevent fungal diseases and rot. Avoid overwatering or allowing water to stagnate on the moss surface.

Step 7: Troubleshooting Common Issues

Troubleshooting Common Issues: How To Grow Moss Between Pavers

Addressing common issues with moss between pavers ensures a thriving and visually appealing garden feature. Here’s how to resolve typical problems:

Dry or Patchy Moss

Dry patches are often due to insufficient moisture. Increase the frequency of misting, especially during hot, dry weather. Ensure that the soil between the pavers remains consistently damp but not soggy. If patches persist, check for drainage issues or add a layer of organic mulch to retain moisture.

Excessive Algae Growth

Algae can outcompete moss if the area is overly moist or shaded. Reduce the amount of standing water and increase air circulation around the moss. Avoid using fertilisers, as they can promote algae growth. Regularly remove algae by gently scrubbing the affected areas with a soft brush.

Moss Discolouration

Yellowing or browning moss may indicate too much direct sunlight or poor soil conditions. Move the moss to a shadier spot and improve the soil’s acidity by adding organic matter like peat moss. Ensure that the moss receives adequate moisture and avoid excessive foot traffic.

Weeds and Debris

Weeds and debris can smother moss and impede growth. Regularly remove weeds by hand and clear debris using a soft brush to prevent it from covering the moss and reducing its health.

Step 8: Enhancing Aesthetics and Functionality

How To Grow Moss Between Pavers: Enhancing Aesthetics and Functionality

Moss creates a lush, natural look that complements various paver styles and landscape designs. Select moss varieties that blend well with your paver colours and textures for a cohesive appearance. Use moss to fill gaps irregularly for a more organic, natural feel, or create defined patterns to add visual interest. 

Beyond their practical benefits, moss between pavers adds a unique aesthetic and functional dimension to outdoor spaces. Explore creative ways to enhance the beauty and functionality of your moss garden between pavers.

Design Ideas for Incorporating Moss into Your Outdoor Space

Incorporating moss into your outdoor space adds a touch of natural beauty and tranquillity. Here are some creative design ideas to make the most of moss between pavers and other areas:

  • Moss-Covered Pathways: Allow moss to grow between pavers to create serene, enchanting pathways. This softens the appearance of traditional hardscapes and provides a lush, green contrast. Choose pavers with irregular shapes for a more natural, winding look, or opt for a geometric pattern to add visual interest.
  • Moss Gardens: Design dedicated moss gardens by planting moss between stepping stones or within garden beds. Combine different moss species to achieve varying textures and shades, creating a textured green carpet that complements other plants and flowers.
  • Moss Wall Features: Incorporate moss into vertical garden designs or as part of a moss wall feature. Mount a frame or create a vertical structure filled with moss to add a striking, living element to fences or walls. This vertical approach brings a fresh perspective to garden design.
  • Moss-Embedded Seating Areas: Transform seating areas by integrating moss between pavers or around outdoor furniture. Moss-covered seating spaces provide a soft, natural cushion and create a relaxing atmosphere, ideal for garden lounges or reading nooks.
  • Moss-Covered Steps: Add a touch of elegance and nature to stairways or garden steps by growing moss between or around the steps. This design adds a charming, rustic feel and enhances the visual appeal of stairways, making them a focal point in your garden.

Benefits of Moss Between Pavers Beyond Aesthetics

By creating a hospitable environment for moss, you support biodiversity and ecological balance in your garden.

  • Water Retention: Moss acts as a natural sponge, absorbing and retaining water in the soil between pavers. This helps to reduce water runoff and erosion, promoting a healthy and sustainable water cycle in your garden.
  • Erosion Control: The dense, fibrous root structure of moss helps to stabilise soil and prevent erosion between pavers. Planting moss on slopes or in areas prone to erosion can help mitigate the effects of runoff and soil displacement.
  • Habitat Creation: Moss provides valuable habitat and food sources for various beneficial insects, including pollinators and decomposers.

To keep moss looking its best, ensure it receives consistent moisture and is debris-free. Trim surrounding plants and maintain proper light levels to prevent moss from becoming overgrown or shaded. 

To sustain its aesthetic and functional benefits, regularly check for and address any issues, such as excess debris or dry patches.

Conclusion

Cultivating moss between pavers is a sustainable and enchanting way to enhance outdoor spaces. Apply the principles shared to embrace its beauty and ecological benefits. 

Start your moss-growing journey today and transform your landscape into a verdant oasis of natural charm.

Are Marble Pavers Right for Your Pool Deck? Everything You Need to Know

Pool decks take a beating. Exposure to harsh sunlight, pool chemicals, and foot traffic can quickly turn an elegant space into an eyesore.

But what if your chosen paver enhances the look and fails to withstand the wear and tear? Uneven surfaces, slipping hazards, and a lack of comfort underfoot can frustrate a relaxing poolside.

Explore whether marble pavers are the answer to your pool deck woes. This guide covers everything you need to know to make an informed choice.

Pros of Using Marble Pavers for a Pool Deck

Pros of Using Marble Pavers for a Pool Deck

Transform your pool deck into a luxurious haven with marble pavers that blend timeless beauty with these practical benefits.

1. Luxury

Marble pavers exude luxury. Their timeless appearance instantly elevates the aesthetic appeal of any poolside area, adding a classic touch. The natural veining and unique patterns give each paver an exclusive look, enhancing the sense of luxury.

2. Cool Underfoot

Known for being naturally cool underfoot, marble is a welcome relief during the hottest summer days, making it perfect for bare feet! The cooling effect ensures comfort, especially around pool areas with overwhelming heat. Choosing marble can make lounging by the pool a pleasant experience, even during peak summer.

3. Durability

Marble can withstand frequent exposure to water and UV rays without losing its stunning finish. This makes it an excellent choice for pool areas that require long-lasting materials. The stone’s inherent strength ensures it maintains its integrity even under high foot traffic, preserving its beauty for years.

4. Ease of Maintenance

Marble pavers are relatively easy to maintain. Regular sweeping and occasional cleaning keep them pristine, while their natural resistance to algae and mildew adds convenience. Proper sealing makes marble even easier to manage, as the sealer helps repel water and prevent staining from pool chemicals.

5. Heat Resistance

One of the unique qualities of marble is its ability to stay cool even under intense sunlight. This feature makes marble a comfortable option for barefoot pool-goers, particularly in hot climates. Unlike darker stones that absorb and retain heat, light-coloured marble reflects sunlight, providing a more excellent surface.

6. Function and Form

If you value function and form, marble pavers are worth serious consideration! They combine aesthetic appeal with practical features, making them versatile for pool decks. Marble’s luxurious look and its functional benefits ensure your pool area remains stylish and safe, offering the perfect blend of beauty and utility.

Cons of Using Marble Pavers for a Pool Deck

Cons of Using Marble Pavers for a Pool Deck

Before choosing marble, it’s important to weigh the potential drawbacks of its luxury appeal. Marble may look stunning but comes with cost, maintenance, and safety concerns. Understanding these factors will help you decide what is best for your pool area.

1. Cost

The cost of marble pavers tends to be higher than that of other materials, which may be off-putting if you’re on a tight budget. The initial investment includes the cost of the material and the cost of professional installation, which can add up quickly.

2. Porosity

Marble is porous, meaning sealing is required regularly to prevent staining from pool chemicals or algae build-up. Marble can absorb water and other substances without proper sealing, leading to discolouration and damage. Regular maintenance is key to preserving its look and longevity.

3. Surface Scratches

Heavy usage can lead to surface scratches, affecting the visual appeal over time. Marble is a relatively soft stone compared to other natural materials, and sharp or heavy objects can easily mar its surface. Protective mats and avoiding dragging furniture can help reduce the likelihood of scratches.

4. Installation Cost

Installing marble pavers requires skilled labour, which adds to the initial outlay. Proper installation is crucial to ensure the pavers are level and secure, especially around a pool with constant water exposure. Hiring experienced professionals will guarantee that the marble is installed correctly, but it does increase the overall project cost.

How to Choose the Right Marble Pavers for Your Pool Deck

How to Choose the Right Marble Pavers for Your Pool Deck

Selecting the ideal marble pavers for your pool deck can feel overwhelming, but with the right knowledge, you can create a stunning and functional space. Let’s explore the key factors that make your pool deck beautiful and practical.

1. Finish

Consider the finish—a honed surface will provide better slip resistance, while a polished one might look more luxurious but be riskier when wet. A honed finish has a matte texture that reduces glare and adds a layer of safety around wet areas, making it a popular choice for pool decks.

2. Outdoor Suitability

Ensure the marble type you select is suitable for outdoor use, as not all varieties can effectively handle weather extremes. Some types of marble are more porous and may not be able to withstand constant exposure to moisture, making them less ideal for outdoor installations.

3. Thickness


Another key element is the pavers’ thickness; thicker options are generally more durable. For pool decks, a thickness of at least 2 cm is recommended to handle high foot traffic and resist cracking or shifting over time. Thicker pavers can better withstand impacts and offer more stability.

4. Colour

Don’t overlook colour – lighter shades like white or beige will remain cooler underfoot. While visually striking, darker marble can absorb more heat and become uncomfortable to walk on during hot weather. Choosing a lighter colour keeps the area cool and enhances the pool deck’s brightness and spaciousness.

What is The Best Way to Clean Marble Pavers?

What is The Best Way to Clean Marble Pavers?

Maintaining marble pavers isn’t as complex as it seems! Start by sweeping the area regularly to clear away dirt and debris, as this prevents scratches. Use a gentle pH-neutral cleaner mixed with water for deeper cleaning, as acidic substances can etch the marble’s surface. 

Avoid harsh chemicals like bleach or vinegar to keep the pavers from becoming damaged. A soft-bristle brush can help remove any build-up, especially around the pool’s edges. 

Stubborn stains should be treated with a marble-specific poultice. After each cleaning, a quick rinse with clean water will ensure no residue lingers, preserving the paver’s elegance.

How Often Should Marble Pavers Be Sealed?

How Often Should Marble Pavers Be Sealed?

Sealing marble pavers is crucial to maintaining their beauty. Depending on usage and exposure to pool chemicals, pavers should be resealed once every one to two years. High-traffic areas might require more frequent sealing to keep the surface protected. 

Before resealing, inspect the surface; if water no longer beads on the marble, it’s time to reapply the sealer. A high-quality, penetrating sealer ensures deeper protection, keeping out moisture and reducing staining. Clean the pavers thoroughly before sealing – sealing over dirt can trap it, causing more harm than good. Regular sealing is the secret to longevity!

Can Marble Pavers Withstand Saltwater Pools?

Can Marble Pavers Withstand Saltwater Pools?

Saltwater pools demand materials that resist corrosion; marble might only sometimes be ideal. Although marble has a certain resistance level, salt can cause etching or dull the finish over time without proper care. 

Sealing plays a major role here. Using a high-grade sealer specifically designed for saltwater can significantly boost marble’s durability. Regular rinsing after exposure to saltwater can also help prolong the finish. 

If a saltwater pool is your dream, choosing a robust sealing routine and consistent maintenance can make marble pavers work. But without these steps, deterioration is inevitable.

Do Marble Pavers Retain Heat in Summer?

Do Marble Pavers Retain Heat in Summer?

Heat retention is an important factor when considering marble for pool decks. Marble, being a naturally cool stone, does a fantastic job of keeping people comfortable even during summer. 

Light-coloured marble pavers, such as white or cream, reflect more sunlight than darker options, keeping them cooler underfoot. Of course, on sweltering days, they might warm slightly, but far less than other materials like concrete or dark granite. 

If staying cool by the pool is a priority, choosing light marble is your best bet. It’s a refreshing alternative that helps keep the pool area enjoyable!

Is it Necessary to Reseal Marble Pavers After Installation?

Is it Necessary to Reseal Marble Pavers After Installation?

Yes, resealing marble pavers after installation is essential to protect against moisture, stains, and wear. Initial sealing acts as a barrier, but that layer wears away over time, making resealing necessary. It’s best to wait 24-48 hours after installation before applying the first coat, ensuring the pavers have settled properly. 

For best results, a high-quality penetrating sealer should be used, providing resistance against water and oil-based stains. Maintenance doesn’t end there,regular inspection and resealing when required will keep your marble pavers looking pristine. With consistent care, your pool deck will retain its elegant charm.

Conclusion

Marble pavers can transform your pool deck into a stunning, luxurious space if you are ready to invest in maintenance and care. 

To enjoy a beautiful, functional poolside area, choose the right marble and maintain it properly. Ready to take the plunge? 

Consult Splendour in Stone today to bring your vision to life!

Stone Secrets: How to Create a Hotel Lobby That Wows Every Guest Stone Secrets for Hotel Lobby Design

Stepping into a hotel lobby, there’s an immediate sense of anticipation. I recall entering a grand space where polished stone surfaces reflected soft lighting, making every corner feel like a glimpse into luxury. 

The ambience was captivating, and each stone feature told a story of elegance and warmth. Guests seemed to slow down, savouring the atmosphere.

I couldn’t help but wonder—how does stone transform a lobby into more than just an entryway? As I lingered, I realised the secret was in every carefully chosen stone. Curious? Let’s explore.

The Unique Appeal of Natural Materials: Crafting First Impressions

Natural materials like stone do more than decorate; they create a powerful first impression that speaks of quality and elegance. Entering a lobby adorned with polished marble or granite instantly evokes luxury, signalling to guests that they are in a refined space. 

The choice of natural materials in a hotel lobby isn’t merely aesthetic; it’s a powerful tool for shaping first impressions. Stone, in particular, conveys authenticity, elegance, and permanence, resonating with guests who seek an environment that feels both luxurious and welcoming. 

The variety in texture, colour, and finish allows designers to create bespoke spaces that subtly reflect the hotel’s brand identity. Each stone type sets a unique tone, from polished marble that exudes sophistication to rugged granite that suggests strength. 

Beyond its appearance, the stone’s durability adds practicality to its appeal. It stands up well to high foot traffic while maintaining its beauty. With stone as a primary material, hotels signal their commitment to quality, reinforcing an upscale guest experience right from the lobby’s entrance.

Creating an Atmosphere of Luxury and Calm with Stone

Stone’s natural elegance and neutral tones can transform a lobby into a serene sanctuary, an oasis away from the bustling outside world. Materials like limestone, sandstone, and travertine offer subtle hues and textures that can soften the space, lending a calming effect. 

When thoughtfully combined with gentle lighting, these stones can make the lobby feel like a warm, inviting escape. Smooth, uninterrupted stone surfaces also add a seamless quality, enhancing the space’s sense of openness and tranquillity. 

Using stone strategically around reception desks, seating areas, and walkways, hotels can elevate the lobby experience, inviting guests to relax and unwind. Such thoughtful stone choices ensure guests feel pampered and at ease inside.

Zoning and Multi-Functional Spaces in the Lobby

Zoning and Multi-Functional Spaces in the Lobby

Today’s hotel lobbies are more than waiting areas; they’re dynamic, multi-functional spaces where guests can work, relax, and socialise. Stone is crucial in defining these zones, creating distinct yet harmonious areas within the same lobby. 

For instance, sleek marble can set an elegant reception zone apart, while warmer stone materials like sandstone signal a casual lounge space. Stone partitions, flooring variations, and feature walls contribute to a fluid yet structured layout, accommodating different guest needs without compromising design. 

By investing in stone, hotels can ensure each area retains a unique character, enhancing the guest experience and supporting versatile functionality in a high-traffic environment.

Designing with Biophilic Elements: Merging Nature with Elegance

Incorporating biophilic design in hotel lobbies is increasingly popular, and the stone is a natural choice for elegant outdoor spaces. Stone textures and organic forms offer a tactile experience that resonates with nature, promoting relaxation and well-being. 

When paired with greenery, water features, or natural light, stone can reinforce this sense of harmony, creating an immersive environment close to nature. Stone flooring, walls, tabletops, plants, and natural light introduce balance and beauty, elevating the lobby’s ambience.

Hotels that use biophilic elements are committed to sustainable, guest-centred design. They provide a refreshing atmosphere that enhances the overall guest experience.

Statement Pieces: Stone Art and Feature Walls

Stone Secrets for Hotel Lobby Design: Statement Pieces: Stone Art and Feature Walls

A well-designed hotel lobby needs a memorable centrepiece, and stone statement pieces deliver elegance and intrigue. Feature walls crafted from unique stone slabs or intricate stone art installations become natural focal points that capture guests’ attention upon arrival. 

Stones like onyx, quartzite, or marble add character and depth, with each piece’s natural veining and colour making it a one-of-a-kind addition. Whether it’s a grand, floor-to-ceiling feature wall or a carefully curated stone sculpture, these statement pieces enhance the sense of luxury and sophistication in the lobby. 

The visual impact of stone art elevates the space and leaves a lasting impression, setting the hotel apart as a place of true elegance and artistry.

Sustainability and Longevity: Investing in Quality Materials

Opting for stone in hotel lobby design isn’t just about style; it’s an investment in sustainability and longevity. Natural stone, with many benefits, is incredibly durable and can withstand decades of use, reducing the need for replacements and repairs. 

This endurance makes stone an environmentally responsible choice, mainly when sourced ethically and used mindfully. Stone also ages gracefully, developing a patina over time that can add to its appeal rather than detract from it. 

By investing in quality stone materials, hotels contribute to a more sustainable design approach that aligns with modern, eco-conscious values. Stone’s timeless nature ensures it remains stylish and resilient, reinforcing the hotel’s commitment to quality and responsibility for years.

Conclusion

Elevate your hotel lobby with stone’s timeless allure, creating an atmosphere guests will remember. Whether through statement walls or serene zones, stone’s elegance speaks volumes. 

Ready to make a lasting impression? Contact Splendour in Stone and let us help you transform your lobby into a masterpiece of luxury and refinement.

Caring for Your Bluestone: Maintenance Tips for Lasting Beauty

Bluestone is celebrated for its enduring beauty, but neglect can lead to wear and dullness over time. With the right care, your Bluestone surfaces can maintain elegance and withstand the elements.

Imagine your patio or floors looking flawless year after year with just a few simple maintenance steps. Follow these expert maintenance tips to protect and enhance your Bluestone’s natural charm, ensuring its lasting beauty and resilience for the future.

Tip 1: Regular washing and cleaning

Regular cleaning is the simplest way to keep your Bluestone looking its best. A consistent routine of sweeping away dirt and debris prevents scratches from forming on the surface. How often should Bluestone be washed? Aim for a weekly rinse with water to remove loose particles and a more thorough clean with a pH-neutral stone cleaner once a month. 

Use a soft-bristle brush to scrub gently for tougher grime without damaging the stone’s finish. Avoid high-pressure washing, as it can degrade Bluestone over time, wearing away its smooth surface. Instead, opt for a garden hose, which provides enough water pressure to cleanse the surface without causing harm. 

Keeping your Bluestone clean enhances its natural appearance and extends its longevity, reducing the need for costly repairs.

Tip 2: Managing Stains and Discolouration

Stains and discolouration are inevitable with Bluestone, especially in outdoor spaces, but they can be managed effectively. The first step is understanding the source of the stain. For oil stains, a poultice made from baking soda and water can lift the residue, allowing the stone to breathe again. 

Organic stains, such as those from leaves, moss, or bird droppings, often respond well to mild detergents or pH-neutral cleaners. Never use acidic cleaners; they can permanently etch the surface of Bluestone, leaving unsightly marks.

Rust stains are more difficult to remove and require specialised stone cleaners. In some cases, applying the cleaner several times may be necessary to remove the rust thoroughly. Acting swiftly is crucial when dealing with any stain, as the longer it sits, the deeper it penetrates the porous stone. 

Sealing the Bluestone helps to create a protective barrier, reducing the chances of future staining. Additionally, always rinse the stone thoroughly after cleaning to remove any residue that could cause further discolouration. 

Tip 3: Sealing Your Bluestone

Sealing your Bluestone protects it from moisture, stains, and weathering. A high-quality sealant creates a barrier that keeps water and debris from penetrating the stone’s surface. How often should Bluestone be sealed? Experts recommend sealing outdoor Bluestone every one to two years, depending on weather exposure and foot traffic. 

Before applying the sealant, it’s vital to clean the surface thoroughly to avoid trapping dirt or stains. Using a roller or sprayer, evenly coat the surface, ensuring full coverage. Allow the sealant to dry completely before using the area to maximise its effectiveness. 

Resealing regularly ensures the stone maintains its natural beauty and resilience, preventing costly damage in the future. Proper sealing will protect your Bluestone against the elements while preserving its aesthetic charm for years.

Tip 4: Repairing cracks and chips

Over time, cracks and chips may appear on Bluestone, but addressing them early can prevent further deterioration. Small cracks can be repaired using an epoxy or resin filler, which bonds with the stone to create a smooth finish.

 Professional intervention is recommended for larger cracks to avoid complications or further damage. Cleaning the affected area before applying filler ensures a solid bond. 

Once the crack is filled, gently smooth the surface to match the surrounding Bluestone. A patching compound can restore the stone’s original shape for chips, especially on the edges. Prompt repair of these imperfections prevents them from spreading, safeguarding the structural integrity of your Bluestone. 

Regularly inspecting the stone for signs of damage will help catch small issues early, minimising the need for more costly repairs. This proactive approach keeps your Bluestone looking pristine and extends its lifespan, preserving its beauty and function.

Tip 5: Inhibiting weed growth

Weeds can be a persistent issue between Bluestone pavers, but proactive measures help keep them at bay. Applying a joint stabilising sealer is highly effective for inhibiting weed growth. This sealer fills the joints, preventing weeds from taking root. How can regular maintenance help? Sweeping frequently removes seeds before they have the chance to germinate. Sand can also fill in gaps between pavers, making growing weeds difficult. 

For existing weeds, a natural weed killer, such as vinegar, is a safe option that won’t harm the Bluestone. Chemical weed killers can also be used, but choose products specifically formulated for use on stone to avoid potential damage.

Promptly addressing weed growth helps maintain Bluestone’s clean, sleek look, ensuring it remains a beautiful feature of your landscape. A proactive approach keeps the surface tidy and prevents weeds from loosening the joints, possibly leading to paver displacement over time.

Tip 6: Regular inspections

Regular inspections are key to keeping Bluestone in top condition. By examining your stonework frequently, you can spot minor issues like cracks or chips before they become larger, more expensive problems. 

How often should inspections be conducted? Ideally, a visual check every few months will help catch early signs of wear. Pay special attention to high-traffic areas, where wear and tear are more likely. 

During an inspection, look for signs of staining, loose pavers, or weeds growing between joints. If any issues are identified, they should be addressed promptly to prevent further damage. Inspecting after extreme weather is especially important, as heavy rain or freezing temperatures can weaken the stone’s structure. 

Keeping an eye on your Bluestone helps maintain its beauty and prevents costly repairs in the long run. Staying proactive with regular inspections will extend the lifespan of your Bluestone surfaces, ensuring they remain functional and visually appealing.

Tip 7: Professional repair services

Conducting regular inspections is essential to ensuring the longevity of Bluestone surfaces. By checking the stonework every few months, you can catch minor problems before they become costly repairs. Start by examining high-traffic areas which are more prone to wear and tear. 

What should you look for? Cracks, chips, or loose pavers are common signs of damage. Checking for stains or moisture build-up is also crucial, especially in areas exposed to rain or humidity. Inspections are especially important after extreme weather conditions, such as heavy rains or freezing temperatures. 

Bluestone is durable, but prolonged exposure to these elements can weaken its structure. Spotting minor issues early allows for timely repairs, preventing damage from spreading and maintaining the stone’s appearance. 

Inspections protect against deterioration and help you retain the Bluestone’s aesthetic appeal, ensuring it remains a stunning feature in your landscape or home.

Conclusion

Proper care for your Bluestone ensures its timeless beauty and longevity. For years, follow simple maintenance tips—regular cleaning, sealing, managing stains, and prompt repairs—to protect your investment.

Ready to give your Bluestone the care it deserves? Apply these tips today and keep your stone surfaces pristine for the long haul.

10 Types of Natural Stone Finishes

Choosing the right finish for natural stone can be overwhelming, especially with many options.  A wrong decision can result in a surface that doesn’t suit your style, requires too much maintenance, or wears out quickly. 

The impact of this choice extends beyond aesthetics—it affects the durability and functionality of your stone.  This guide will simplify the process by breaking down the 10 most popular natural stone finishes, helping you select the perfect one for your project.

1. Polished Finish

Polished Finish

A polished finish creates a sleek, glossy surface that beautifully reflects light. Crafted through grinding and buffing, this finish enhances the stone’s natural colour and pattern. 

Have you ever wondered why marble floors look so luxurious? It’s often because of the polished finish that gives them a mirror-like sheen. With its smooth texture, this type of finish is ideal for areas where an elegant and sophisticated appearance is desired, such as countertops and walls. 

On the downside, polished stone can be slippery when wet, making it less suitable for outdoor applications or high-traffic areas like bathrooms. It also tends to show scratches more easily. However, regular maintenance and sealing can help preserve its lustrous appearance over time. 

A polished finish might be your best bet if you’re looking for a timeless, high-end look. Why not elevate your space with the stunning reflective quality only polished stone can provide?

2. Honed Finish

Honed Finish

A honed finish delivers a smooth, matte surface, offering a more muted and understated appearance than the glossy sheen of polished stone. By grinding the stone to create a flat, non-reflective surface, this finish brings out the stone’s natural beauty without the shine. 

The result is a soft, velvety texture, making it particularly appealing for modern and traditional interior designs. Have you ever noticed how honed finishes are favoured in high-traffic areas? Their matte quality provides better slip resistance, making them ideal for kitchens, bathrooms, and hallway flooring.

Additionally, honed finishes are excellent for concealing scratches, dents, and general wear, offering a more durable option for busy spaces. While this finish may not have the glossy appeal of polished stone, it showcases the natural veining and patterns of the material in a more subdued and sophisticated way. 

Honed stone is also suitable for outdoor use, as it doesn’t become as slippery when exposed to moisture. However, due to its porous nature, it may require regular sealing to prevent staining.

3. Brushed Finish

Brushed Finish

A brushed finish offers a textured, weathered appearance that enhances the natural beauty of stone while giving it a rustic charm. Using wire brushes to wear down the stone’s surface gently, this finish results in a rough yet soft texture that feels aged and lived-in. 

Why is a brushed finish popular in outdoor and high-traffic areas? Its slip-resistant texture makes it ideal for patios, walkways, and even pool surrounds, where safety is essential.

Visually, the brushed finish brings out the stone’s natural colours and patterns with a soft, muted effect. Unlike polished or honed finishes, the surface retains a slightly rough quality, giving it a tactile appeal that works beautifully in more casual settings. 

The process also subtly highlights the stone’s unique veining, adding character without overwhelming the overall design. Though it has a rugged appearance, the finish is durable and relatively easy to maintain. 

Occasional sealing can help preserve its look and protect the surface from stains. The brushed finish is versatile and stylish for homeowners seeking a finish that balances natural beauty with practical durability.

4. Tumbled Finish

Tumbled Finish

A tumbled finish creates a soft, aged appearance, offering a timeless aesthetic that evokes the look of weathered stone. Achieved by placing the stone in a tumbler with abrasives, this process gently rounds the edges and softens the surface, giving it a worn and rustic feel. 

Have you ever wondered how to add instant character to a space? The tumbled finish brings a natural, vintage look that suits traditional and contemporary designs.

The slightly uneven texture provides slip resistance, making it an excellent choice for flooring in bathrooms, kitchens, and outdoor areas like patios and courtyards. 

Unlike polished finishes, tumbled stone doesn’t reflect light, allowing its natural tones and patterns to stand out more subtly. The muted, earthy colours add warmth to any space, making this finish a favourite for those seeking a cosy, lived-in look.

Though it has an old-world appeal, a tumbled finish is remarkably durable. It can withstand wear and tear while requiring minimal maintenance. Occasional sealing can further protect the surface, ensuring it remains beautiful for years. Tumbled stone is an ideal choice if you’re after a finish that offers both character and practicality.

5. Sandblasted Finish

Sandblasted Finish

A sandblasted finish offers a distinctive rough texture created by blasting the stone’s surface with high-pressure sand. This process results in a matte, slightly coarse surface, ideal for creating a non-slip environment. 

Why is a sandblasted finish often chosen for outdoor spaces? Its excellent traction makes it perfect for areas like pool decks, walkways, and garden paths, where safety is a priority.

The finish also softens the stone’s natural colour, giving it a more muted, weathered look. Unlike polished finishes, which highlight the stone’s vibrancy, sandblasted surfaces provide a more natural and understated appearance. 

With its textured feel, this finish adds a tactile element to the stone and enhances durability, making it resilient to the elements and daily wear.

A sandblasted finish is an excellent choice for those looking to combine aesthetic appeal with practicality, especially for areas exposed to moisture or high foot traffic. 

Occasional sealing can help maintain the surface’s appearance and prevent staining, ensuring its rugged beauty lasts for years. If you’re after a finish that provides both style and function, the sandblasted option is a versatile and long-lasting solution.

6. Flamed Finish

Flamed Finish

A flamed finish is created by exposing the stone to intense heat, followed by rapid cooling. This process causes the surface to burst and crack, leaving a rough, textured appearance behind. 

Why is this finish favoured for outdoor applications? It offers excellent slip resistance, making it ideal for areas like patios, driveways, and pool surrounds, where safety is crucial.

The high-temperature process also gives the stone a natural, weathered look, often enhancing its earthy tones. Flamed finishes add a bold, rugged aesthetic that creates a rustic or industrial feel in residential and commercial spaces. Despite its rough texture, the surface remains durable and withstand heavy foot traffic and exposure to the elements.

Flamed stone typically works best with granite and other hard materials, as softer stones might not withstand the extreme heat involved in the process. Occasional sealing may be necessary to protect the surface from stains and preserve its rich, natural colours. 

The flamed finish is a standout option for exterior designs that aim to blend natural beauty with functional durability.

7. Leathered Finish

Leathered Finish

A leathered finish offers a soft, textured surface that balances polished and honed finishes. This finish is achieved by running diamond-tipped brushes over the stone, resulting in a slightly rough, matte surface with a unique, tactile feel. 

Have you ever wondered why this finish has gained popularity in modern interiors? It provides a sophisticated look while also being easy to maintain. The texture of a leathered finish adds depth and character to the stone, bringing out its natural grain and colour without the high shine of a polished surface. 

One of the key advantages of a leathered finish is its resistance to fingerprints and watermarks, making it an excellent choice for countertops and high-traffic areas. It also feels warm and inviting, perfect for creating a cosy yet elegant atmosphere in living spaces.

Leathered finishes are most commonly applied to granite, although other stones like marble and quartzite can also be treated this way. The finish is durable and easy to clean, requiring minimal upkeep to preserve its beauty. If you’re seeking a blend of texture, style, and practicality, a leathered finish is perfect for aesthetic and functional appeal.

8. Bush Hammered Finish

Bush Hammered Finish

A bush-hammered finish creates a rugged, heavily textured surface that stands out for its bold and natural appearance. Achieved by repeatedly striking the stone with a specialised hammer with multiple points, this finish leaves behind a pitted, rough texture that resembles the weathered look of stone. 

Have you ever considered why a bush-hammered finish is often chosen for outdoor spaces? The bumpy texture provides excellent slip resistance, making it ideal for driveways, patios, and pool surrounds.

This finish dramatically enhances the stone’s natural strength and durability, allowing it to withstand heavy traffic and extreme weather conditions. With its coarse appearance, the bush-hammered finish is perfect for creating a rustic or industrial aesthetic. 

The process also subtly lightens the stone’s colour, giving it a unique, weathered charm that works beautifully in residential and commercial spaces. Although it may appear rough, bush-hammered stone is incredibly sturdy and low-maintenance. Occasional cleaning and sealing can help preserve its natural beauty. 

The bush-hammered option offers striking aesthetics and functional benefits for those seeking a finish combining rugged texture and practicality.

9. Sawn Finish

Sawn Finish

A sawn finish gives the natural stone a raw, unpolished appearance, highlighting its authentic beauty. Created by cutting the stone with a diamond-tipped saw, this finish leaves behind a flat, slightly rough surface with visible saw marks. Why is the sawn finish popular in modern architecture? Its clean, minimalist look makes it ideal for contemporary designs where simplicity is key.

The texture of a sawn finish provides a subtle grip, making it suitable for indoor and outdoor applications, particularly in spaces like pathways, patios, or feature walls. The finish emphasises the stone’s natural colours and patterns without the added shine or smoothness of polished finishes, allowing for a more organic feel in design projects.

While the surface may seem unfinished, it is highly durable and can withstand heavy use, especially in high-traffic areas. Occasionally, sealing the stone can help protect it from moisture and staining, prolonging its longevity. For those seeking a natural yet refined look, a sawn finish balances raw beauty and functional durability, making it an excellent choice for residential and commercial spaces.

10. Split Face Finish

Split Face Finish

A split-face finish provides a rugged, uneven surface that reveals the stone’s raw, natural appeal. Created by manually or mechanically splitting the stone, this finish produces a rough texture that adds depth and dimension to any space.

Why is the split-face finish so popular in feature walls and facades? Its dramatic, textured look creates a bold, eye-catching effect, perfect for adding architectural interest.

Unlike smooth finishes, the split face option highlights the stone’s natural layers and colour variations, making it an ideal choice for projects seeking an organic, earthy aesthetic. This finish is well-suited for indoor and outdoor applications, adding character and texture while maintaining a rustic charm.

Its uneven surface provides a striking contrast when paired with smoother materials like glass or metal, offering a unique design element. While the rough texture is visually appealing, it’s important to note that the surface can be more challenging to clean.

If you want to enhance a space with texture and natural beauty, the split face finish offers a dynamic solution that leaves a lasting impression.

Choosing the Right Finish for Your Project

Choosing the Right Finish for Your Project

Selecting the ideal natural stone finish is crucial for the success of your project. Factors to consider include location, usage, and aesthetics.

  • Location: Determine whether the stone will be used indoors or outdoors. Outdoor stones require finishes that can withstand weather conditions, such as a flamed or textured finish for better grip. Indoor stones can benefit from polished or honed finishes for a sleek look.
  • Usage: Consider the space’s function. High-traffic areas like floors or pathways need durable, slip-resistant finishes like bush-hammered or sandblasted. Smoother finishes, polished or honed, are suitable for decorative walls or low-traffic areas.
  • Aesthetics: Think about the overall design and style you wish to achieve. Polished finishes offer a luxurious and reflective look, while textured finishes provide a rustic and natural appearance. Match the finish with your design vision to enhance the space’s visual appeal.
  • Expert Tips: Consult with a professional to understand the maintenance requirements of different finishes. Some finishes may require more upkeep than others. Additionally, request samples to see how the finish looks in your specific environment and lighting conditions.

Conclusion

Natural stone finishes are crucial in enhancing your spaces’ aesthetics and functionality. Consult professionals for tailored advice on selecting the perfect finish for your project. Contact us for expert guidance and personalised solutions.

How Do Permeable Pavers Work?

Traditional paved surfaces like concrete and asphalt prevent water from draining into the ground, leading to flooded areas and strained drainage systems. It can cause property damage, disrupt transportation, and strain the environment. 

Permeable pavers offer a sustainable solution by allowing water to seep through the paved surface into the ground, mimicking the natural water absorption process.

How Do Permeable Pavers Work?

Permeable pavers work by allowing water to infiltrate through their surface and into the ground below. They are designed with gaps or porous materials that enable rainwater to pass through, reducing runoff and promoting groundwater recharge. This eco-friendly solution helps manage stormwater and prevents flooding, making it ideal for sustainable landscaping.

Functions of Permeable Pavers

Functions of Permeable Pavers

Permeable pavers serve multiple critical functions, making them invaluable in modern landscaping and urban planning. 

Their primary function is to manage stormwater effectively. Unlike traditional paving solutions, permeable pavers allow water to seep through their surface, reducing surface runoff and mitigating the risk of flooding. This infiltration process helps recharge groundwater supplies, ensuring a more sustainable water cycle.

Another critical function of permeable pavers is filtering pollutants. As water passes through the paver layers, contaminants such as oils, heavy metals, and sediments are trapped and filtered out, improving water quality before it re-enters the ecosystem. 

This natural filtration process is crucial for maintaining clean waterways and supporting local biodiversity.

Additionally, permeable pavers contribute to reducing the urban heat island effect. Allowing water to permeate and evaporate helps cool the surrounding area, making urban environments more comfortable and reducing the need for artificial cooling solutions.

Benefits of Permeable Pavers

Benefits of Permeable Pavers

Permeable pavers offer a range of advantages, from stormwater management to ecological enhancement. Discover how these innovative paving solutions can transform your construction projects.

  • Stormwater Management: Permeable pavers allow water to infiltrate through the surface, reducing the risk of flooding and erosion. This eco-friendly solution helps replenish groundwater, contributing to sustainable water management.
  • Water Quality Improvement: Permeable pavers enhance water quality by filtering pollutants and contaminants from rainwater as they percolate through the surface layers. This feature is precious in urban environments where impervious surfaces exacerbate water pollution issues.
  • Cost-effectiveness: These pavers’ porous nature reduces the need for conventional drainage systems, saving on installation and maintenance costs over time.
  • Safety Enhancement: Permeable pavers minimise surface water accumulation, reducing the risk of accidents caused by slippery surfaces, thus enhancing safety.
  • Ecological Enhancement: Permeable pavers promote biodiversity by facilitating soil aeration and moisture retention, fostering healthier conditions for vegetation growth.
  • Durability: Permeable pavers are typically durable and can withstand heavy loads, making them suitable for various traffic conditions, including pedestrian walkways, driveways, and parking lots.
  • Versatility: These pavers come in various shapes, sizes, and colours, offering flexibility in design and allowing for creative landscaping solutions.
  • Aesthetic Appeal: Permeable pavers can enhance the aesthetic appeal of outdoor spaces by providing a visually pleasing alternative to traditional pavement materials.

Applications of Permeable Pavers

Applications of Permeable Pavers

Discover the myriad applications of permeable pavers, from urban landscaping to residential surfaces and commercial developments. Explore how these versatile paving solutions can transform various settings while effectively addressing stormwater management needs.

Builders extensively use permeable pavers for sidewalks, pedestrian plazas, and streetscapes in urban landscaping. Their ability to allow water infiltration helps manage stormwater runoff, reducing flooding risks and alleviating strain on drainage systems. 

Additionally, permeable pavers lessen the urban heat island effect by promoting natural cooling through water evaporation.

Permeable pavers are prevalent in driveways, patios, and pathways in residential settings. They prevent surface water accumulation, enhancing safety by reducing the risk of slippery surfaces. 

Homeowners appreciate their aesthetic appeal and the variety of design options available, which can complement any architectural style. 

Furthermore, permeable pavers help maintain healthy lawns and gardens by ensuring adequate water penetration to the soil, supporting plant growth, and reducing erosion.

Most employ permeable pavers in parking lots, loading areas, and outdoor recreational spaces in commercial and industrial areas. Their durability and stormwater management capabilities make them ideal for high-traffic areas, ensuring long-lasting performance while promoting environmental sustainability. 

Businesses benefit from reduced maintenance costs associated with traditional drainage systems, and the enhanced aesthetic appeal can improve customer and employee satisfaction. 

Moreover, using permeable pavers can contribute to achieving green building certifications, such as LEED (Leadership in Energy and Environmental Design), which recognises sustainable construction and design efforts.

Installation Process of Permeable Pavers

Installation Process of Permeable Pavers

Discover the meticulous steps in installing permeable pavers, from excavation to compaction, ensuring a stable and effective stormwater management system.

Step 1: Excavation

The installation process begins with excavation. You should excavate the area designated for the permeable pavers to a 6 to 12-inch depth, adjusting it based on the project’s specific requirements and soil characteristics. 

Excavation ensures enough space to accommodate the base material layers needed for proper drainage and stability.

Step 2: Base Layer

Once the excavation is complete, a base layer of aggregate material, typically crushed stone or gravel, is spread and compacted within the excavated area. The base layer serves several essential functions. 

First, it provides a stable foundation for the pavers, ensuring they remain level and do not shift over time. Additionally, the base layer acts as a reservoir for stormwater, allowing excess water to drain away from the surface.

Step 3: Bedding Sand

After the base layer is in place, a layer of bedding sand is evenly distributed over the compacted aggregate base. The bedding sand provides a smooth and level surface for laying the pavers. 

It also helps to cushion the pavers and distribute weight evenly across the surface. Properly levelled bedding sand is crucial for achieving a uniform finished surface and preventing any irregularities or dips in the pavement.

Step 4: Paver Installation

Carefully place each paver to ensure a tight fit and cohesive surface. Interlocking pavers are often used for permeable pavement systems, as they provide additional stability and prevent shifting.  Lay the pavers in the desired pattern, with small gaps left between them to allow water to permeate through.

Step 5: Joint Sand

After installing the pavers, sweep additional joint sand over the surface to fill the gaps between them. This joint sand helps to lock the pavers in place and prevent them from shifting or becoming loose.

It also helps to promote proper drainage by allowing water to flow freely between the pavers and into the underlying base layers.

Step 6: Compaction

Finally, the entire surface is compacted using a mechanical compactor. This compaction process helps to secure the pavers further and ensure they are firmly seated on the base layers below. 

Compaction also helps to eliminate any air pockets or voids within the pavement, improving overall stability and durability.

Maintenance of Permeable Pavers

Maintenance of Permeable Pavers

Maintaining permeable pavers is essential for preserving their functionality and longevity. Regular maintenance tasks include periodic surface cleaning through sweeping or pressure washing to remove debris and prevent clogging of pores, ensuring permeability.

Weed control is necessary, and it involves removing weeds by hand or using eco-friendly herbicides to prevent vegetation from obstructing water flow. Moss and weeds can often grow between the gaps of pavers, especially in damp or shaded areas. Regularly addressing these issues keeps the pavers clean and ensures proper water flow. 

Joint refilling with fresh sand helps maintain the pavers’ stability and interlocking, which may erode over time.

Regular surface inspections identify any damage or irregularities, allowing for prompt repairs to prevent further deterioration. Periodically resealing the pavers protects them from stains and enhances their durability, especially in high-traffic areas. 

Checking and levelling the surface ensures proper water drainage and prevents uneven settling, which can affect permeability.

During winter, removing snow and ice promptly using plastic shovels or snow blowers prevents damage and maintains accessibility. Additionally, monitoring nearby trees and managing root growth helps avoid damage to the paver surface and underlying layers.

Conclusion

Permeable pavers offer a sustainable solution for managing stormwater, enhancing urban landscapes, and promoting ecological balance. 

Their ability to mitigate flooding, improve water quality, and reduce environmental impact underscores their importance in sustainable landscaping. Embrace permeable pavers for a greener, more resilient future.

The Benefits of Valencia Travertine for Your Home

Choosing the right type of stone for your home can be difficult, especially with all the available options.

Many homeowners struggle to find the perfect, durable, and visually stunning stone, often compromising on one aspect to meet the other.

Valencia Travertine offers the ideal solution, combining aesthetic appeal with exceptional resilience. It is a sought-after choice for any home renovation or construction project.

1. Timeless Aesthetic Appeal

Valencia Travertine brings a classic elegance that remains ever-relevant. Characterised by its warm, natural tones, this stone adds a sophisticated touch to any interior. The subtle veining and intricate patterns make each piece unique, enhancing the overall aesthetic. 

Can you imagine a more versatile choice for your home? Its neutral colour palette complements various décor styles, seamlessly fitting into traditional and modern settings. 

Choosing Valencia Travertine ensures a refined look that adapts effortlessly to any design vision. Its versatility extends to its use as flooring, wall cladding, or countertops. Every piece offers a distinctive charm, ensuring that your space stands out. Craftsmanship in quarrying and finishing further elevates its visual appeal. 

2. Versatility in Applications

Valencia Travertine is celebrated for its remarkable versatility, making it an exceptional choice for various home applications. This stone provides a blend of durability and elegance when used for flooring. 

Its natural texture, distinctive veining, and colour variations ensure a unique look in every room. The stone’s durability makes it suitable for high-traffic areas like hallways and living rooms and more intimate spaces like bedrooms.

Valencia Travertine creates a stunning visual impact in wall cladding. Its ability to add depth and character to walls makes it an excellent choice for feature walls, fireplaces, or backsplashes. The stone’s natural patterns and textures can transform a simple wall into a focal point, enhancing the room’s overall décor.

Valencia Travertine’s versatility also benefits outdoor applications. Its resistance to weathering makes it ideal for patios, walkways, and driveways. The stone withstands the elements, including rain and UV exposure, while maintaining its aesthetic appeal.

Countertops made from Valencia Travertine offer both beauty and functionality. Resistant to heat and scratches, these surfaces are stylish and practical for daily use. Whether in a kitchen or bathroom, travertine countertops provide a timeless, sophisticated look while enduring the rigours of everyday life.

3. Exceptional Durability

Valencia Travertine is celebrated for its exceptional durability, making it a superb choice for various home applications. T

his natural stone’s robust characteristics stem from its formation process, which gives it significant strength and resilience. With its dense composition, Valencia Travertine can easily handle heavy foot traffic, making it ideal for high-traffic areas such as hallways, living rooms, and commercial spaces.

The stone’s durability extends to its resistance to scratches and impacts. Unlike other materials that can easily show signs of wear, Valencia Travertine maintains its appearance even under substantial use. This makes it particularly suitable for environments where durability is crucial, such as kitchens and entryways.

Outdoor applications also benefit from the stone’s durability. Valencia Travertine can withstand exposure to the elements, including UV rays, rain, and temperature fluctuations, without significant deterioration. This makes it a practical choice for patios, driveways, and other exterior surfaces where weather resistance is important.

4. Low Maintenance Requirements

Valencia Travertine is a standout choice for those seeking low-maintenance materials. Its inherent properties reduce the need for frequent upkeep, allowing you to enjoy its beauty with minimal effort. The stone’s dense surface makes it resistant to stains and spills, meaning that everyday accidents are less likely to cause lasting damage.

Regular cleaning is typically required to keep Valencia Travertine looking pristine. A simple sweep and mop with a mild, pH-balanced cleaner will maintain its appearance without the need for harsh chemicals. Have you considered the convenience of a stone that doesn’t require specialised cleaning products or procedures?

Sealing the surface periodically can further enhance its stain resistance and prolong its lifespan. This preventative measure helps protect the stone from moisture and dirt, ensuring it continues to look its best over time. In addition to its easy maintenance, the stone’s durability means it can withstand high-traffic areas without showing significant wear.

5. Environmental Sustainability

Valencia Travertine is an environmentally sustainable choice that aligns with modern eco-conscious values. Sourced directly from quarries with minimal processing, this natural stone reduces the carbon footprint associated with synthetic materials. 

The extraction process for travertine generates less waste than that of many manufactured alternatives. Consider how choosing a natural product over synthetic options reduces environmental impact.

Longevity is another key factor in the travertine’s sustainability. By opting for a material that lasts for decades, you minimise the need for frequent replacements and the associated waste. Have you considered how durability can enhance sustainability by decreasing the frequency of renovation?

The stone’s thermal properties also support energy efficiency. Valencia Travertine helps maintain stable indoor temperatures, potentially lowering the need for artificial heating and cooling. Recycling by-products during the travertine production process further diminishes environmental impact.

6. Cost-Effectiveness

Valencia Travertine is a cost-effective choice that offers substantial value over time. Although its initial cost may be higher than some other materials, its durability makes it a wise financial investment. 

The stone’s robust nature means it can withstand heavy use without significant wear, reducing the need for frequent replacements or repairs. Have you considered how fewer replacements could save you money in the long run?

Valencia Travertine’s low maintenance requirements also contribute to its cost-effectiveness. Regular sweeping and mopping and occasional sealing are simple and inexpensive compared to the extensive care needed for some other surfaces.

Unlike synthetic options that may require costly specialised cleaners or treatments, travertine’s upkeep is straightforward and budget-friendly.

The stone’s timeless aesthetic also means it remains stylish for many years. This eliminates the need for frequent updates or renovations, which can be costly and disruptive. Travertine’s application versatility further enhances its value, as it can be used for flooring, wall cladding, and countertops without requiring different materials.

7. Health and Safety Benefits

Valencia Travertine offers notable health and safety benefits, making it an excellent choice for creating a healthier living environment. The stone’s natural properties contribute to improved indoor air quality. 

Unlike synthetic materials, travertine does not emit volatile organic compounds (VOCs) that can negatively impact air quality. Have you considered how natural materials can enhance your home’s air purity?

Additionally, Valencia Travertine’s surface is naturally hypoallergenic. This characteristic helps reduce the accumulation of dust and allergens, creating a cleaner and healthier environment, especially for those with allergies. 

The stone’s anti-slip qualities also add a layer of safety. When adequately sealed, its texture provides better traction than smoother surfaces, reducing the risk of slips and falls.

Another safety advantage is its fire resistance. Travertine can withstand high temperatures without releasing harmful fumes, making it a safer choice for areas around fireplaces and stoves. 

8. Customisation Options

Valencia Travertine provides various customisation options, making it a versatile choice for any design project. Various finishes are available, allowing you to select the one that best complements your aesthetic. For instance, a polished finish offers a sleek, reflective surface that sophisticates contemporary interiors. 

In contrast, a honed finish provides a softer, matte look that suits more traditional or minimalist designs. The tumbled finish, on the other hand, delivers a textured, antique appearance perfect for rustic or Mediterranean themes.

Tile sizes and shapes can be customised to fit your specific requirements. Whether you prefer large-format tiles that create a seamless look or smaller tiles arranged in intricate patterns, Valencia Travertine can be cut and shaped to meet your design vision.

Custom patterns, such as mosaic or herringbone layouts, add unique visual interest and can be tailored to fit any room size or shape.

Edge treatments also offer design flexibility. You can choose from various edge profiles, including straight cuts for a clean, modern look, bevelled edges for a more refined appearance, or bullnose edges for a softer, rounded finish.

9. Enhancing Property Value

This natural stone, renowned for its distinctive blend of warmth and elegance, isn’t merely an aesthetic upgrade; it’s a strategic investment that can significantly enhance your property’s market appeal.

Consider the impact of showcasing a kitchen adorned with elegant travertine countertops or a bathroom where travertine tiles create a spa-like retreat. These luxurious features elevate your daily living experience and make a powerful statement to potential buyers. 

The timeless beauty and durability of travertine speak volumes, often translating into quicker sales and higher offers.

Furthermore, travertine’s longevity ensures your investment continues to pay off. Unlike synthetic materials that may deteriorate over time, travertine’s natural resilience stands the test of time, enhancing your property’s value for years.

Is it time to transform your house into a valuable asset that appeals to your heart and the market? With Valencia Travertine, you’re not just upgrading your home; you’re making a smart financial decision that will reap rewards in the long run.

Conclusion

Valencia Travertine stands out as the perfect choice for homeowners seeking elegance, durability, and eco-friendliness. From its timeless beauty to its low-maintenance nature, Valencia Travertine offers a myriad of benefits for your home. Elevate your living spaces with this versatile natural stone and enjoy a lifetime of luxury.

10 Great Stone BBQ Ideas

Struggling to find the perfect BBQ setup for your outdoor space? Many BBQ designs fall short on durability, aesthetics, or functionality, leaving you with a subpar cooking experience.

Discover 10 great stone BBQ ideas that combine strength, beauty, and practicality to transform your outdoor cooking area into a stunning and efficient space.

1. Integrate a BBQ into a Stone Wall

Integrating a BBQ into a stone wall is an innovative way to maximise your outdoor space while adding a touch of elegance. Start by selecting a suitable location where the BBQ can be seamlessly built into the existing stone wall. This saves space and provides a sturdy, heat-resistant surface for cooking.

Choose a durable stone type such as granite or limestone, ensuring it complements the existing design of your outdoor area. Proper ventilation is crucial; incorporate vents into the stone structure to allow smoke to escape efficiently, preventing any build-up of heat or smoke.

2. Stone Fire Pit with Cooking Grate

A stone fire pit with a cooking grate offers the perfect blend of rustic charm and practical functionality for your outdoor space. Begin by selecting a durable stone such as granite or limestone for constructing the fire pit. These materials provide a sturdy structure and add a natural aesthetic to your garden or patio.

Ensure the fire pit is built on a level surface and away from flammable materials or structures. The size of the fire pit should accommodate both the fire and the cooking grate, providing ample space for cooking various foods.

Choose a high-quality, heat-resistant cooking grate that fits securely over the fire pit. Stainless steel or cast iron grates are excellent options due to their durability and ease of cleaning. The grate should be easily removable for adjusting the fire and cleaning purposes.

3. Stone Chimney BBQ

A stone chimney BBQ is an excellent way to elevate your outdoor cooking experience, combining functionality with an impressive aesthetic. Start by choosing a durable stone such as granite or limestone to construct the BBQ and the chimney. These materials are robust and enhance the visual appeal of your outdoor space.

Ensure the BBQ is positioned away from flammable structures and in a well-ventilated area to promote safety and efficiency. The chimney is crucial in directing smoke away from the cooking area, providing a cleaner and more enjoyable environment for the chef and guests.

Incorporate a spacious grilling area with high-quality, heat-resistant grates. Stainless steel or cast iron grates are ideal for their durability and ease of maintenance. Additionally, consider adding adjustable grates to allow for versatile cooking options.

4. Stone Casing for BBQ Units

A stone chimney BBQ is a sophisticated addition to any garden, providing an efficient cooking space and a stunning focal point. Start by selecting a durable stone such as granite, limestone, bluestone, or sandstone, known for their robustness and aesthetic appeal. These materials will ensure the longevity of your BBQ structure.

Position the BBQ away from flammable structures and ensure it’s in a well-ventilated area. The chimney’s primary function is to funnel smoke upwards and away from the cooking area, keeping the air clear and making the cooking process more pleasant.

Construct a spacious grilling area with high-quality, heat-resistant grates. Stainless steel or cast iron grates are preferable due to their durability and ease of cleaning. Adjustable grates can offer versatile cooking heights for different types of food.

5. Built-In Stone BBQ Smoker

A built-in stone BBQ smoker is a fantastic addition for those who love rich, smoky flavours of slow-cooked meats. Start by selecting a durable stone such as granite, bluestone, or sandstone to construct the smoker. These materials ensure the structure can withstand high temperatures and outdoor elements while adding a rustic charm to your garden.

Position the smoker in a well-ventilated area, away from flammable materials, to ensure safety and optimal smoke dispersion. The design should include a firebox where wood or charcoal is burned, generating the smoke needed for cooking.

6. Stone BBQ Island

A stone BBQ island transforms your garden into the ultimate outdoor cooking station, combining functionality with style. Choose a durable stone such as granite, limestone, travertine, or quartzite for the island’s construction. These materials ensure longevity and add a sophisticated touch to your outdoor space.

Position the BBQ island in a central, accessible area of your garden or patio to make it the focal point for gatherings. Ensure there’s ample space around it for movement and socialising.

Equip the island with a built-in grill of high-quality, heat-resistant materials like stainless steel. This ensures durability and easy maintenance. Consider adding multiple cooking zones, including a grill, a side burner, and a smoker, to provide versatile cooking options.

7. Dedicated Stone BBQ Pit

A dedicated stone BBQ pit is the perfect choice for those who appreciate the simplicity and authenticity of traditional grilling. Begin by selecting a durable stone such as granite or bluestone for the pit’s construction. 

These materials can withstand high temperatures and outdoor elements, ensuring a long-lasting structure.

Choose a suitable location for the BBQ pit, preferably on level ground and away from flammable materials or structures. Ensure ample space around the pit for safety and ease of movement.

Construct the pit comfortably, typically 60 to 90 centimetres, to make grilling easy and ergonomic. The interior should be lined with firebrick to withstand the fire’s intense heat.

8. Stacked Stone BBQ Grill

A stacked stone BBQ grill combines rustic elegance with modern functionality, creating a stunning centrepiece for any outdoor space. Begin by selecting high-quality stones such as quartzite or travertine. These stones provide durability and add a natural, textured look to the grill.

Position the BBQ grill in the centre of your garden or patio to maximise its visual impact and accessibility. Ensure the area is level and provides ample space for cooking and socialising.

Construct the grill base using stacked stone, carefully arranging the rocks to create a stable and visually appealing structure. The grill should be built to a comfortable cooking height, typically around 90 centimetres, to ensure ease of use.

Install a high-quality grilling surface made from stainless steel or cast iron. These materials are known for their heat retention and durability. The grilling surface should securely fit into the stone base, providing enough space for various cooking methods.

9. Outdoor Stone Pizza Oven

Transform your backyard into a culinary haven with an outdoor stone pizza oven. Not only does it elevate your outdoor entertaining experience, but it also adds a rustic charm and increases your home’s value.

When selecting a stone pizza oven, consider materials like limestone, granite, or brick for durability and heat retention. These stones withstand high temperatures and enhance the oven’s aesthetic appeal. Ensure the stove is placed on a sturdy, fire-resistant base to prevent accidents and to improve safety.

Position your pizza oven in a convenient yet safe location, ideally away from flammable structures but within reach of your outdoor dining area. This ensures easy access for cooking and serving, making your gatherings more enjoyable.

10. Separate Stone Grill Zone

Creating a separate stone grill zone can significantly enhance your outdoor cooking experience. This dedicated area not only optimises your cooking space but also adds an element of sophistication to your backyard. 

Opt for materials like granite or limestone. These stones are visually appealing and highly durable, capable of withstanding high temperatures and the elements.

Position your stone grill zone away from the main seating area to minimise smoke and heat disruption. Ensure it’s easily accessible from the kitchen for convenient food preparation and transfer. Incorporate counter space around the grill for prepping and serving food. 

Integrate features such as built-in shelves or cabinets for storing grilling tools and accessories. Adding a stone countertop provides ample space for plating and resting hot dishes.

To enhance safety, use non-combustible materials around the grill. Ensure proper ventilation, and consider adding a stone backsplash to protect surrounding surfaces from heat and grease splatters. 

Regularly clean the stone surfaces to prevent staining and maintain their appearance. Use a stone sealer to protect against weathering and grease buildup.

Conclusion

Elevate your outdoor cooking experience with these innovative stone BBQ ideas. Whether you’re hosting a summer feast or a cosy winter grill, these designs will inspire and impress. Ready to transform your garden into a gourmet haven? Start planning your dream BBQ setup today and savour the art of stone-cooked perfection.

Porcelain Pavers: Advantages and Disadvantages

Choosing the right paving material can be daunting with so many options available.

Selecting the wrong paver can lead to costly maintenance, poor durability, and an unattractive finish, which can cause frustration and disappointment.

Porcelain pavers offer a mix of advantages and disadvantages. In this article, we’ll explore both sides to help you make an informed decision about your project and ensure you choose the best option for your needs.

Advantages of Porcelain Pavers

Discover the exceptional benefits of porcelain pavers, from their impressive strength and longevity to their stunning design options and minimal environmental impact. Explore how these versatile pavers can transform your outdoor space into a safe, beautiful, and sustainable haven.

1. Durability and Strength

One of the most significant advantages of porcelain pavers is their durability and strength. These pavers are produced by firing clay at very high temperatures, creating dense and robust material. 

This manufacturing process makes porcelain pavers highly resistant to cracking, chipping, and wear, even in high-traffic areas.

Porcelain pavers can withstand heavy loads without compromising their structural integrity. 

This characteristic makes them an excellent choice for driveways, patios, and walkways. Unlike other paving materials, such as concrete or natural stone, porcelain does not deteriorate quickly under pressure, ensuring long-term performance and minimal maintenance.

2. Aesthetic Versatility

Porcelain pavers offer various design options, making them suitable for different architectural styles and personal preferences. They come in various colours, textures, and finishes, allowing you to achieve the desired look for your space. 

Whether you prefer the rustic charm of wood, the elegance of natural stone, or the modern appeal of concrete, porcelain pavers can mimic these materials with remarkable accuracy.

The consistency in colour and texture provided by porcelain pavers ensures a cohesive and polished appearance.

This uniformity makes them ideal for large projects where a consistent look is essential. Moreover, porcelain pavers are available in various sizes and shapes, offering endless design possibilities to create unique and visually stunning patterns.

3. Low Maintenance

One of the standout benefits of porcelain pavers is their low maintenance requirements. Their non-porous surface makes them resistant to stains, mould, and mildew, common issues with other paving materials. 

This characteristic also means porcelain pavers do not absorb water, preventing damage from freeze-thaw cycles in colder climates. Cleaning porcelain pavers is straightforward and hassle-free. 

Regular sweeping and occasional washing with water and a mild detergent are usually sufficient to keep them looking pristine. This ease of maintenance saves time and effort and reduces the overall upkeep cost.

4. Weather Resistance

Porcelain pavers are designed to withstand various weather conditions, making them suitable for hot and cold climates. Their resistance to frost, heat, and UV rays ensures they maintain their appearance and functionality over time. 

Porcelain pavers remain stable and vibrant, unlike materials that may fade or warp under extreme temperatures.

The non-porous nature of porcelain pavers also provides excellent moisture resistance, preventing issues such as mould and mildew growth. This feature is particularly beneficial in areas with high humidity or frequent rainfall, ensuring that the pavers remain in good condition year-round.

5. Slip Resistance

Safety is crucial when choosing paving materials, and porcelain pavers excel in providing a slip-resistant surface. The textured finishes applied during manufacturing enhance grip, reducing the risk of slips and falls, even in wet conditions. 

This makes porcelain pavers ideal for pool surrounds, patios, and walkways where safety is a priority.

6. Eco-Friendly

Porcelain pavers are eco-friendly for those looking to reduce their environmental impact. The manufacturing process often incorporates recycled materials, and their durability means they require fewer replacements over time, reducing waste.

Additionally, their low maintenance needs reduce the use of harsh chemicals and cleaning agents, making them a sustainable choice for paving projects.

Disadvantages of Porcelain Pavers

While porcelain pavers offer numerous benefits, it is essential to consider some potential drawbacks to make an informed decision.

1. Higher Initial Cost

One of the primary disadvantages of porcelain pavers is their higher initial cost compared to other paving materials such as concrete or brick. The advanced manufacturing process and high-quality materials used to produce porcelain pavers increase their price. 

While the upfront investment in porcelain pavers is higher, the long-term benefits and potential savings on maintenance and replacements must be considered.

2. Installation Complexity

The installation process for porcelain pavers can be more complex and demanding than other materials. 

Proper substrate preparation, precise placement, and specific installation techniques are crucial to ensuring their longevity and performance. This complexity often necessitates professional installation, adding to the overall cost.

3. Limited Load-Bearing Capacity

Although porcelain pavers are durable, they have a limited load-bearing capacity compared to other materials like concrete. This limitation can make them less suitable for areas subject to heavy vehicular traffic or significant loads. 

For instance, while they perform excellently in residential driveways, there may be better choices for commercial or industrial applications where heavy machinery or frequent high-load usage is expected.

4. Potential for Breakage

Porcelain pavers can be more susceptible to breakage during handling and installation than materials like concrete or natural stone. This fragility requires careful transport and precise handling to avoid damage. Once installed, they are highly durable, but the initial stages demand extra caution.

5. Limited DIY Suitability

Due to their installation complexity and potential for breakage, porcelain pavers are generally less suited for DIY projects. 

Homeowners may find it challenging to achieve a professional finish without the necessary experience and tools. Hiring a professional installer while ensuring the best results adds to the overall cost and may deter those looking for a more hands-on approach.

Conclusion

Porcelain pavers offer a blend of durability, aesthetic appeal, and low maintenance, making them an excellent choice for outdoor applications. 

However, their higher initial cost, installation complexity, and limited load-bearing capacity are important considerations. You can determine if porcelain pavers are the right choice for your project by weighing these advantages and disadvantages.

Stone Cladded Fireplace Request

At Splendour in Stone, we specialise in supplying and installing natural stone cladded fireplaces that bring warmth, beauty, and character to your home. Each piece is crafted with precision and presence, ensuring a timeless centrepiece built to last.

Planning a new fireplace or upgrading an existing one? Complete the form below and receive your personalised quote within 24 hours.
Share anything about your vision, home style, or needs
Important Installation Note
The fireplace unit must be installed prior to our stonework.
This ensures proper fitting and a seamless final result. If you need help coordinating this, we’re happy to assist. Just mention it in your message.
In SQM?

Please fill your details to download.


      Request Callback


        Enquiry Form


        Please fill your details to download.