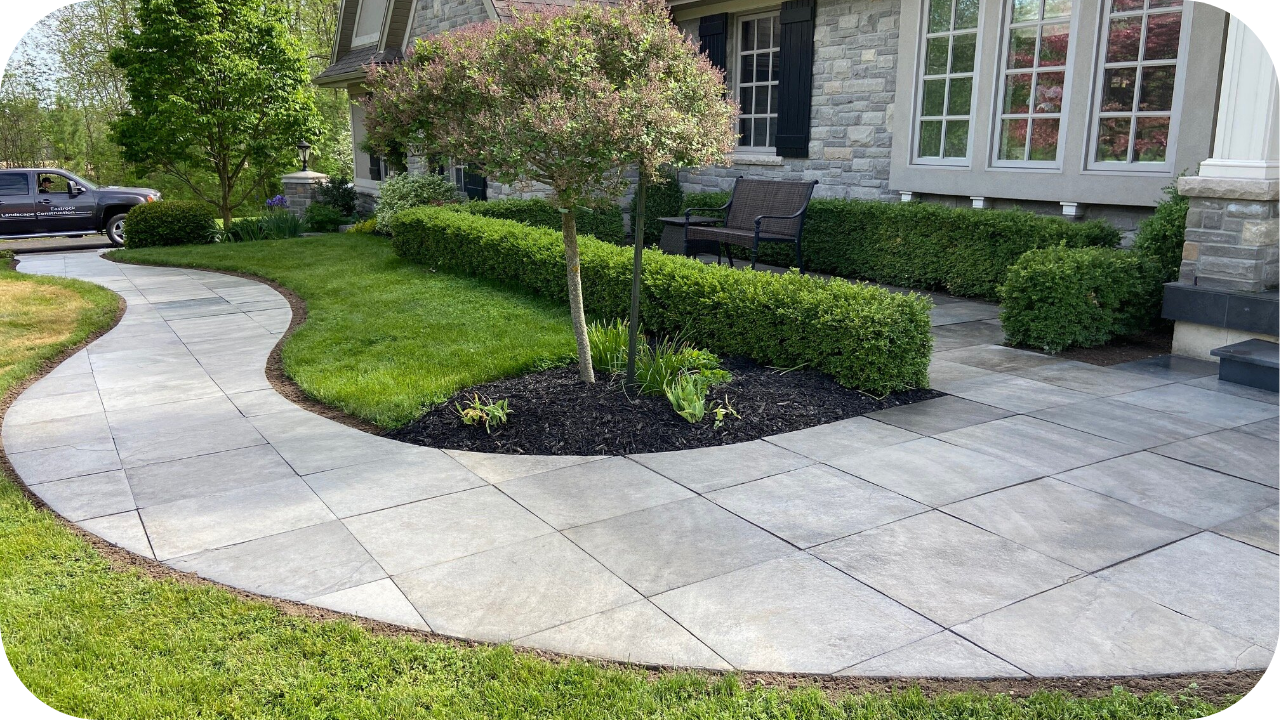
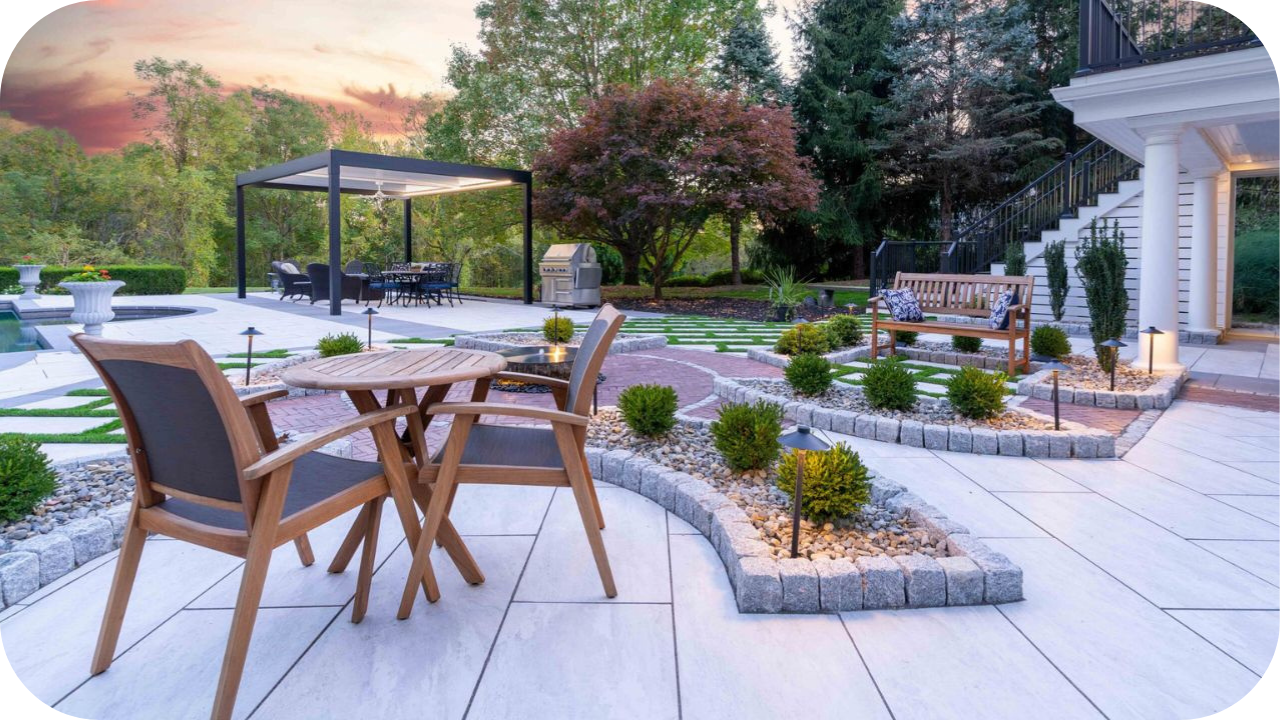
Curved paver edges bring a fluid, natural feel to outdoor layouts while adding visual softness that blends beautifully with surrounding gardens and greenery.
Whether designing a winding walkway or shaping a circular patio, cutting curves into your pavers takes planning, the right tools, and a steady hand. Done well, it elevates the look and function of any paved space.
In this guide, we’ll walk you through the step-by-step process for cutting curved paver edges, covering everything from preparation and marking to clean cutting, fitting, and securing for lasting results.
Why Curved Edges Matter in Landscape Design
Curved edges introduce a sense of flow and movement that straight lines often lack, making them a valuable design element in modern landscapes. They help soften the hard geometry of paved surfaces, allowing patios and garden paths to feel more organic and inviting.
In spaces where nature and structure meet, curved edges offer a gentle transition that complements plantings, stonework, and outdoor furnishings. These shapes also enhance spatial navigation by guiding foot traffic naturally around corners and focal points.
Curved layouts avoid harsh angles, bringing balance and openness to small or uneven spaces. Whether using natural stone or pavers, incorporating curves enhances both the look and usability of outdoor areas with a softer, more organic design flow.
Tools and Materials You’ll Need
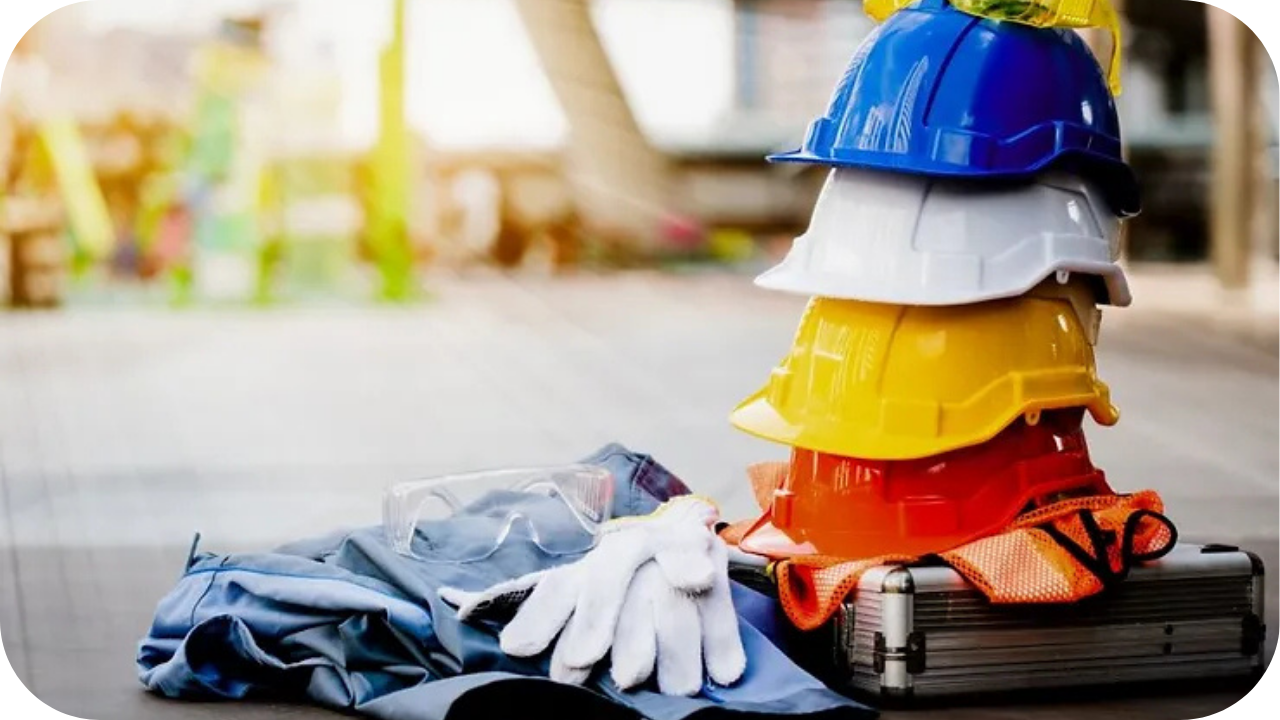
To cut precise curved edges that last, you need the right tools for accuracy, safety, and support. Here’s everything required before making your first cut.
- Safety gear: Gloves, safety goggles, a dust mask or respirator, steel-capped boots, a high-vis vest, and ear protection are necessary to shield yourself from debris, fine dust, heavy tools, and noisy equipment.
- Marking tools: Essential for outlining your curved design clearly on the surface before cutting begins. Tools like spray paint, garden hoses, or chalk lines work best for freeform shapes.
- Measuring equipment: Use a tape measure, string line, or flexible boards to check radius consistency and maintain layout accuracy across the entire curved section.
- Cutting tools: Choose between an angle grinder, circular saw with diamond blade, or masonry saw, depending on your paver material and the precision needed.
- Support materials: Have edge restraints, compacted base materials, and bedding sand ready to secure cut pavers and maintain the curve’s structure once installed.
Step-by-Step Guide to Cutting Curved Pavers
Cutting curves requires patience, precision, and a well-structured process. Follow these key steps to shape your pavers smoothly and maintain the natural flow of your layout.
1. Plan and Mark the Curve
Start by assessing your landscape layout and identifying the best placement for a curved edge. Use a garden hose, rope, or flexible conduit to visualise the shape. Then mark it clearly with spray paint or chalk to create an accurate, visible cutting guide.
2. Dry-Lay the Pavers
Place the pavers along the marked curve without securing them permanently. This step lets you preview the layout, refine the curve, and identify which pieces will need trimming. It also ensures consistent joint spacing and base alignment before making any cuts.
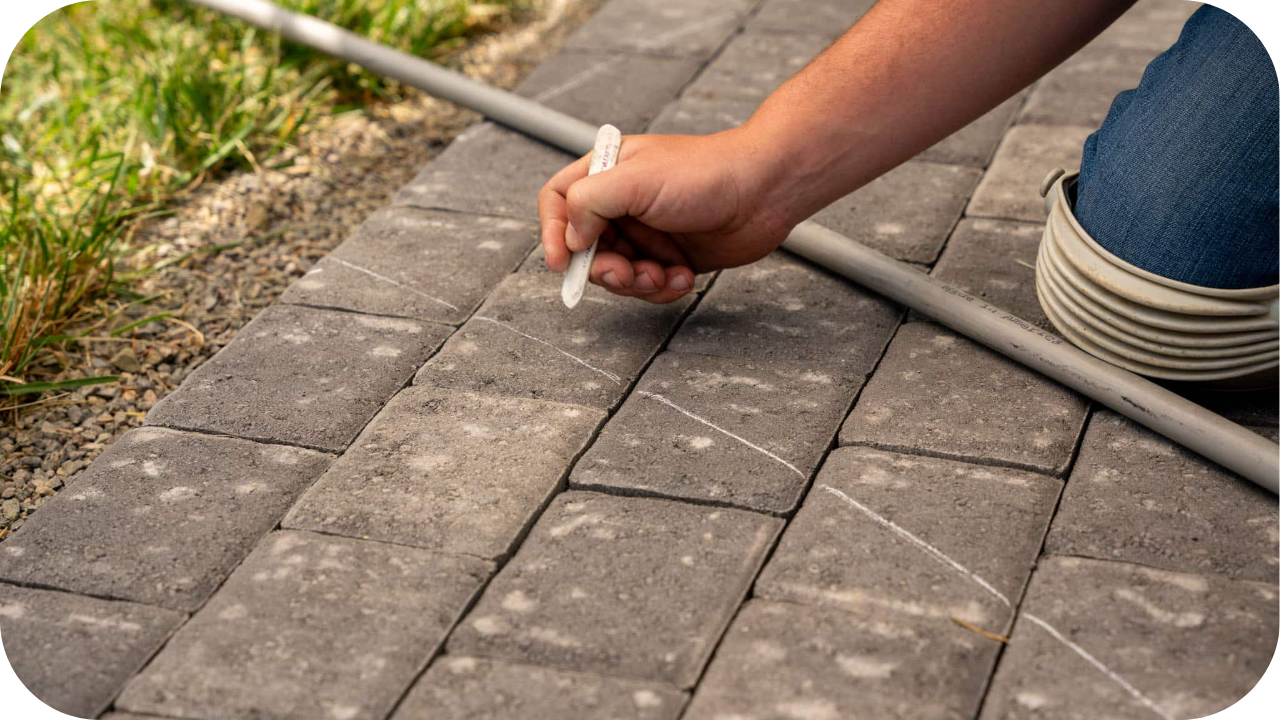
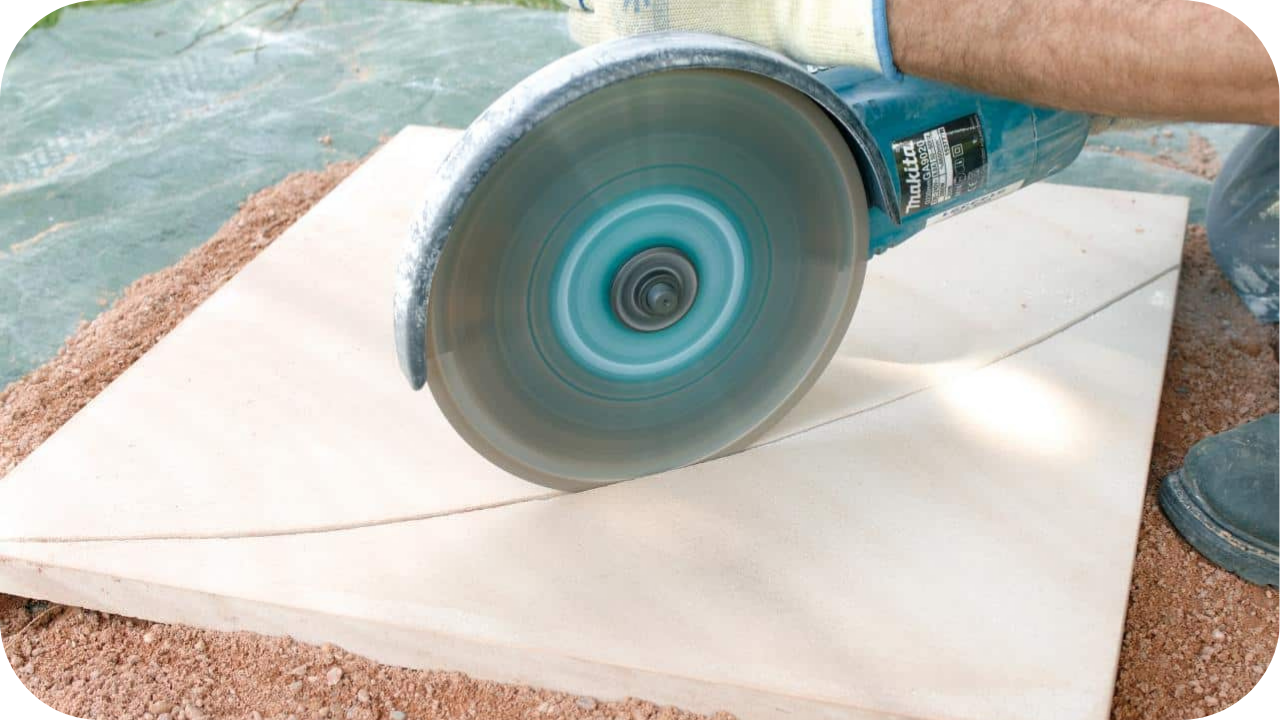
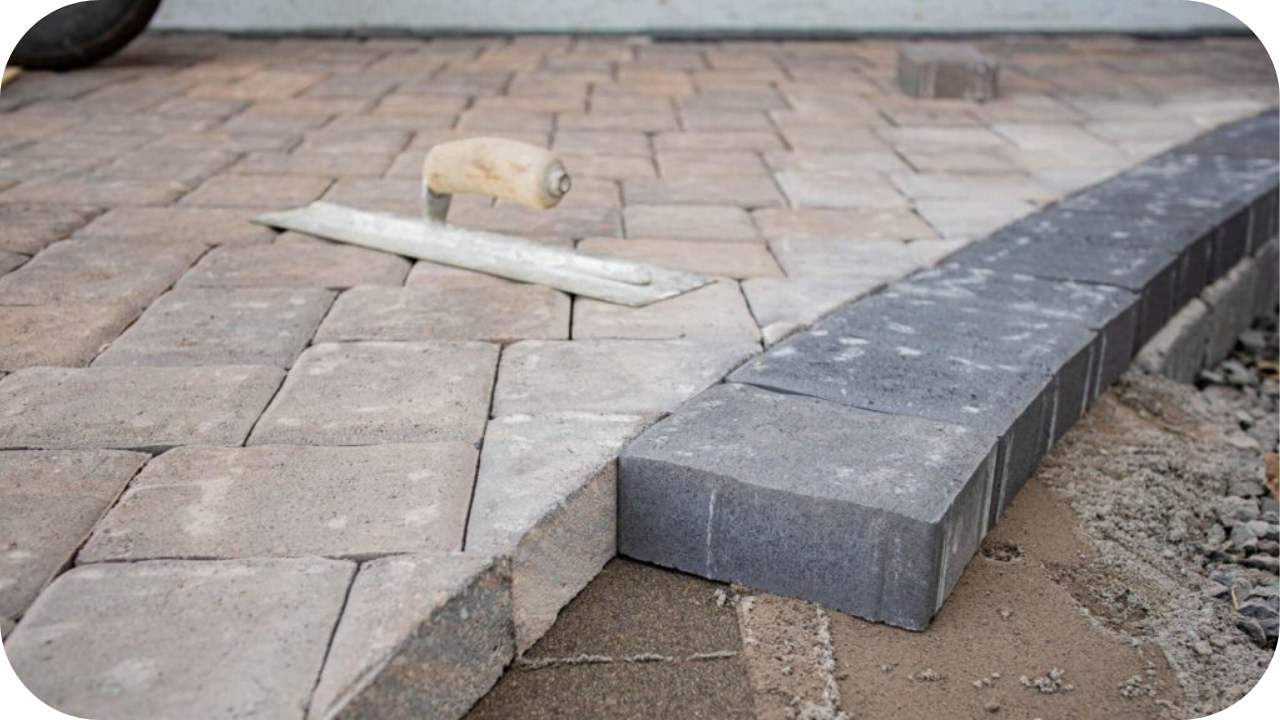
3. Score and Cut the Pavers
Remove each paver that needs adjustment. Mark the cut line on the surface using chalk or a masonry pencil, following the curve exactly. Use a masonry saw or angle grinder with a diamond blade to cut slowly, avoiding chips or breakage along the curve.
4. Smooth and Fit the Cut Edges
Once cut, smooth out rough or jagged edges with a sanding block or masonry file. Dry-fit each paver back into place along the curve to check alignment and adjust as needed before final installation. Precision at this stage ensures a professional-looking result.
5. Set and Secure the Pavers
With all cut pavers ready, install any necessary edge restraints to lock in the curve’s shape. Re-lay the pavers on compacted bedding sand, then sweep in jointing sand. Lightly hose the area to settle the joints and ensure structural integrity for years.
Common Mistakes to Avoid
Avoiding these mistakes saves time, reduces waste, and ensures your curved paver edges are seamless, secure, and built to last. Here’s what not to do.
1. Cutting dry without proper dust control
Cutting without water or dust extraction generates harmful particles that pose serious health risks and reduce visibility. It also damages your tools over time. Always prioritise safe cutting practices and proper protective equipment.
2. Rushing cuts or forcing tools
Speeding through cuts causes jagged, inaccurate edges or cracked pavers. Forcing your tools can also lead to breakage and uneven lines. Move steadily, allowing the blade to cut cleanly through the material.
3. Misjudging the curve’s radius
Incorrect radius planning leads to awkward transitions and poor visual flow. Tight or inconsistent curves can affect alignment and usability. Use guides or templates to confirm measurements before cutting or laying pavers.
4. Forgetting joint spacing in layout
Neglecting to leave space for joints disrupts alignment and leads to an uneven finish. Always account for sand or mortar gaps to ensure consistent spacing and long-term stability in curved sections.
5. Using the wrong blade for the material
Each paver type requires a specific blade for clean cuts. Using an unsuitable blade can result in chipped edges, overheating, or tool damage. Always match your blade to the paver’s material and hardness.
Pro Tips for Better Results
Well-executed curved edges depend on more than just cutting. These expert tips help you fine-tune the finish and maintain a consistent, professional result.
- Double-check your curve radius: Confirm your arc layout before cutting begins to ensure a smooth, flowing design that avoids sudden shifts in direction or visible inconsistencies across the entire edge.
- Start at the centre and work outward: Begin installation from the curve’s midpoint to maintain symmetry on both sides, reducing layout misalignment and helping the flow feel more natural and intentional.
- Use smaller pavers or offcuts: Tight turns are easier to manage with compact pieces, which allow you to shape the curve more accurately and prevent gaps or awkward transitions at the edge.
- Add variation in colour or texture: Use slight shifts in tone or finish along the curve to create depth and contrast without overpowering the broader paving design or disrupting layout continuity.
- Practice on spare pavers before cutting: Use offcuts to refine your cutting control, test curve shapes, and avoid costly errors on key pieces that need to fit neatly and cleanly.
- Dry-fit before final placement: Position all cut pavers in place before securing them permanently to check alignment, spacing, and visual flow, making small adjustments where needed for the best overall finish.
Conclusion
Curved paver edges add movement, softness, and sophistication to any walkway or patio. With the right tools, planning, and cutting techniques, achieving a precise curve becomes a manageable DIY or professional project.
Avoid shortcuts and common mistakes to ensure a flawless finish that lasts. For expert guidance and high-quality natural stone suited for curved landscapes, speak with the team at Splendour in Stone today.
Natural Stone Materials: Types, Benefits, and Choosing the Right Stone for Your Project
Natural stone is widely used in Australian homes because it offers lasting beauty, strength, and natural character in both indoor and outdoor spaces. Its variation
How to Maintain Limestone Pavers for Long Term Surface Quality
Limestone is a favourite choice for Australian outdoor spaces because its soft texture and natural warmth bring a relaxed, timeless feel to patios, pathways, and
