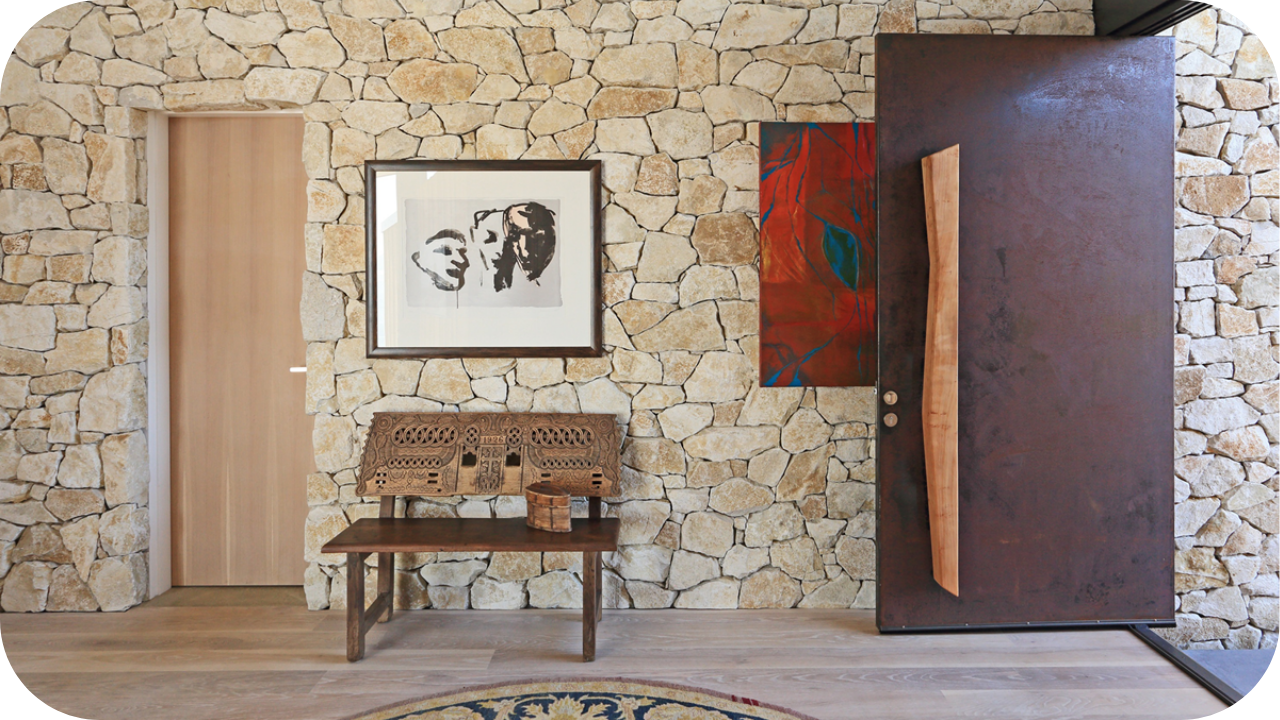
“A stunning stone wall can boost your home’s value by up to 10%,” says one design expert. But is it really worth risking a DIY disaster?
Many assume it’s as simple as sticking stone to plaster. But halfway through, they’re surrounded by dust, uneven cuts, and dried-out mortar. It can turn messy very quickly.
Before you reach for the trowel, let’s unpack what building a DIY stone feature wall really involves. Is doing it yourself a bold move or just a big mistake?
Can You DIY a Stone Feature Wall?
Yes, you can DIY a stone feature wall, but it requires proper planning, the right tools, and basic skills. Using stone cladding panels can make the process easier, but surface prep, cutting, and levelling are still important. While DIY saves money, hiring a professional may be better for complex or large installations.
Why People Consider DIY
Many homeowners consider DIY stone feature walls to save money on labour costs. Hiring a professional stonemason or installer can be expensive, so doing it yourself seems like a cheaper option.
Others enjoy the hands-on satisfaction of completing a home improvement project themselves. It offers a chance to be creative, especially if you’re designing a unique feature wall using your own layout and choice of stone.
Some people also believe that installing a stone feature wall is simple, especially when using interlocking stone panels or adhesive systems that look beginner-friendly. Online tutorials and step-by-step guides make the process seem manageable, even for first-timers.
DIY is also attractive to those working on tight renovation timelines, where scheduling a tradie may cause delays. And if you’re doing a small wall or outdoor section, it might feel like a low-risk project worth trying on your own.
However, while the appeal of saving money and gaining personal achievement is strong, it’s important to know what’s involved before you begin. Mistakes can be costly, and poor installation can affect both appearance and durability.
How to Construct a DIY Stone Feature Wall
Before you mix mortar or cut your first stone, make sure you’re properly prepared. Follow these clear steps to avoid costly errors and get a feature wall you’ll be proud of.
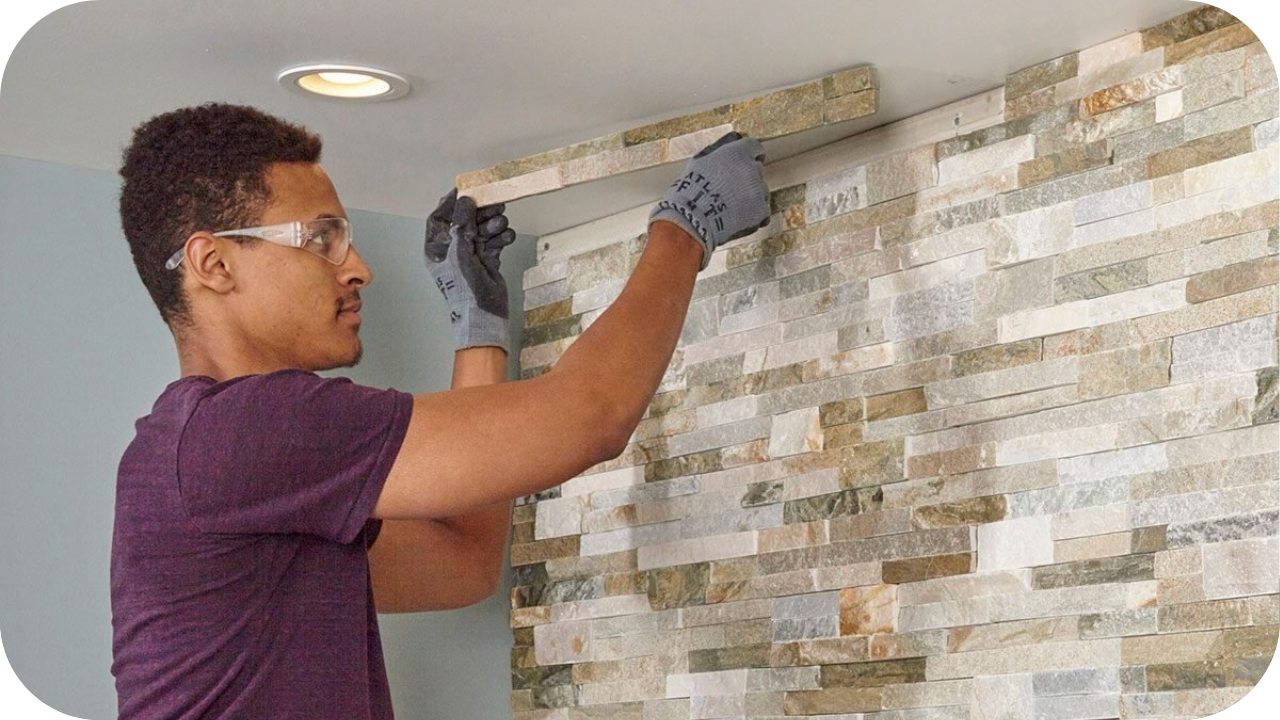
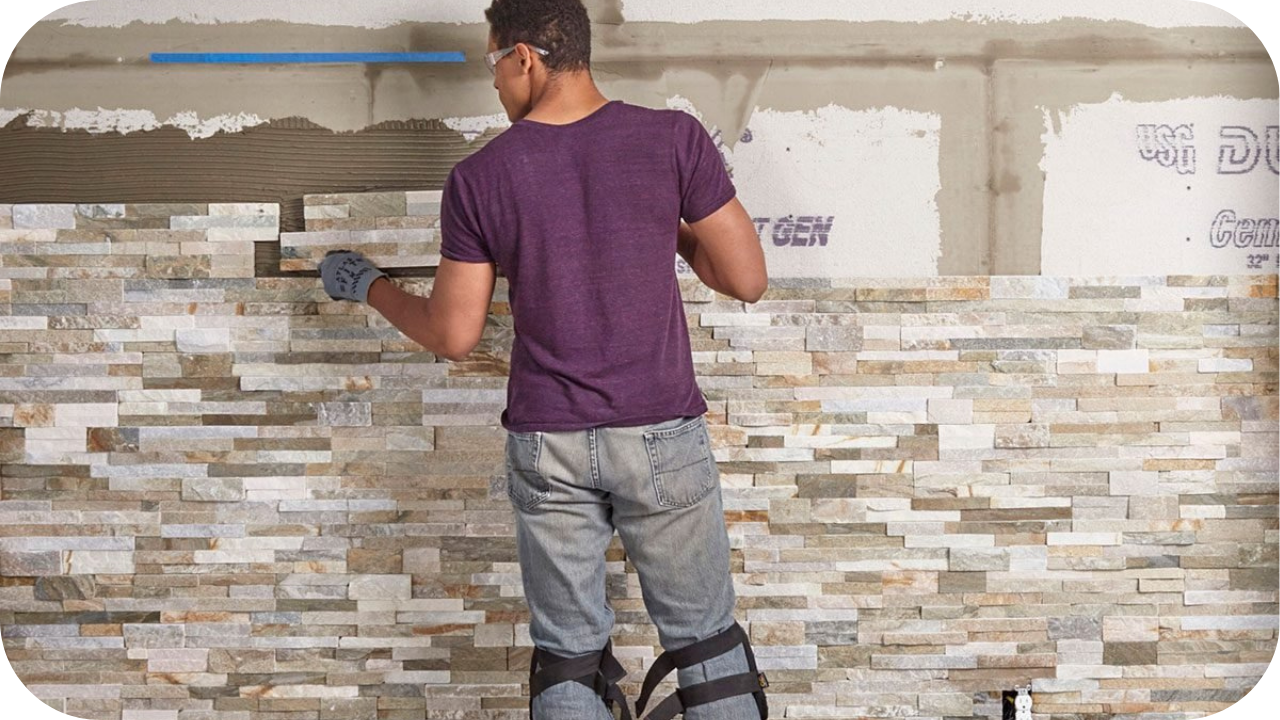
1. Prepare the Surface
Begin by cleaning and levelling the wall to create a proper bonding surface. If the wall is made of timber or plasterboard, install cement sheeting or a suitable backer board to support the stone’s weight.
2. Measure and Plan Carefully
Measure the entire area precisely. Dry-lay a few stones to visualise your layout and adjust your pattern. This helps prevent awkward gaps or cuts when the adhesive is applied and time becomes limited.
3. Choose the Right Stone for the Space
Select stone cladding or interlocking panels that are suitable for either indoor or outdoor use. Make sure the product is rated for your specific wall type and matches the design style of your space.
4. Gather the Correct Tools and Materials
Assemble all essential tools before starting. This includes a notched trowel, spirit level, safety gloves, eye protection, angle grinder or wet saw, masonry adhesive or mortar, and optional spacers for even stone placement.
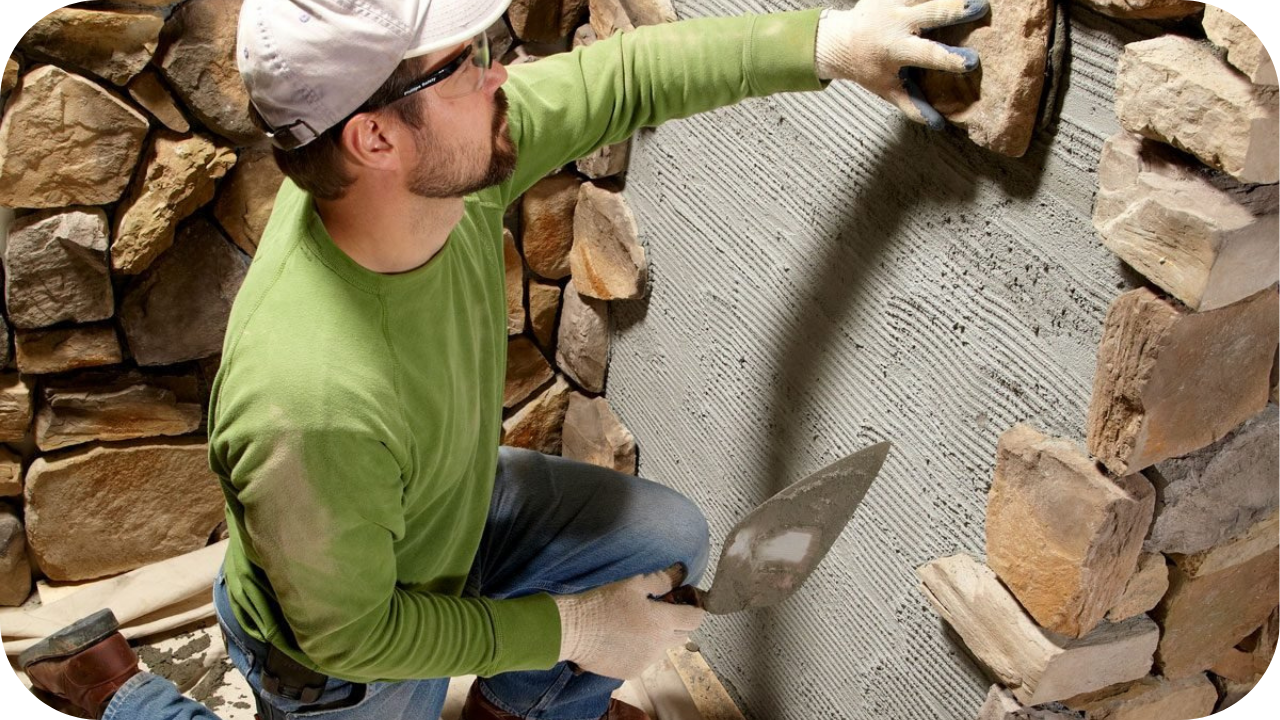
5. Apply Adhesive or Mortar in Small Sections
Spread adhesive or mortar using a notched trowel across small areas at a time. Press each stone panel firmly into place, checking the level and alignment as you go. Use spacers if needed.
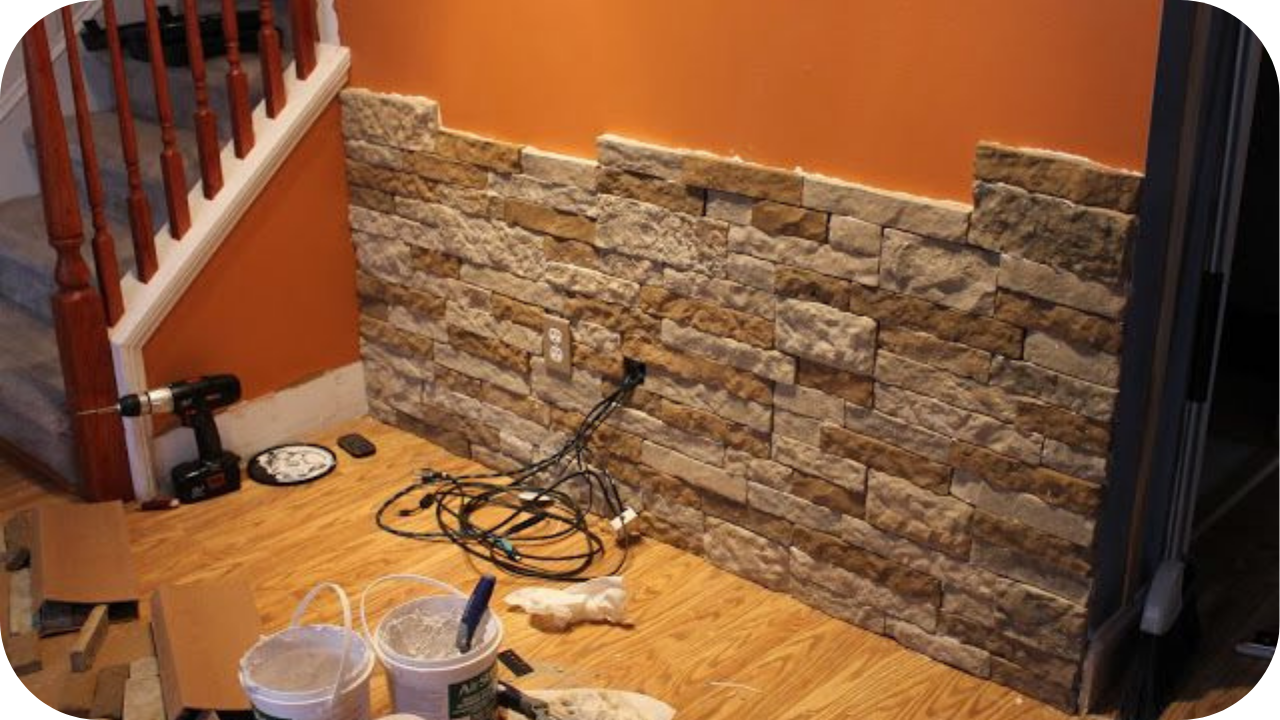
6. Cut and Fit the Edges Precisely
Use an angle grinder or wet saw to trim stones for corners and edges. Neat, accurate cuts make all the difference when it comes to achieving a professional finish on your feature wall.
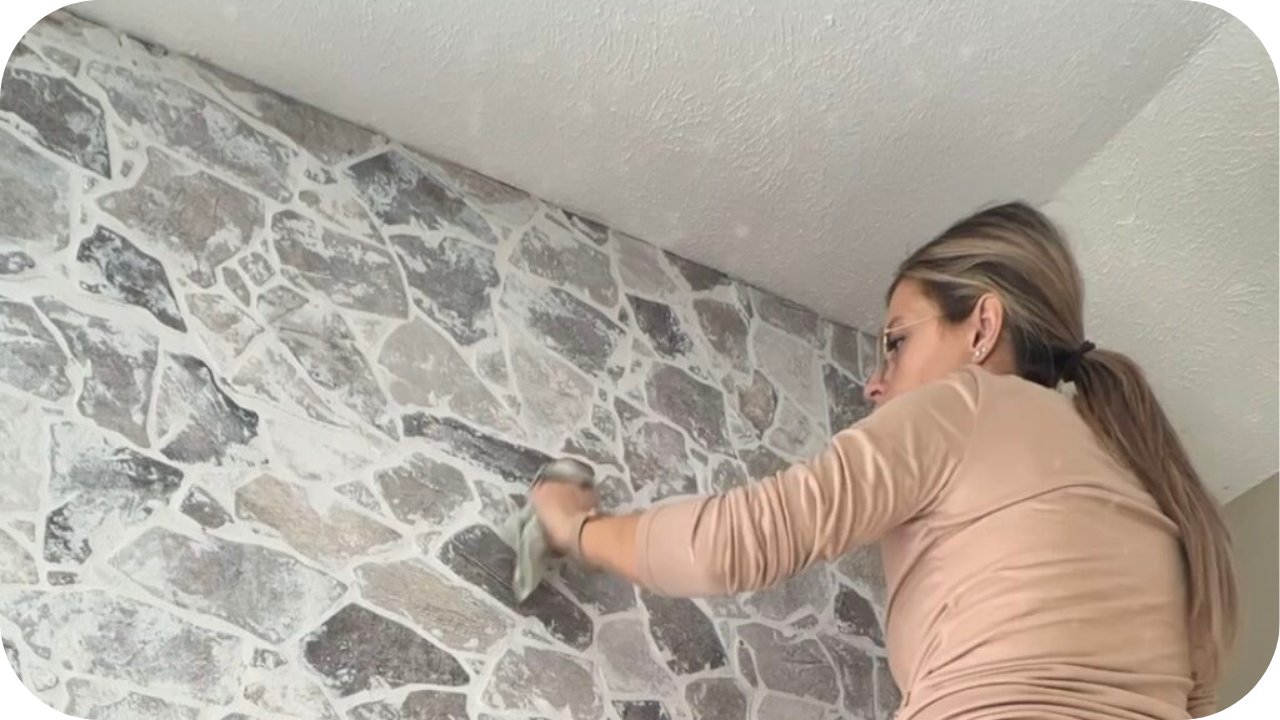
7. Grout the Joints if Required
Some stone types need joint filling to complete the look. Once your panels are fixed and dry, apply grout to the gaps to improve strength, appearance, and weather resistance where necessary.
8. Seal the Stone to Protect It
Apply a penetrating stone sealer, especially if using porous stone or installing outdoors. Sealing prevents stains, moisture damage, and fading while enhancing the colour and lifespan of your new feature wall.
9. Clean Up Thoroughly After Installation
Wipe off any adhesive spills immediately to avoid permanent staining. Once the wall is finished, give it a full clean with a soft cloth and water. Avoid harsh cleaners that could damage the surface.
Pros and Cons of DIYing a Stone Feature Wall
Turning a blank wall into a showpiece sounds tempting. But DIY stonework isn’t always easy. Weigh the pros and cons before diving into your first project.
Pros
- Cost Savings: You save on labour costs, making the project more affordable overall. It’s ideal if you’re handy and want to avoid paying for trades.
- Creative Control: You get to choose the layout, stone type, and overall look. This gives you the freedom to create something that reflects your exact taste.
- Personal Satisfaction: There’s a real sense of pride in completing a hands-on home project. Seeing the finished wall can be incredibly rewarding and satisfying.
- Flexible Timing: You can work at your own pace without waiting on tradespeople. It’s great if you prefer to tackle projects in your own time.
Cons
- Skill Required: Stone installation needs careful planning, levelling, and cutting. Mistakes can lead to poor results and expensive fixes if not done correctly the first time.
- Time-Consuming: DIY takes longer, especially if you’re new to this kind of work. Each stage requires patience, attention to detail, and lots of elbow grease.
- Tools and Safety: You’ll need the right tools and safety gear, which adds to the cost. Handling stone involves dust, noise, sharp edges, and heavy lifting.
When to Hire a Professional Instead
While DIY might suit smaller or straightforward jobs, there are times when hiring a professional is the smarter choice. If your stone feature wall involves high areas, complex corners, or curved surfaces, it’s best left to someone with experience.
Professionals know how to prepare the surface properly, apply adhesive evenly, and cut stone accurately, which affects the wall’s finish and safety.
You should also consider a pro if you’re working with heavy stone or building near a fireplace or wet area, where mistakes can cause long-term issues. If you don’t have the right tools, enough time, or feel unsure about your skills, calling in an expert can save you stress and future repair costs.
A poorly installed wall can lead to loose stones, uneven surfaces, or water damage. In the end, paying for proper installation may cost more upfront, but it ensures your feature wall looks stunning and lasts for years.
Tips If You Decide to DIY
Building a stone wall yourself? Plan carefully. It’s tougher than it looks. These smart tips will help you avoid mistakes and get lasting, pro-level results.
- Start with a Small Project: Choose a smaller wall, like a fireplace or entry nook, before moving on to a full feature wall. It’s less risky and easier to manage.
- Pick Easy-to-Install Stone Panels: Use interlocking stone cladding or panels designed for DIY. These are lighter and faster to work with than loose stone.
- Use the Right Tools and Safety Gear: Have a spirit level, trowel, bucket, angle grinder, gloves, and goggles ready before starting. Don’t try to improvise.
- Plan the Layout Before You Begin: Dry-lay the stones on the ground to test your pattern and fit. This helps avoid gaps and last-minute cuts.
- Apply Adhesive in Small Areas: Don’t cover the entire wall at once. Work on small sections to prevent the adhesive from drying out too quickly.
- Check Level Frequently: Use a spirit level every few rows to keep your stones straight. One small tilt can throw off the whole wall.
- Measure Carefully When Cutting: Always double-check measurements before trimming stone pieces. Use proper cutting tools to avoid chips and cracks.
- Wipe Away Excess Adhesive Immediately: Clean up as you go. Dried mortar or glue can stain natural stone and ruin the final look.
- Seal the Stone if Needed: Some stone types, like sandstone or limestone, need sealing after installation, especially outdoors or in wet areas.
- Take Your Time: Don’t rush. Working slowly and carefully leads to better results and fewer mistakes.
Conclusion
A stone feature wall can completely transform your space, but going the DIY route isn’t for everyone. If you’ve got the tools, time, and patience, it’s doable. However, for complex jobs or flawless results, hiring the pros might save you time, stress, and long-term costs.
Not sure where to start? Chat with the experts at Splendour in Stone for premium materials, expert advice, and support every step of the way.
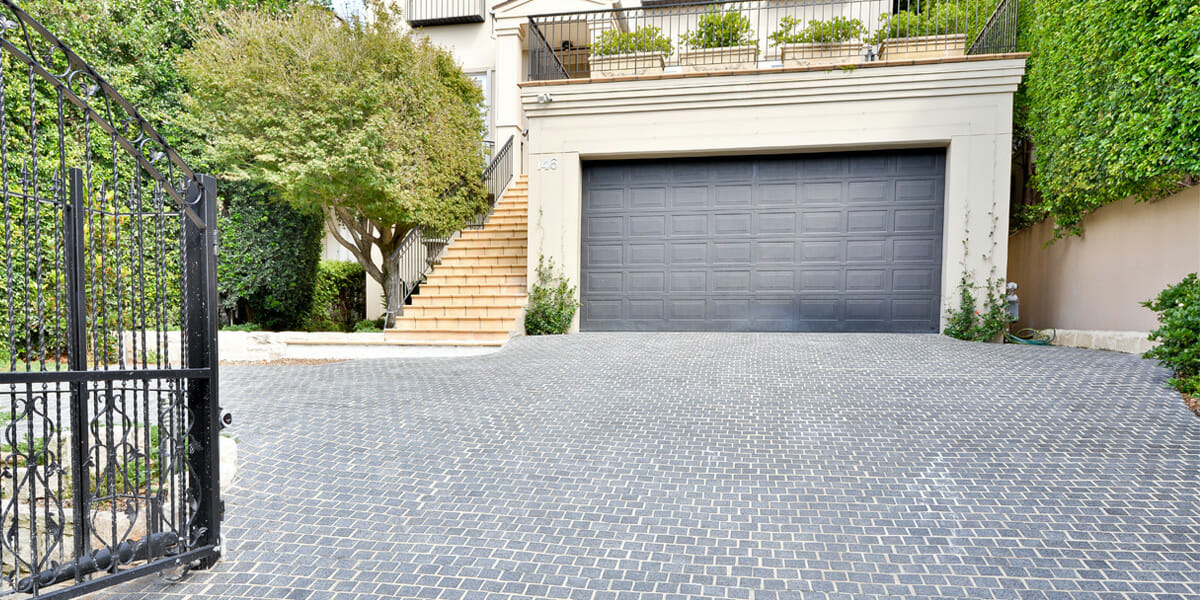
Grey Granite Cobblestones for Driveways: Strength and Style
Grey granite cobblestones combine strength, safety, and timeless appeal, making them a popular choice for Melbourne driveways and outdoor spaces. Their natural flamed texture offers
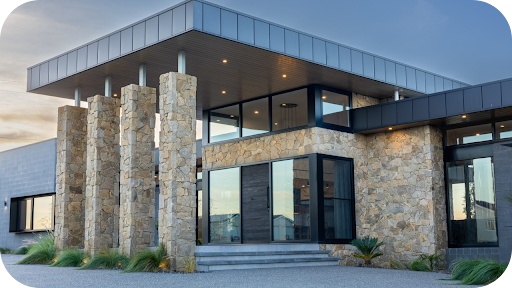
Granite Wall Cladding Melbourne: Modern and Classic Appeal
Granite wall cladding brings both modern sophistication and classic charm to Melbourne architecture. Known for its durability and natural beauty, granite transforms façades, feature walls,
