Imagine hosting a garden party, only to notice unsightly stains tarnishing your beautiful pavers. Oil spills, rust marks, or algae growth—sound familiar? Stubborn stains not only ruin the aesthetic but can be tough to remove if left untreated.
The good news? With the right cleaning solutions, restoring your pavers to their pristine glory is simpler than you think. But what methods truly work?
Let’s uncover the most effective techniques to tackle even the most persistent stains and keep your outdoor space looking flawless. Keep reading—your pavers will thank you!
1. Oil and Grease Stains
Oil and grease stains on pavers are common, particularly in driveways, and can be an eyesore if left untreated. To tackle these stains, start by blotting the affected area with a paper towel or cloth to remove as much excess grease as possible.
Avoid rubbing, as this could spread the stain. Prepare a cleaning mixture by combining baking soda and a few drops of dishwashing liquid to create a paste. Apply it to the stain, then scrub gently with a soft-bristle brush in circular motions.
For more stubborn stains, use a degreaser designed explicitly for pavers, following the product’s instructions carefully.
After cleaning, rinse the area thoroughly with water to remove any leftover residue and restore your pavers’ original look.
2. Rust Stains
Rust stains often occur when metal furniture, tools, or fixtures come into contact with pavers, leaving behind unsightly marks.
To address mild stains, mix white vinegar with water in a 1:1 ratio and apply the solution to the affected area. Let it sit for a few minutes to break down the rust before scrubbing gently with a soft brush.
For tougher, embedded stains, opt for a specialised rust remover formulated for pavers. Always follow the product’s instructions carefully to ensure effective cleaning without harm to the surface.
Avoid using harsh chemicals like muriatic acid, as they can erode or discolour the pavers, potentially causing permanent damage. Rinse thoroughly after treatment to ensure no residue remains.
3. Mould, Moss, and Algae Stains
Damp and shaded areas often encourage the growth of mould, moss, and algae on pavers, creating slippery surfaces and dull appearances.
To address this, prepare a cleaning solution by mixing bleach and water in a 1:10 ratio. Apply the solution evenly using a garden sprayer, ensuring thorough coverage of the affected areas. Allow it to sit for 10–15 minutes to kill spores and loosen stains effectively.
For smaller areas, scrub the pavers with a stiff-bristle brush, focusing on heavily affected spots. In larger spaces, consider using a pressure washer to remove stubborn growth and achieve a uniform clean.
After cleaning, rinse thoroughly to eliminate bleach residues, which can harm surrounding plants or discolour the paver surface over time.
4. Food and Beverage Stains
Barbecues and outdoor gatherings often result in food or wine spills that can leave persistent stains on your pavers.
To prevent stains from setting, clean fresh spills promptly using warm soapy water and a soft cloth or sponge. For stains that have dried, create a paste using baking soda and water.
Apply this paste to the affected area, allowing it to sit for about 15 minutes to loosen the residue, and then scrub gently with a soft-bristle brush. Acidic stains, such as those from wine or fruit juices, can be treated with white vinegar.
Dab the vinegar onto the stain and let it work its magic without harming the paver’s finish. Always rinse thoroughly to ensure your pavers stay spotless and vibrant.
5. Paint or Sealant Stains
Accidental drips of paint or sealant on pavers can be tricky to clean, but prompt and careful handling is required to prevent the stain from spreading. If the paint is water-based, gently blot the area with a sponge and warm soapy water to lift the stain.
For oil-based paints, use a solvent like turpentine to dissolve the residue effectively. Apply the solvent to a clean cloth and dab the stained area, working carefully to avoid smearing.
Always test any cleaning solution or solvent on a small, inconspicuous section of the paver to ensure it won’t damage or discolour the surface.
After cleaning, rinse the area thoroughly with water to remove any remaining residue, leaving your pavers clean and stain-free.
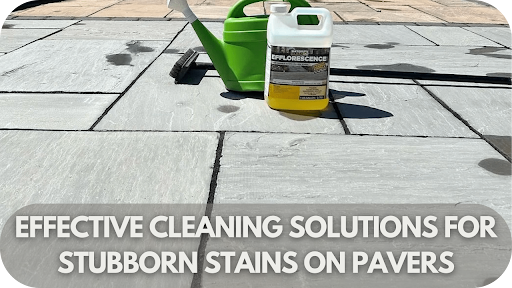
6. Efflorescence Stains
Efflorescence, the white residue caused by salt deposits, often appears on paver surfaces in damp or newly installed areas.
To address this issue, begin by brushing the area with a stiff broom to remove any loose deposits. For more persistent stains, use a commercial efflorescence remover designed specifically for pavers.
Before applying, ensure the pavers are completely dry, as moisture can intensify the problem and reduce the cleaner’s effectiveness. Follow the product instructions carefully, applying evenly and scrubbing gently if needed.
After treatment, rinse the area thoroughly to eliminate any remaining residue, restoring your pavers to their original, clean appearance. Regular maintenance can help prevent efflorescence from recurring.
Safety Precautions for Cleaning Pavers
Cleaning pavers requires caution and the right approach. Follow these essential safety tips to protect yourself and maintain the integrity of your pavers throughout the process.
- Wear protective gear: Always wear gloves and safety goggles to protect your hands and eyes from harmful chemicals.
- Avoid mixing chemicals: Never combine cleaning agents, as this can produce dangerous toxic reactions.
- Choose eco-friendly products: Opt for non-toxic, paver-safe cleaners to ensure the safety of surrounding plants, pets, and the environment.
- Conduct a patch test: Test cleaning solutions on a small, inconspicuous area of the paver to check for compatibility and prevent surface damage.
- Ensure proper ventilation: Work in well-ventilated areas, especially when using strong cleaning agents or solvents.
- Rinse thoroughly: After cleaning, rinse the pavers thoroughly to remove any leftover chemicals and prevent residue buildup.
Preventive Maintenance for Pavers
Keeping your pavers in top condition starts with prevention. These simple maintenance tips will help you minimise stains, reduce damage, and keep your pavers looking flawless for years to come.
- Apply a protective sealant: Use a high-quality sealant. Paver sealing shields your pavers from stains and weather damage.
- Sweep regularly: Keep dirt, debris, and leaves off the surface to prevent them from embedding into the pavers.
- Clean spills promptly: Address spills as soon as they happen to prevent them from becoming long-term stains.
- Maintain surrounding greenery: Trim plants and trees near the pavers to minimise shade and moisture, reducing the risk of moss and algae growth.
- Inspect periodically: Check your pavers for signs of wear or damage and address any issues promptly to maintain their appearance and durability.
Conclusion
Stubborn stains don’t have to tarnish the beauty of your pavers. With the right cleaning methods and preventive care, your outdoor space can remain spotless and inviting for years to come.
Remember, timely action and proper maintenance make all the difference.
Need professional advice or high-quality solutions for your pavers? Contact Splendour in Stone today and let us help you restore your pavers to their former glory. Your perfect outdoor space is just a call away!
More To Explore

What to Look for When Choosing Grange Limestone in Australia
Grange Limestone is becoming a popular choice in Australian architecture for its refined texture, neutral grey tones, and structural integrity. Ideal for walling applications, both

Which Natural Stone is Best for a Resort-Style Backyard?
A resort-style backyard is all about creating a relaxing, elegant escape at home. Natural stone plays a key role in setting the tone, offering texture,


