Register your Information for Free Stone Samples Sent Express to You!

Installation Steps for Porcelain Pavers Comprehensive Guide

Installing porcelain pavers can be intimidating, with the potential for costly errors if not done correctly.

Installation mistakes can lead to uneven surfaces, loose tiles, and water damage, turning a beautiful outdoor project into a frustrating, expensive ordeal.

This comprehensive guide breaks down the installation steps for porcelain pavers, ensuring you can confidently undertake this project. From choosing the right materials to the final touches, we cover everything you need for a successful and stylish outcome.

Tools and Materials Needed

Tools and materials are essential for a successful and durable porcelain paver installation. Here’s a detailed list to ensure you are fully prepared for the task:

Essential Tools

  1. Wet Cut Tile Saw with Diamond Blade: This is crucial for making precise cuts through the robust porcelain without causing breakage.
  2. Paver Clamps: These are useful for handling and positioning the pavers accurately.
  3. Rubber Mallet: This is for gently tapping the pavers into place without damaging them.
  4. Level: To ensure the pavers are laid evenly.
  5. Measuring Tape and Stakes: These mark the area and ensure accurate measurements.
  6. Shovel: For excavation and spreading base materials.
  7. Plate Compactor: Compact the base layers, ensuring a stable foundation.

Necessary Materials

  1. Geotextile Fabric: Placed over the excavated area to prevent weed growth and soil erosion.
  2. Gravel Base: A 4-5 inch layer of compacted gravel provides a stable and well-draining foundation.
  3. Sand Layer: A 1-2 inch layer of compacted sand to create a smooth and level surface for the pavers.
  4. Polymeric Sand: Used to fill joints between pavers, locking them in place and preventing weed growth.
  5. 4mm Spacers: To maintain uniform gaps between the pavers, allowing for expansion and joint filling.
  6. Edge Restraints: Metal or plastic strips anchored into the ground to keep the pavers secure and prevent shifting.

Step-by-Step Installation Guide

Installing porcelain pavers involves meticulous preparation and precise execution to ensure a durable and aesthetically pleasing result. Here’s a detailed step-by-step guide to help you achieve professional-grade installation:

Step 1: Preparation

Begin by assessing your site and planning the layout. Mark the perimeter of your project using stakes and string lines, ensuring that the area is larger than the installation footprint to accommodate working space.

Excavate the area to the required depth, typically 6 to 8 inches, to allow for the gravel base, sand layer, and paver thickness. Ensure the site is clean and free of debris.

Step 2: Base Installation

Lay a geotextile fabric over the excavated area to prevent weed growth and soil erosion. Spread a 4-5 inch layer of compacted gravel, ensuring even distribution and compacting it thoroughly to create a stable base.

Next, add a 1-2 inch layer of sand, compact it, and screed it to a smooth finish. This layer should be level but sloped slightly away from structures to facilitate drainage.

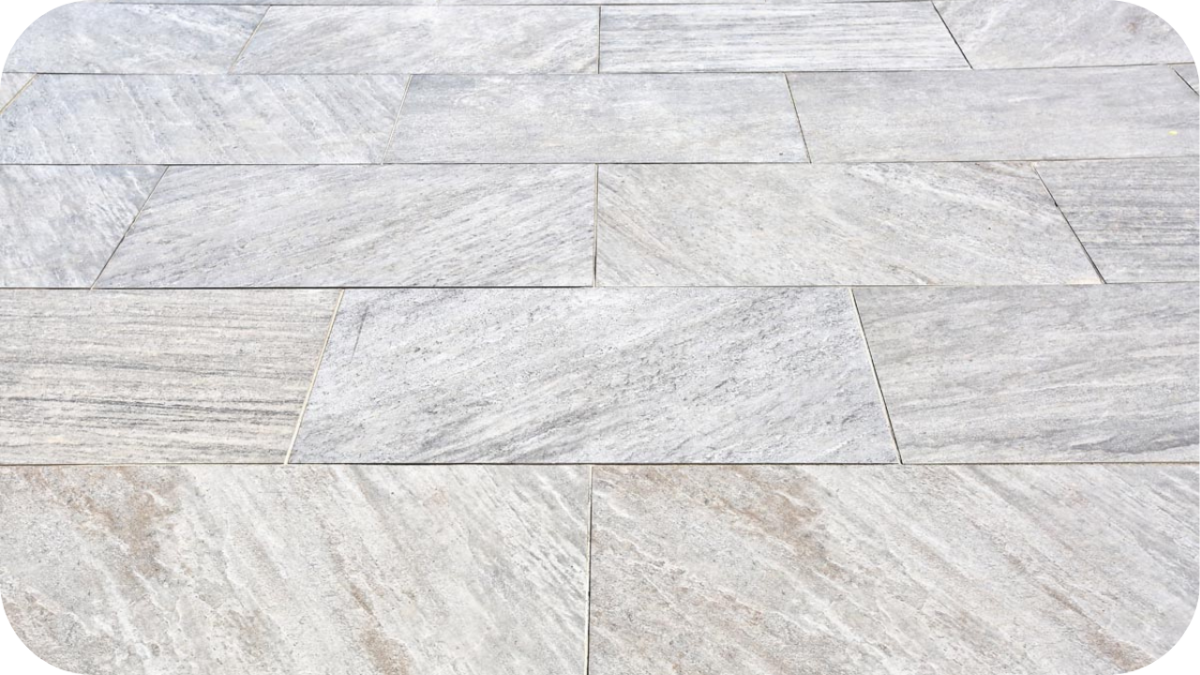
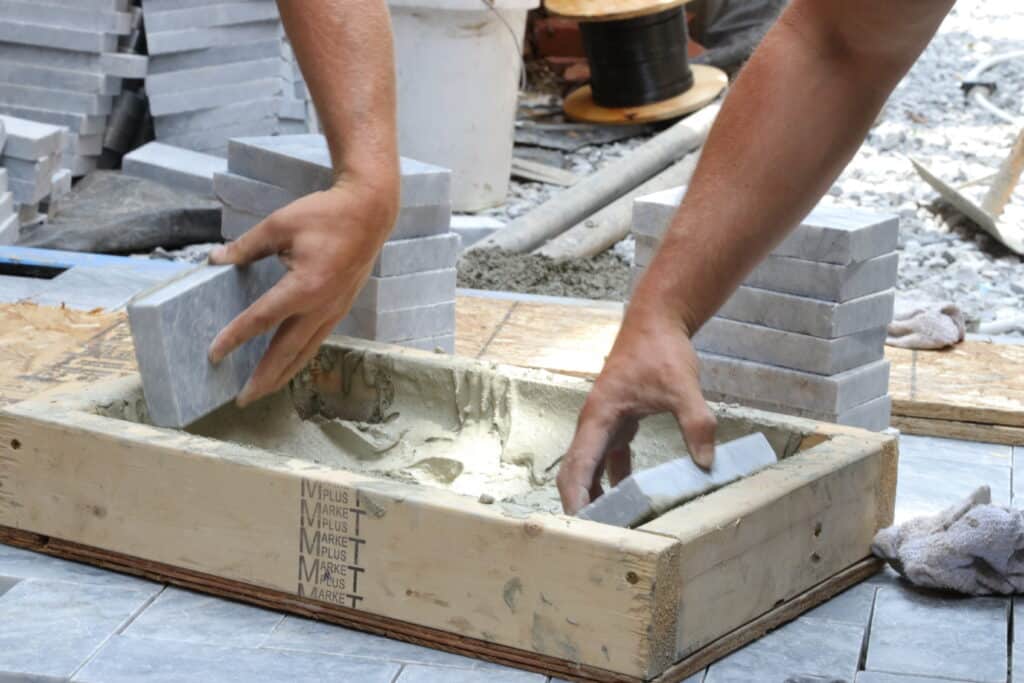
Step 3: Paver Placement

Position 4mm spacers to maintain uniform gaps between the pavers, which are crucial for accommodating expansion and joint filling.

Carefully place the pavers on the prepared base, ensuring they are level and aligned. Use a rubber mallet to tap the pavers into place gently. For mortar installations, apply a layer of mortar to the base before placing the pavers, ensuring each paver is securely bonded.

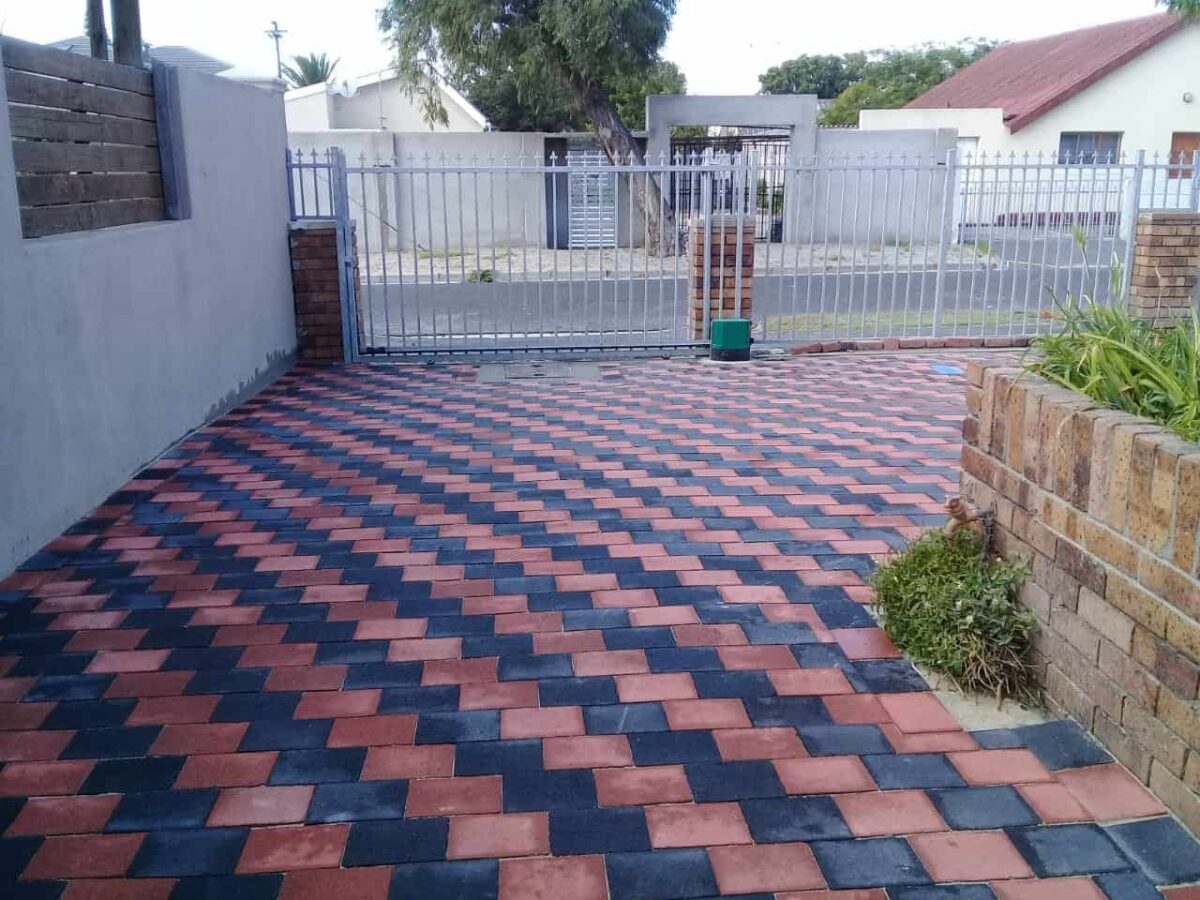
Step 4: Joint Filling

Sweep polymeric sand into the joints between the pavers, ensuring the joints are filled. Polymeric sand helps to lock the pavers in place and prevent movement.

After filling the joints, mist the surface with water to activate the polymer in the sand, which will harden and secure the joints. Ensure all excess sand is removed from the surface to avoid staining.

Step 5: Edge Restraints

Edge restraints, made from metal or plastic, should be installed along the installation’s perimeter to keep the pavers secure and prevent shifting over time. This step is essential for maintaining the integrity of the installation and preventing the pavers from moving out of place.

Step 6: Final Adjustments and Cleaning

After the pavers are installed and the joints filled, make any necessary adjustments to ensure all pavers are level and properly aligned. Use a level to check for high spots or hollows and adjust before the mortar sets.

Clean the surface of any remaining sand or debris, and allow the installation to cure according to the manufacturer’s recommendations before allowing foot or vehicle traffic on the surface.

Conclusion

Installing porcelain pavers transforms any outdoor space into a durable and elegant area. This comprehensive guide ensures a professional finish that stands the test of time. Ready to enhance your garden or patio? Contact Splendour In Stone Melbourne for expert advice and high-quality materials today!

What is Quartzite?

Quartzite is a dense, natural metamorphic rock formed when pure sandstone is subjected to intense heat and pressure deep within the Earth. 

This transformation fuses the stone into a hard, crystalline material with remarkable strength and natural shimmer. With colour variations ranging from white and grey to rose and gold, quartzite offers both durability and visual elegance. 

In Australian design, it’s commonly used for paving, wall cladding, and other architectural features that demand performance, longevity, and a premium finish.

What Is Quartzite?

Quartzite is a natural metamorphic rock formed from sandstone that undergoes intense heat and pressure over time. This process results in an extremely hard, crystalline stone that’s resistant to weathering and wear. Known for its marble-like beauty and strength, quartzite is ideal for outdoor paving, walling, and architectural applications that require both durability and elegance.

Key Characteristics of Quartzite

Key Characteristics of Quartzite

Quartzite is defined by its natural strength, crystal-rich texture, and unique formation. Below are the core physical traits that make this metamorphic stone distinct in both structure and visual appearance.

1. High Mineral Hardness

Formed under extreme pressure, quartzite has a tightly bonded structure. It ranks at 7 on the Mohs scale, meaning it resists surface wear and retains sharp, clean edges over long periods.

2. Crystalline Surface Texture

Quartzite’s surface features interlocking crystals that catch and reflect light. This crystalline pattern is a direct result of intense metamorphism and gives the stone its sparkling, glassy appearance when exposed.

3. Natural Colour Variation

Quartzite occurs in a wide spectrum of colours such as white, beige, grey, rose, and gold. Its hues often feature subtle veining, adding movement and natural depth without artificial treatment.

4. Low Water Absorption

Quartzite is naturally dense with low porosity. This makes it less susceptible to water intake in its raw form, helping preserve its appearance when used in areas with moisture or humidity.

5. UV Stability

Quartzite holds its colour and texture under prolonged sun exposure. Its mineral makeup prevents fading and surface deterioration, making it reliable in high-exposure environments with strong ultraviolet light.

Quartzite Finishes: Surface Styles with a Luxurious Feel

Quartzite Finishes: Surface Styles with a Luxurious Feel

Quartzite is available in a range of surface treatments, each highlighting its crystalline texture differently. These finishes allow you to tailor the look and feel of your project with precision and style.

1. Natural Split

This finish retains the raw texture and natural clefts of quartzite, giving a rustic and earthy appearance. It’s especially popular in outdoor cladding projects and pairs well with varieties like Sierra Quartzite.

2. Honed

With a smooth, matte surface, honed quartzite softens the stone’s natural sparkle for a subtle, refined appearance. Euro Quartzite is ideal for interiors, especially in minimalist or contemporary settings that favour understated elegance.

3. Brushed

Brushed quartzite features a lightly textured surface with a gentle sheen. It offers a natural feel that complements coastal designs, particularly when using soft-toned varieties like Arctic Quartzite.

4. Polished

Polished quartzite reveals the stone’s crystalline clarity and intricate veining. This high-shine finish works best on walls or low-traffic areas, adding glamour and depth without compromising the natural character of the stone.

5. Flamed

This surface is created by exposing the quartzite to high heat, producing a coarse, slip-resistant texture. Andorra Quartzite is especially striking in a flamed finish around pool coping, patios, or outdoor walkways.

Where Quartzite Works Best in and Around Your Home

Where Quartzite Works Best in and Around Your Home

Quartzite isn’t just visually appealing; it performs across a wide range of settings. From outdoor paving to stylish interiors, here’s how this premium stone fits into Australian homes and landscapes.

1. Outdoor Paving

Quartzite’s strength and resistance to weathering make it ideal for patios, garden paths, and courtyards. It easily handles heavy foot traffic, offering long-lasting visual appeal in residential and commercial landscaping projects.

2. Wall Cladding

Quartzite cladding creates striking façades and feature walls. Its crystalline texture beautifully catches natural light, adding depth and brilliance to both indoor and outdoor spaces while complementing a wide range of architectural styles.

3. Pool Surrounds and Stepping Stones

Quartzite’s heat resistance and dense structure make it ideal for pool coping, surrounds, and steppers. It stays cool underfoot while adding texture, durability, and natural beauty to water-adjacent outdoor spaces.

4. Interior Flooring

With its marble-like appearance and toughness, quartzite elevates interior spaces such as hallways, kitchens, and open-plan living areas. It blends strength with elegance for flooring that’s visually impactful and made to last.

5. Kitchen Splashbacks and Feature Surfaces

Used selectively indoors, quartzite works well for splashbacks and vertical surfaces. Its unique veining and sparkle offer a sophisticated alternative to more common materials, especially when subtle elegance is the goal.

Why Choose Quartzite for Your Design Project

Why Choose Quartzite for Your Design Project

Quartzite offers durability, sophistication, and premium performance across applications. That’s why it remains a go-to material for architects and homeowners who want strength and style in their surfaces.

1. Delivers Exceptional Hardness and Longevity

Quartzite’s dense mineral composition makes it incredibly tough. It resists chips, scratches, and pressure, making it a long-term solution for areas that see frequent use, heavy foot traffic, or shifting weather conditions.

2. Adds Visual Luxury with Natural Sparkle

With its crystalline sheen and soft veining, quartzite brings visual depth to spaces. It’s a high-end material that mimics marble while offering superior strength, making it ideal for elegant yet durable design.

3. Performs Well in Harsh Australian Conditions

Quartzite handles heat, UV exposure, and seasonal changes without losing its structural integrity or colour. It’s suited for outdoor applications where durability and appearance must withstand Australia’s challenging climate.

4. Supports Low-Maintenance Living

Once sealed, quartzite is easy to maintain. It resists staining and doesn’t require frequent upkeep, making it practical for busy households or commercial settings where time-efficient care is essential.

5. Elevates Both Modern and Classic Designs

Quartzite’s neutral tones and polished surfaces pair well with minimalist, coastal, or traditional themes. Its versatility allows it to blend with other materials while adding an unmistakably refined and grounded presence.

Maintenance and Care for Quartzite

Maintenance and Care for Quartzite

Quartzite performs best with the right care. These simple steps help protect its beauty and extend its lifespan:

  • Seal on installation: Apply a penetrating natural stone sealer to reduce moisture absorption and guard against stains. This is essential for outdoor paving and busy interior zones.
  • Clean with pH-neutral products: Avoid acidic or abrasive cleaners. Instead, use a pH-balanced stone cleaner or mild soap and water to preserve the finish and avoid etching.
  • Re-seal as needed: Reapply sealer every 3–5 years based on use and exposure. Check for water absorption to determine if a new coat is needed.
  • Sweep and rinse regularly: Remove debris and grime with a soft broom and water. Regular upkeep maintains the stone’s clarity and prevents long-term buildup.
  • Wipe spills promptly: Address oil-based or coloured spills immediately. Even sealed quartzite can absorb stains if liquids are left to sit too long.
  • Inspect and maintain edges: Occasionally check for chips or scratches. If found, consult a stone care specialist to repair without compromising appearance.
  • Protect indoor floors: Use rugs or mats in high-traffic areas to reduce wear, catch dirt, and keep surfaces looking fresh for longer.

Conclusion

Quartzite combines stunning natural beauty with long-lasting strength, making it ideal for both indoor and outdoor applications. Its crystalline texture, durability, and low maintenance needs make it a premium choice. 

For expert advice or to choose the perfect quartzite finish for your space, speak with the specialists at Splendour in Stone and bring lasting elegance to your next project.

7 Favorite Driveway Paving Patterns

Choosing the right paving pattern for your driveway can be overwhelming, with many options.

The wrong choice affects the visual appeal and can impact durability and maintenance.

Discover our 7 favourite driveway paving patterns to simplify your decision and enhance your home’s curb appeal. Each pattern is designed to offer unique benefits, ensuring you find the perfect fit for your needs.

1. Herringbone Pattern

The herringbone pattern is a popular choice for driveway paving and is well-known for its distinctive V-shaped arrangement. This classic design not only creates a visually striking effect but also enhances the durability of your driveway.

The interlocking pattern of herringbone provides superior strength and stability, making it ideal for withstanding heavy traffic and harsh weather conditions. Its unique layout helps distribute weight evenly, reducing the risk of shifting or cracking.

The herringbone pattern is typically best suited to bricks, concrete pavers, or stone materials. These materials complement the pattern’s geometric precision and improve its long-lasting performance.

For best results, ensure proper alignment and spacing of pavers during installation. This pattern requires careful planning to maintain its symmetry and effectiveness. Additionally, consider using contrasting colours or textures to accentuate the pattern’s visual appeal.

2. Basketweave Pattern

The basketweave pattern stands out for its classic charm and functional design. This pattern features alternating rows of pavers laid perpendicularly, creating a basket-like woven effect.

The basketweave pattern is celebrated for its ability to add visual interest while providing a robust and stable surface. Its interlocking design distributes weight evenly, reducing the likelihood of shifting or cracking, which is particularly useful for driveways subject to heavy loads.

This pattern works well with various materials, including brick, concrete, and stone pavers. The choice of material can affect the overall aesthetic, from traditional to modern looks, ensuring that the basketweave pattern can complement different architectural styles.

For the installation, precision is key to achieving a perfect basketweave design. Ensure that each paver is aligned accurately and that gaps between them are consistent. Consider using contrasting colours or textures to highlight the woven effect for added visual impact.

3. Running Bond Pattern

The running bond pattern is a timeless favourite for driveway paving. It offers simplicity and versatility that suit a wide range of architectural styles. This pattern involves pavers laid in rows, with each row offset by half a paver width, creating a staggered brickwork appearance.

The running bond pattern is known for its straightforward installation and cost-effectiveness. Its design provides excellent stability and load-bearing capacity, making it a reliable choice for driveways. The staggered joints help to distribute weight evenly, reducing the risk of cracks and shifting over time.

This pattern is highly adaptable to various materials, including brick, concrete, and natural stone. The choice of material can enhance the pattern’s visual appeal, ranging from traditional red brick to sleek, modern concrete.

To install this pattern, ensure consistent spacing and alignment to maintain its uniform appearance. Its simplicity allows easy installation, making it a popular choice for DIY projects. Consider incorporating different colours or textures to create a customised look for added interest.

4. Stretcher Bond Pattern

The stretcher bond pattern is a quintessential choice for driveway paving, valued for its simplicity and efficient use of materials. This classic design involves laying pavers in a continuous row, with each paver aligned end-to-end to create a seamless, linear appearance.

The stretcher bond pattern is renowned for its ease of installation and cost-effectiveness, making it an ideal option for budget-conscious homeowners. Its straightforward layout offers excellent structural integrity, ensuring a stable surface capable of handling heavy vehicular traffic.

This pattern is compatible with various materials, including brick, concrete, and natural stone. Each material brings its unique aesthetic, allowing homeowners to tailor the look to match their property’s style, from rustic to contemporary.

To achieve the perfect stretcher bond pattern, ensure precise alignment and consistent spacing between pavers. This pattern is particularly suited for rectangular pavers, enhancing its linear appeal. Consider using contrasting colours or materials to add visual interest and dimension to the driveway.

5. Circular Pattern

The circular pattern is an eye-catching choice for driveway paving, transforming a functional space into a stunning focal point. This design involves arranging pavers in concentric circles, radiating out from a central point, which adds a sense of movement and elegance to any driveway.

The circular pattern is celebrated for its visual impact and ability to draw attention to specific areas of the driveway. It can break up large expanses of paving and introduce a unique, artistic element that enhances the property’s overall aesthetic. The pattern’s interlocking nature also ensures stability and durability.

This pattern works well with various materials, such as stone, brick, or concrete pavers. The choice of material can influence the pattern’s appearance, with different textures and colours highlighting the circular design.

Precision is crucial when installing a circular pattern. Start from the centre and work outward, ensuring each circle is evenly spaced and aligned. Using a compass or pre-cut circular templates can help maintain accuracy. Consider using a contrasting border or a combination of colours for a striking effect.

6. Random Pattern

The random pattern is a favourite for those looking to incorporate natural beauty and uniqueness into their driveway design. This pattern involves laying pavers of various sizes and shapes in a seemingly haphazard arrangement, creating a rustic and organic appearance.

The random pattern offers a distinctive, one-of-a-kind look that complements various architectural styles, from classic to contemporary. Its irregular arrangement helps to break up large paved areas and add visual interest. The pattern’s flexibility also makes it ideal for accommodating curves and irregularly shaped driveways.

This pattern is best suited to natural stone pavers such as sandstone, limestone, or slate, as their unique textures and colours enhance the design’s organic feel. However, varying sizes and shades of concrete pavers can also achieve a similar effect.

When installing a random pattern, select a mix of paver sizes and shapes that complement each other. Place the largest pieces first, then fill the gaps with smaller pavers. To maintain visual balance, avoid clustering similar sizes or shapes together.

7. Chevron Pattern

The chevron pattern is a striking choice for driveway paving, and it is known for its modern elegance and dynamic visual appeal. This pattern features pavers arranged in a continuous V-shape, creating a zigzag effect that draws the eye and adds a sense of movement to the space.

The chevron pattern is highly regarded for its bold geometric design that can elevate the look of any driveway. Its interlocking nature provides excellent structural integrity, ensuring a durable, long-lasting surface capable of handling heavy traffic. The pattern’s directional lines can also make a driveway appear longer or wider, enhancing the overall sense of space.

The chevron pattern is versatile and can be executed with various materials, including brick, concrete, or stone pavers. The choice of material can impact the pattern’s aesthetic, with sleek, smooth finishes offering a contemporary look and textured materials providing a more rustic feel.

Achieving the perfect chevron pattern requires precise pavers’ cutting and alignment. Use pavers with angled edges to ensure a seamless fit. Consistent spacing and alignment are crucial to maintaining the pattern’s integrity. Consider using contrasting colours or textures to accentuate the pattern’s design.

Conclusion

Choosing the right driveway paving pattern can transform your home’s exterior, enhancing beauty and functionality. Whether you prefer classic or contemporary designs, these patterns offer something for every style and need.

For expert advice and installation, contact Splendour In Stone Melbourne today and bring your vision to life with our exceptional paving solutions.

Stone Cladded Fireplace Request

At Splendour in Stone, we specialise in supplying and installing natural stone cladded fireplaces that bring warmth, beauty, and character to your home. Each piece is crafted with precision and presence, ensuring a timeless centrepiece built to last.

Planning a new fireplace or upgrading an existing one? Complete the form below and receive your personalised quote within 24 hours.
Share anything about your vision, home style, or needs
Important Installation Note
The fireplace unit must be installed prior to our stonework.
This ensures proper fitting and a seamless final result. If you need help coordinating this, we’re happy to assist. Just mention it in your message.
In SQM?

Please fill your details to download.


      Request Callback


        Enquiry Form


        Please fill your details to download.