Register your Information for Free Stone Samples Sent Express to You!

Popular Paver Patterns for Modern Australian Outdoor Spaces

Nearly 60% of Australian homeowners say their outdoor space feels unfinished because the paving pattern does not suit the look or layout of the area.

A mismatched pattern throws off the whole space. Paths feel awkward, patios look smaller than they are, and the design loses its modern edge. It can be frustrating when you are aiming for a clean, stylish outdoor setup.

The right paver pattern can instantly lift your space, improve flow and create a polished, modern feel. This guide walks you through the most popular patterns in Australia and how to choose the perfect one for your outdoor area.

Why Pattern Choice Matters in Modern Outdoor Design

Pattern choice plays a bigger role in outdoor design than most people realise, especially in modern Australian landscapes. The layout you choose influences how people move through the space, how large or small an area feels and how well the paving performs over time.

A well-planned pattern can guide foot traffic naturally, create visual balance and tie different outdoor zones together in a seamless way. Certain patterns also provide greater strength, as the arrangement of pavers affects load distribution and long-term stability. This is important for driveways, pool sides, and high-traffic paths that require dependable performance.

Patterns also shape the overall style, whether you want a sleek contemporary look or something textured and character-filled. 

Colours, textures and patterns work together, so choosing the right layout makes your stone look sharper and more cohesive. When selected with care, a paving pattern becomes a design feature that enhances both function and visual appeal.

Most Popular Paver Patterns for Australian Outdoor Spaces

Ashlar pattern natural stone paving in soft grey tones beside a lush green lawn, showcasing a modern layout with varied tile sizes in an Australian outdoor space.

The right paving pattern can completely change the look and feel of your outdoor space, adding structure, style and natural flow to every area. Here are some of the patterns:

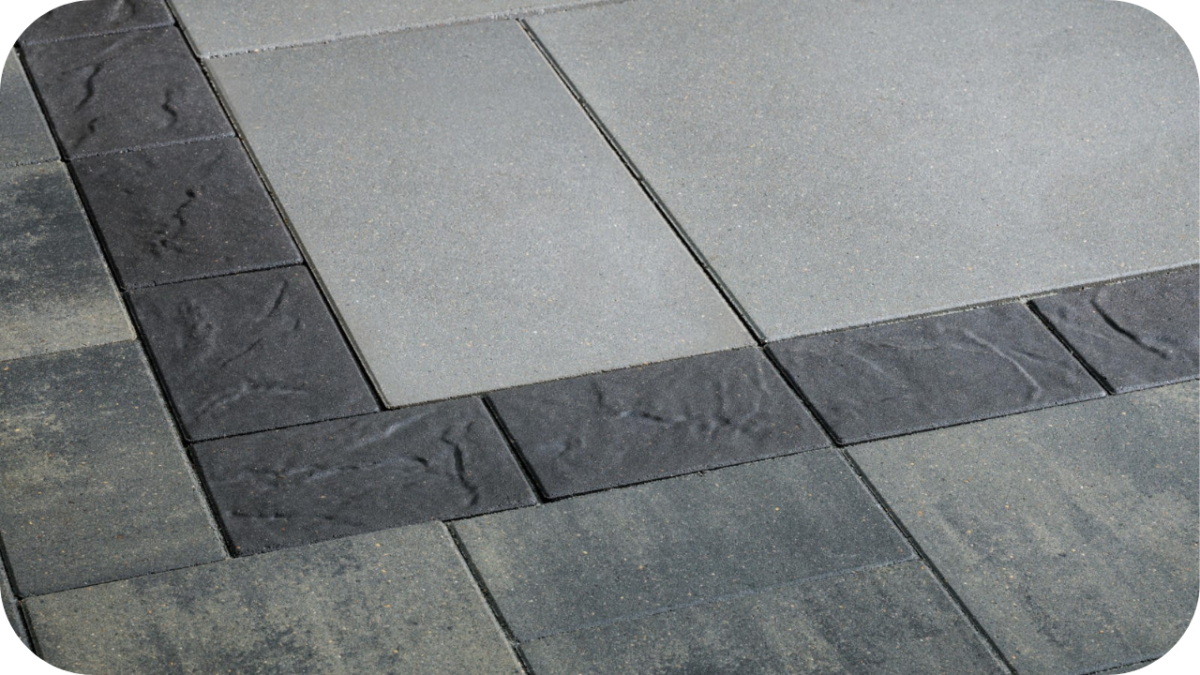
1. Stacked Bond Pattern

The stacked bond pattern is perfect for modern Australian homes that favour clean lines and minimalist design. Pavers are laid in straight rows, creating a uniform look that suits patios, courtyards, and pool surrounds. 

This layout works best with larger format stones, which enhance the sense of space and make outdoor areas feel more open. It delivers a neat, structured finish that complements contemporary architecture.

2. Running Bond Pattern

The running bond layout is one of the most versatile patterns for outdoor spaces. Each row is offset from the one above, which helps create a smooth sense of flow and makes narrow areas feel longer. 

It works well for pathways, garden edges and relaxed entertaining areas. The pattern adds subtle movement without overwhelming the design and suits a range of natural stone types.

3. Modular Pattern

Modular patterns combine regular paver sizes to form a modern, structured layout that suits contemporary outdoor spaces. The repeated design brings balance and a strong architectural feel while still allowing flexibility in scale and proportion. 

Modular layouts work well across patios, walkways and alfresco zones, especially when using stones with subtle colour variations. They create a clean, cohesive finish that complements many design styles.

4. Basket Weave Pattern

Basket weave layouts are perfect for adding charm and character to outdoor spaces. By alternating pairs of pavers in different directions, the pattern creates a woven effect that feels warm and traditional. 

It suits cottage-inspired gardens, heritage homes and relaxed outdoor dining zones. The design offers plenty of visual texture without becoming too busy, making it a popular choice for small patios and quiet seating corners.

5. French Pattern or Versailles Layout

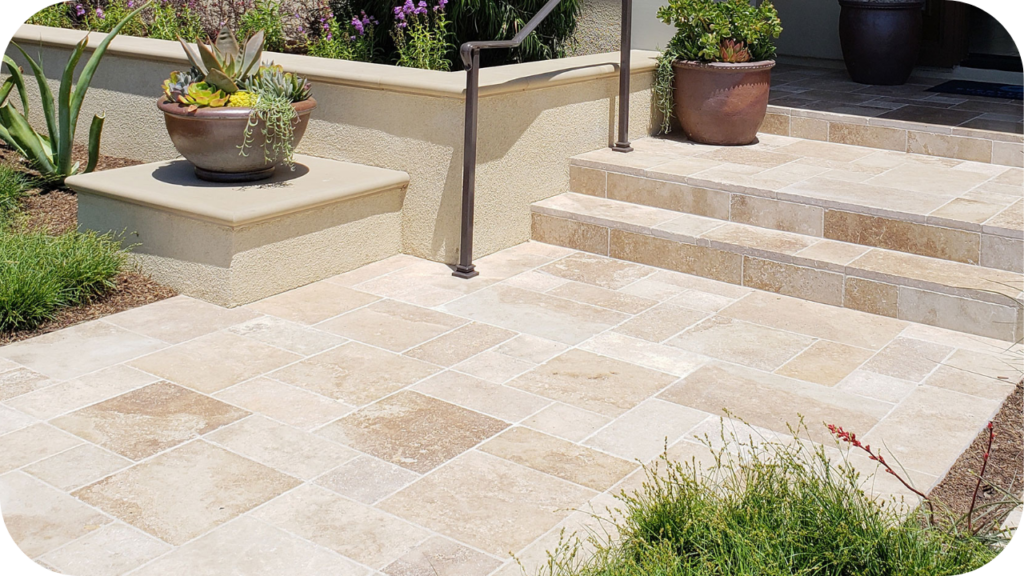
French pattern layouts use a combination of four paver sizes arranged in a repeating sequence, creating a premium and naturally flowing look. This style works particularly well with Travertine and Limestone, thanks to their soft, earthy tones. 

The pattern adds depth and movement to pool areas, courtyards and large entertaining spaces. Its blended layout helps break up wide surfaces and brings a luxury resort feel to Australian homes.

6. Herringbone Pattern

The herringbone pattern is known for its incredible strength, making it ideal for driveways, high-traffic walkways and busy family areas. Its interlocking layout distributes weight evenly, helping prevent shifting and movement over time. 

The angled design also adds visual interest, giving outdoor spaces a bold, sophisticated feel. Whether laid at forty-five or ninety degrees, herringbone offers a timeless combination of style and durability.
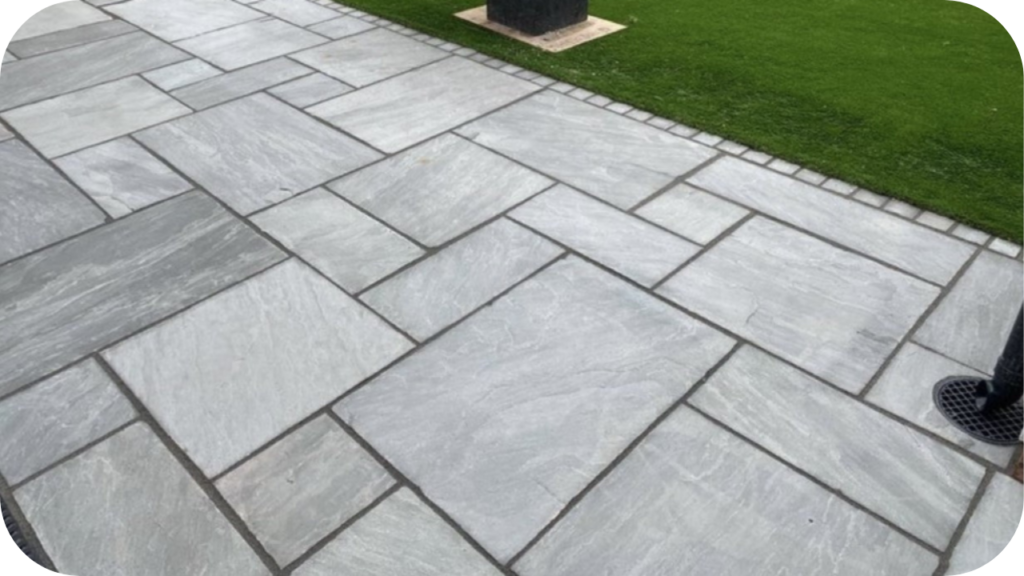
7. Ashlar Pattern

Ashlar combines pavers of varying sizes to create an elegant, random layout that enhances premium outdoor spaces. The modular arrangement creates a natural flow, reducing visible joints and adding depth to patios, pool surrounds, and pathways. 

This pattern showcases the colour movement found in natural stone, especially sandstone, limestone, and bluestone. It suits modern architectural homes that want a refined, timeless finish.
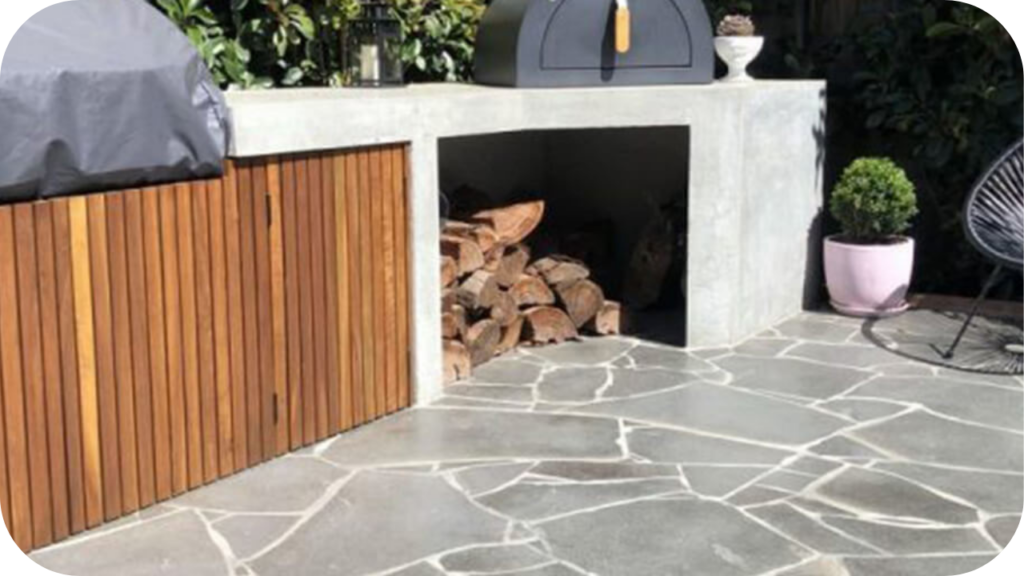
8. Crazy Paving

Crazy paving offers an organic, free-flowing design that celebrates the natural irregularity of stone. Each piece is placed like a puzzle, creating a textural surface with unique character. 

It is popular in Australian gardens, around pools, and in relaxed outdoor living areas due to its strong visual impact. Crazy paving works particularly well with sandstone, slate, limestone, and bluestone, bringing natural charm and individuality to any space.

Best Stones for Modern Paver Patterns

 Light grey stone pavers arranged in a clean square layout beneath a modern outdoor bench, highlighting a sleek contemporary paving finish for outdoor areas.

Here are the natural stone pavers that deliver the durability, style, and long-lasting performance needed to create modern paver patterns in Australian outdoor spaces.

1. Granite

Granite is one of the most durable stone options and performs exceptionally well in high-load or high-traffic areas. It suits herringbone, stretcher bond, and cobblestone-inspired layouts due to its density and scratch resistance. 

Granite varieties such as Charcoal Granite or Grey Granite maintain their appearance under harsh Australian weather and offer strong slip resistance. Its refined grain and subtle sparkle give outdoor areas a premium architectural finish.

2. Bluestone

Bluestone is one of the most popular choices for modern Australian paver patterns because of its dense strength, consistent colour, and natural slip resistance. Its smooth texture works beautifully in stretcher bond, herringbone, and ashlar layouts. 

Bluestone examples like Honed Bluestone or Flamed Bluestone handle heavy foot traffic, poolside moisture, and outdoor weathering with ease. Its contemporary grey tones also pair well with minimalist landscaping and modern architectural designs.

3. Limestone

Limestone delivers a refined, elegant finish that suits clean, structured patterns such as stack bond or stretcher bond. Its subtle tones brighten outdoor areas and complement contemporary homes. 

Limestone Options, such as Loch Limestone or Brooklyn Limestone, provide strong durability and perform well around pools and patios when sealed correctly. 

The smooth, consistent surface highlights pattern direction, making it ideal for homeowners who want a sophisticated, modern look without visual clutter.

4. Travertine

Travertine is a favourite for modern Australian pool surrounds and entertaining spaces due to its natural cooling effect and soft, textured surface. It suits ashlar and modular patterns that highlight its tonal movement. 

Travertine provides excellent slip resistance when honed and filled, staying comfortable even in hot weather. Varieties such as Classic Travertine and Silver Travertine brighten outdoor areas and create a spacious, inviting atmosphere.

5. Quartzite

Quartzite offers exceptional hardness, vibrant natural texture, and strong slip resistance, making it ideal for contemporary paver patterns like ashlar and random modular layouts. Its crystalline structure creates a distinctive, high-end finish.

Andorra Quartzite stands out for its cool grey tones, subtle shimmer, and long-term durability. It performs reliably in high traffic areas and holds colour beautifully, giving outdoor spaces a fresh, modern aesthetic.

How to Choose the Right Paver Pattern for Your Space

Random crazy paving in natural grey stone surrounding an outdoor kitchen with timber cabinetry and a pizza oven, creating a relaxed modern entertaining space.

Here are the key design factors that help you choose a paver pattern that suits your space, style, and long-term outdoor needs.

  • Size and shape of the area: Certain patterns can visually stretch or tighten a space. Long patterns suit narrow zones, while mixed layouts break up large surfaces and create balance across wider outdoor areas.
  • Match to your home’s architecture: The paving pattern should support your home’s style. Clean linear patterns suit modern builds, while textured or woven layouts complement traditional, coastal or character-filled properties.
  • Traffic and practical performance: High traffic areas need strong interlocking patterns that resist movement. Driveways and busy walkways benefit from herringbone, while softer patterns suit quiet patios and relaxed entertaining zones.
  • Stone colours and textures: Pattern and tone must work together. Light stones brighten structured layouts, while darker or varied textures add depth to woven or multi-size patterns, creating a cohesive outdoor design.
  • Budget Considerations: Simple patterns like stretcher bond or stack bond reduce installation costs, while detailed patterns such as herringbone or ashlar require more labour and materials, creating higher overall project expenses.
  • Slope and Drainage: Steeper areas require stable layouts that guide water flow safely. Patterns with tighter joints and strong interlock improve traction, reduce shifting, and help maintain long-term structural integrity.
  • Visual Direction: Patterns that run lengthwise can elongate narrow spaces, while cross patterns widen compact areas. This helps shape outdoor zones and creates a balanced flow that matches your landscape design.

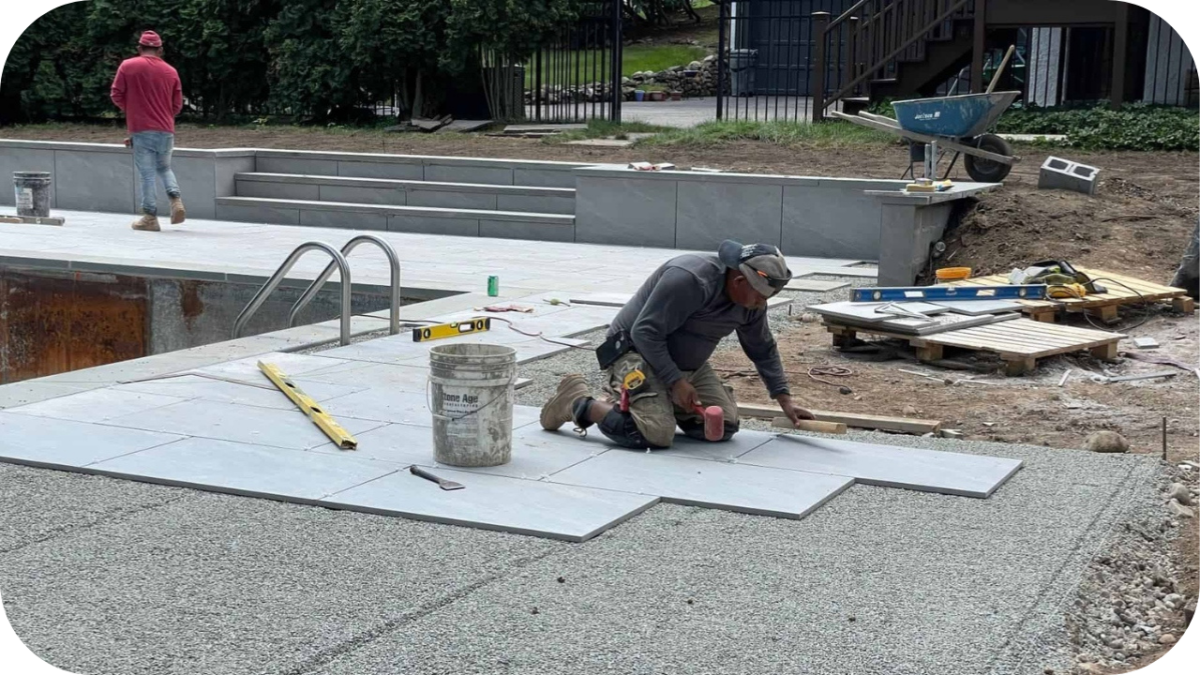
Installation and Maintenance Tips for Long Lasting Results

Here are the key installation and maintenance practices that keep your paver patterns stable, attractive, and performing well in Australian outdoor conditions.

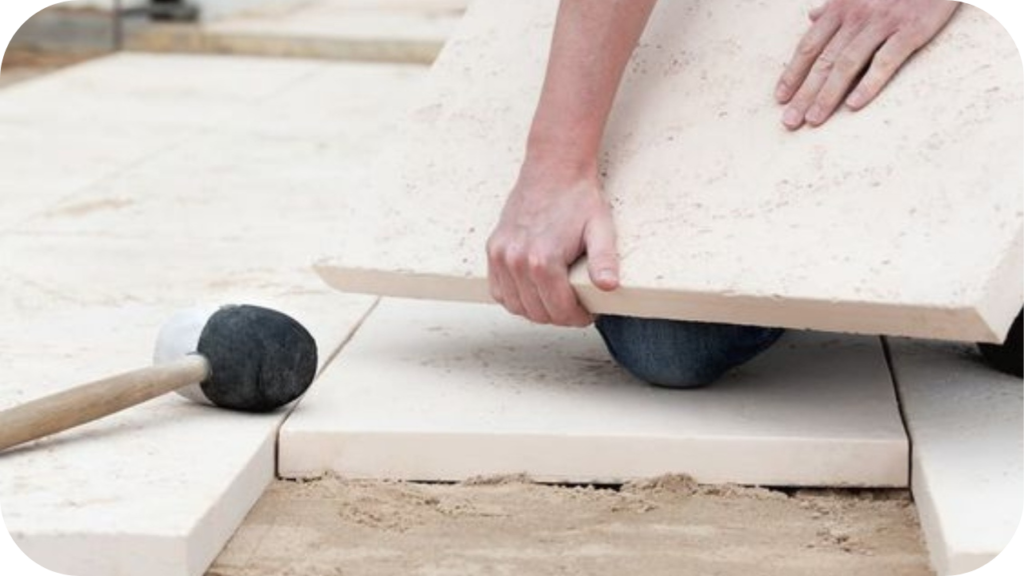
  • Prepare a proper base: A strong base controls stability. Compacting crushed rock and ensuring correct levels prevents movement, improves drainage, and supports the paver pattern so it stays even and durable over time.
  • Set consistent joint spacing: Joint spacing affects strength and appearance. Consistent gaps allow for sand bedding, movement control, and natural expansion, helping prevent cracking and keeping the pattern aligned across all outdoor areas.
  • Install reliable edge restraints: Strong edges prevent pavers from shifting under pressure. Concrete haunching or metal restraints keep patterns in place, especially on sloped sites or in high-traffic areas where movement is common.
  • Follow a regular cleaning routine: Keeping pavers free of debris protects the surface and reduces staining. Gentle washing and sweeping help maintain colour, improve traction, and preserve the overall look of the paved area.
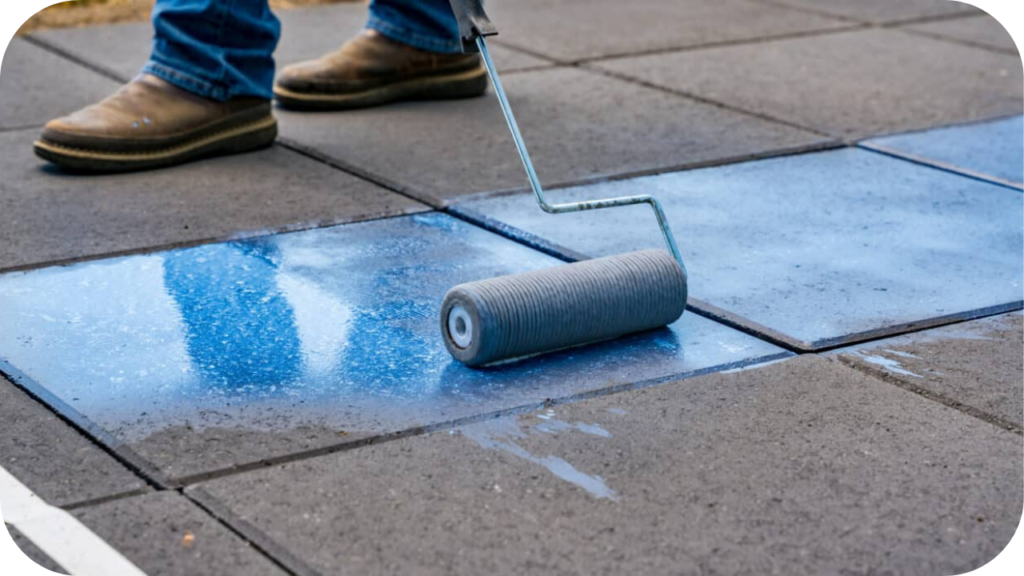
  • Seal natural stone correctly: Sealers protect stone from moisture, weathering, and stains. Applying a quality sealer enhances durability, maintains colour, and ensures materials like sandstone, limestone, and bluestone perform well outdoors.
  • Maintain effective drainage: Proper drainage prevents water pooling and reduces erosion under the pavers. Clear channels, functional falls, and clean grates help protect the base layer and extend the lifespan of the pavers.
  • Repair early shifts promptly: Addressing slight movement or small gaps early prevents bigger problems. Quick repairs keep the pattern aligned, stop water infiltration, and improve long-term structural performance in all outdoor spaces.

Final Thoughts

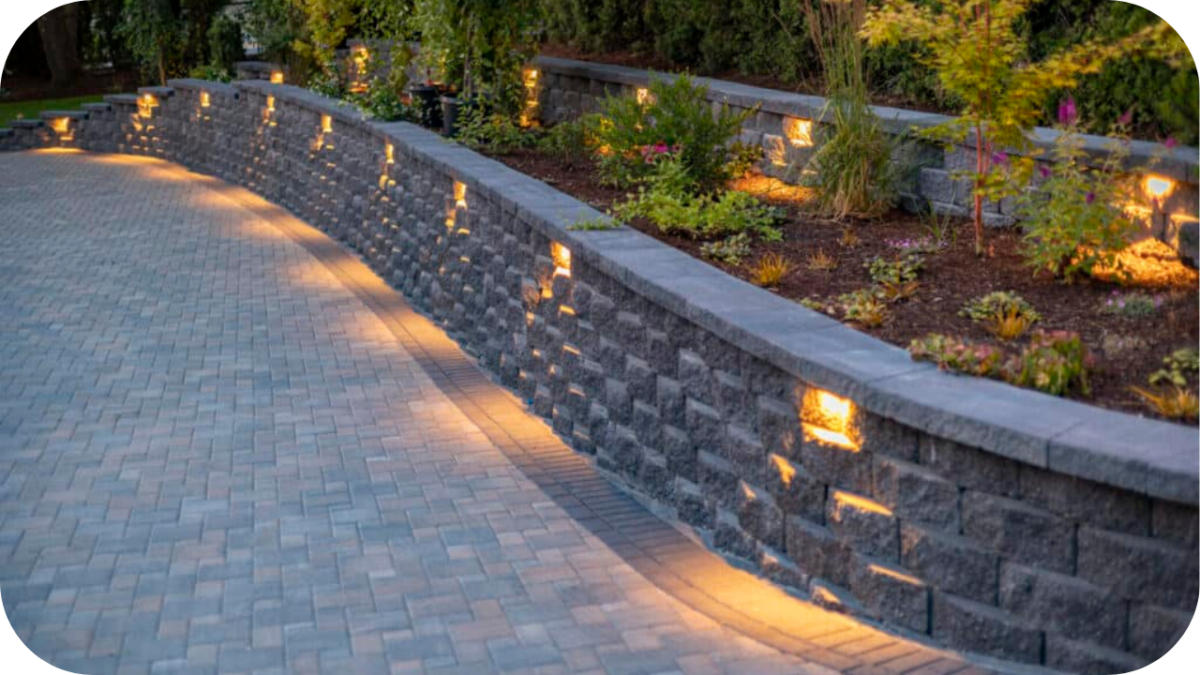
Choosing the right paver pattern can elevate any outdoor space, shaping how it looks, feels and functions on a day-to-day basis. Whether you prefer clean modern lines or textured, character-filled layouts, thoughtful pattern selection brings balance, flow and long-lasting appeal to 

Australian homes. With the right stone and layout, your outdoor area becomes more inviting and visually cohesive. If you want expert guidance or premium paving options, contact Splendour in Stone for personalised help and beautiful stone choices.

Step by Step Guide to DIY Paving for Beginners

Nearly half of Aussies planning outdoor upgrades say paving feels too technical to attempt alone, even though most projects only need a few simple skills.

It is easy to feel overwhelmed. Measuring, digging, levelling, choosing stone, it can seem like a lot. One wrong step and the whole area can shift or sink. No one wants that headache.

With the right guidance, DIY paving becomes surprisingly straightforward. This beginner-friendly guide walks you through each step with clear instructions, practical tips and Aussie-friendly advice to help you create a strong, good-looking paved space.

Why DIY Paving Is Easier Than You Think

DIY paving is far more achievable than most beginners imagine, especially when you break the process into clear steps. Many people assume paving requires advanced skills, yet the fundamentals are simple. You need good planning, the right tools and a solid base. 

Once those are in place, laying the stones becomes a smooth, repetitive task that builds confidence as you go. Most natural stone pavers are beginner-friendly because they come in consistent sizes that make alignment easy. 

You also control the pace, working in small sections without pressure. Even tasks like levelling and compacting become manageable with basic equipment and a bit of patience. 

The real advantage is flexibility, since you can design the layout you want and learn as you go. With proper guidance, DIY paving becomes an accessible project that delivers lasting results and a sense of accomplishment.

Tools and Materials You Will Need

Here are the essential tools and materials that every beginner needs to plan, prepare, and complete a successful DIY paving project.

  • Shovel: Used for digging out the area, shaping the edges and moving soil or crushed rock during preparation.
  • Rake: Helps level the ground and spread materials evenly across the site before compacting.
  • Wheelbarrow: Makes it easier to transport soil, crushed rock, sand and pavers around the work area.
  • Rubber mallet: Gently taps pavers into place without damaging the stone surface.
  • Spirit level: Ensures each paver sits flat and the entire surface follows the correct fall for drainage.
  • Tape measure: Helps mark accurate dimensions and confirm that the layout fits perfectly within your planned space.
  • Hand tamper or plate compactor: Compresses the base material and bedding layer to create a solid, long-lasting foundation.
  • Stiff broom: Sweeps jointing sand into gaps and cleans the surface once the paving is complete.
  • Natural Stone: The main material that defines the final appearance. Choose stone suited to your pattern, weather exposure, and overall design goals for consistent long-term performance.
  • Jointing Sand: Jointing sand locks the pavers together by filling the gaps between them. This improves stability, reduces movement, and helps protect the surface from weeds and erosion.
  • Sealer: A quality sealer protects the surface from stains, weather, and wear. Applying the right sealer enhances colour, strengthens durability, and maintains your paved area’s appearance over time.
  • Safety Gear: Gloves, knee pads, goggles, and sturdy boots keep you protected while working. Safety gear helps prevent injuries, especially during cutting, digging, or compacting tasks.

Recommended Stones for Beginner-Friendly DIY Paving

Here are the beginner-friendly stone options that offer simple installation, strong durability, and a polished finish for your first paving project.

1. Granite Pavers

Granite is the top choice for beginners because it provides strength, weather resistance and a clean, uniform finish that is easy to work with. Its consistent thickness helps with faster installation, and it handles high foot traffic without chipping or shifting. 

Beginners appreciate varieties such as Charcoal Granite or Grey Granite, as they stay stable once placed, making it ideal for patios, pathways and outdoor entertaining areas with long-term durability.

2. Bluestone

Bluestone is one of the easiest stones for beginners to work with due to its consistent thickness and strong durability. Its smooth texture helps create clean patterns, while its natural grip improves safety. 

Bluestone examples like Honed Bluestone or Flamed Bluestone suit patios, paths, and modern outdoor areas, offering a reliable balance between strength, style, and straightforward installation.

3. Limestone

Limestone provides a refined, bright finish and is simple for beginners to install because of its uniform sizing. It works well in structured patterns like stretcher bond or stack bond. 

Choose options such as Loch Limestone or Brooklyn Limestone. Its smooth surface is comfortable underfoot, and with proper sealing, limestone maintains its colour and performance across everyday outdoor use.

4. Travertine

Travertine is ideal for beginners thanks to its lightweight feel and easy handling. Its natural tones create a warm, inviting look, especially in entertaining areas and around pools. 

Choose examples like Silver Travertine or Ivory Travertine. When installed in an ashlar layout, travertine delivers a premium finish without complex cutting. Sealing protects it and supports long-term outdoor performance.

5. Quartzite

Quartzite is a strong, beginner-friendly paving stone thanks to its high density, slip resistance, and consistent slab quality. Its natural shimmer and durable surface make installation straightforward while delivering a premium, modern look.

Choose Andorra Quartzite for a stable, long-lasting option that suits patios, garden paths, and outdoor entertaining areas. Its cool grey tones stay consistent over time and provide a clean finish that beginners can install with confidence.

Step-by-Step DIY Paving Guide for Beginners

Hands placing a light coloured stone paver onto a sand base with a mallet nearby, showing a simple DIY paving step in progress. 

Here is a simple step-by-step guide that helps beginners create neat, durable, and long-lasting paving results with confidence.

Step 1: Plan and Measure Your Space

Start by measuring the exact size of your paving area and marking it out with a string line. Planning helps you understand how many pavers you need, what pattern works best, and whether any cuts will be required. 

It also allows you to check site conditions such as slope, soil type, and water flow, so you can prepare for proper drainage.

Step 2: Clear and Excavate the Ground

Remove grass, old materials, and any loose soil within the marked space. Excavate to the required depth, allowing room for crushed rock, bedding sand, and the final paver thickness. 

A deeper excavation is needed for driveways or heavy-load areas. Keep the ground as even as possible during this stage to make the next layers easier to prepare and shape.

Step 3: Create a Strong Crushed Rock Base

Spread crushed rock evenly across the excavated area, then compact it in layers to create a firm foundation. This base prevents sinking and movement once the pavers are laid. 

Creating the correct fall is important so water drains away instead of pooling. A well-prepared base layer is the most important part of any paving project and supports long-term performance.

Step 4: Add and Level the Bedding Sand

Spread a layer of bedding sand over the compacted base, then smooth it with a straight board or screed. The sand should be maintained at a consistent thickness to support the pavers evenly. 

Avoid walking on the sand after levelling it, as footprints or dips can affect the final surface. Take your time here because the quality of this layer shapes the entire finish.

Step 5: Lay Your Pavers Carefully

Begin laying pavers from a straight edge or reference line to keep the pattern aligned. Place each paver gently onto the bedding sand without dragging it. Maintain consistent joint gaps and check levels as you go. 

Use a rubber mallet to tap pavers into place and keep the surface even. Make cuts with the correct tools to maintain clean edges and pattern flow.

Step 6: Lock the Pavers in Place

Once all pavers are laid, spread jointing sand across the surface and sweep it into the gaps. This sand locks the pavers together, improving stability. Use a compactor with a protective mat to vibrate the surface and help the sand settle. 

Add more sand if required and repeat the process. This step prevents movement and prepares the paving for everyday use.

Step 7: Seal and Protect the Surface

After the paving is complete and settled, apply a sealer suitable for your chosen stone or paver. Sealing enhances colour, protects against stains, and reduces moisture absorption. It also makes cleaning easier in the long run. 

Follow the sealer’s instructions carefully and avoid foot traffic until it dries. Regular resealing helps maintain the appearance and durability of the paved area.

Common Mistakes Beginners Should Avoid

Here are the common paving mistakes beginners often make, along with simple ways to avoid them for a longer-lasting finish.

  • Insufficient Excavation Depth: Shallow excavation weakens the entire structure. Without sufficient depth for crushed rock and bedding sand, the paving shifts, sinks, or cracks under everyday foot traffic and weather.
  • Poor Base Compaction: A weak base leads to movement and uneven surfaces. Proper compaction strengthens the foundation and ensures the pavers stay level, stable, and supported once the project is complete.
  • Ignoring Drainage Needs: Incorrect falls cause water pooling and erosion. Designing the right slope helps water move away safely, protecting the base layers and increasing the lifespan of the paved area.
  • Uneven Bedding Sand: Uneven sand creates dips and raised spots that affect the final look. Consistent levelling ensures each paver sits firmly and maintains the intended pattern and surface finish.
  • Inconsistent Joint Gaps: Uneven spacing disrupts the pattern, creating weak points. Keeping joints consistent makes the paving stable, improves sand locking, and delivers a more professional finish.
  • Mixing Batches of Pavers: Using different batches can create colour inconsistency. Keeping materials from the same batch ensures a uniform appearance and avoids patchy areas that stand out in natural light.
  • Rushing the Installation: Working too quickly increases mistakes and alignment issues. Paving requires patience, regular checks, and careful placement to achieve a smooth, durable result that lasts for years.

Maintenance Tips to Keep Your Paving Looking New

A roller applying sealer across dark outdoor pavers, creating a glossy protective layer that enhances colour and preserves the paved surface.

Here are the simple maintenance habits that keep your paving fresh, vibrant, and performing well through changing seasons and everyday outdoor use.

  • Regular Sweeping: Frequent sweeping removes dirt, leaves, and debris that can stain or scratch the surface. Keeping the area clean helps preserve the original colour and finish of your paving.
  • Gentle Washing: Washing with mild soap and water lifts grime without damaging the surface. Regular rinsing prevents buildup and keeps the paving fresh, especially in areas exposed to weather or garden debris.
  • Treat Stains Quickly: Address spills promptly to prevent deep staining. Using suitable cleaners for your stone type prevents discolouration and helps maintain the natural tones and clarity of each paver.
  • Top Up Jointing Sand: Over time, sand can wash away. Topping it up helps secure pavers, reduces gaps, and prevents movement or weed growth that can spoil the paved surface.
  • Apply Resealer When Needed: Resealing protects the stone from weather, stains, and fading. Following the recommended timing for your stone type helps keep the colour vibrant and the surface resilient.
  • Remove Weeds Promptly: Weeds can push between pavers, causing movement. Removing them early prevents root growth and helps preserve the clean, uniform look of your paved area.
  • Inspect Edges Regularly: Checking edge restraints prevents shifting and keeps the pattern aligned. Strong edges support long-term stability and ensure the paved space maintains its intended shape.

Final Thoughts

Creating your own paved area is a rewarding DIY project that transforms your outdoor space when each step is followed with care. With the right tools, a solid base, and a little patience, even beginners can achieve results that look polished and last for years. 

If you are ready to begin your project, explore the quality stone options at Splendour in Stone. Their range helps you choose materials that elevate your design and support long-term durability.

Best Paving and Retaining Wall Options for Sloped Blocks in Australia

Many Aussie homes sit on sloped blocks, and more than 40% of them face drainage or stability issues that limit how the space can be used.

Uneven ground can feel frustrating. Water runs where it should not, soil shifts after heavy rain, and outdoor areas become harder to enjoy. It throws a real spanner in the works for anyone planning a beautiful garden or paved zone.

Smart paving choices and the right retaining walls can transform that tricky slope into a safe, practical, and visually appealing outdoor space. This guide walks you through the best options for Aussie conditions and how to make your block work in your favour.

Challenges of Sloped Blocks in Australia

Here are the key challenges that every Australian homeowner should understand before choosing paving or retaining wall solutions for a sloped block.

  • Natural erosion and water runoff: Sloped blocks push water downhill, which increases erosion risks. Poor drainage leads to washed-out soil, unstable foundations and early damage to paved or landscaped areas.
  • Restricted access and usability: Steep gradients limit safe movement around the property. Paths become harder to build, outdoor zones feel uneven, and creating functional entertainment or seating areas becomes challenging without proper design.
  • Soil movement and instability: Australian soils often shift after rain or heat. On a slope, this movement becomes amplified, affecting retaining walls, paving stability and long-term structural performance across the landscape.
  • Engineering and approval requirements: Sloped sites commonly need professional assessment, soil reports and council approval. Height limits, drainage rules and structural standards influence how retaining walls and paved areas must be built safely.
  • Drainage System Complexity: Sloped blocks require layered drainage solutions, including ag pipes, gravel beds, and correct fall angles. These systems prevent water pressure behind walls and protect paved surfaces from saturation.
  • Slip Hazards on Steep Surfaces: Sloped pathways, driveways, and outdoor living areas become slippery in wet conditions. Surfaces need correct slip ratings, heavier materials, and proper installation to ensure safe everyday use.

Best Paving Materials for Sloped Blocks in Australia

Here are the top paving materials that offer strength, safety, and long-lasting performance for creating stable outdoor spaces on sloped Australian blocks.

1. Granite Pavers

Granite is a premium choice for steep or high-traffic sloped areas because of its incredible hardness and natural slip resistance. It handles moisture, heat and heavy loads without losing its finish, which makes it ideal for challenging gradients. 

The fine-grain texture supports safe footing, even in wet conditions. Varieties such as Charcoal Granite or Grey GraniteGranite also offer long-lasting colour consistency, giving outdoor spaces a polished, architectural appearance.

2. Bluestone Pavers

Bluestone is one of the most reliable choices for sloped Australian blocks because it offers strong grip, impressive durability, and a refined look that suits modern and classic homes

Its dense composition resists weather changes, while its natural texture provides a safer footing on gradients. Bluestone, like Honed Bluestone or Flamed Bluestone, also handles high foot traffic with ease, making it ideal for stepped pathways, terraces and multi-level outdoor environments.

3. Limestone Pavers

Limestone offers a soft, natural colour palette that blends well with Australian landscapes while delivering dependable strength on sloped blocks. Its subtle texture improves grip, and its consistent density creates reliable stability across pathways and outdoor living areas.

Options such as Loch Limestone or Brooklyn Limestone are easy to shape for steps and tiered layouts, which adds flexibility for complex gradients. With the right sealing and maintenance, it performs well in varied climates.

4. Travertine Pavers

Cream travertine pavers arranged in a French pattern at a home entrance with steps, garden beds and planters creating a bright, welcoming outdoor space.

Travertine brings a warm, elegant finish that works beautifully on sloped sites when installed with proper fall and drainage. Its natural pores create a gentle texture underfoot, supporting slip resistance across open or shaded areas. 

Homeowners often choose examples like Silver Travertine or Ivory Travertine due to their light tones and natural texture. 

Traventine remains cool in the sun, which makes it ideal for Australian backyards. When sealed correctly, it withstands moisture, heat, and daily wear, providing a practical and visually appealing surface.

5. Cobblestones

Cobblestones provide exceptional grip and strength on steeper gradients due to their interlocking layout and smaller format. Their weight and thickness help resist movement, while their textured surfaces create reliable traction for vehicles and foot traffic. 

Homeowners often choose options like Porphyry Cobbles or Bluestone Cobbles for their light tones and natural textures. 

This makes cobblestones a standout choice for driveways and high-load areas. Their rustic character also brings charm and heritage appeal to Australian homes, especially in landscape designs with classic styling.

Best Retaining Wall Options for Sloped Blocks

Here are the retaining wall options that offer reliable strength, long-term stability, and visual appeal for managing soil and shaping outdoor spaces on sloped blocks.

1. Granite

Granite offers unmatched durability and long-term strength, making it ideal for challenging sloped landscapes that require maximum stability. Its tightly packed mineral structure resists erosion, soil movement, and harsh weather. 

Granite blocks such as Buffalo and Hotham Granite create a premium, timeless appearance that suits luxury outdoor designs. Their reliable density ensures each block interlocks securely, forming a reinforced retaining system that performs exceptionally well on steep gradients where strength is vital.

2. Limestone

Limestone is a popular option for sloped blocks thanks to its uniform block structure and bright, elegant appearance. Its moderate density supports low to medium-height retaining walls effectively, provided proper drainage and base preparation are used. 

Limestone options like Jasper and Jamieson Limestone create a softer visual finish that suits modern gardens, paved areas, and poolside designs. It remains an appealing choice for homeowners seeking a clean and light aesthetic combined with reliable performance.

3. Sandstone

Sandstone introduces a warm, natural look to sloped gardens while still delivering dependable structural performance. Although softer than bluestone and granite, high-quality sandstone, like Charlotte and Australiana, provides good support for moderate slope retention. 

Its workable nature makes shaping and placement easier, especially for curved or tiered walls. The textured surface blends beautifully with coastal gardens and bush settings, adding earthy tones that enhance natural landscapes while maintaining practical stability.

4. Travertine

Travertine offers a stylish, refined option for retaining walls on gentle to moderate slopes. While not as dense as granite or bluestone, its natural strength supports decorative and functional wall designs when installed with proper footings and drainage. 

Options such as Classic Travertine and Silver Travertine bring soft patterns and timeless character to outdoor areas. Travertine works particularly well with Mediterranean-inspired gardens and light coloured paving.

5. Quartz

Quartz provides excellent structural strength for sloped retaining walls thanks to its dense composition and ability to resist moisture, pressure, and shifting soil. Its durability supports long-term stability across moderate and steep gradients.

Options such as Shoreham Quartz and Blue Ridge Quartz offer consistent sizing, clean edges, and attractive colour variation. Their refined finish suits gardens and architectural landscapes where both structural performance and visual appeal are essential.

Factors to Consider for Sloped Block Paving and Retaining Walls

Here are the essential factors that guide safe, durable, and visually balanced paving and retaining wall decisions for any sloped block in Australia.

  • Drainage and water control: Effective drainage stops water from pooling or pushing against paved areas and walls. Without it, soil shifts, surfaces weaken, and long-term structural problems appear across the entire landscape.
  • Soil stability and compaction: Sloped blocks need a solid, compacted base to hold weight and resist movement. Stable soil protects paving, strengthens retaining walls and reduces the risk of cracks or collapses over time.
  • Material suitability for climate: The wrong stone can become slippery, fade or fracture. Choosing materials that handle heat, rain and heavy foot traffic ensures safe, durable and visually consistent results across the property.
  • Council and engineering requirements: Retaining walls above certain heights require engineering approval. Local rules, load calculations and site conditions guide how structures must be built to stay compliant and safe on Australian slopes.
  • Design Integration with the Slope: The layout must follow the land’s natural slope. Terracing, stepped levels, and reinforced platforms help create functional, visually balanced outdoor spaces on uneven sites.
  • Retaining Wall Height and Load: The height of the wall determines engineering needs, council approval, and structural design. Higher walls carry greater soil pressure and need stronger foundations for long-term stability.

Installation and Maintenance

Proper installation and ongoing maintenance play a major role in how well paving and retaining walls perform on a sloped block. 

  • Correct base preparation: A strong foundation starts with proper excavation, soil assessment, and thorough compaction, because any weakness in the base eventually leads to shifting, cracking, or uneven surfaces.
  • Accurate laying and drainage fall: Professional installers position each stone with the right fall to ensure water flows away from structures rather than pooling in areas that could cause long-term issues.
  • Quality retaining wall support: Retaining walls require precise footing depths, suitable backfill materials, and dependable drainage systems, such as gravel layers and weep holes, to relieve pressure behind the wall.
  • Consistent maintenance routines: Regularly clearing debris from drainage points, checking early signs of movement, topping up joint sand and sealing selected stone types help maintain strength and appearance.
  • Simple upkeep for safety: Small tasks like clearing leaves or soil buildup on steps improve safety on steep gradients and support the long-term stability of sloped outdoor spaces.

Final Thoughts

Thoughtful paving and retaining wall choices can completely transform a sloped block, turning challenges into functional outdoor spaces with lasting visual appeal. Quality natural stone provides strength, stability and timeless style suited to Australian conditions. 

With the right layout, drainage planning and material selection, your landscape becomes safer, more usable and far more inviting. If you are ready to improve your sloped block with durable, beautiful stone solutions. Reach out to Splendour in Stone for guidance and product recommendations tailored to your project.

Stone Cladded Fireplace Request

At Splendour in Stone, we specialise in supplying and installing natural stone cladded fireplaces that bring warmth, beauty, and character to your home. Each piece is crafted with precision and presence, ensuring a timeless centrepiece built to last.

Planning a new fireplace or upgrading an existing one? Complete the form below and receive your personalised quote within 24 hours.
Share anything about your vision, home style, or needs
Important Installation Note
The fireplace unit must be installed prior to our stonework.
This ensures proper fitting and a seamless final result. If you need help coordinating this, we’re happy to assist. Just mention it in your message.
In SQM?

Please fill your details to download.


      Request Callback


        Enquiry Form


        Please fill your details to download.