Register your Information for Free Stone Samples Sent Express to You!

Porcelain Tiles in Australia: Where to Buy the Best Quality at Affordable Prices?

If you are renovating or building a new home, porcelain tiles are the perfect wall and floor covering.

Finding high-quality porcelain tiles at affordable prices in Australia can be challenging.

With so many options available, it’s easy to feel overwhelmed and end up with tiles that don’t meet your expectations or budget. Poor-quality tiles can lead to frequent repairs and additional costs.

In this article, we’ll guide you through the best places to buy top-quality porcelain tiles at affordable prices in Australia, ensuring you get the best value for your money and beautiful, durable results for your home.

What Makes Porcelain Tiles Unique?

Due to several unique characteristics, porcelain tiles stand out in the flooring and wall coverings world. 

Firstly, they are crafted from a fine-grained clay called kaolin, which, when fired at extremely high temperatures (over 1,200 degrees Celsius), creates a dense, vitrified material. This high firing temperature results in a hard and durable tile with a low porosity, making it resistant to water and stains.

One of the critical attributes of porcelain tiles is their remarkable durability. Their dense composition allows them to withstand heavy foot traffic and resist chipping and cracking, making them ideal for indoor and outdoor applications. 

Moreover, porcelain tiles are renowned for their water resistance. The low water absorption rate makes them perfect for moisture-prone areas, such as bathrooms, kitchens, and outdoor patios.

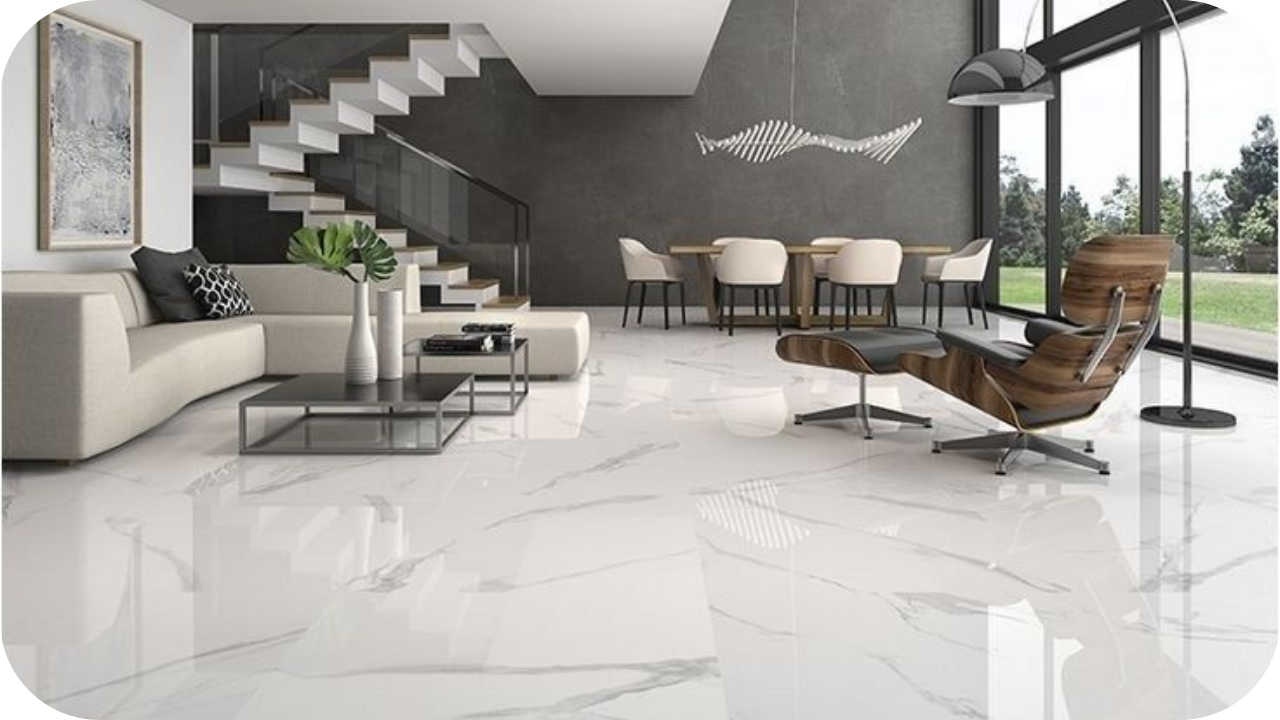
Porcelain tiles also offer aesthetic versatility. They can mimic the look of natural stones, wood, and even concrete, providing homeowners with a wide range of design options. The tiles come in various finishes, including glossy, matte, and textured, catering to different stylistic and functional needs.

Additionally, porcelain tiles contribute to healthier indoor environments. Their moisture resistance prevents the growth of mould, mildew, and bacteria, which is particularly beneficial in kitchens and bathrooms.

This hygienic quality, combined with ease of maintenance, makes porcelain tiles a practical choice for modern homes.

Benefits of Using Porcelain Tiles

Porcelain tiles are an excellent choice for residential and commercial spaces, offering a range of benefits that make them highly desirable. Here’s why porcelain tiles are a smart investment:

Durability

Porcelain tiles are fired at extremely high temperatures, making them harder and denser than standard ceramic tiles. This results in a robust surface that can withstand heavy foot traffic and resist chipping and cracking, making them ideal for high-traffic areas like kitchens and hallways.

Water and Stain Resistance

With a water absorption rate of less than 0.5%, porcelain tiles are highly resistant to moisture and stains. This makes them perfect for bathrooms, kitchens, and outdoor areas where water exposure is frequent.

Their non-porous nature also prevents the growth of mould and mildew, contributing to a healthier living environment.

Low Maintenance

Porcelain tiles are straightforward to clean and maintain. Regular sweeping and occasional mopping with water is usually sufficient to keep them looking new. They also resist most household chemicals, allowing for thorough cleaning without damage.

Design Versatility

One of the standout features of porcelain tiles is their ability to mimic the appearance of other materials, such as natural stone, wood, or even concrete. This versatility allows homeowners to achieve the desired aesthetic without compromising on porcelain’s practical benefits.

Fire Resistance

Porcelain tiles do not burn or emit toxic fumes, making them a safe choice for areas prone to high temperatures, such as kitchens.

Longevity

High-quality porcelain tiles can last for decades, making them a cost-effective option in the long run. Their durability ensures they remain in good condition with minimal maintenance, providing excellent value for money.

Factors to Consider When Buying Porcelain Tiles

When purchasing porcelain tiles, several crucial factors should guide your decision to ensure you choose the best option for your needs:

  • Tile Size and Shape: Porcelain tiles come in various sizes and shapes. Larger tiles can create a seamless look and reduce grout lines, while smaller tiles are ideal for intricate patterns or smaller spaces. Consider the room’s dimensions and layout when selecting.
  • Durability and PEI Rating: Porcelain tiles are rated for durability using the Porcelain Enamel Institute (PEI) scale. Choose tiles with a higher PEI rating (IV or V) for high-traffic areas to ensure they can withstand heavy use without wear.
  • Water Absorption Rate: The effectiveness of porcelain tiles in wet environments depends on their water absorption rate. Opt for tiles with a low absorption rate (less than 0.5%) for moisture-prone areas, such as bathrooms and kitchens.
  • Finish and Texture: Porcelain tiles are available in various finishes, including matte, gloss, and texture. Glossy finishes are easier to clean but slippery when wet, while matte or textured tiles provide better traction.
  • Colour and Pattern: Consider the aesthetic impact of the tile’s colour and pattern on your space. Lighter colours can make small rooms appear larger, while darker shades add warmth and depth. Patterns can enhance visual interest or mimic natural materials like stone or wood.
  • Cost and Quality: While price is a factor, balance cost with quality. Higher-priced tiles often offer better durability and design options. Assess the cost per square metre and compare it with the tile’s quality and features.

Read more about the factors to consider when or before buying tiles.

Top Places to Buy Porcelain Tiles in Australia

For those seeking high-quality porcelain tiles at competitive prices, consider these top Australian suppliers:
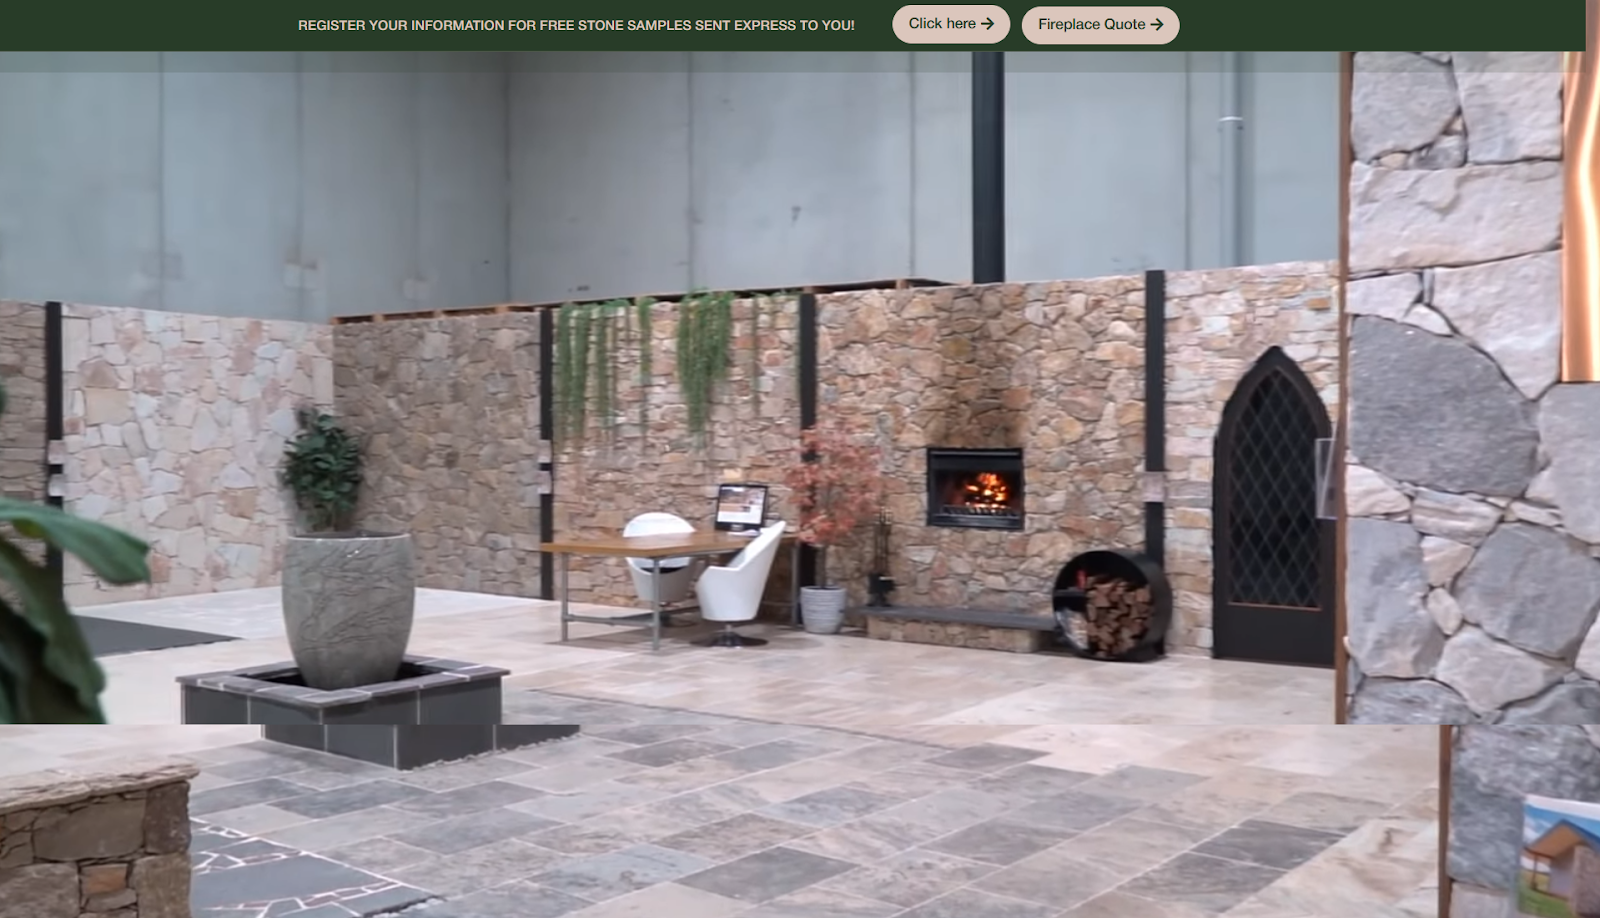
  1. Splendour in Stone
    Splendour in Stone is a premier choice for luxury porcelain tiles. They offer a wide range of high-end tiles with unique textures and designs, perfect for adding elegance to any space. Known for their superior quality and expert customer service, they provide contemporary and classic options to suit various styles and preferences.
  2. Bunnings Warehouse
    Bunnings Warehouse offers an extensive selection of porcelain tiles at affordable prices. Their inventory includes various styles and sizes, catering to different project needs. With numerous locations across Australia and a comprehensive online store, Bunnings makes it easy to find tiles that fit your budget and design requirements.
  3. Tile Factory Outlet
    Tile Factory Outlet provides a diverse range of porcelain tiles at competitive prices. They offer discontinued lines and current collections, allowing you to find high-quality tiles at discounted rates. Their website features a wide selection of styles and sizes, making finding the right fit for your project easy.

Tips for Getting the Best Deals

Securing the best deals on porcelain tiles in Australia requires strategic shopping and awareness of various discount opportunities. Here are some valuable tips to help you get the most value for your money:

  • Shop Around and Compare Prices: Take the time to shop around and compare prices from different retailers. Online price comparison tools can help you find the best deals, but visiting stores in person can also reveal unadvertised discounts. By comparing prices, you can ensure you get the best value for your money.
  • Bulk Purchasing Discounts: Buying in bulk can lead to significant savings. Many suppliers offer discounts for large orders, making it a cost-effective option for tiling a large area or multiple rooms. Always inquire about bulk pricing, as the savings can be substantial compared to purchasing tiles individually.
  • End-of-Line Sales: End-of-line sales are an excellent opportunity to buy high-quality porcelain tiles at reduced prices. Retailers often clear out discontinued lines to make way for new stock, offering these tiles at a fraction of their original cost. Keep an eye on your preferred tile suppliers for these sales, which can provide excellent bargains.
  • Negotiating with Suppliers: Be bold and deal with suppliers, especially if you’re making a large purchase. Many suppliers are willing to offer discounts or price matches to secure your business. Building a good relationship with suppliers can also lead to future discounts and preferential treatment.
  • Sign Up for Newsletters and Alerts: Subscribe to newsletters from tile retailers and suppliers to stay informed about upcoming sales, promotions, and exclusive discounts. Many retailers offer first-time subscriber discounts or special deals to their mailing list, ensuring you’re among the first to know about savings opportunities.
  • Utilise Social Media and Forums: Follow tile retailers on social media and join home improvement forums. These platforms often share sales announcements, discount codes, and user reviews, providing valuable insights and additional savings opportunities.

Conclusion

Australia offers a wealth of options for high-quality, affordable porcelain tiles. Suppliers like Splendour in Stone and Bunnings Warehouse provide excellent choices, whether you seek luxury or budget-friendly choices. Explore their websites to find the perfect tiles for your project and elevate your space with style and durability. 

Can You Install Porcelain Tile Over Existing Tile? Tips & Tricks

Want to upgrade your flooring but dread the messy and time-consuming tile removal process?

Tearing out existing tiles can be daunting, leading to extensive clean-up, potential damage, and high costs.

Discover how to install porcelain tiles over existing tiles with our expert tips and tricks. Learn how to achieve a stunning, durable finish without the hassle of tile removal. Read a step-by-step guide to simplifying the process and ensuring professional results.

Assessing the Existing Tile Surface

Before installing new porcelain tiles over existing ones, it’s crucial to thoroughly assess the current tile surface to ensure a successful installation. 

Begin by inspecting the tiles for any signs of damage. Check for loose, cracked, or uneven tiles, as these can compromise the stability of the new layer. If you find any damaged tiles, replace them or repair the surface to create a solid foundation.

Next, ensure the existing tiles are clean and free from grease, grime, or any residue that could prevent proper adhesion

Use a strong tile cleaner and allow the surface to dry completely. For glazed or glossy tiles, roughen the surface with sandpaper or an abrasive pad to enhance the bonding of the new adhesive.

Additionally, consider the overall flatness of the tile surface. Any protrusions or uneven areas can cause problems during the installation of the new tiles. Use a levelling compound to smooth out any irregularities, ensuring a flat and even surface for the new tiles.

Finally, the moisture levels in the area should be evaluated. Ensure there are no underlying moisture issues, which can lead to long-term problems such as mould growth or tile detachment. 

Preparing the Surface

Proper surface preparation is crucial when installing porcelain tiles over existing tiles to ensure a solid and lasting bond. Here are the essential steps to prepare the surface effectively.

  • Cleaning the Existing Tiles: First, thoroughly clean the existing tiles to remove all dirt, grease, and residues. Use a heavy-duty tile cleaner or a mixture of water and mild detergent. Scrub the surface with a stiff brush and rinse well to ensure no cleaning agents remain, as they can interfere with the adhesion.
  • Roughening the Surface: The surface must be roughened to enhance the bond between the existing tiles and the new adhesive. Use an electric sander or angle grinder with a diamond grinding wheel to scuff the glaze of the existing tiles. This creates a textured surface, allowing the new adhesive to grip more effectively.
  • Applying a Primer or Bonding Agent: After roughening the surface, apply a primer or bonding agent specifically designed for tiling over tiles. These products help improve adhesion and create a strong bond between the old tiles and the new adhesive. Follow the manufacturer’s instructions for application and drying times.
  • Repairing Any Imperfections: Inspect the surface for any remaining imperfections. Fill gaps, cracks, or uneven areas with a suitable filler or levelling compound. Ensure the surface is smooth and level before proceeding with the tile installation.

Choosing the Right Adhesive

The right adhesive is essential for a successful tile-over-tile project. The glue holds everything together, ensuring your porcelain masterpiece lasts for years. Here’s what you need to consider:

  • Strength and Flexibility: Porcelain tiles require a strong adhesive due to their weight and density. Opt for a high-performance adhesive specifically designed for porcelain. Look for an S1-rated adhesive, indicating its deformability and suitability for tile-over-tile applications. This flexibility helps prevent cracks and breakages caused by movement.
  • Setting Time: Choose an adhesive with a setting time that suits your skill level. Faster-setting adhesives are ideal for experienced tilers while slower-setting ones provide more wiggle room for adjustments if you’re a DIY enthusiast.
  • Colour: Adhesives are typically available in white or grey. Choose a colour that complements your grout for a seamless finish.
  • Coverage: Calculate the area you need to cover and purchase enough adhesive for the entire project. It’s better to have a little extra than to run out halfway through.
  • Brand Reputation: Stick with reputable brands known for producing quality tile adhesives. This ensures you’re getting a product that has been tested and proven to work.

Laying the New Porcelain Tiles

Properly laying the new porcelain tiles over existing tiles is crucial for achieving a professional and long-lasting finish. Here are the essential steps to follow.

  • Planning the Layout: Before you start, prepare the tile layout to ensure an even and aesthetically pleasing design. Dry-lay the tiles to see how they fit and make adjustments as needed. Begin from the centre of the room or a key focal point and work your way out to avoid narrow cuts at the edges.
  • Cutting Tiles to Fit: Use a wet saw or a tile cutter to make precise cuts for tiles that need to fit around obstacles, such as corners, fixtures, and edges. Measure and mark the tiles carefully to ensure accurate cuts. Always wear safety gear when cutting tiles to protect yourself from dust and debris.
  • Applying Adhesive: Spread the adhesive on the prepared surface using a notched trowel. Apply the glue evenly, working in small sections to prevent it from drying before the tiles are placed. Ensure complete coverage to avoid air pockets that can weaken the bond.
  • Placing the Tiles: Press each tile firmly into the adhesive, using a slight twisting motion to ensure a good bond. Use tile spacers to maintain consistent gaps between the tiles for even grout lines. Regularly check the alignment and level of the tiles as you work to ensure a smooth and professional finish.
  • Final Adjustments: Once all the tiles are laid, allow the adhesive to cure for the time specified by the manufacturer. To prevent any displacement, avoid walking on the tiles during this period.

Grouting and Sealing

Grouting and sealing are the final steps in installing porcelain tiles over existing tiles, ensuring a polished and durable finish. Here’s how to do it right.

  • Selecting the Appropriate Grout: Choose a high-quality grout suitable for porcelain tiles. Epoxy grout is popular due to its durability and resistance to stains and moisture. For areas prone to movement or moisture, flexible grout can help prevent cracks.
  • Applying the Grout: Once the adhesive has fully cured, use a rubber float to apply the grout. Spread the grout diagonally across the tiles, pressing it into the gaps between them. Ensure all joints are filled to avoid voids that can weaken the structure. Wipe away excess grout with a damp sponge, rinsing it frequently to keep the tiles clean.
  • Cleaning the Tiles: A haze may form on the tile surfaces after grouting. Once the grout has set, use a grout haze remover or a mixture of vinegar and water to clean the tiles. This ensures a spotless finish and prevents any residue from dulling the tiles.
  • Sealing the Grout: To enhance the durability and longevity of your installation, apply a grout sealer. This helps protect the grout from stains, moisture, and mildew. Use a small brush or applicator to apply the sealer evenly along the grout lines. Allow it to dry according to the manufacturer’s instructions before using the tiled area.
  • Final Inspection: Inspect the entire installation for any gaps or imperfections. Address any issues promptly to ensure a flawless finish.

Tips for a Successful Installation

Successfully installing porcelain tiles over existing tiles requires careful planning and attention to detail. Here are some essential tips to ensure a flawless finish.

  • Work in Small Sections: Work in small sections when applying adhesive and laying tiles. This prevents the adhesive from drying out before the tiles are set, ensuring a solid bond. It also allows you to adjust and maintain alignment and level.
  • Ensure Even Adhesive Application: Use a notched trowel to apply the adhesive evenly across the surface. This helps prevent air pockets and ensures complete coverage, which is crucial for the tiles to adhere correctly and stay in place.
  • Maintain Consistent Grout Lines: Use tile spacers to maintain consistent gaps between the tiles. This not only ensures a neat appearance but also makes grouting easier. Consistent grout lines contribute to the tiled surface’s aesthetic and structural integrity.
  • Allow Sufficient Drying Time: After laying the tiles, allow the adhesive to cure for the recommended time before grouting. This ensures the tiles are securely bonded to the surface. Similarly, let the grout set entirely before sealing and using the area.
  • Regularly Check Alignment and Level: Periodically check that the tiles are aligned and level as you work. Use a spirit level to ensure the tiles are even. Making adjustments during the installation process is much easier than correcting mistakes later.
  • Clean As You Go: Keep a damp sponge or cloth handy to immediately remove excess adhesive or grout. This prevents it from hardening on the tile surface, making clean-up easier and ensuring a pristine finish.

Conclusion

Installing porcelain tiles over existing tiles is a practical and efficient way to upgrade your space. Follow our expert tips for a seamless and durable finish.

Visit Splendour In Stone Melbourne for quality materials and professional advice. Contact us to start your tile transformation today.

Maintaining the Beauty of Your Stone Tiles: Expert Tips and Tricks

Stone tiles are a stunning addition to any home but can lose their lustre over time if improperly maintained.

Regular care is necessary for your beautiful stone surfaces to become dull, stained, and damaged, diminishing their aesthetic and value.

In this article, we provide expert tips and tricks to maintain the beauty of your stone tiles, ensuring they remain pristine and elegant for years to come.

1. Daily Cleaning Routine

Maintaining the beauty of your stone tiles starts with a consistent daily cleaning routine. Begin by sweeping or vacuuming the tiles to remove dirt and debris, which can scratch the surface if left unattended

Use a soft-bristled broom or a vacuum cleaner with a brush attachment to avoid damaging the tiles.

Next, prepare a gentle cleaning solution by mixing a few drops of pH-neutral stone cleaner with warm water. Avoid harsh chemicals or acidic cleaners, which can erode the stone’s natural finish. 

Dampen a soft, microfibre mop or cloth with the solution and gently wipe the tiles, ensuring even coverage. Use a soft-bristled brush to lightly scrub for tougher spots without applying excessive pressure.

After mopping, rinse the tiles with clean water to remove any residue from the cleaning solution. Dry the tiles thoroughly with a clean cloth to prevent water spots and streaks. 

This daily regimen keeps your stone tiles looking their best and extends their lifespan by preventing dirt buildup and surface damage. Consistency is key; a few minutes of care each day will preserve the elegance and integrity of your stone tiles for years to come.

2. Deep Cleaning Techniques

Even with a diligent daily cleaning routine, your stone tiles occasionally require a deep clean to maintain their pristine condition. Start by removing any surface dust and debris with a vacuum cleaner or a soft-bristled broom. This ensures that the deep cleaning process will be more effective and prevents scratching.

Prepare a deep cleaning solution by mixing a pH-neutral stone cleaner with warm water according to the manufacturer’s instructions

Avoid acidic or abrasive cleaners, which can damage the stone’s surface. Apply the solution using a soft-bristled brush or a non-abrasive scrubbing pad, focusing on grout lines and any stained areas. Gently scrub in a circular motion to lift embedded dirt and grime without harming the tiles.

After scrubbing, rinse the tiles thoroughly with clean water to remove any remaining cleaning solution. It’s crucial to eliminate all residues, which can attract dirt and dull the stone’s finish. Use a wet vacuum to extract excess water, or dry the tiles with a clean cloth.

Consider using a poultice – a paste made from a powdery material and a cleaning agent for stubborn stains. Apply the poultice to the stain, cover it with plastic wrap, and let it sit for 24 to 48 hours. The poultice will draw out the stain, after which you can rinse and dry the area.

3. Sealing Your Stone Tiles

Sealing your stone tiles is essential for preserving natural beauty and enhancing longevity. This process protects against stains, moisture, and daily wear and tear. 

Begin by selecting a high-quality, penetrating sealer suitable for your specific type of stone. It’s crucial to choose a sealer that is designed for natural stone to ensure optimal protection.

Before applying the sealer, thoroughly clean the tiles to remove any dirt, dust, or existing stains. Ensure the surface is completely dry, as moisture can affect the sealer’s effectiveness. 

Using a clean, soft cloth or a brush, apply the sealer evenly across the stone tiles, following the manufacturer’s instructions. Cover all areas, including grout lines, for comprehensive protection.

Allow the sealer to penetrate the stone for the recommended time, usually 15 to 30 minutes. Wipe away any excess sealer with a clean cloth to avoid a hazy finish. Apply a second coat after the first has dried completely for best results. This ensures maximum protection, especially in high-traffic areas.

Sealing should be done periodically, typically every 1 to 3 years, depending on the stone type and usage. Regular sealing maintains the stone’s resistance to stains and damage, keeping your tiles stunning and pristine for years.

4. Preventing Damage

Preventing damage to your stone tiles is crucial for maintaining their pristine appearance. You can avoid scratches, chips, and cracks with proper care, ensuring your tiles remain beautiful and durable.

Tips for Avoiding Scratches, Chips, and Cracks

Always use soft cleaning tools such as microfibre cloths or soft-bristle brushes to prevent scratches. Avoid dragging heavy or sharp objects across the tiles. 

Place doormats at entrances to reduce dirt and grit being tracked onto the surface, as these can cause abrasion over time.

Best Practices for Moving Furniture on Stone Tiles

When moving furniture, lift it rather than dragging it across the floor. Use furniture pads or sliders to minimise contact and protect the tiles from potential damage. 

For particularly heavy items, consider using dolly or protective plywood sheets to distribute the weight evenly and prevent pressure points that can cause cracks or chips.

Protective Measures for High-Traffic Areas

High-traffic areas are more prone to wear and tear. To provide extra protection, use area rugs or runners in these spaces. Ensure the rugs have non-slip backings to prevent accidents. Rotate the rugs regularly to distribute wear evenly. 

Applying a quality sealant will help shield the tiles from damage and make cleaning easier.

5. Dealing with Specific Issues

Even with regular maintenance, specific issues can arise with stone tiles. Knowing how to address these problems promptly can help preserve their beauty and integrity.

  • Removing Mould and Mildew: Mould and mildew can develop in damp areas. To remove them, use a solution of water and mild detergent or a specialised stone-safe mould remover. Apply the solution with a soft brush, scrub gently, and rinse thoroughly with clean water. Ensure the area is well-ventilated and dry to prevent future growth.
  • Handling Spills and Stains Promptly: Immediate action is key to preventing stains. Blot spills with a clean, soft cloth—do not rub, as this can spread the stain. For oil-based stains, use a poultice of baking soda and water, leaving it on the stain for 24 hours before rinsing. A mixture of hydrogen peroxide and a few drops of ammonia can be effective for organic stains, such as coffee or wine. Always test any cleaning solution on a small, inconspicuous area first.
  • Repairing Minor Damage: Minor chips and cracks can be repaired using a stone repair kit at most hardware stores. Clean the damaged area thoroughly, then apply the repair compound according to the manufacturer’s instructions. Consider professional repair services for deeper cracks to ensure a seamless finish and prevent further damage.

6. Seasonal Maintenance Tips

Adjusting your care routine according to the seasons is crucial for maintaining the beauty and durability of your stone tiles. Here’s how to prepare your tiles for different seasonal challenges.

  • Preparing Stone Tiles for Winter: Winter can be particularly harsh on stone tiles, especially in areas with freezing temperatures. To prepare, ensure your tiles are thoroughly sealed to prevent moisture penetration, which can cause cracks when frozen. Clean the tiles to remove dirt and debris, which can scratch the surface. Place doormats at entrances to minimise the amount of salt and grit brought inside, which can be abrasive to the tiles.
  • Summer Care Tips: High temperatures and increased foot traffic during summer can affect your stone tiles. Regularly sweep and mop to remove sand and dirt that can scratch the surface. Blinds or curtains can prevent indoor tiles from fading in direct sunlight. Outdoor tiles should be well-sealed to shield them from UV rays and rain damage.
  • Addressing Seasonal Challenges Specific to Your Region: Different regions face unique challenges. In humid areas, moisture control is essential to prevent mould and mildew growth; use dehumidifiers and ensure proper ventilation. In regions with heavy rainfall, ensure adequate drainage around outdoor tiles to avoid water pooling and damage. Frequent sweeping and damp mopping for areas with high dust levels will help keep your tiles clean and scratch-free.

Why Should You Use Professional Cleaning and Restoration Services?

Professional cleaning and restoration services offer expertise and experience that can significantly enhance the care of your stone tiles. 

Professionals can access specialised equipment and products not typically available to homeowners, ensuring a deeper and more effective clean.

They provide tailored solutions based on thoroughly assessing your tiles and addressing specific issues precisely. 

While the upfront cost may seem high, professional services can be cost-effective in the long run by preventing costly repairs and extending the lifespan of your tiles. 

Investing in professional care ensures your stone tiles maintain their beauty and durability for years.

Conclusion

By following these expert tips for daily cleaning, sealing, and seasonal care, you can preserve the beauty and durability of your stone tiles. 

Implement a regular maintenance routine to ensure long-lasting results. 

For professional advice and services, contact Splendour In Stone Melbourne today and let us help you keep your stone tiles in pristine condition.

The Top 5 Stone Tile Trends for 2024: Elevate Your Interior Design

Keeping up with the latest interior design trends can be overwhelming.

Outdated stone tile choices can make your home look old-fashioned and lower its aesthetic appeal.

Discover the top 5 stone tile trends in 2024 to elevate your interior design. This guide will help you stay ahead of the curve with stylish, modern stone tiles that transform your living spaces into contemporary masterpieces.

1. Natural and Earthy Tones

Embracing natural and earthy tones is a top trend for stone tiles in 2024, reflecting a shift towards designs that celebrate simplicity and nature.

These hues, such as warm beiges, soft greys, and deep browns, infuse spaces with a serene and grounded atmosphere. Their inherent warmth and subtlety make them perfect for creating inviting, balanced environments.

In these muted shades, stone tiles like travertine and sandstone offer more than just visual appeal. They introduce texture and authenticity to interiors, with their natural variations in colour and pattern providing depth without overpowering the space.

This versatility allows them to complement both contemporary and classic decor styles effortlessly.

Furthermore, opting for natural tones supports sustainable design principles. These materials, often locally sourced, have a reduced environmental impact compared to synthetic alternatives.

2. Textured Finishes

Textured finishes are a key trend for stone tiles in 2024, offering a dynamic touch to interior design. Finishes like honed, brushed, and riven enhance the surface with depth and character.

Honed finishes provide a smooth, matte look with reduced glare, which is ideal for high-traffic areas. Brushed textures create a soft, weathered appearance, adding warmth to the space. Riven textures, with their irregular surfaces, lend a rugged, natural feel.

Beyond aesthetics, these textures improve functionality. Textured tiles offer better slip resistance, making them suitable for wet areas. They also hide dirt and wear, maintaining their appearance longer. Textured finishes can elevate your design, adding unique visual and tactile qualities.

3. Large Format Tiles

Transforming interior spaces and large format tiles are a top trend for 2024, offering a sleek and modern aesthetic. These tiles, which often measure 60×60 cm or larger, provide a seamless appearance with minimal grout lines, enhancing the sense of space and continuity in any room.

Their expansive size makes them perfect for creating uninterrupted surfaces, adding a clean and sophisticated touch. Large format tiles are particularly effective in open-plan layouts, which help unify the space visually. Their contemporary style also lends a sense of grandeur to both small and large areas.

Beyond their visual appeal, large-format tiles are highly practical. They minimise grout lines, which simplifies maintenance and boosts durability. These tiles are ideal for floors and walls, especially well-suited for high-traffic areas, including bathrooms and kitchens.

4. Sustainable and Eco-Friendly Stones

In 2024, the focus on sustainable and eco-friendly stones will reshape interior design, emphasising environmentally responsible choices. Recycled stone tiles, crafted from reclaimed materials, reduce waste and offer unique, textured aesthetics that add character to spaces.

Eco-friendly options extend to stones like granite sourced from quarries with strict environmental regulations. These materials are appreciated for their longevity and minimal ecological impact.

Additionally, stones produced through energy-efficient methods or local sources further contribute to sustainability by lowering carbon footprints and reducing transportation emissions.

These green materials often benefit from being biodegradable or easily repurposed, aligning with broader eco-conscious trends. 

5. Bold Patterns and Geometric Designs

Bold patterns and geometric designs are leading the charge in stone tile trends for 2024, offering a vibrant way to enhance interiors. These designs, characterised by sharp angles, repetitive motifs, and intricate patterns, introduce dynamic visual elements that capture attention and elevate the space.

Geometric tiles featuring patterns such as chevrons, hexagons, and herringbones give floors and walls a contemporary edge.

Their distinct shapes and contrasting colours create a striking visual impact, turning ordinary surfaces into focal points. These tiles are versatile, making them suitable for large expanses and accent features.

How to Choose the Right Trend for Your Home

Selecting the right stone tile trend for your home in 2024 involves balancing aesthetics with functionality. The first step is to assess your space. Consider the room’s size, lighting, and existing décor. 

For smaller rooms, large format tiles can create a sense of expansiveness, while bold patterns and geometric designs add striking visual interest to larger spaces or feature areas.

Next, evaluate the room’s function. High-traffic areas like kitchens and hallways benefit from durable options such as textured finishes or sustainable, low-maintenance and resilient stones

Conversely, natural and earthy tones are ideal for a serene and timeless look, providing versatility and a calming atmosphere.

Lastly, reflect on your style. Sustainable and eco-friendly stones align with green living practices and offer long-term durability. Bold patterns and geometric designs provide a contemporary edge. Consider how each trend complements your existing décor and the overall mood you wish to achieve.

Conclusion

Embracing the top stone tile trends for 2024 can transform your home into a stylish haven. Whether you prefer natural tones, textured finishes, or bold designs, there’s a trend to suit every taste. 

Ready to elevate your interior design? Contact Splendour In Stone Melbourne today for expert advice on premium stone tiles.

What is the Standard Grout Size?

Choosing the right grout size for your tiles can be confusing, with various options available.

Incorrect grout size can lead to issues like uneven tiles, grout cracking, and an unappealing finish.

To help you achieve a flawless tiling job, we explain the standard grout sizes and guide you in selecting the perfect width for different tile types and applications. Read on to ensure your tiling project is both beautiful and durable.

Understanding Grout

Grout is essential in any tiling project, serving both functional and aesthetic purposes. 

It is a dense fluid, usually a mixture of water, cement, and sand, used to fill the gaps between tiles. Grout helps secure tiles in place and prevents debris and moisture from getting underneath, which can cause damage over time.

Types of Grout

There are two main types of grout used in tiling:

  1. Sanded Grout: This type of grout contains sand, making it more durable and resistant to cracking. It is commonly used for wider joints (greater than 1/8 inch) because the sand helps to prevent the grout from shrinking as it cures.
  2. Unsanded Grout: Unsanded grout is smoother and doesn’t contain sand. It is typically used for narrower joints (less than 1/8 inch) and on delicate surfaces like glass or polished tiles where sanded grout could scratch the surface.

Importance of Grout in Tiling

Grout plays a crucial role in tiling beyond simply filling the gaps between tiles. Firstly, grout provides structural integrity to the tiled surface by bonding the tiles together, preventing them from shifting and becoming uneven over time. 

This ensures the durability and longevity of your tiled surfaces, be it walls, floors, or countertops.

Moreover, grout acts as a protective barrier against moisture. Sealing the spaces between tiles prevents water and other liquids from seeping underneath, damaging the substrate and promoting mould growth. This is especially vital in moisture-prone areas such as bathrooms and kitchens.

Aesthetically, grout contributes to the overall look of your tiled surface. The colour and finish of grout can enhance the design, creating a cohesive and polished appearance. Choosing the right grout colour can blend with the tiles for a seamless look or contrast for a striking effect.

Lastly, grout makes maintenance easier. Properly sealed grout lines are easier to clean and maintain, helping to keep tiled surfaces looking pristine for years. Tiles would be more prone to damage, dirt accumulation, and premature wear without grout.

Factors Influencing Grout Size

Selecting the right grout size is crucial for the success of a tiling project. Several factors influence this decision, each impacting the functionality and aesthetic of the finished surface. Understanding these factors can help you choose the appropriate grout width for your needs.

1. Tile Type and Size

The type and size of the tiles you use play a significant role in determining the grout size. Different tiles have varying requirements for grout width. Small tiles typically require narrower grout lines to maintain a balanced and proportional look. 

A grout size of 1/16 to 1/8 inch is usually recommended for small tiles. For medium tiles, a grout size of 1/8 to 3/16 inches is common, as this size allows for slight variations in tile dimensions and helps maintain uniform spacing. 

Larger tiles often need wider grout lines, around 3/16 to 1/2 inch, to accommodate the potential for more significant size variations and to ensure stability.

2. Tile Placement

The location where the tiles will be installed also influences the grout size. Different areas have different requirements. Floor tiles generally require wider grout lines (3/16 to 1/2 inch) to account for movement and to provide additional stability. 

For walls, wall tiles can have narrower grout lines (1/16 to 1/8 inch) since they do not experience as much stress and movement as floor tiles. 

The grout size for kitchen or bathroom backsplashes can vary depending on the tile size and design preference, but it typically ranges from 1/16 to 1/8 inch.

3. Tile Material

The material of the tiles affects the choice of grout size. Different materials have different characteristics that must be considered. 

Ceramic and porcelain tiles are generally consistent in size and shape, allowing for narrower grout lines (1/16 to 1/8 inch). 

Natural stone tiles, like marble, travertine, and slate, often have more irregular edges and variations in size, necessitating wider grout lines (3/16 to 1/2 inch) to accommodate these inconsistencies.

4. Expansion and Contraction

Expansion and contraction are critical factors to consider when determining the appropriate grout size for your tiling project. 

Temperature fluctuations and humidity changes cause tiles and the substrate to expand and contract. This movement can lead to cracked tiles and grout and damage the underlying structure without proper grout lines.

Grout lines act as a buffer, absorbing the stress caused by these natural movements. This is particularly important in areas with significant temperature variations, such as outdoor spaces or floors with underfloor heating. 

Wider grout lines (3/16 to 1/2 inch) are typically recommended for such environments, as they provide more flexibility to accommodate expansion and contraction.

In contrast, areas with stable temperatures and minimal moisture variation, like indoor walls or backsplashes, can utilise narrower grout lines. However, even in these settings, grout still plays a crucial role in maintaining the integrity of the tile installation.

Standard Grout Sizes

Understanding standard grout sizes is essential for a professional and durable tile installation. Grout sizes typically range from 1/16 inch to 1/2 inch, depending on tile type, size, and installation location.

A grout size of 1/16 to 1/8 inch is common for small tiles, such as mosaics. This narrow width maintains a balanced and seamless appearance, preventing the grout from overpowering the delicate design of the tiles. 

Medium-sized tiles, like standard ceramic or porcelain tiles, usually require grout lines of 1/8 to 3/16 inch. This size accommodates slight variations in tile dimensions and ensures uniform spacing.

Larger tiles, including natural stone or large-format tiles, often need wider grout lines, typically ranging from 3/16 to 1/2 inch. These wider gaps help manage the more significant size variations and ensure stability, especially in areas subject to movement or temperature changes.

Selecting the correct grout size is important for your tile installation’s aesthetics, functionality, and longevity.

Tips for Preventing Grout Issues

Preventing grout issues is essential for maintaining the appearance and durability of your tiled surfaces. Proper preparation, application, and maintenance are key to avoiding common problems like cracking, discolouration, and mould growth.

First, ensure the substrate is clean, dry, and stable before applying grout. Any debris or moisture can compromise the grout’s adhesion and lead to premature failure. Use a high-quality grout suitable for your tile type and location. For example, epoxy grout is more resistant to stains and moisture, making it ideal for kitchens and bathrooms.

Follow the manufacturer’s instructions for mixing and applying grout. Incorrect mixing ratios or application techniques can result in weak or uneven grout lines. To ensure proper set, allow adequate curing time before exposing the grout to water or heavy traffic.

Sealing the grout after it has cured provides extra protection against stains and moisture. Regularly inspect and clean the grout lines using pH-neutral cleaners to prevent discolouration and damage.

Address any minor issues promptly to prevent them from becoming major problems. A grout repair kit can repair small cracks or gaps, maintaining the integrity of the tiled surface.

Conclusion

Choosing the right grout size and properly installing grout are critical steps in achieving a professional and durable tile installation. 

By understanding the impact of grout size on aesthetics and functionality, selecting the appropriate tools and techniques, and proactively addressing common grout issues, you can ensure a beautiful and long-lasting tiled surface in any space.

Roman Sandstone: Perfect for Sophisticated Walls in Warrandyte

Finding the right material for your walls in Warrandyte can be challenging, especially if you seek sophistication and durability.

Many options fall short, lacking the elegant appearance or the robust nature required for lasting beauty.

Enter Roman Sandstone – the perfect solution. Renowned for its timeless elegance and exceptional strength, Roman Sandstone transforms any space into a sophisticated haven, ensuring aesthetic appeal and enduring quality.

Benefits of Using Roman Sandstone for Walls

Roman Sandstone offers numerous benefits for constructing sophisticated walls, making it an ideal choice for homeowners in Warrandyte. Here are some key advantages:

  • Durability: Known for its robustness, Roman Sandstone is highly resistant to weathering, ensuring that your walls maintain their pristine appearance for years to come.
  • Aesthetic Appeal: Roman sandstone’s unique texture and warm, earthy tones enhance the overall look of any property with a touch of elegance and timeless beauty.
  • Versatility: This material complements various architectural styles, from traditional to contemporary designs. It blends seamlessly with other building materials like wood and metal, enhancing its adaptability.
  • Low Maintenance: Roman Sandstone walls require minimal upkeep. Regular, simple cleaning is enough to retain their charm and appearance.
  • Thermal Insulation: Roman Sandstone provides excellent thermal insulation, helping to keep your home cool in the summer and warm in the winter. This energy efficiency can reduce heating and cooling costs, offering long-term financial benefits.
  • Investment Value: By choosing Roman Sandstone for your walls, you invest in a material that combines aesthetic appeal, durability, and practicality, adding value to your property.

Applications of Roman Sandstone in Warrandyte Homes

Roman Sandstone is a versatile material that enhances both the aesthetic and functional aspects of homes in Warrandyte. It is an excellent choice for exterior cladding, providing a sophisticated, durable facade that withstands the elements while enhancing curb appeal. 

The natural colours and textures of Roman Sandstone blend harmoniously with the surrounding landscape, creating a cohesive look. Roman Sandstone can be used to create stunning feature walls inside the home

Whether in the living room, hallway, or bedroom, its unique patterns and hues add a focal point that exudes elegance and timeless charm.

Roman Sandstone is also ideal for crafting beautiful, heat-resistant fireplaces. Its natural resilience to heat ensures safety, while its aesthetic qualities contribute to a cosy and stylish atmosphere.

Roman Sandstone is perfect for constructing garden walls, retaining walls, and other landscaping features in outdoor spaces

Its durability ensures it can handle exposure to the weather while providing a visually appealing backdrop for plants and outdoor decor.

Additionally, Roman Sandstone can be utilised for pathways and patios, offering a non-slip, hard-wearing surface that enhances the functionality and beauty of garden spaces. 

Design Ideas with Roman Sandstone

Roman Sandstone offers endless design possibilities, adding sophistication and elegance to any Warrandyte home. Here are some creative design ideas to inspire your next project:

  1. Feature Walls: Create stunning feature walls in your living room, hallway, or bedroom using Roman Sandstone. The stone’s natural textures and earthy tones add a focal point that exudes timeless beauty and charm.
  2. Outdoor Facades: Roman sandstone cladding enhances the exterior of your home. Its durability and resistance to weathering make it perfect for facades, creating a sophisticated and cohesive look that blends seamlessly with the natural surroundings.
  3. Fireplaces: Design a beautiful, heat-resistant fireplace with Roman Sandstone. Its natural resilience to heat ensures safety, while its aesthetic qualities contribute to a cosy and stylish atmosphere, becoming the centrepiece of your living space.
  4. Garden Walls: Construct garden walls and retaining walls using Roman sandstone. Its durability ensures it can handle exposure to the weather while providing a visually appealing backdrop for your outdoor space, complementing plants and other garden features.
  5. Pathways and Patios: Lay Roman Sandstone for pathways and patios. This non-slip, hard-wearing surface enhances the functionality and beauty of your garden. The stone’s natural look integrates well with outdoor landscapes, seamlessly transitioning from house to garden.

Installation Tips for Roman Sandstone Walls

Installing Roman Sandstone walls requires careful planning and attention to detail to ensure a flawless finish. Here are some essential tips to guide you through the process:

  1. Surface Preparation: Start by preparing the surface where the sandstone will be installed. Ensure it is clean, dry, and free from debris. A solid, stable foundation is crucial for the wall’s longevity.
  2. Correct Tools and Materials: Use the appropriate tools and high-quality materials. This includes using a suitable adhesive or mortar for stone installations, ensuring a strong bond and durability.
  3. Proper Alignment: Lay the stones before applying adhesive to check for alignment and fit. This helps in planning the placement of each stone and avoids any misalignment during installation.
  4. Adhesive Application: Apply the adhesive evenly to the back of each stone, covering the entire surface to prevent gaps that could lead to instability or water infiltration.
  5. Grouting and Sealing: Once the stones are in place, apply grout to fill the joints. After the grout has been set, seal the stones and grout lines to protect against moisture and staining, enhancing the longevity and appearance of your wall.
  6. Maintenance Considerations: Regularly inspect your Roman Sandstone walls for any signs of damage or wear and perform maintenance as needed to keep them looking their best.

Maintenance and Care for Roman Sandstone Walls

Proper maintenance and care are essential to preserve the beauty and longevity of your Roman Sandstone walls. Here are some key tips to keep them in top condition:

  • Regular Cleaning: Regularly clean your Roman Sandstone walls to remove dirt, dust, and grime. Use a soft brush and mild detergent mixed with water to scrub the surface gently. Avoid harsh chemicals that can damage the stone.
  • Sealing: Apply a high-quality sealant to your sandstone walls every few years. Sealing protects the stone from moisture, stains, and other environmental factors, maintaining its appearance and durability.
  • Inspect for Damage: Periodically inspect your walls for any signs of damage, such as cracks, chips, or loose stones. Address any issues promptly to prevent further deterioration. Small repairs can often be managed with appropriate stone fillers or adhesives.
  • Avoid High-Pressure Washing: High-pressure washing can erode the surface of Roman Sandstone and cause long-term damage. Instead, opt for low-pressure methods or professional cleaning services experienced with natural stone.
  • Protect from Weather: If your Roman Sandstone walls are exposed to harsh weather conditions, consider installing protective measures like overhangs or awnings to shield them from excessive rain or direct sunlight.

Where to Source Roman Sandstone in Warrandyte

Finding high-quality Roman Sandstone for your sophisticated walls in Warrandyte is crucial for achieving the best results. Here are some reliable suppliers :

  1. Splendour In Stone: Renowned for its premium quality and extensive range, Splendour In Stone is the best and most reliable supplier of Roman Sandstone. They offer personalised service and expert advice to help you choose the perfect stone for your project.
  2. Melbourne Brick : A well-known supplier offering a wide range of natural stones, including Roman Sandstone. They have multiple locations across Melbourne and provide excellent customer service.
  3. Cinajus: A Sydney-based supplier with a strong reputation for quality natural stones, including Roman Sandstone. They offer nationwide delivery and have a comprehensive online catalogue.
  4. Craftstone: Craftstone offers various natural stone products, including durable and aesthetically pleasing Roman Sandstone. It focuses on high-quality materials and exceptional service.

Conclusion

Roman Sandstone’s timeless beauty, unmatched durability, and design versatility make it the ultimate choice for elevating your Warrandyte walls. Transform your space with this natural masterpiece – contact Splendour in Stone today for expert advice, inspiration, and a stunning range of Roman Sandstone options.

The Environmental Impact of Stone Quarrying and Extraction Processes

Stone quarrying and extraction processes pose a significant environmental problem.

Have you considered the detrimental effects on ecosystems, air quality, and water resources?

Discover sustainable practices and regulatory measures in our comprehensive article to mitigate the environmental impact.

Understanding Stone Quarrying and Extraction

Stone quarrying involves the extraction of natural stones from the earth’s crust for various purposes, including construction, decoration, and manufacturing. The process typically begins with locating suitable stone deposits through geological surveys. 

Once identified, the quarrying process commences with heavy machinery to remove large blocks of stone from the ground.

Extraction methods vary depending on the type of stone and the site’s geological characteristics. Common techniques include drilling, blasting, and cutting. Explosives are often used to break apart rock formations and facilitate extraction.

After extraction, the stones undergo further processing, such as cutting, shaping, and polishing, to meet specific requirements for construction or other applications. This processing may occur on-site at the quarry or off-site facilities.

Stone quarrying and extraction can have significant environmental impacts, including habitat destruction, soil erosion, air and water pollution, and landscape alteration. Understanding these processes is essential for implementing effective environmental management strategies and promoting sustainable practices in the stone industry.

Environmental Impact on Land

  • Habitat destruction and fragmentation due to physical alteration of the landscape
  • Displacement of wildlife and disruption of ecological processes
  • Soil erosion and degradation from the removal of vegetation and topsoil
  • Loss of soil fertility and decreased soil quality
  • Increased risk of sedimentation in nearby water bodies
  • Adverse effects on aquatic ecosystems and water quality
  • Long-term environmental challenges in abandoned quarries, including invasive species proliferation and contamination risks
  • Mitigation measures and restoration efforts are necessary to promote sustainable land use practices and minimise ecological damage.

Environmental Impact on Air Quality

  • Release of particulate matter (PM) during drilling, blasting, and crushing activities
  • PM pollution can lead to respiratory problems and other health issues
  • Emission of nitrogen oxides (NOx), sulfur dioxide (SO2), and volatile organic compounds (VOCs)
  • These pollutants contribute to smog and ground-level ozone formation
  • Diesel-powered machinery emits nitrogen dioxide (NO2) and particulate matter
  • Measures like dust suppression techniques and machinery optimisation can mitigate air quality degradation
  • Implementing air quality monitoring programs is essential for assessing and addressing the impact on nearby communities.

Environmental Impact on Water Resources

  • Alteration of hydrological patterns due to removal of vegetation and topsoil
  • Increased erosion, sedimentation, and flooding in nearby water bodies
  • Contamination of water sources from the discharge of pollutants like sediment, heavy metals, and chemicals
  • Leaching of pollutants into groundwater, compromising water quality
  • Risks to human health and aquatic ecosystems
  • Lowering of water tables impacting water availability for communities, agriculture, and wildlife
  • Mitigation measures include erosion and sediment control, proper wastewater management, and groundwater quality monitoring

Effects on Wildlife and Ecosystems

  • Habitat destruction and fragmentation due to physical alteration of the landscape during quarrying activities
  • Displacement of wildlife species from their natural habitats, leading to population declines and loss of biodiversity
  • Disruption of ecological processes and food chains, affecting the balance of ecosystems
  • Increased risk of invasive species colonisation in disturbed areas, further threatening native flora and fauna.
  • Loss of nesting sites, shelter, and food sources for various wildlife species
  • Negative impacts on endangered and sensitive species that rely on intact habitats for survival
  • Alteration of natural watercourses and wetland habitats, affecting aquatic ecosystems and associated wildlife
  • Implementation of habitat restoration and conservation measures to mitigate the effects on wildlife and ecosystems, including reforestation, habitat enhancement, and protected area designation

Energy Consumption and Carbon Footprint

  • Stone quarrying and extraction processes require significant energy inputs, contributing to their carbon footprint. The extraction of natural stones involves using heavy machinery, such as excavators, loaders, and haul trucks, which consume large amounts of fossil fuels. 
  • Energy-intensive processes like drilling, blasting, and crushing contribute to energy consumption and greenhouse gas emissions.
  • Transportation of extracted stone materials to processing facilities and end-users, typically using diesel-powered trucks or other vehicles, also adds to the carbon footprint.
  • Moreover, the processing of stone materials, including cutting, shaping, and polishing, requires energy from electricity or other sources, further contributing to carbon emissions.
  • Reducing energy consumption and carbon footprint in the stone quarrying industry is crucial for mitigating climate change impacts. Implementing energy-efficient technologies, optimising transportation logistics, and utilising renewable energy sources can help minimise the environmental impact of stone extraction processes while promoting sustainability in the industry.

Climate Change Implications

  • Increased greenhouse gas emissions from energy-intensive quarrying processes: Contribute to global warming and climate change.
  • Deforestation and habitat destruction associated with stone quarrying: Reduce carbon sequestration capacity, exacerbating climate change effects.
  • Alteration of landscapes and hydrological patterns: Disrupt local ecosystems, increasing climate-related risks such as flooding and erosion.
  • Transportation of stone materials: Emits additional greenhouse gases, further contributing to climate change.
  • Stone quarrying’s climate change implications: Emphasise the urgency of adopting sustainable practices to minimise environmental impact and mitigate climate-related risks.

Mitigation Measures and Best Practices

Implementing effective mitigation measures and adopting best practices are essential for minimising the environmental impact of stone quarrying and extraction processes. Some key strategies include:

  • Environmental Impact Assessments (EIAs): Conduct thorough EIAs before initiating quarrying operations to identify potential environmental risks and develop mitigation plans.
  • Sustainable Quarrying Practices: Promote sustainable quarrying techniques, such as selective extraction methods and quarried areas’ reclamation, to minimise habitat destruction and landscape alteration.
  • Dust Suppression Techniques: Employ dust suppression measures, such as water spraying and covering conveyor belts, to reduce airborne dust emissions and protect air quality in surrounding areas.
  • Water Management: Implement proper wastewater management systems to prevent contamination of water sources and minimise the impact on aquatic ecosystems.
  • Energy Efficiency: Invest in energy-efficient machinery and equipment to reduce energy consumption and greenhouse gas emissions associated with quarrying activities.
  • Community Engagement: Engage with local communities and stakeholders to address concerns, promote transparency, and ensure quarrying operations benefit the community while minimising negative impacts.
  • Regulatory Compliance: Adhere to relevant environmental regulations and standards to ensure compliance and accountability in quarrying operations.

Stakeholder Engagement and Community Involvement

Effective stakeholder engagement and community involvement are crucial to mitigating the environmental impact of stone quarrying and extraction processes. Engaging with stakeholders, including local communities, government agencies, environmental organisations, and industry representatives, fosters transparency, collaboration, and shared decision-making.

Community involvement initiatives such as public consultations, information sessions, and participatory decision-making processes enable residents to voice their concerns, provide feedback, and contribute to environmental management strategies. 

Regulatory Framework

A robust regulatory framework is essential for managing the environmental impact of stone quarrying and extraction processes. Local, regional, and national government agencies enact regulations and guidelines to ensure compliance with environmental standards and protect natural resources. 

These regulations typically cover various aspects of quarrying operations, including land use, air and water quality, wildlife conservation, and rehabilitation of quarried areas.

Environmental Impact Assessments (EIAs) are often required before commencing quarrying activities to assess potential environmental risks and propose mitigation measures. 

Permitting processes ensure quarry operators adhere to environmental regulations and obtain necessary approvals before initiating operations.

Regular monitoring and enforcement of regulatory compliance are crucial for minimising environmental harm and holding quarry operators accountable for their actions. Authorities may impose fines, penalties, or even suspension of operations for non-compliance with environmental regulations.

Conclusion: Call to Action

While stone quarrying has undeniable environmental consequences, proactive measures such as stakeholder engagement, regulatory enforcement, and sustainable practices offer pathways to mitigate its impact. 

Let’s advocate for stringent regulations and responsible quarry management to safeguard our ecosystems for future generations.

Restoring the Beauty of Timeworn Stone: Repair Techniques

While charming, timeworn stone often shows its age with cracks, chips, and discolouration. These blemishes can detract from the beauty of your home or landscape.

Neglecting these issues can worsen the damage, leading to costly replacements and a loss of the stone’s historic character.

Fortunately, several restoration techniques are available to repair and revive timeworn stone. You can restore its natural beauty and protect it with the right approach for years.

Understanding Timeworn Stone

The passage of time leaves its mark on stone, creating a unique patina that speaks of history and character. This patina may include subtle colour variations, a softened surface texture, or even the presence of mosses and lichens. However, time also brings about deterioration. Here’s what you need to know:

A. Characteristics of Aged Stone

  • Patina: A thin surface layer altered by exposure to the elements, giving the stone a sense of history.
  • Colour Changes: Sunlight, water, or minerals can lead to fading, darkening, or staining.
  • Surface Texture: Erosion creates a smoother, sometimes pitted surface than fresh stone.

B. Factors Causing Deterioration

  • Weathering: Freeze-thaw cycles, rain, and wind physically erode stone over time.
  • Biological Growth: Mosses, lichens, and algae can trap moisture and release acids, harming the stone.
  • Chemical Attack: Acid rain, pollutants, and harsh cleaners damage stone surfaces.
  • Improper Repairs: Previous repairs with incompatible materials can accelerate deterioration.

Assessment and Preparation

A successful restoration begins with carefully evaluating your stone’s condition and thoughtful preparation. Here’s why this stage is crucial:

A. Importance of Assessment

  • Identifying Damage: Assess the extent of cracks, chips, discolouration, and biological growth to determine the most suitable repair techniques.
  • Understanding Causes: Determine if the damage is from weathering, past repairs, or underlying issues like moisture problems. Addressing the root cause prevents future deterioration.
  • Matching Materials: Identify the stone type to ensure compatibility between replacement materials or repair mortars, ensuring a seamless result.

B. Preparation Steps

  • Cleaning: Gently remove dirt, debris, and biological growth using appropriate methods for your stone type. This allows for better assessment and repair of adhesion.
  • Surface Preparation: This might include filling minor cracks, removing loose mortar, or roughening surfaces to improve the adhesion of new materials. Proper preparation is essential for a long-lasting restoration.

Repairing Chips and Cracks

Addressing those unsightly chips and cracks is key in restoring your stone’s beauty. Here’s what you need to know:

A. Techniques for Repair

  • Small Chips: Simple fills with coloured epoxy or stone-dust-infused resin can disguise minor chips.
  • Larger Chips: Reattach broken pieces with epoxy or replace missing sections with matching stone and mortar.
  • Cracks: Stabilise cracks by injecting flexible epoxy or resin. This prevents further widening and water penetration.

B. Choosing Materials & Methods

  • Material Selection: Epoxies and resins are common because of their strength and colour-matching abilities. However, for historical accuracy, lime-based mortars might be more suitable.
  • Application: Small repairs can often be DIY, while larger cracks or replacements may require a professional.
  • Colour Matching: Tinting repair materials are crucial for a seamless blend with the existing stone. Experiment on an inconspicuous area first.

Patching and Blending

The art of restoration lies in fixing damage and making those repairs disappear. Here’s how to achieve a seamless finish:

A. Methods for Patching and Blending

  • Filling and Leveling: Use repair materials to overfill the damage slightly. Once cured, carefully sand or grind them flush with the surrounding surface.
  • Colour Matching: Use pigments or stone dust to tint repair materials to match the original stone’s colour variations perfectly.
  • Texture Replication: Recreate the texture of the stone using fine tools or texturing compounds. This is particularly important for smooth or polished stones.
  • Feathering: Blend the edges of repairs into the existing surface for an invisible transition.

B. Tips for a Seamless Result

  • Practice: First, test your techniques and colour matching on a scrap piece of stone.
  • Lighting: Work in good lighting, ideally similar to where the stone is located, to judge your blending accurately.
  • Patience: Blending may require multiple layers and adjustments. Take your time to achieve perfection.
  • Sealing: After repairs, consider applying a sealer to the entire surface to create a uniform finish and protect the stone.

Rejuvenating Surface Finishes

Sometimes, restoring a stone’s beauty comes down to bringing back its original shine and lustre. Here’s how to revitalise those surfaces:

A. Techniques for Surface Revival

  • Cleaning: Thoroughly clean the stone to remove built-up grime and reveal its true condition.
  • Polishing: Use successively finer diamond polishing pads or compounds to buff out scratches and create a smooth, reflective surface.
  • Honing: This creates a less glossy, satin-like finish using finer abrasives than polishing.
  • Chemical Treatments: Some stones may benefit from specialised enhancers to deepen colour or reveal specific characteristics.

B. Choosing the Right Finish

  • Desired Look: Do you want a high-gloss polish or a softer, honed finish? Consider the stone type and your aesthetic preference.
  • Practicality: Polished surfaces may be more susceptible to showing wear in high-traffic areas.
  • Professional Assistance: Polishing and honing often require specialised tools and experience. Consider a professional for larger areas or delicate stone types.
  • Maintenance: Polished or honed surfaces may need periodical resealing to maintain protection and their desired finish.

Consolidation and Strengthening

When weathering has weakened the stone’s structure, deeper intervention is needed to prevent further crumbling. Here’s what to know about consolidation:

A. Strategies for Weakened Stone

  • Consolidation: This involves applying liquid consolidants that penetrate the stone’s pores, binding loose particles and increasing internal strength.
  • Strengthening: In some cases, more robust strengthening agents might be used, providing a deeper level of reinforcement.

B. Consolidants and Strengthening Agents

  • Material Considerations: The choice of consolidant depends on the stone type and its porosity. Common options include silicate-based compounds, lime-based materials, or acrylic resins.
  • Compatibility: It is crucial to choose consolidants that will not harm the stone, alter its appearance, or trap moisture within.
  • Application: Consolidants are typically applied by brushing, spraying, or specialised techniques such as poulticing. Deeply weakened stone may require multiple applications.
  • Professional Expertise: Due to the sensitivity of the process and the variety of products on the market, consulting a stone restoration professional is often advisable.

Colour Enhancement and Stain Removal

Addressing discolouration and stubborn stains is vital for a fully refreshed stone surface. Here’s how to tackle these issues:

A. Techniques for Colour and Stain Removal

  • Stain Identification: Determine the stain’s source (oil, organic, rust, etc.). This dictates the best removal method.
  • Poultices: These are absorbent pastes applied directly to stains. They draw out the stain over time. Depending on the stain type, poultice powders are mixed with specific liquids.
  • Chemical Cleaners: Specialised cleaners formulated for stone might be needed for specific stains. Always test in an inconspicuous area first.
  • Colour Enhancers: These products intensify the stone’s natural colour, especially after fading or cleaning.

B. Cautions and Considerations

  • Testing: Always test any stain removal or enhancement product on a hidden area to avoid adverse reactions.
  • Harsh Chemicals: Avoid acids or bleach on most stones unless specifically recommended by a professional.
  • Deep Stains: Some stains may be too deep-set for DIY removal and require professional services.
  • Prevention: Sealing your stone helps prevent many stains from setting in the first place.

Grout and Joint Repair

Damaged grout doesn’t just look bad; it compromises the integrity of your stonework. Here’s what you need to know for effective joint repairs:

A. Repairing Damaged Joints

  • Removing Old Grout: Carefully chisel or grind loose, crumbly grout or mortar. Take care not to damage the surrounding stone.
  • Preparation: Clean the joints thoroughly to remove dust and debris for optimal adhesion of the new material.
  • Re-grouting/Repointing: Fill the joints with a suitable mortar or grout, working it firmly into the gaps. Shape to match the original joint profile.

B. Material Selection & Techniques

  • Matching Matters: Choose a grout or mortar that matches the existing colour and texture as closely as possible.
  • Strength & Compatibility: Ensure the chosen material is strong enough for the application and compatible with your stone type.
  • Historic Structures: To maintain breathability, traditional lime-based mortars may be required for historic preservation.
  • DIY vs. Professional: Homeowners can often tackle smaller re-grouting projects, while larger repointing jobs may necessitate a skilled mason.

Protection and Maintenance

Your restoration efforts deserve lasting protection. Here’s how to safeguard your stone and keep it looking its best:

A. The Importance of Sealants

  • Stain Prevention: Sealants create a barrier against spills and staining, making cleanup easier.
  • Water Resistance: They minimise water absorption, reducing the risk of damage caused by freeze-thaw cycles or efflorescence (salt deposits).
  • UV Protection: Some sealants help protect against fading caused by sunlight.
  • Choosing Sealants: Select a sealant appropriate for your stone type (porous vs. dense) and the desired finish (matte vs. glossy).

B. Ongoing Maintenance

  • Regular Cleaning: Gently remove dirt and debris with cleaners formulated for natural stone. Avoid harsh chemicals.
  • Address Spills Quickly: Blot up spills immediately to prevent staining.
  • Resealing: Reapply sealants according to the manufacturer’s recommended schedule to maintain protection.
  • Professional Inspections: For major restorations or historic stone, consider periodic professional evaluations to ensure the longevity of your repairs.

Case Studies and Examples

Seeing the principles of stone restoration in action can inspire and guide your project. Here’s a glimpse into some successful transformations:

  • Historic Building Facade: A weathered historic limestone facade might be cleaned with specialised methods, have cracks injected with flexible fillers, and broken pieces replaced with carefully matched stone.
  • Stained Marble Fireplace: Deep-set oil stains on a marble fireplace could be treated with poulticing methods. Afterwards, the entire piece could be honed and polished to restore its original lustre.
  • Crumbling Garden Wall: A deteriorating garden wall could have its mortar repointed, loose stones re-set, and missing sections rebuilt with reclaimed stone that matches the original.

Finding Examples

  • Restoration Companies: Many stone restoration specialists have before-and-after galleries on their websites.
  • Historic Preservation Organisations: These groups often document restoration projects on historically significant buildings.
  • Online Resources: Search for specific restoration examples based on your stone type or project goals.

Professional vs. DIY Restoration

Deciding whether to DIY or call in the experts is a common question. Here’s a breakdown to help you decide:

A. When to Consider a Professional

  • Scale of the Project: Large areas or complex repairs often require specialised tools and extensive experience.
  • Stone Type: Delicate or precious stones are best left to professionals to avoid costly mistakes.
  • Historic Significance: Restoring historic structures often necessitates specialised techniques and materials to maintain their integrity.

B. What Makes Restoration Challenging

  • Correct Diagnosis: Accurately identifying damage types and causes is crucial for choosing the right fix.
  • Specialised Materials: Consolidants, repair mortars, and colour-matching materials may not be readily available to the average homeowner.
  • Tools and Techniques: Grinding, polishing, and other restoration methods often require specific tools and skills acquired through practice.
  • Risk of Further Damage: Without proper understanding, well-intentioned DIY attempts can worsen the problem.

Conclusion

The right techniques can breathe new life into timeworn stone, from filling cracks to reviving colour. 

Don’t let your stone’s beauty fade away—explore restoration options and rediscover its unique charm. 

The satisfaction of preserving a piece of history is well worth the effort.

Stone Water Features: Design Ideas for Tranquil Gardens

Is your garden lacking that serene, calming atmosphere you crave? 

The constant noise and hustle of everyday life can leave you feeling stressed and overwhelmed, making it difficult to find solace in your outdoor space. 

Introducing stone water features is the perfect solution to transform your garden into a tranquil oasis. From bubbling fountains to soothing streams, these natural elements will add visual interest and create a peaceful ambience with their gentle sounds.

Benefits of Stone Water Features

Let’s be honest; nothing beats the classic look of stone in a garden. But stone water features go way beyond just looking awesome. Here’s why they’re a fantastic addition to your outdoor space:

  • Visual Harmony: Stone effortlessly blends with any garden with its natural textures and colours. Want a modern, minimalist vibe? Think polished granite. Looking for rustic charm? Stacked fieldstone will do the trick.
  • The Sound of Serenity: The gentle trickle or rush of water over a stone has a powerful calming effect. It magically drowns out traffic or distracting noises, creating your little oasis.
  • A Stress-Busting Sanctuary: It’s not just an excellent idea; science backs it up. The sound of water measurably reduces stress and promotes a deep sense of relaxation. It’s your spa in the backyard.
  • Welcome, Wildlife!: Birds and butterflies love a good water source. Add a stone water feature and your garden becomes a vibrant haven.

Types of Stone Water Features

Stone water features offer stunning variety for any garden design. Here’s an overview of the most popular types:

  • Fountains: These come in many styles, from classic tiered designs to modern spheres and minimalist basins. Fountains create beautiful focal points and add soothing sounds.
  • Waterfalls: Stacked stone offers rustic charm, while polished stone waterfalls deliver a contemporary feel. These provide the most immersive soundscapes for ultimate relaxation.
  • Ponds: Stone-lined ponds bring a sense of peace and natural beauty. They can feature water plants, fish, and reflective surfaces that enhance your garden’s ambience.
  • Wall Fountains: Perfect for small spaces, wall fountains range from minimalist to ornate. They transform patios and small gardens into tranquil havens.
  • Disappearing / Pondless Waterfalls: These offer the beauty of a waterfall without a pond. Water recirculates, making them a low-maintenance option.

Fountain Design Ideas

a. Traditional Fountain Designs

  • Carved Stone Sculptures: Add a touch of timeless elegance with fountains featuring carved sculptures like cherubs, mythical creatures, or overflowing urns. These bring a classic, artistic feel to your outdoor space.
  • Tiered Arrangements: Multi-tiered fountains create a dramatic focal point. These grand designs work beautifully in formal gardens or courtyards, where their size can be fully appreciated.

b. Modern Fountain Designs

  • Sleek Stone Structures: Think polished spheres, geometric shapes, or minimalist basins. These fountains emphasise clean lines and let the beauty of the stone and water interaction shine. They complement modern homes and zen-inspired gardens.
  • Wall-Mounted Wonders: Space-saving wall fountains offer modern appeal. Opt for bas-relief carvings for an artistic touch or simple stone basins for a purely minimalist vibe. Adding LED lighting creates a spectacular nighttime display.
  • Bubbling Boulders: Transform natural boulders into fountains for an organic feel. Water can trickle down the rock or emerge from the stone with a gentle bubbling effect. These blend effortlessly into naturalistic garden settings.

Pond and Waterfall Designs

a. Naturalistic Pond Designs

  • Stone-Edged Oasis: Mimic the beauty of a natural pond by using stones to create a soft, organic border. Add boulders of varying sizes for visual interest and incorporate diverse aquatic plants like water lilies, irises, or cattails. These ponds create a haven for wildlife and a sense of tranquillity.

b. Cascading Waterfall Designs

  • Dramatic Stone Formations: Stacked fieldstone waterfalls offer a rustic, timeless feel ideal for sloped areas. Conversely, smooth, polished stone creates a sleek, contemporary look. Let the natural formation of the stones guide the flow of water for a stunning and unique waterfall feature. The sound of cascading water will bring a profound sense of peace to your garden.

Incorporating Stone Water Features into Garden Layouts

a. Selecting the Ideal Location & Placement

  • Choose a Relaxing Spot: Place your water feature where you can frequently enjoy its calming sights and sounds. Consider a view from the patio or a window inside your home.
  • Factor in Sunlight & Power: Aquatic plants need some sunlight, and all water features require access to a power source for pumps and lighting if desired.
  • Consider Scale & Proportion: A small fountain perfectly fits an intimate courtyard, while a larger pond and waterfall combination demands a more expansive garden setting.

b. Integrate with Existing Landscaping

  • Harmonise with Stonework: Choose stone for your water feature that matches or complements existing stone elements in your garden, like pathways, retaining walls, or patios.
  • Utilise Natural Flow: Guide the visitor’s eye towards the water feature with pathways, stepping stones, or strategically placed plants that create a visual path.

Lighting and Ambiance

a. Enhancing Stone Water Features with Strategic Lighting

Transform your stone water feature into a captivating nighttime focal point with carefully considered lighting. Soft, warm hues create a tranquil atmosphere, while spotlights add drama and visual interest. Timers and dimmable lighting systems offer flexibility for customising the perfect ambience as the evening progresses.

b. Lighting Techniques for Textural Accentuation and Reflections

  • Subtle Pond Illumination: Submersible lights create a magical glow, highlighting reflections and adding depth to your pond. Place them strategically for a balanced and visually appealing effect.
  • Highlight Textures: Position uplights or spotlights at the base of waterfalls or fountains to emphasise the stone’s texture. Cascading water and dramatic shadows add a sense of wonder.
  • Focal Point Emphasis: Consider underwater lighting or spotlights focused directly on the water flow for fountains. This highlights the movement and adds a sense of brilliance to the feature.

Customisation and Personalization

Stone water features offer endless possibilities for expressing your style and adding touches of personality to your garden. Here’s how:

a. Unique Stone Choices

  • Colour and Texture: Explore the vast range of natural stone colours and textures. From smooth river rock to rustic fieldstone, the options are endless. Choose stones that harmonise with your home or garden aesthetic.
  • Shapes and Sizes: Large, dramatic boulders make a bold statement, while smaller, stacked stones create a quieter feel. Experiment with different shapes and sizes to achieve your desired look.

b. Personalized Touches

  • Engraving: Add a special inscription, family name, or meaningful quote directly on the stone.
  • Sculptural Elements: Incorporate carved stone figures like animals, mythical creatures, or abstract forms with personal significance.
  • Themed Designs: Reflect on your hobbies or passions. A seashell-shaped fountain for beach lovers or a stacked stone waterfall with a fishing motif are just a few ideas.

Maintenance and Care Considerations

a. Overview of Maintenance Requirements

  • Regular Cleaning: Frequently remove leaves and other debris from the water’s surface. This prevents buildup around the pump and filter, ensuring smooth operation.
  • Algae Control: Small amounts of algae can be scrubbed away manually. For more extensive algae growth, use a pond-safe algae control product.
  • Periodic Deep Cleaning: Depending on the size of your feature, it’s wise to drain and thoroughly clean it occasionally. This is particularly important before the winter season in areas with freezing temperatures.

b. Tips for Proper Functionality and Longevity

  • Pump Care: Follow the manufacturer’s instructions for cleaning and maintaining your pump and filter. Ensure the pump is always submerged to prevent damage.
  • Maintain Water Levels: Evaporation naturally occurs, so check water levels regularly, particularly in hot weather. Keeping the water topped up ensures your pump always operates correctly.
  • Winterisation: If you live in an area with freezing temperatures, it’s crucial to drain your water feature, remove the pump, and store it indoors. This will protect it from damage.

Sustainable Design Practices

Stone water features can be designed with an eye towards eco-friendliness. Here’s how to enhance their sustainability:

a. Eco-Friendly Design Principles

  • Solar Power: Opt for solar-powered pumps to reduce electricity consumption and your carbon footprint. This saves on operating costs and allows for placement flexibility in your garden.
  • Recirculating Systems: Choose fountains or pondless waterfalls that recirculate the existing water. This minimises the need for regular top-offs and conserves this precious resource.
  • Rainwater Harvesting: Consider a system that collects rainwater from your roof and channels it into your water feature. This is an excellent way to utilise a natural, renewable water source.

b. Water Conservation & Wildlife Preservation

  • Native Plants: Surround your water feature with native plant species. These require less watering, and attract beneficial insects and birds, promoting a healthy ecosystem in your garden.
  • Wildlife-Friendly Design: Add gently sloping sides or rocks to your pond to allow birds, amphibians, and other creatures to drink and bathe easily.

Seasonal Considerations

a. Tips for Seasonal Maintenance

  • Spring: After the last frost, clean your feature, check all components, and refill with fresh water. If needed, introduce any algae control treatments.
  • Summer: Focus on keeping the feature clean of debris and regularly topping up the water level due to evaporation.
  • Fall: Remove fallen leaves diligently. Drain smaller features before the first freeze. If you have a larger pond, consider a protective cover for winter.
  • Winter (Cold Climates): Completely drain all water features. Remove, clean, and store the pump indoors. Provide a protective cover, especially for larger ponds.

b. Seasonal Decor Ideas

  • Spring: Introduce vibrant flowering aquatic plants or whimsical floating solar lights for a burst of colour and life.
  • Summer: Frame your feature with lush greenery for shade and tranquility. Accentuate it with submersible lights for enchanting nighttime effects.
  • Fall: Incorporate colourful gourds, pumpkins, or autumnal foliage around the feature for a festive touch.
  • Winter: If suitable, decorate drained fountains with simple evergreen accents or frost-resistant statuary.

Case Studies and Examples

Case Study 1: Portland Japanese Garden (Portland, OR)

This famous Japanese garden showcases the flat garden style, with raked gravel surrounding geometric shapes formed by precise borders of hand-cut Lithonia granite. 

Within these patterns are placed three rough-surfaced stone basins fed by bamboo pipes, gently allowing water to trickle into the basins. The serene sound and sight of moving water contrast with the stillness of the raked gravel.

Analysis: Using geometric shapes and clean lines in the hardscape elements provides an ordered, contemplative space that draws focus to the stone water basins as focal points. The rough basin textures juxtaposed with smooth water surfaces add visual interest. Integrating the basins within the larger composition results in a harmonious blend of traditional Japanese design principles.

Case Study 2: Garden of Cosmic Speculation (Dumfries, Scotland)

This avant-garde garden incorporates inventive stone water features like the “DNA Garden”, with a series of arched stone lintels spanning a rill, allowing water to flow through the arches. Nearby, large carved stone slabs with spiral patterns have water flowing across their surface.

The compelling “Terracotta Life Mound” is a massive serpentine-shaped earthwork with rills cut into the stone coils that channel small rivulets of water.

Analysis: These water features are highly imaginative in form and function, utilising hydraulics creatively combined with intricate stone carvings and sculptural earthworks. The varied patterns and textures engage the senses of sight and sound. Placing these elements across the landscape as focal points connected by pathways encourages exploration and appreciation from multiple vantage points.

Case Study 3: Alnwick Garden (Alnwick, England) 

The dramatic centrepiece is a towering 56-foot cascading fountain where water rushes down sculpted layers of stone. 

Surrounding this main fountain is an ornate arrangement of smaller interconnected fountains, rills, and basins incorporating both natural rock and intricately carved stone pieces in its design.

The powerful roar of cascading water provides a breathtaking multi-sensory experience.

Analysis: This ambitious multi-level water feature takes advantage of the natural flow from a nearby river. It utilises the forces of gravity and hydraulics to create an awe-inspiring sight and sound experience. 

The large scale combined with rough natural stone and refined carved details in the hardscaping results in a grandiose yet thoughtfully composed landscape element.

Surrounding the cascades with supplementary fountains and basins helps contain the experience within an artfully designed space that can be appreciated from numerous vantage points.

Conclusion

From classic fountains to cascading waterfalls, stone water features offer endless ways to create a sanctuary in your backyard. 

Embrace the natural beauty of stone and the soothing power of water to design a space that nourishes the senses. 

Let the inspiration flow and discover how a stone water feature can transform your garden into a haven of peace and tranquillity.

Boost Your Home Value: Stone Investments That Pay Off

Natural stone is more than just a design statement; it’s a proven way to increase property value. Whether you’re renovating for resale or upgrading for lifestyle, stone features like façades, paving, and pool surrounds offer lasting beauty and strong return on investment. 

Stone’s versatility makes it suitable for various architectural styles, ensuring long-term durability and minimal maintenance. 

In this guide, we’ll reveal which stone applications add the most value to your home and how to choose the right materials that future-proof your investment.

Why Natural Stone Is a Smart Investment

Natural stone is not just an aesthetic feature; it offers substantial long-term value. Here’s why it’s a smart choice for increasing both the appeal and durability of your property.

1. Offers a Long Lifespan with Low Maintenance

Natural stone is highly durable, requiring minimal upkeep. It withstands weathering, fading, and wear, ensuring longevity. With simple cleaning and occasional sealing, natural stone maintains its appearance, making it a low-maintenance investment.

2. Adds Instant Visual Appeal and Architectural Integrity

Natural stone immediately enhances your home’s exterior with timeless beauty. The unique textures, colours, and natural variations create an elegant visual presence, boosting curb appeal and adding architectural integrity to the overall design.

3. Performs Well in Both Modern and Classic Designs

Whether your home is modern or traditional, natural stone blends seamlessly with any architectural style. Its versatility makes it an ideal choice for both contemporary urban designs and rustic, classic facades, offering lasting aesthetic value.

4. Provides Environmental and Energy Efficiency Benefits

Natural stone has excellent thermal properties that help regulate indoor temperatures. By reducing the need for heating and cooling, it lowers energy costs, making it an environmentally responsible and financially beneficial option for any home.

5. Increases Property Value with Timeless Appeal

A natural stone façade not only enhances curb appeal but also increases your property’s market value. Its luxurious, long-lasting appearance ensures your home stands out, providing a solid return on investment when selling or renting.

Exterior Stone Applications That Add the Most Value

Exterior Stone Applications That Add the Most Value

Stone applications on the exterior of your home significantly enhance both visual appeal and property value. Here are the top stone applications that provide maximum returns for homeowners looking to elevate their home.

1. Stone Façades and Wall Cladding

Stone façades and wall cladding make a bold statement, enhancing curb appeal. Whether used for full façades or accent features, stone creates a luxurious, timeless look that suits all architectural styles and boosts overall property value.

2. Outdoor Stone Paving

Stone paving is perfect for patios, courtyards, and alfresco areas, creating a unified look across outdoor zones. Its weather resistance and aesthetic appeal boost the value of these spaces, making them ideal for entertaining and everyday use.

3. Stone Driveways

A stone driveway adds elegance to your property’s entrance. Its durability and luxury appeal outperform traditional concrete, offering resistance to heavy vehicles, heat, and rain. Stone driveways are a long-lasting investment that enhances property value.

4. Stone Steps and Staircases

Stone steps provide a sophisticated way to connect multi-level garden areas or entrance points. Their durability and elegance not only enhance the functionality of sloped areas but also offer cohesive design when matched with paving or walls.

5. Stone Pool Coping and Surrounds

Stone pool coping and surrounds elevate outdoor pool areas with refined style and safety. UV- and salt-resistant when properly sealed, stone adds luxury while increasing the appeal of pools, making them a key selling feature for homes.

Interior Stone Features That Impress Buyers

Interior Stone Features That Impress Buyers

Interior stone features add sophistication and timeless beauty to any home. Here are some of the most popular stone features that can boost appeal and impress potential buyers, elevating the overall interior design.

1. Natural Stone Fireplace Surrounds

A natural stone fireplace surround serves as a striking focal point in the living room. With its elegant texture and luxurious appearance, stone enhances warmth and comfort while adding both style and value to the space.

2. Stone Cladding for Entryways or Stairwells

Stone cladding in entryways or stairwells offers a grand, inviting look. It creates a seamless connection between indoor and outdoor spaces, adding depth, texture, and timeless elegance to high-traffic areas while boosting property appeal.

3. Bathroom Walls and Floors

Stone for bathroom walls and floors creates a spa-like atmosphere. Its natural beauty and moisture-resistant properties make it ideal for creating a luxurious, durable space. This timeless feature enhances both the aesthetics and functionality of bathrooms.

4. Kitchen Splashbacks That Add Tactile Warmth

Stone splashbacks provide a luxurious, tactile surface that complements the kitchen. They offer practical benefits by protecting the walls while enhancing the overall design with their refined appearance, making the kitchen feel both elegant and functional.

5. Stone Countertops for a Luxurious Finish

Stone countertops in kitchens and bathrooms create a refined, high-end look. Their durability, heat resistance, and timeless appeal make them a desirable feature for buyers, enhancing both the functionality and aesthetic value of your home.

Choosing the Right Stone for Maximum ROI

Choosing the Right Stone for Maximum ROI

Choosing the right stone for your home is crucial for boosting property value. Here are some popular stone options and how they can maximise your return on investment.

  • Marble: Marble’s luxury and timeless beauty make it perfect for high-end interiors like kitchens and bathrooms. It enhances property value with lasting appeal and sophisticated design.
  • Granite: Granite is durable and heat-resistant, making it ideal for countertops and high-traffic areas. Its refined beauty and long-lasting performance provide excellent return on investment.
  • Quartzite: Quartzite offers natural elegance and durability. It’s great for countertops, flooring, and paving, adding sophistication and increasing the overall value of your property.
  • Travertine: Travertine’s classic beauty is perfect for both indoor and outdoor spaces, including patios and pool areas. Its timeless charm and long-lasting qualities make it an excellent investment.
  • Quartz: Quartz is non-porous, durable, and low-maintenance, making it ideal for countertops and bathrooms. Its sleek look adds value and enhances the functionality of high-use areas.
  • Bluestone: Bluestone is durable and aesthetically pleasing option for driveways, paths, and pool areas. It provides a refined finish and stands up to wear over time.
  • Limestone: Limestone’s warm tones and texture make it ideal for façades, patios, and floors. It adds natural beauty with minimal upkeep, offering long-term value and charm.
  • Sandstone: Sandstone provides a textured and natural finish that’s perfect for traditional exteriors and garden walls. Its timeless appeal and durability make it a valuable asset for any home.
  • Porphyry: Porphyry offers unique colour variations and a rugged look. It’s ideal for custom paving, adding luxury and character that increases your home’s curb appeal.

Factors That Influence ROI on Stone Installations

Factors That Influence ROI on Stone Installations

The return on investment (ROI) from stone upgrades depends on various factors. Here are the key elements that influence the value stone additions bring to your home.

1. Installation Quality

The skill of your installer significantly impacts the durability and aesthetics of stone features. Proper installation ensures longevity, reducing the need for repairs and helping preserve the stone’s appearance, ultimately contributing to a higher ROI.

2. Design Integration

How well stone integrates with your home’s existing style and materials can enhance its overall appeal. A cohesive design maximises the stone’s impact, ensuring it complements both interior and exterior elements for increased property value.

3. Maintenance Practices

Regular maintenance, such as sealing and cleaning, keeps stone looking pristine. Proper care extends the stone’s lifespan, maintaining its beauty and preventing damage, which directly contributes to the long-term value and ROI of your investment.

4. Location Factor

The location of your property plays a crucial role in ROI. In high-value areas, stone upgrades tend to yield stronger returns, as buyers in these regions appreciate the elegance and durability of natural stone in home features.

5. Market Trends and Buyer Preferences

Staying informed about current market trends and buyer preferences can boost the ROI of stone upgrades. If stone features are in high demand in your area, they’ll likely attract more buyers and higher offers, increasing the overall value of your property.

Why Choose Splendour in Stone for Value-Boosting Projects

Why Choose Splendour in Stone for Value-Boosting Projects

When it comes to enhancing your home’s value, choosing the right stone and expert guidance is crucial. Here’s why Splendour in Stone is the perfect partner for your stone investment projects.

  • Premium, Locally Sourced Natural Stones: Splendour in Stone offers high-quality, locally sourced stone specifically selected for Australian conditions, ensuring durability and long-lasting performance for your home’s exterior and interior features.
  • Expert Advice Tailored to Your Needs: Our team provides expert advice to help you choose the ideal stone type, finish, and application, ensuring a seamless integration with your home’s design and maximising value.
  • Wide Range of Stone Options: From façades and paving to countertops and garden features, Splendour in Stone offers a diverse selection of stone types and finishes to suit any architectural style and meet your aesthetic preferences.
  • Trusted by Top Architects and Landscapers: With a reputation for excellence, Splendour in Stone is trusted by leading architects, landscapers, and homeowners in Victoria to deliver superior stone solutions that elevate both the beauty and value of properties.

Conclusion

Natural stone is an investment that not only enhances the beauty of your home but also boosts its value. From façades and driveways to interior features, stone offers timeless appeal and long-term durability. 

Choose Splendour in Stone for premium, locally sourced stone and expert guidance to transform your property with lasting elegance and increased market value.

Stone Cladded Fireplace Request

At Splendour in Stone, we specialise in supplying and installing natural stone cladded fireplaces that bring warmth, beauty, and character to your home. Each piece is crafted with precision and presence, ensuring a timeless centrepiece built to last.

Planning a new fireplace or upgrading an existing one? Complete the form below and receive your personalised quote within 24 hours.
Share anything about your vision, home style, or needs
Important Installation Note
The fireplace unit must be installed prior to our stonework.
This ensures proper fitting and a seamless final result. If you need help coordinating this, we’re happy to assist. Just mention it in your message.
In SQM?

Please fill your details to download.


      Request Callback


        Enquiry Form


        Please fill your details to download.