Register your Information for Free Stone Samples Sent Express to You!

Hardscape, Softscape, and Landscape: What Are the Differences?

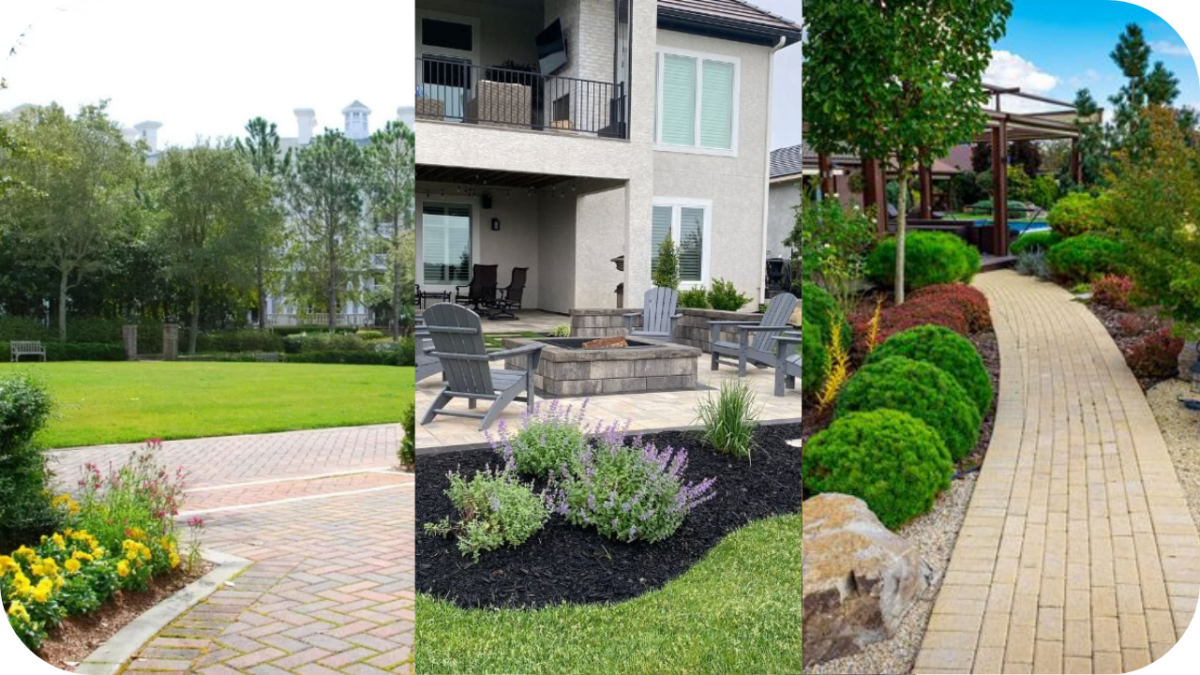
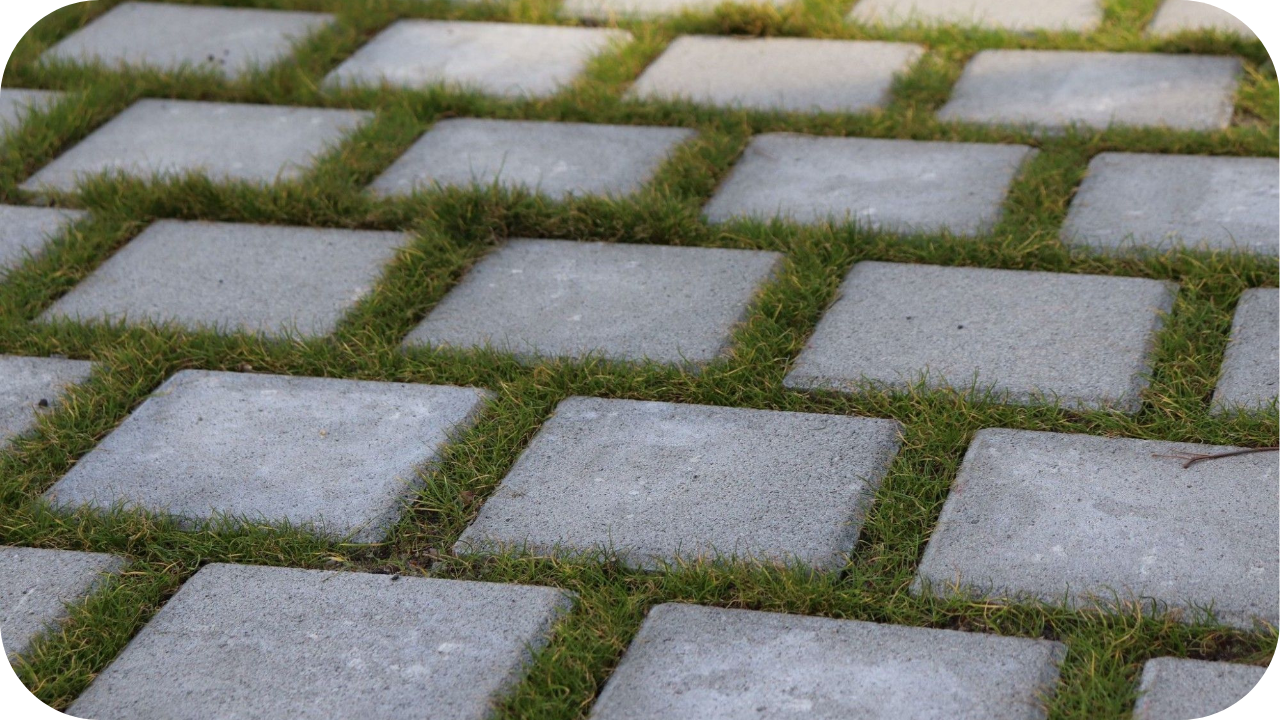
Hardscape refers to the non-living elements of outdoor spaces, such as stone paving and retaining walls. Softscape covers living features like plants, grass, and trees. 

Landscape combines both to create a complete design. Knowing the differences ensures balanced, functional, and visually appealing spaces. 

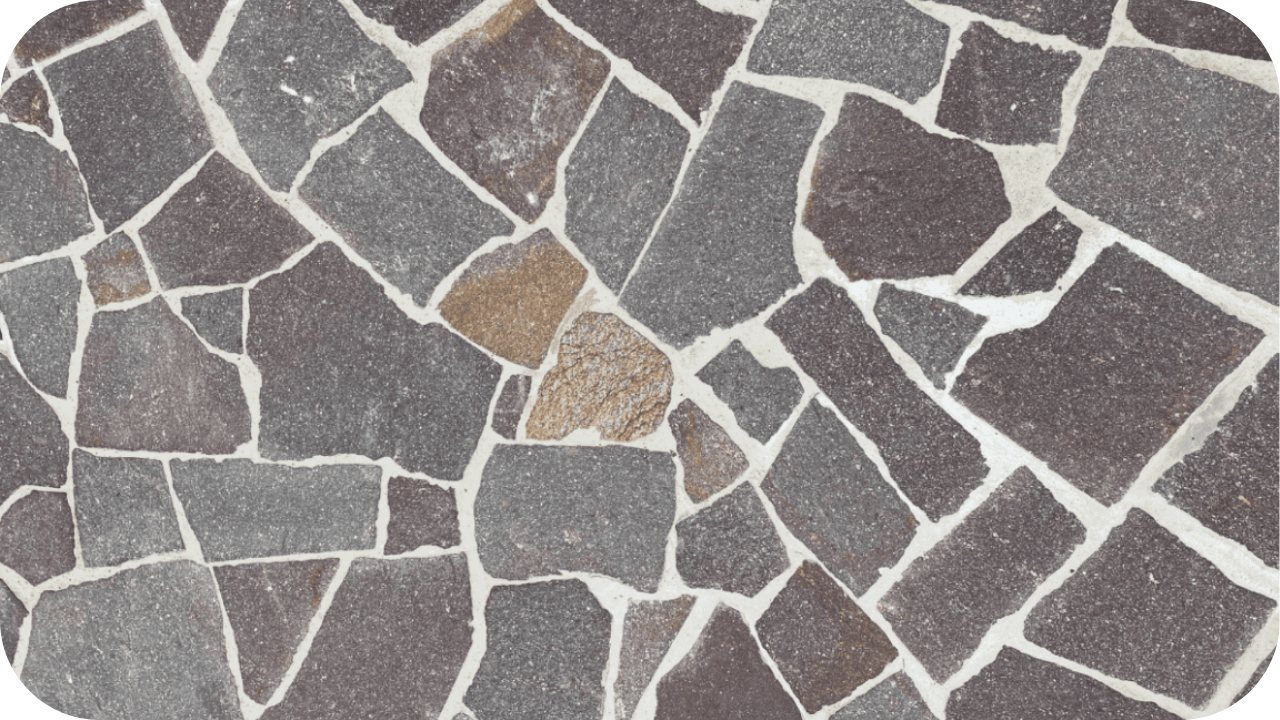
Splendour in Stone’s premium natural stone products bring durability, style, and timeless beauty to hardscape projects, making them an essential foundation for enhancing any garden or outdoor living area.

What is Hardscape?

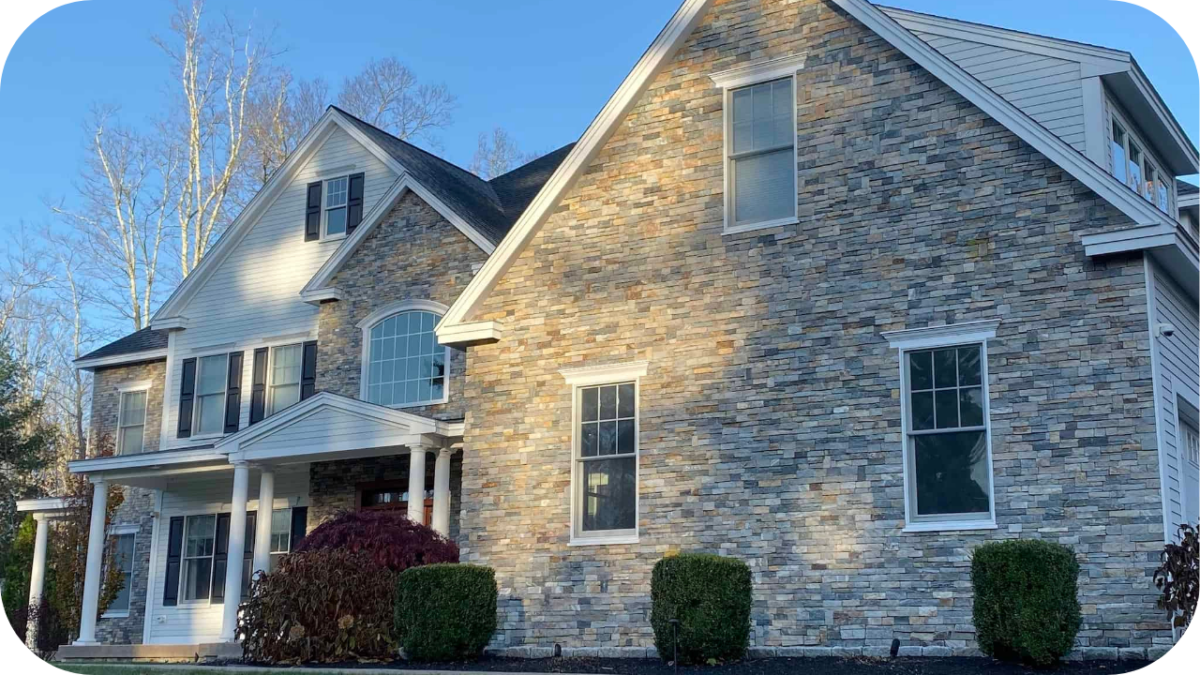
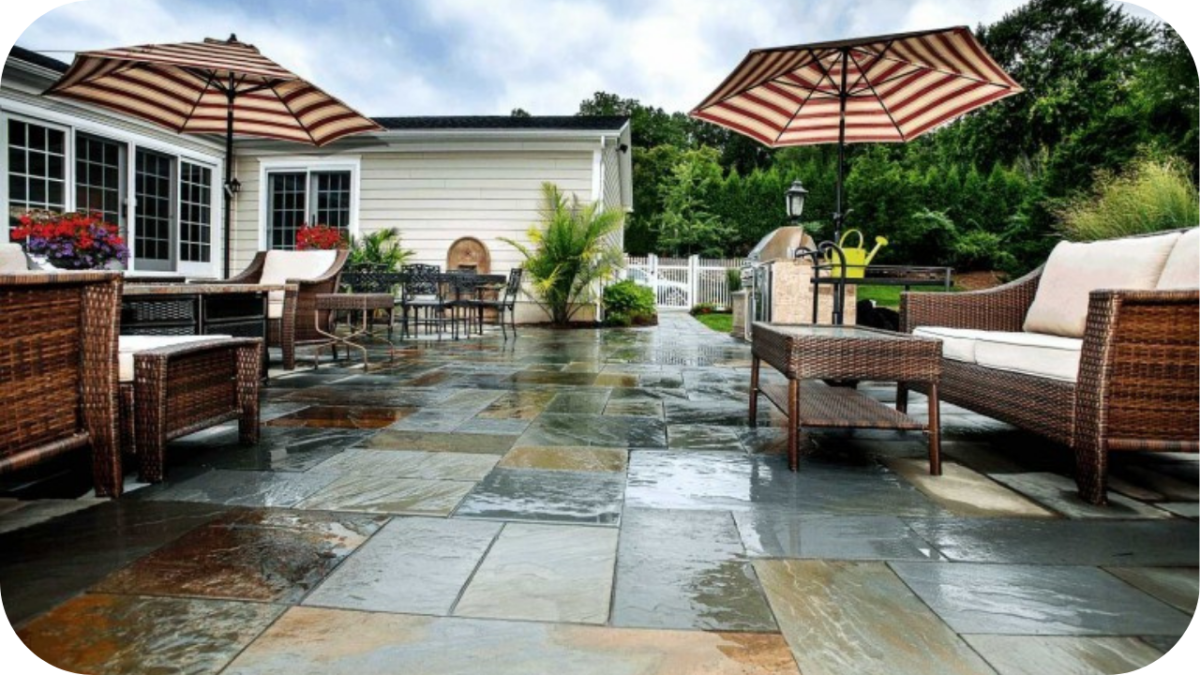
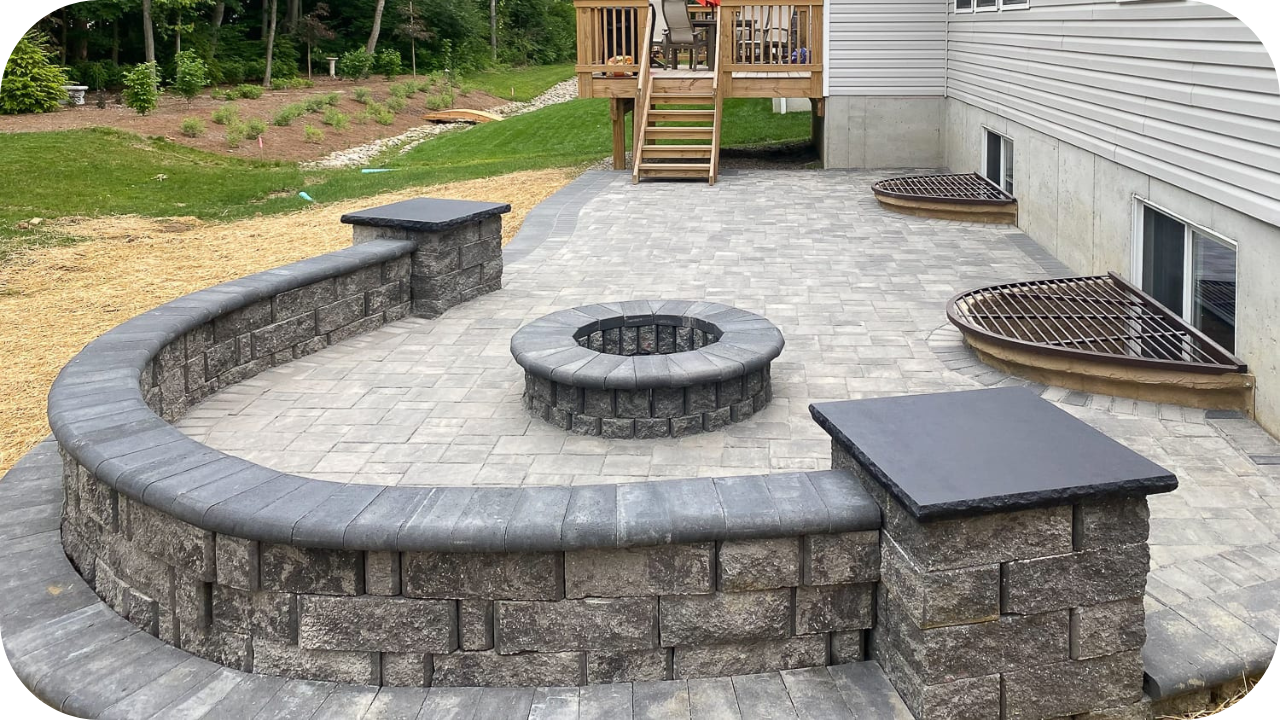
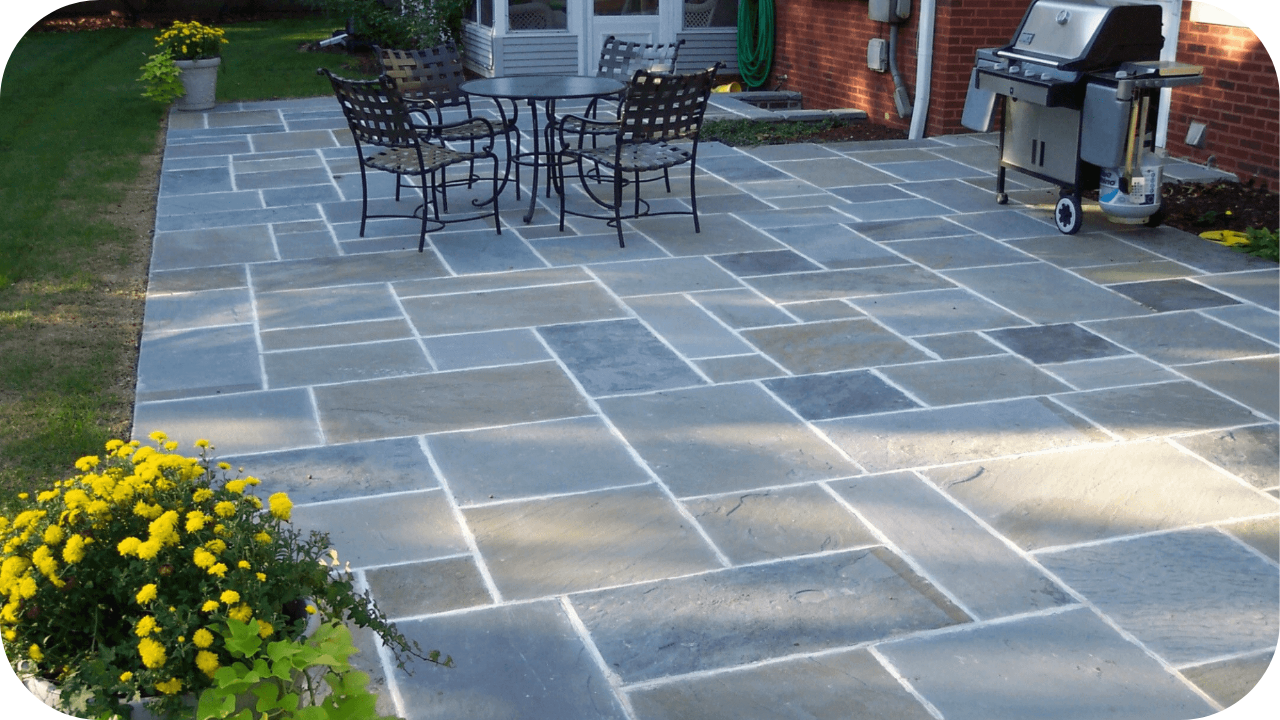
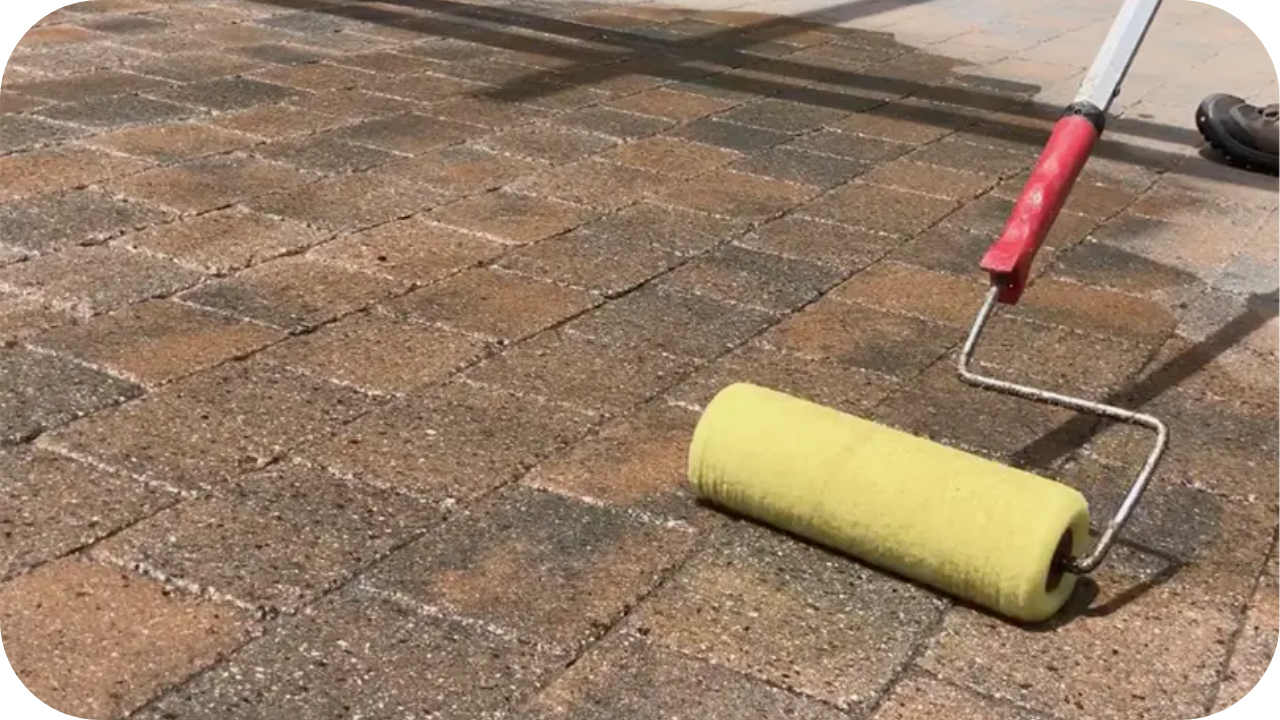
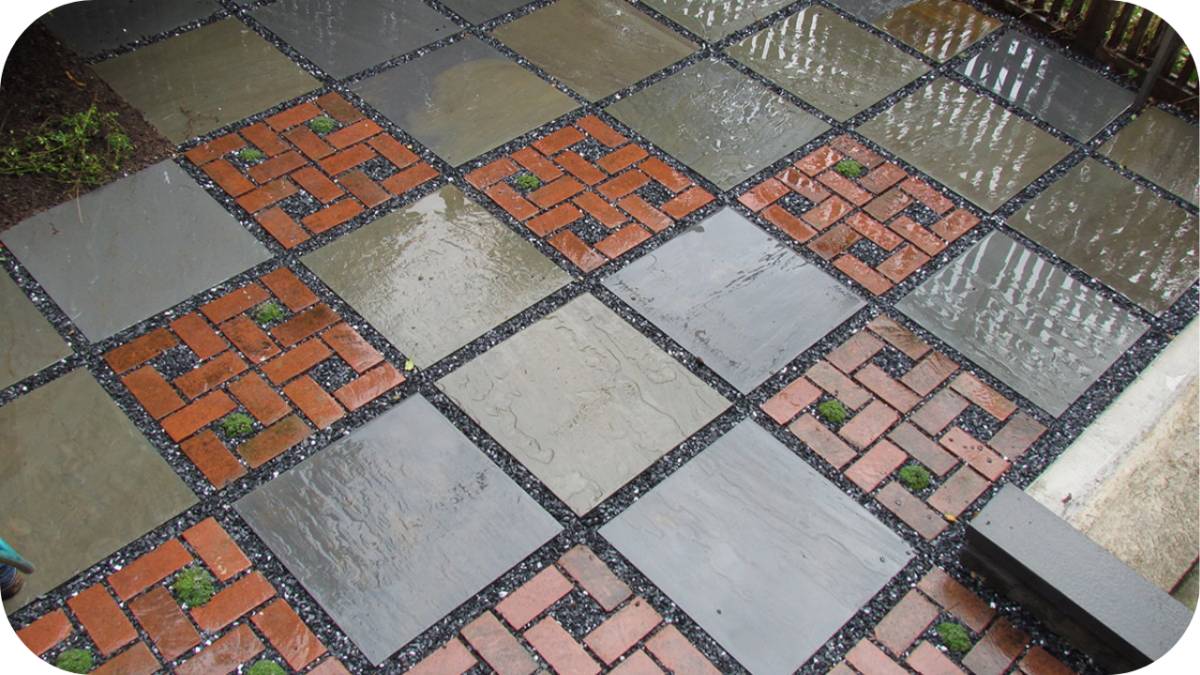
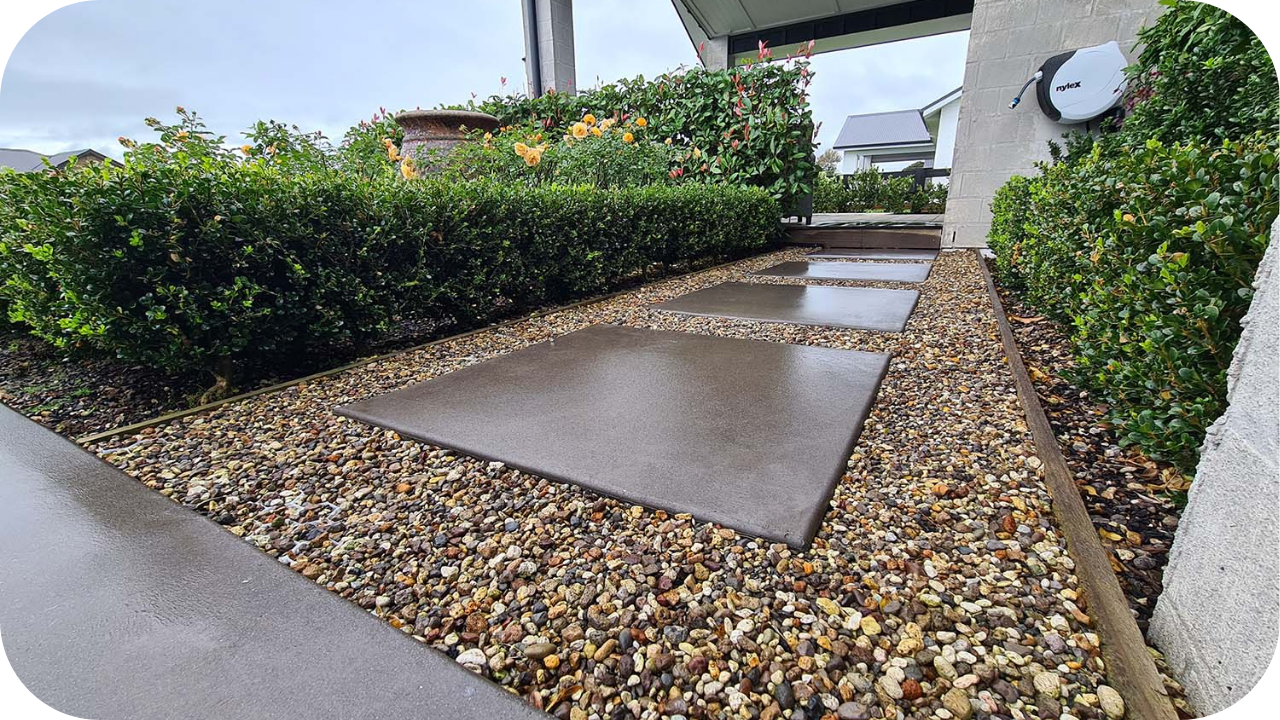
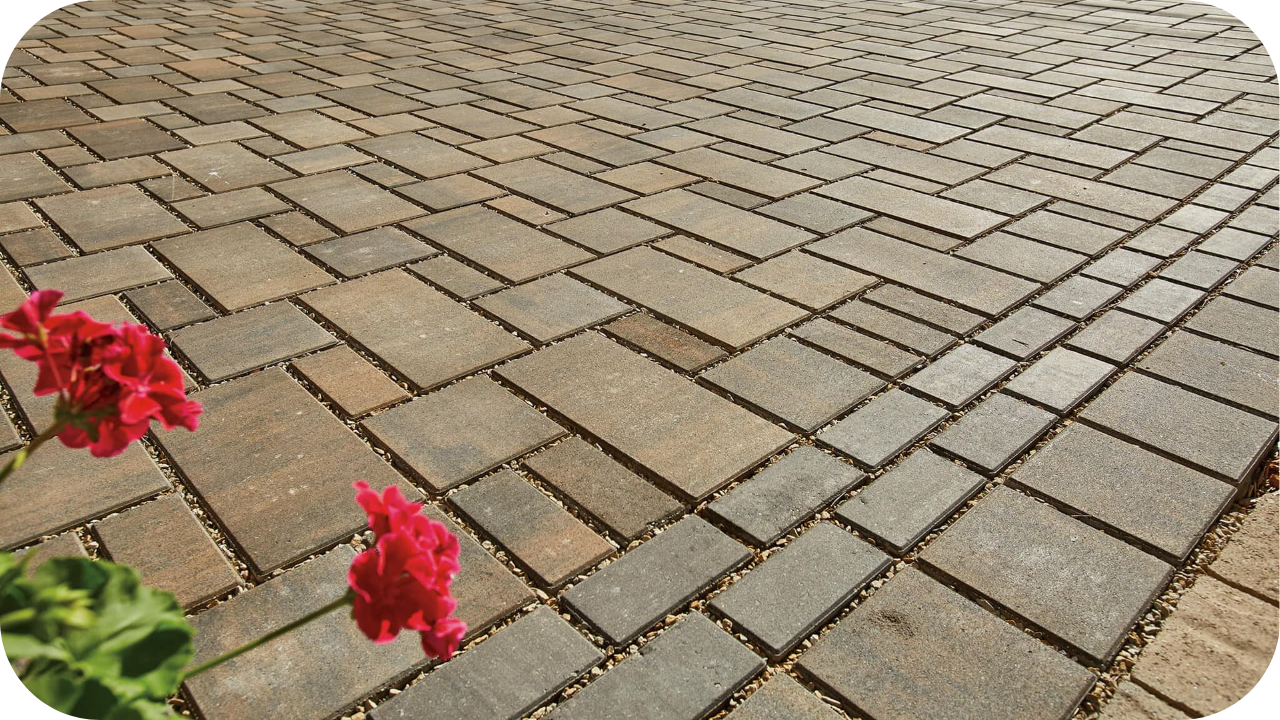
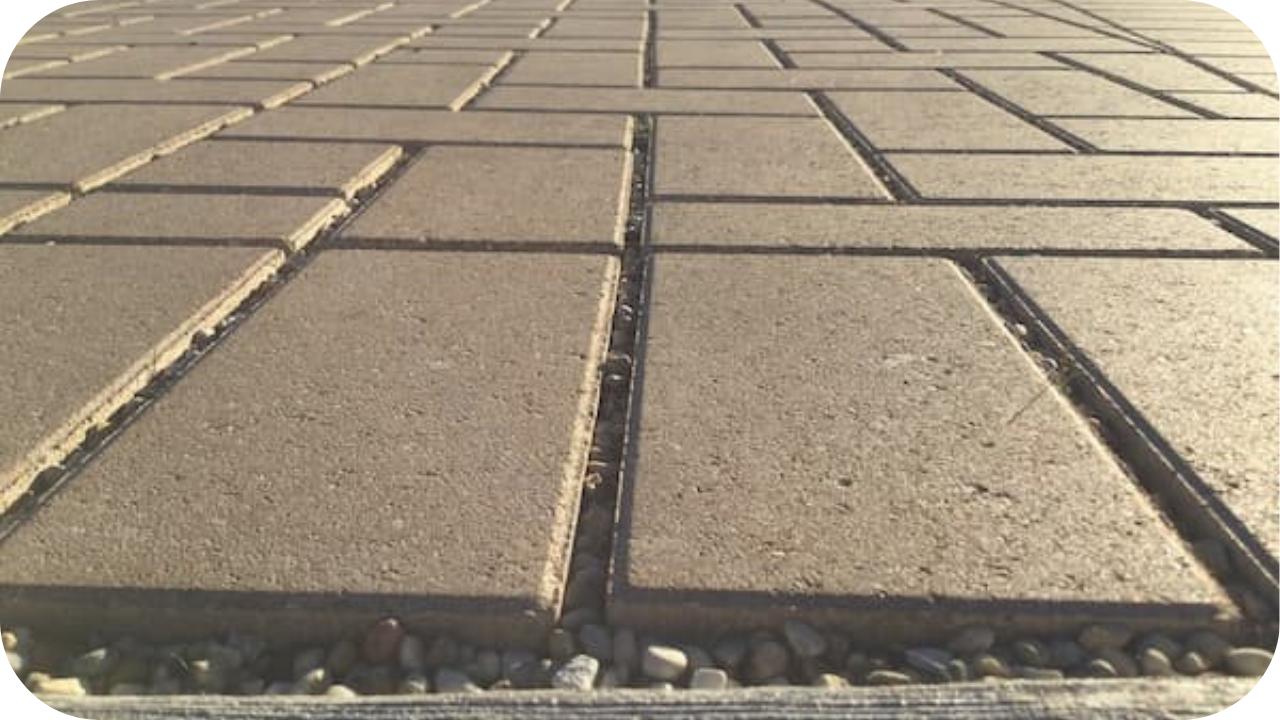
Hardscape includes the non-living elements that shape and structure outdoor areas, such as natural stone paving, walls, pathways, and patios. These features provide durability, define spaces, and require minimal upkeep. 

At Splendour in Stone, hardscaping materials like premium stone pavers and cladding offer both functional strength and aesthetic appeal, creating long-lasting outdoor foundations that enhance usability and style.

What is Softscape? 

Softscape covers the living, organic components of an outdoor space, including grass, plants, flowers, shrubs, and trees. These elements bring colour, texture, and seasonal variety while softening the look of hardscape features. 

Softscape also plays a role in environmental benefits like air purification and soil health. When combined thoughtfully with hardscape, it creates a balanced and inviting landscape design.

What is Landscape? 

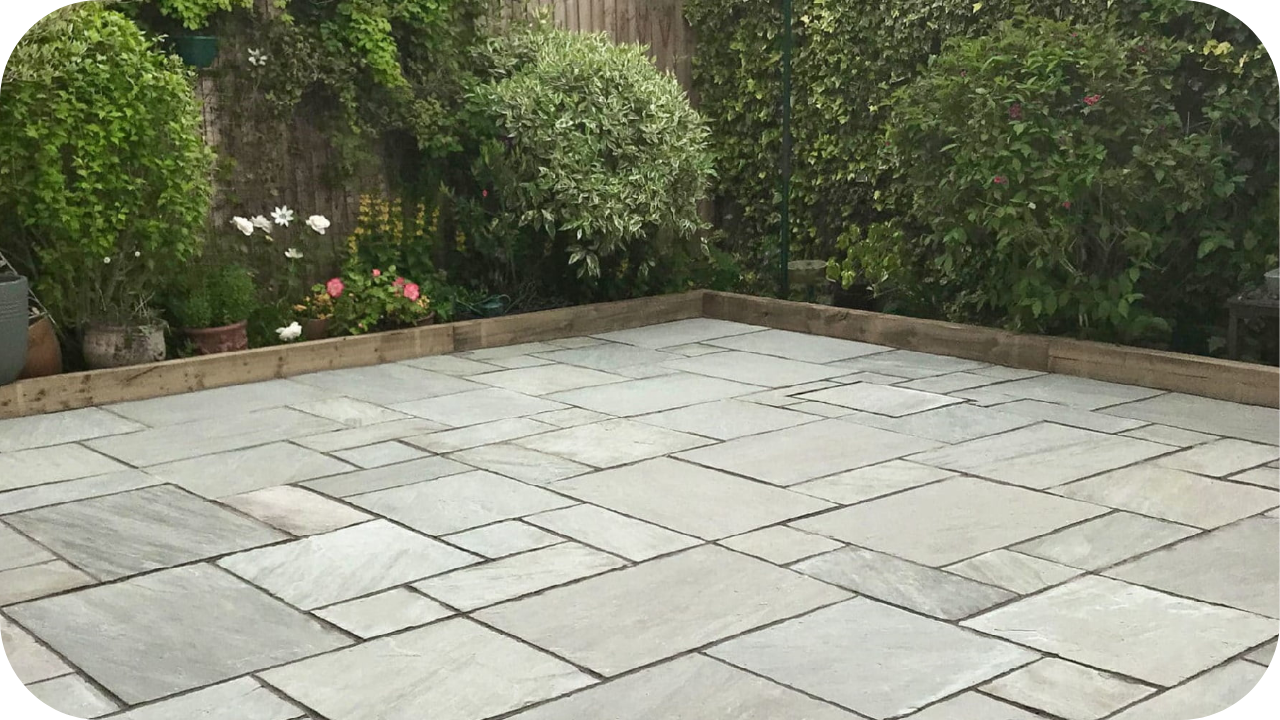
Landscape refers to the overall design that harmoniously blends hardscape and softscape elements into a cohesive outdoor space. It considers function, beauty, and environmental sustainability, ensuring that each component complements the other. 

A well-planned landscape transforms a property’s appearance, improves usability, and increases value, especially when premium materials like Splendour in Stone’s natural stone are incorporated into the design.

Key Differences Between Hardscape, Softscape, and Landscape

Key Differences Between Hardscape, Softscape, and Landscape

Striking the right balance between hardscape, softscape, and landscape is key to creating outdoor spaces that are beautiful, functional, and built to last. Understanding their differences ensures every design decision adds value and harmony:

Durability and Lifespan

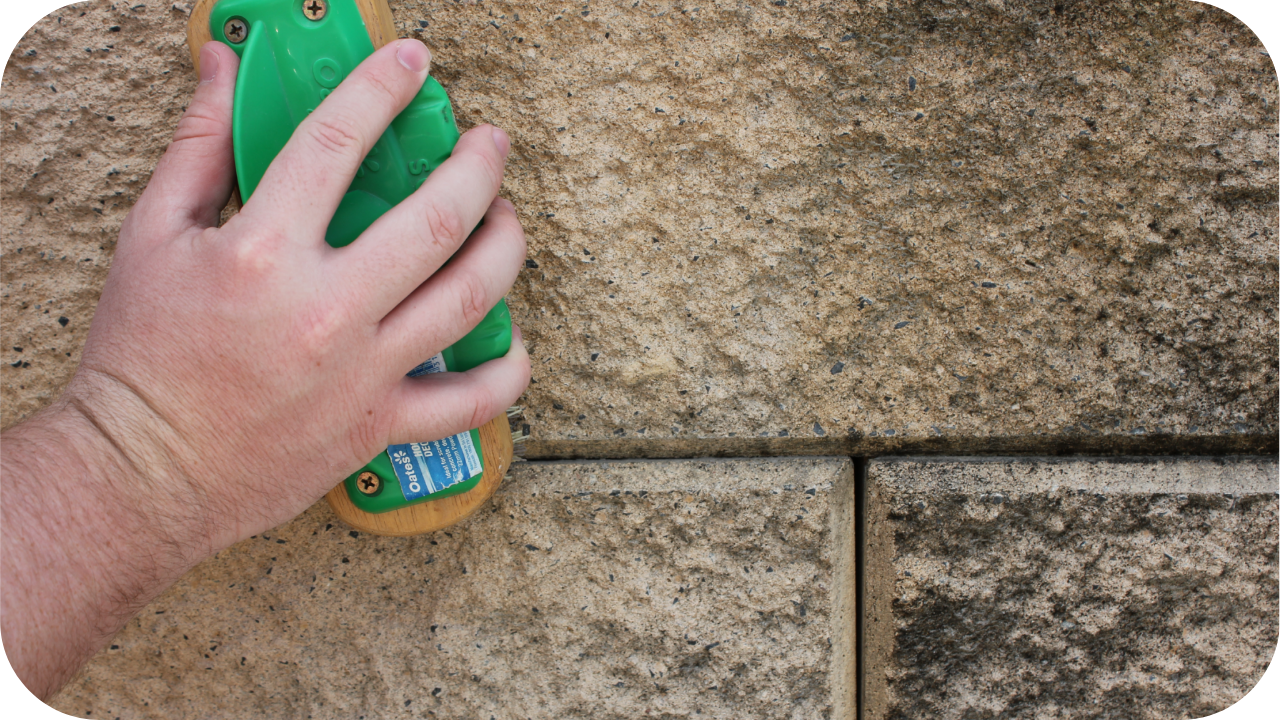
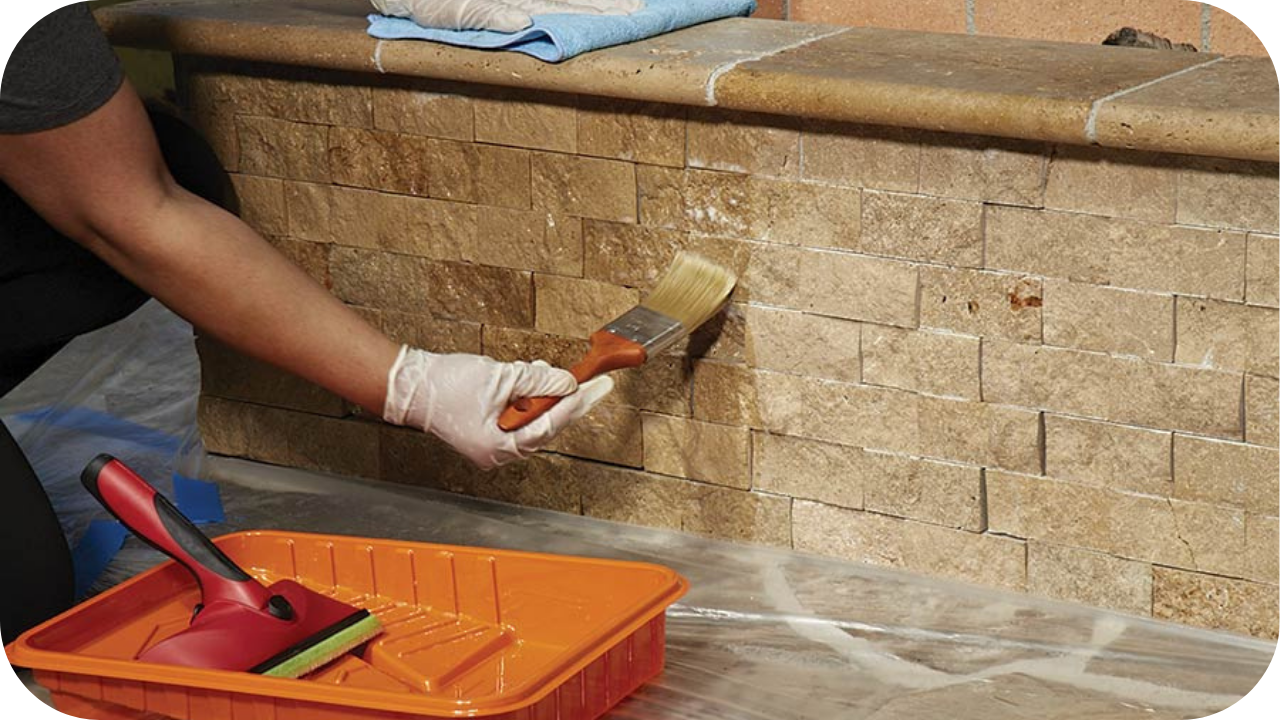
Hardscape elements, such as stone pavers and retaining walls, are built from materials designed to last for decades with minimal maintenance. These non-living features resist weather damage and wear, providing a permanent framework for outdoor spaces. 

In contrast, softscape features like plants and lawns have a limited lifespan, requiring seasonal upkeep, replanting, and watering to remain vibrant. Landscape, being the combination of both, inherits a mixed lifespan; its longevity depends on maintaining living elements while ensuring the durability of the hardscape foundation

Understanding these differences helps property owners plan for long-term investment, balancing permanent structures with flexible, renewable greenery for a complete, enduring outdoor design.
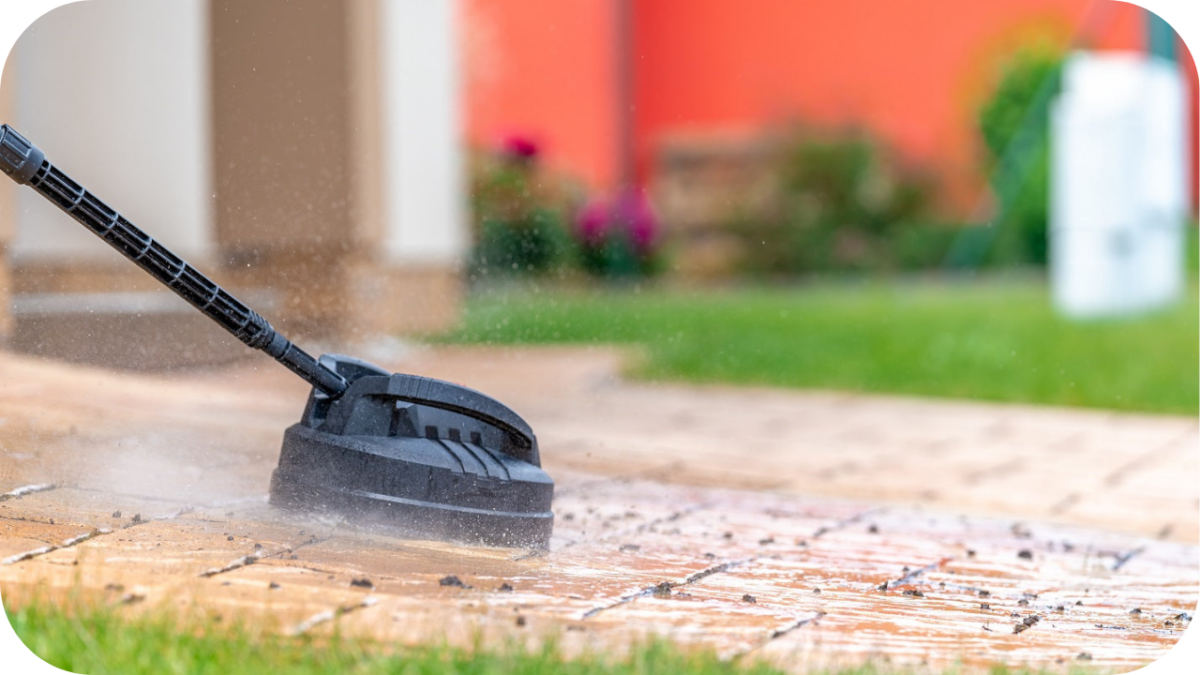
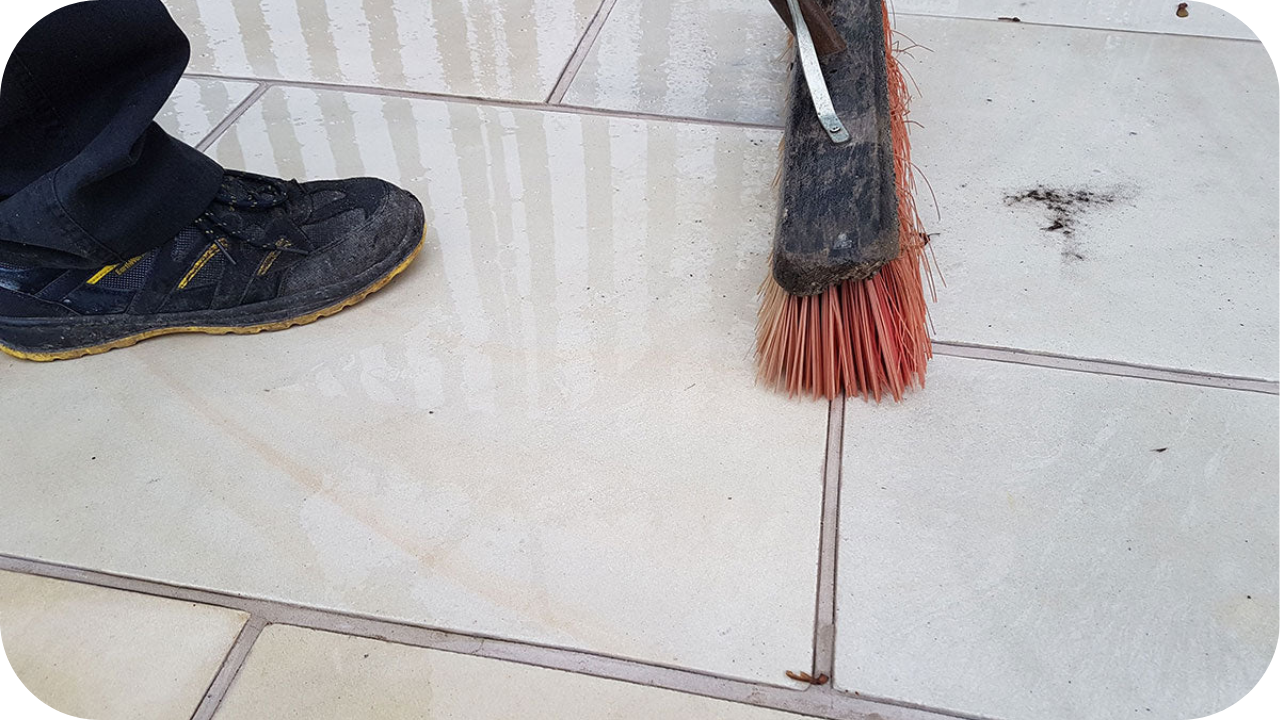
Maintenance Needs

Hardscape requires relatively low maintenance, often needing only occasional cleaning or sealing to keep surfaces in top condition. Softscape demands more ongoing care, including watering, pruning, fertilising, and seasonal planting to ensure healthy growth. 

Landscapes blend these needs, meaning maintenance plans must address both structural upkeep and plant care. Neglecting either side can lead to imbalance, with overgrown greenery overwhelming structures or hard surfaces looking stark without lush vegetation. 

By knowing the specific maintenance demands of each, homeowners can allocate time and resources effectively. Choosing durable materials like Splendour in Stone’s natural pavers reduces the workload while preserving the outdoor space’s beauty year-round.

Impact on Functionality and Aesthetics

Hardscape serves as the backbone of functionality, offering paths, seating areas, and structural features that make an outdoor space usable in all seasons. Softscape enhances aesthetics by adding movement, colour, and a natural touch that creates a welcoming atmosphere. 

Landscape brings the two together, ensuring functional areas blend seamlessly with visually appealing, living elements. Without hardscape, a garden may lack structure; without softscape, it can appear cold or lifeless. 

Combining them strategically results in spaces that are both practical and beautiful. Premium hardscaping materials from Splendour in Stone elevate this balance, creating designs that are as durable as they are visually striking.

Influence on Property Value

Well-planned hardscape installations, such as stone patios, pool surrounds, and pathways, significantly boost property value by enhancing both function and visual appeal. Softscape contributes through curb appeal, making a home more attractive to potential buyers with lush, healthy greenery. 

Landscape, when executed properly, combines these elements to create a complete outdoor living environment that appeals to both emotional and practical considerations. Homes with a balanced mix often command higher market prices, as they offer beauty, usability, and low-maintenance options. 

Investing in quality hardscaping products from Splendour in Stone ensures that the property’s value gains are long-lasting, adding timeless appeal that stands out in any market.

Choosing the Right Balance for Your Outdoor Space

Choosing the Right Balance for Your Outdoor Space

Finding the perfect mix of hardscape and softscape starts with considering key factors that shape beauty, function, and longevity in your outdoor space. Here’s what to keep in mind:

  • Assess Your Space’s Needs: Evaluate how you plan to use the area, whether for entertaining, relaxation, or functional pathways, to guide your hardscape-to-softscape ratio.
  • Consider Climate and Maintenance: Select materials and plants suited to your local weather, and balance your choices with the amount of upkeep you’re willing to commit to.
  • Blend Aesthetics with Functionality: Ensure your design is visually appealing while offering practical features like seating, walkways, and shaded areas for year-round use.
  • Use Quality Materials: Invest in premium hardscaping products, such as Splendour in Stone’s natural pavers, to ensure long-term durability and timeless style.
  • Plan for Seasonal Changes: Incorporate a mix of evergreen plants and seasonal blooms so your outdoor space remains attractive all year round.
  • Maximise Space Efficiency: Design layouts that make the most of available space without overcrowding, leaving room for both movement and visual flow.
  • Think Long-Term Growth: Choose plants and trees that will complement your hardscape as they mature, avoiding roots or branches that could cause damage.
  • Integrate Lighting and Features: Include outdoor lighting, water features, or fire pits to enhance both ambience and functionality, especially during evenings and cooler months.

Benefits of Quality Hardscaping Materials from Splendour in Stone

Here’s how Splendour in Stone’s premium hardscaping materials can transform your outdoor space with lasting strength, timeless beauty, and added property value:

  • Enhanced Durability: Premium natural stone withstands weather, wear, and heavy use, ensuring your hardscape features remain strong and beautiful for decades.
  • Timeless Aesthetic Appeal: High-quality finishes and unique textures add elegance and character, complementing both modern and classic outdoor designs.
  • Low Maintenance Requirements: Quality stone surfaces resist stains, fading, and erosion, reducing the need for frequent repairs or replacements.
  • Increased Property Value: Well-crafted hardscaping with premium materials makes your outdoor space more attractive to buyers and boosts overall market value.
  • Versatile Design Options: Splendour in Stone’s range suits patios, pool surrounds, pathways, and feature walls, adapting to various styles and functions.
  • Eco-Friendly Choice: Sourced responsibly, natural stone offers a sustainable option that blends seamlessly with the environment.

How to use hardscape and softscape to create a beautiful landscape

How to use hardscape and softscape to create a beautiful landscape

Combining hardscape and softscape effectively is the key to designing a landscape that feels cohesive, inviting, and visually stunning all year round. Here’s how to achieve the perfect harmony:

  • Start with a Solid Framework: Lay out your hardscape first, including pathways, patios, and retaining walls, to define structure and flow.
  • Layer in Softscape Elements: Add plants, trees, and flowers that soften the lines of your hardscape and bring life to the design.
  • Balance Proportion and Scale: Ensure hardscape features and greenery are proportionate, so one does not overpower the other visually.
  • Create Functional Zones: Use hardscape to separate dining, lounging, and garden areas, while softscape ties them together with colour and texture.
  • Incorporate Seasonal Interest: Choose a mix of evergreen and seasonal plants to keep the landscape appealing throughout the year.
  • Blend Colours and Textures: Match the tones of your stone or pavers with complementary plant hues and foliage textures for a cohesive look.

In Closing: Grounded in Balance, Growing in Value

When every element of your outdoor environment works in harmony, the result is a space that feels inviting, purposeful, and enduring. Stone becomes more than just a surface — it becomes the foundation of moments shared, gardens that thrive, and homes that carry a sense of character and permanence. Balance is not only a design principle here; it is the difference between a space that looks complete today and one that continues to inspire for decades.

If you’re ready to create an outdoor setting that combines strength, elegance, and long-term value, the Splendour in Stone team is here to help. Explore our range of natural stone products and discover how the right choice of material can elevate your design from functional to unforgettable. Begin your journey toward a timeless landscape by getting in touch with us today.

Colour Palettes and Natural Stone: Matching Stones with Your Home’s Exterior

The right natural stone colour palette can transform your home’s exterior, elevating curb appeal while creating a sense of balance and harmony. Colour shapes mood, defines style, and enhances architectural character, making it a key element in exterior design. 

Whether aiming for contrast, cohesion, or a timeless blend, thoughtful colour pairing ensures your stonework works beautifully with other materials and surroundings. 

This guide looks at how to choose stone colours that highlight your home’s best features and complement its overall style.

Why Colour Harmony Matters for Your Home’s Exterior

Colour harmony plays a crucial role in creating an exterior that feels both inviting and visually balanced. The right colour pairing can enhance curb appeal, making a strong first impression that reflects the homeowner’s style. 

By aligning stone tones with architectural elements and the natural surroundings, you achieve a look that feels intentional and cohesive. A well-chosen palette also contributes to a timeless appearance, ensuring the design remains appealing as trends change. 

Beyond aesthetics, harmonious colours can increase a property’s value, as buyers often connect with homes that appear well-considered and visually unified. Whether subtle or bold, colour decisions shape how your home is perceived from the moment it comes into view.

Popular Natural Stone Colours for Exterior Applications

Popular Natural Stone Colours for Exterior Applications

Natural stone comes in a variety of colours, each offering a different mood and design potential. These popular options can dramatically shape the look and feel of your home’s exterior.

1. Light Neutrals

Light neutrals, such as limestone, sandstone, and travertine, create airy, open looks that make spaces feel larger and more inviting. Their soft tones pair effortlessly with most materials, providing a timeless, understated elegance that works across both traditional and modern architectural styles.

2. Earthy Browns and Beiges

Earthy browns and beiges bring warmth and an organic connection to the landscape. These tones work beautifully in natural surroundings, blending stone walls seamlessly with gardens, timber features, and other warm-toned materials for a grounded, cohesive aesthetic.

3. Greys and Charcoal

Greys and charcoal offer modern elegance and adaptability. They pair well with bold architectural lines, metallic accents, and glass, making them ideal for minimalist and industrial-inspired exteriors seeking a sleek yet enduring colour palette.

4. Bold and Dark Tones

Bold and dark tones, such as slate, basalt, and darker granites, make dramatic statements. Their richness creates a striking contrast against lighter façades, adding depth, prestige, and a strong visual anchor to exterior designs.

5. Warm Golds and Ambers

Warm golds and ambers create an inviting glow, especially in sunlight. These tones add richness and warmth, working well with timber, brick, or cream finishes to create a welcoming yet sophisticated exterior style.

6. Cool Whites and Off-Whites

Cool whites and off-whites offer a crisp, clean aesthetic that brightens exteriors and reflects light beautifully. Ideal for coastal or modern homes, they pair well with blue, grey, and green accents for a fresh, uplifting look.

7. Mixed Tones

Mixed tones feature multi-coloured and variegated surfaces that provide texture and visual depth. They are perfect for adding character, breaking up large wall expanses, and achieving a more organic, handcrafted appearance that feels unique to each project.

Matching Natural Stone to Your Home’s Exterior Style

Matching Natural Stone to Your Home's Exterior Style

Matching natural stone to your home’s style ensures a cohesive, intentional design. These style pairings help create exteriors that reflect both personality and architectural character.

  • Modern and Minimalist Homes: Use sleek greys, charcoals, and uniform finishes for a streamlined look. These tones emphasise clean lines and pair well with glass, metal, and minimalist landscaping for a crisp, contemporary feel.
  • Classic and Heritage Homes: Choose warm sandstone, reclaimed bricks, or traditional patterns to enhance character. These materials respect the home’s history while delivering timeless elegance, depth, and architectural authenticity that blends old-world charm with modern function.
  • Coastal and Hamptons-Style Homes: Soft whites, creams, and weathered textures evoke a relaxed, beachside feel. These shades pair beautifully with light timber, white trims, and breezy outdoor living spaces for a fresh, airy atmosphere.
  • Rustic and Country Homes: Opt for earthy tones with rough or split-face finishes. These create a grounded, natural look that complements expansive gardens, timber features, and traditional rural architectural styles perfectly.
  • Contemporary Luxe Homes: Select polished surfaces and rich, deep colours for a dramatic, high-end feel. These choices convey sophistication and pair well with bold architectural statements and statement lighting.

Factors to Consider When Selecting Stone Colours

Factors to Consider When Selecting Stone Colours

Choosing the right stone colour involves more than personal taste. These factors ensure your selection enhances your home’s style, works with its surroundings, and lasts beautifully over time.

1. Existing Exterior Materials

Consider how the stone will interact with existing materials such as brickwork, timber, render, or roofing. A well-matched palette creates harmony, while contrasting tones can highlight architectural features without overpowering the home’s overall visual balance.

2. Surrounding Landscape

Look at your garden, nearby trees, and the surrounding environment when selecting stone colours. Complementary tones help your home feel naturally integrated with its setting, creating a unified and visually cohesive aesthetic across the property.

3. Architectural Details

Window frames, doors, trims, and other features influence the ideal stone colour. Matching tones maintains cohesion, while well-chosen contrast can emphasise key architectural elements and elevate your home’s design appeal significantly.

4. Maintenance and Ageing

Different stones age in unique ways. Some deepen in colour, others fade or develop a patina. Considering these changes ensures your choice remains visually appealing and aligned with your long-term design vision.

5. Personal Preference

Your style should guide the final choice. Select colours you connect with, ensuring you enjoy your home’s exterior for years while feeling confident the decision reflects your personality and taste.

How to Combine Multiple Stone Colours

How to Combine Multiple Stone Colours

Combining different stone colours can add richness and depth to your exterior. Follow these practical tips to achieve a balanced, cohesive look across various applications.

1. Highlight Accent Features

Use a contrasting stone colour on pillars, entryways, or feature walls to draw attention to key focal points. This method enhances visual appeal, creates distinction, and adds personality without overpowering the rest of your home’s design.

2. Layer Textures with Colour

Mix smooth and rough stone finishes in complementary tones to create both visual and tactile contrast. This layered approach builds depth, enriches your home’s exterior, and ensures every section feels connected and harmonious in appearance.

3. Create Visual Flow Between Spaces

Repeat specific stone colours across various areas of your exterior to link them visually. This technique establishes a sense of movement, ensuring all design elements feel unified, balanced, and visually pleasing throughout the property.

4. Define Zones with Colour Variation

Apply different stone colours to distinct areas, such as garden walls, outdoor kitchens, or pathways. This approach highlights functional zones while improving the overall usability and style of your home’s exterior design.

5. Balance Light and Dark Tones

Combine lighter and darker stone colours to create depth and dimension. Light shades can open up spaces, while darker tones provide contrast and grounding, resulting in a balanced, sophisticated overall appearance.

The Role of Stone Finishes in Colour Presentation

The Role of Stone Finishes in Colour Presentation

The finish of a natural stone can dramatically influence how its colour is perceived, making it an essential consideration in exterior design. 

Polished and honed finishes tend to intensify colour depth, bringing out rich tones and creating a more refined, high-end appearance. These finishes also enhance the stone’s ability to reflect light, which can make colours appear more vibrant. 

In contrast, sandblasted and tumbled finishes soften tones, lending a more natural, weathered feel that works well for rustic or coastal styles. Split-face and raked finishes introduce shadow play and texture, which can add dimension and variation to the overall colour presentation. 

Choosing the right finish isn’t just about style; it also affects how the stone interacts with its surroundings, how it ages over time, and how much maintenance it will require. 

A carefully selected finish ensures the stone’s colour complements your home’s exterior design while maintaining its beauty for years.

Common Mistakes to Avoid When Choosing Natural Stone Colours

Common Mistakes to Avoid When Choosing Natural Stone Colours

Avoiding these common mistakes will help you choose stone colours that stay attractive, cohesive, and functional for years to come.

  • Ignoring Natural Light: Failing to view stone samples in various lighting conditions can lead to unexpected results once installed. Colours may appear vibrant in sunlight but muted in shade, altering the intended design effect significantly.
  • Choosing Clashing Undertones: Mixing warm and cool undertones often creates visual dissonance. Even subtle clashes can disrupt overall harmony, making the exterior appear unbalanced and less appealing from different viewing angles.
  • Overcomplicating with Too Many Colours: Using multiple stone colours without a clear plan can overwhelm the design. Restricting the palette helps maintain visual clarity and ensures a cohesive, well-structured appearance.
  • Overlooking Long-Term Changes: Neglecting to consider how the stone will weather or patina over time may lead to dissatisfaction if the colour evolves away from your desired look.
  • Forgetting Surrounding Elements: Ignoring the influence of nearby features such as gardens, fencing, and driveways can cause the stone colour to clash with its environment, reducing overall harmony and design impact.

Final Thoughts

The right natural stone colour palette adds unmatched beauty, harmony, and prestige to your home’s exterior. When paired with expert installation, it ensures timeless appeal, durability, and a cohesive design that elevates your property’s value.

Consult Splendour in Stone for premium natural stones and professional installation services that guarantee exceptional results. Let us help you choose colours that reflect your style and create an exterior built to impress for years to come.

The Best Sustainable Stone Options for Green Building Projects

The building sector accounts for nearly 40% of global carbon emissions, and material choices play a huge role in that impact.

Keep using resource-heavy materials, and we’ll keep draining the planet. It’s that simple. The cost? Our environment, our wallets, and our future!

That’s why smart builders are turning to sustainable stone, beautiful, durable, and eco-friendly. 

In this guide, we’ll unpack the best options for green projects, from reclaimed pieces to low-impact natural stones that deliver both style and sustainability.

Why Choose Sustainable Stone for Green Building?

Sustainable stone offers a combination of durability, environmental responsibility, and visual appeal, making it a preferred choice for eco-conscious construction. 

Unlike many synthetic materials, stone is a natural product with a long lifespan, which reduces the need for frequent replacements and minimises waste. Its ability to be reclaimed and repurposed further enhances its environmental value.

Stone’s thermal mass properties can contribute to energy efficiency, helping regulate indoor temperatures and reducing the reliance on heating or cooling systems. When sourced from local or responsibly managed quarries, it supports regional industries while lowering transport-related emissions.

In addition to its functional benefits, sustainable stone provides timeless beauty that suits both traditional and modern designs. Choosing stone for your green building project means selecting a material that performs well, has a lower environmental impact, and adds enduring character to any structure or landscape.

Key Factors to Consider When Selecting Sustainable Stone

Key Factors to Consider When Selecting Sustainable Stone

Selecting the right sustainable stone goes beyond looks. These key factors help achieve eco-friendly, stylish, and long-lasting walling and paving.

  • Source and Origin: Where your stone is sourced influences its environmental footprint. Local supply reduces transport emissions and supports community industries. Check that quarrying methods meet responsible environmental guidelines.
  • Energy Efficiency: Sustainable stones often provide excellent thermal mass benefits. They help maintain consistent indoor temperatures naturally. This can cut down on heating and cooling demands significantly.
  • Maintenance Needs: Low-maintenance stones require minimal chemical treatments. This lowers environmental harm and simplifies upkeep. Opt for materials that remain attractive without frequent intervention.
  • Recyclability and Reuse: Some stones can be reclaimed or repurposed after their first use. This reduces landfill waste and maximises resource efficiency. Always assess the stone’s end-of-life potential.
  • Durability in Local Climate: Stone performance can vary in different climates. Select materials proven to withstand Australian conditions without compromising structure or appearance. This ensures long-term sustainability.
  • Compatibility with Other Eco-Friendly Materials: Choose stones that integrate well with sustainable construction elements. They should pair effectively with recycled timber, eco-friendly mortar, and low-impact finishes. This creates a cohesive green design.

Top Sustainable Stone Options for Green Building Projects

Top Sustainable Stone Options for Green Building Projects

These sustainable stone options deliver strength, style, and environmental benefits, perfect for long-lasting walling and paving in Australian projects.

1. Granite

Granite stands out for its incredible durability and ability to resist wear in high-traffic areas. Locally sourced granite reduces transport emissions, supporting sustainability. 

Its dense structure makes it ideal for both walling and paving projects that demand strength. Granite like Buffalo Granite offers a striking look with reliable performance, making it an eco-conscious choice for builders aiming for longevity and style.

2. Limestone

Limestone offers natural elegance with soft, earthy tones that suit both modern and traditional projects. It requires less energy to process, reducing its carbon footprint. Highly versatile, it works beautifully for retaining walls, cladding, and paving. 

Splendour in Stone’s Barwon Limestone delivers refined texture and local character, making it a sustainable and stylish option for environmentally conscious walling and landscaping designs.

3. Sandstone

Sandstone

Sandstone provides timeless charm with excellent drainage and natural insulation properties. It performs well in diverse climates, making it a practical and sustainable choice. Its warm tones enhance both residential and commercial spaces. 

Example like Charlotte Sandstone combines beauty and durability, offering an eco-friendly walling solution that blends seamlessly with outdoor landscapes while reducing environmental impact.

4. Travertine

Travertine is known for its light tones, which stay cool underfoot and enhance outdoor comfort. It is minimally processed, making it a more sustainable stone option. 

Perfect for pool surrounds, patios, and alfresco spaces, it also offers excellent longevity. Splendour in Stone’s Pearl Travertine delivers a luxurious yet eco-conscious finish, ideal for stylish walling or paving that aligns with green building principles.

5. Bluestone

Bluestone is durable and visually striking with its blue-grey tones. It stands up to heavy wear and Australia’s harsh outdoor conditions. Its longevity reduces the need for replacements, supporting sustainability. 

Urban Bluestone offers a contemporary finish for walling and paving, delivering both safety and style for eco-conscious designs without compromising performance in demanding environments.

6. Quartzite

Quartzite

Quartzite is a high-density stone prized for resilience and weather resistance, ideal for outdoor sustainable spaces. Its textured surface and strong structure resist erosion and thermal variation, making it a practical, long-lasting solution. Locally selected quartzite helps reduce embodied carbon and supports greener building choices.

7. Reclaimed Stone

Reclaimed stone reuses materials from previous structures, cutting waste and the need for new quarrying. Every piece carries a unique history and character.

It offers unmatched sustainability without sacrificing style or performance. Reclaimed Hawthorn provides rich textures and warm tones, making it a perfect choice for environmentally friendly walling or paving projects that value heritage as much as sustainability.

Design Inspiration for Eco-Friendly Projects Using Stone

Design Inspiration for Eco-Friendly Projects Using Stone

Stone offers endless possibilities for creating stylish spaces that also respect the environment. Here are inspiring ideas for sustainable designs worth considering.

  • Feature Walls: Limestone and sandstone are popular choices for feature walls, adding texture and warmth to both interiors and exteriors. Locally sourced options reduce transport emissions and support regional suppliers. These walls work beautifully in modern, rustic, and heritage-style homes.
  • Pathways: Reclaimed stone and bluestone create durable, visually striking pathways. They repurpose existing materials, reducing demand for new quarrying while adding character. Ideal for gardens, courtyards, and heritage properties.
  • Outdoor Kitchens: Granite and quartzite offer hard-wearing, low-maintenance surfaces perfect for outdoor kitchens. Their durability extends the lifespan of installations, reducing replacement needs. They suit both sleek modern layouts and robust, rustic designs.
  • Paving Areas: Quartzite and granite are excellent for sustainable paving in patios, courtyards, and driveways. Their strength ensures a long service life, reducing waste. Both stones offer colour variations to suit different architectural styles.
  • Pool Surrounds: Bluestone and granite provide comfort underfoot around pools. Locally sourced materials help lower the project’s environmental footprint. Their neutral tones complement various landscaping styles.
  • Garden Steps: Sandstone and granite make sturdy, attractive garden steps. They integrate naturally into landscaped spaces, blending with greenery. Choosing locally quarried stone supports sustainable building practices.

Maintenance Tips to Maximise Longevity and Sustainability

Maintenance Tips to Maximise Longevity and Sustainability

Caring for sustainable stone correctly extends its life. These maintenance tips keep your walling and paving strong, stylish, and eco-friendly.

  • Clean with pH-Neutral Solutions: Harsh cleaners can damage stone surfaces over time. Opt for pH-neutral products to protect texture and finish. Regular gentle cleaning preserves the stone’s natural beauty.
  • Seal Where Necessary: Some stones benefit from sealing to resist stains and moisture. Use eco-friendly sealants when possible. Reseal periodically to maintain protective performance.
  • Inspect Regularly for Damage: Small chips or cracks can worsen quickly. Address them early to avoid costly repairs. Frequent checks keep your stone in top condition.
  • Avoid High-Pressure Cleaning: Strong water pressure can erode stone surfaces. Choose low-pressure rinsing for safe cleaning. This prevents unnecessary wear while keeping areas fresh.
  • Use Protective Mats or Pads: Furniture or heavy items can scratch or chip stone. Adding mats or pads reduces direct impact. This simple step helps preserve the surface.
  • Keep Surrounding Areas Clear: Overhanging plants or pooling water can damage stone. Maintain clear drainage and trim foliage nearby. This minimises moisture retention and organic build-up.

Why Choose Splendour in Stone for Sustainable Projects

Why Choose Splendour in Stone for Sustainable Projects

Splendour in Stone offers a carefully selected range of stone products that meet the demands of both design and sustainability. The company prioritises sourcing from reputable suppliers who follow responsible quarrying practices, ensuring minimal environmental impact. 

Many products are available in reclaimed or locally sourced options, helping to reduce transport emissions and support Australian industries.

With years of experience in supplying stone for residential and commercial projects, Splendour in Stone understands the balance between aesthetic appeal and environmental responsibility. 

The team provides expert advice on selecting the right stone for long-term durability and minimal maintenance, ensuring your investment stands the test of time.

Whether you are creating a contemporary outdoor space or restoring a heritage property, Splendour in Stone can supply materials that align with your sustainability goals. By choosing their products, you contribute to greener building practices without compromising on quality, strength, or timeless style.

Conclusion

Sustainable stone blends beauty, strength, and responsibility, making it the smart choice for eco-conscious walling and paving. From reclaimed textures to durable, low-impact options, every selection shapes a greener future while elevating your project’s style.

 Ready to build with materials that last and protect our planet? Explore Splendour in Stone’s sustainable range today and bring your vision to life with stone that’s as timeless as it is environmentally friendly.

Midnight Ash Brick: Bold Style for Modern Homes

In a world of safe design choices, Midnight Ash Brick dares to stand out. Its deep charcoal tones and refined surface create a bold foundation for architectural expression. 

Whether featured on a sharp urban façade or an internal statement wall, this brick offers contrast, character, and presence. Designed for homeowners and architects who want to break from tradition, it delivers style without compromise. 

Midnight Ash is not just a material. It is a modern design move that adds depth, strength, and intention to every project.

What Is Midnight Ash Brick?

Midnight Ash Brick is a premium clay brick recognised for its deep grey tones, charcoal undertones, and smooth matte finish that perfectly suits modern architectural styles. 

Available in both new and reclaimed formats, it offers design flexibility with added character and sustainability. Kiln-fired for strength and consistency, each brick delivers a clean, refined aesthetic that stands out in both interior and exterior settings. 

Its sleek profile and modular sizing allow for crisp laying patterns and sharp visual lines. Unlike traditional red or brown bricks, Midnight Ash brings a bold, minimalist edge to any space, working beautifully with timber, steel, stone, or rendered finishes.

Why Choose Midnight Ash Brick for Modern Homes?

Why Choose Midnight Ash Brick for Modern Homes?

To choose a brick that feels bold yet timeless, understanding its design strengths is essential. These benefits show why Midnight Ash is ideal for modern homes.

1. Enhances Curb Appeal with Bold Exterior Walls

Midnight Ash Brick transforms standard exteriors into architectural statements. Its deep tones provide instant depth and contrast, helping façades appear more structured, refined, and visually striking from the street without overwhelming the overall design.

2. Creates Contrast in Light-Toned or Monochrome Façades

When used alongside pale render, timber cladding, or off-white finishes, Midnight Ash introduces balance and visual drama. It prevents minimalism from feeling flat by adding a grounded, high-impact finish to clean modern surfaces.

3. Ideal for Boundary Walls, Feature Pillars, and Entryways

This brick adds sophistication to landscape structures such as boundary walls and entry piers. Its consistent tone and sharp edges allow for smooth transitions between garden spaces, architecture, and hardscaping elements like steel or concrete.

4. Offers a Low-Maintenance Finish for Busy Lifestyles

Midnight Ash Brick maintains its sleek, clean appearance with minimal upkeep. Its dark, dense surface resists staining, weathering, and general wear, making it ideal for modern homeowners who want bold aesthetics without high maintenance demands.

5. Suited to Both Detached Homes and Urban Developments

Whether used on a large suburban home or a compact urban townhouse, Midnight Ash Brick fits seamlessly. Its bold presence scales well, offering timeless appeal across modern homes, duplexes, and medium-density developments.

Interior Applications of Midnight Ash Brick in Modern Homes

Interior Applications of Midnight Ash Brick in Modern Homes

Midnight Ash Brick brings depth and definition to interior spaces, especially where light, contrast, and material layering matter. Here are the most effective ways to use it indoors:

  • Statement feature walls in living rooms or hallways: These bricks add bold contrast and texture to interior walls, creating a visual anchor that elevates open spaces or corridors with architectural confidence and timeless impact.
  • Fireplace surrounds in modern or industrial homes: Midnight Ash frames fireplaces with clean lines and rich tones, offering warmth and weight that makes the hearth a standout design feature in minimalist or loft-style interiors.
  • Internal feature pillars or dividing walls: Perfect for structural columns or mid-space dividers, this brick introduces visual rhythm, texture, and definition without disrupting the open-plan interior’s flow.
  • Accent walls in entryways or stairwells: First impressions matter, and Midnight Ash delivers. It adds character and visual depth in transitional spaces, contrasting beautifully with natural light and neutral finishes.
  • Kitchen splashbacks or rear walls in open-plan spaces: In kitchen and dining areas, this brick adds mood and elegance. It pairs beautifully with timber, stone, or matte cabinetry while enhancing the overall material palette.

Exterior Applications of Midnight Ash Brick in Modern Homes

Exterior Applications of Midnight Ash Brick in Modern Homes

Midnight Ash Brick is designed to perform across a range of outdoor settings, from residential landscapes to large-scale architectural builds. Here are the most effective ways to use it externally:

  • Façades, landscape walls, and architectural fencing: Midnight Ash enhances structure and contrast across external surfaces. It’s ideal for full-height façades, retaining walls, and sleek fencing that demands clean lines and long-term durability.
  • Blending with dark rooflines, steel accents, or black window frames: This brick complements other dark-toned architectural elements, creating a cohesive, high-contrast exterior that looks sharp, intentional, and distinctly modern.
  • Complementing stone pavers and retaining walls: When paired with dark or textured stone elements, Midnight Ash adds tonal consistency. It grounds the landscape design while supporting seamless transitions between built and natural elements.
  • Use in multi-residential and commercial builds: Midnight Ash Brick scales beautifully across larger developments. Its clean finish and contemporary colour suit high-density housing, retail facades, and urban architectural projects requiring consistency and sophistication.

How Midnight Ash Brick Compares to Other Dark Bricks

How Midnight Ash Brick Compares to Other Dark Bricks

To select a dark brick that feels refined and lasting, you need to weigh up your options. These comparisons highlight how Midnight Ash stands apart in real-world applications.

1. Offers a Richer, More Consistent Colour Than Recycled Dark Bricks

While recycled bricks can bring character, their tone and surface often vary from batch to batch. Midnight Ash provides a stable, consistent charcoal finish with subtle depth, making it ideal for design-led projects that require uniformity.

2. Superior to Painted Brick in Texture and Longevity

Painted brick may offer short-term aesthetic appeal, but it often chips, fades, or peels over time. Midnight Ash delivers a baked-in tone and refined matte surface that requires no touch-ups while ageing naturally with grace.

3. Outperforms Basalt Bricks in Workability and Finish

Basalt bricks are heavy and difficult to work with, often requiring specialised tools. Midnight Ash is easier to cut and install while still offering a contemporary, stone-like finish that architects love for modern builds.

4. Delivers Lower Efflorescence Than Many Dark Bricks

Efflorescence can be a common issue in dark brickwork, but Midnight Ash is kiln-fired with low porosity. This reduces the chance of salt deposits appearing, helping the surface stay clean and true in tone.

5. Provides a More Refined Surface Than Wirecut Alternatives

Wirecut bricks tend to have a rugged, uniform finish that can feel generic. Midnight Ash features a smoother, more architectural surface with soft variations that add visual depth and elevate the material palette.

How to Style Midnight Ash Brick in Your Build

How to Style Midnight Ash Brick in Your Build

To create a look that feels complete and visually refined, every detail in your brickwork matters. These styling ideas help you maximise Midnight Ash Brick’s design potential.

1. Use Grout Colours That Create Contrast or Subtle Transitions

Grout colour has a significant impact on the overall look. A darker grout blends with the brick for a seamless effect, while a lighter grout introduces contrast and highlights each brick’s shape and layout clearly.

2. Choose Laying Patterns That Reinforce Modern Aesthetics

Midnight Ash works beautifully in clean running bonds, stacked patterns, or vertical alignments. These layouts add order and repetition, enhancing the brick’s linear appeal and reinforcing the architectural rhythm in contemporary home designs.

3. Pair with Natural Cladding, Stone, or Render Finishes

This brick sits confidently alongside textured or refined surfaces like timber battens, honed stone, or smooth render. These pairings offer material contrast while keeping the overall design grounded in neutral, timeless tones.

4. Highlight Feature Zones with Lighting or Landscaping

Strategic lighting and landscape elements can elevate Midnight Ash Brick even further. Uplighting accent walls or framing with greenery helps soften the tone, drawing focus to texture and creating mood in day and night settings.

5. Study Real Projects for Inspiration and Placement Ideas

Reviewing past builds that feature Midnight Ash Brick can provide layout ideas, styling references, and placement tips. These visual examples often reveal unexpected combinations and practical solutions that suit a range of architectural styles.

How to Maintain Midnight Ash Brick for Lasting Performance

How to Maintain Midnight Ash Brick for Lasting Performance

Midnight Ash Brick is designed for long-term use, but a few thoughtful maintenance practices can help it stay visually sharp and structurally sound. Here’s how to care for it properly:

  • Clean gently using water and a soft brush: Remove surface dirt and dust with a garden hose and soft-bristled brush. Avoid high-pressure cleaning or harsh chemicals, which can dull the brick’s finish or disrupt mortar lines.
  • Seal only when necessary in exposed areas: Use breathable, clay-compatible sealants for surfaces exposed to moisture or staining. This helps protect the finish without trapping water inside, which could cause long-term discolouration.
  • Monitor the brick’s colour and surface as it ages: Midnight Ash matures beautifully, with only subtle tone changes over time. Check occasionally for uneven weathering or dulling in high-traffic or moisture-prone zones.
  • Prevent staining from water, salt, or dust buildup: Ensure the surrounding landscape includes proper drainage and ventilation. Early signs of efflorescence can be removed with a dry cloth or a gentle vinegar solution.
  • Inspect joints and mortar annually for wear or gaps: Seasonal weather changes can lead to minor mortar erosion. Fill small cracks or joints with appropriate repair mortar to maintain the structure and clean appearance.

Final Thoughts

Midnight Ash Brick offers bold character, modern appeal, and long-term performance for any architectural space. At Splendour in Stone, we supply premium reclaimed Midnight Ash Brick for striking, sustainable design outcomes. 

Contact our expert team to request samples, explore styling advice, or arrange professional installation support. Let us help you achieve a refined and distinctive finish that sets your project apart.

Clayburn Brick for Timeless Feature Walls and Exteriors

Warm, earthy, and effortlessly timeless, Clayburn Brick is fast becoming the go-to choice for architects and homeowners looking to elevate both interiors and exteriors. 

Whether you’re building a striking feature wall or refining your home’s façade, this natural clay brick brings a handcrafted charm that modern materials cannot replicate. 

Its soft variation and textural depth create a grounded, organic look that blends seamlessly with contemporary or heritage design. If you’re after classic appeal with lasting performance, Clayburn delivers on both style and substance.

What Is Clayburn Brick?

Clayburn Brick is a premium clay brick known for its soft texture, warm tones, and timeless character. Made from high-quality clay and kiln-fired for strength, it offers a natural finish that suits both traditional and modern builds. 

Each brick features subtle colour variation, adding depth and authenticity to walls. Available in both new and reclaimed options, Clayburn brings flexibility to a wide range of design styles. 

Its handcrafted appearance sets it apart from uniform, mass-produced bricks, making it ideal for projects that require visual richness. When compared to standard bricks, Clayburn stands out for its durability, natural appeal, and architectural elegance.

Why Use Clayburn Brick for Feature Walls?

Why Use Clayburn Brick for Feature Walls?

To create a feature wall that feels layered and considered, the brick you choose must deliver warmth, tone, and texture. These benefits make Clayburn Brick a smart, lasting choice.

1. Offers Rich Visual Texture and Depth

Clayburn Brick delivers organic variation and a tactile finish that adds natural warmth to any wall. Its soft colour shifts and subtle texture give interior surfaces visual dimension, helping you create layered and expressive room designs.

2. Complements Timber, Stone, and Neutral Accents

This brick pairs beautifully with timber, concrete, and neutral tones, making it ideal for cohesive design schemes. The warm, earthy finish supports a balanced look, allowing other textures and materials in the room to shine through effortlessly.

3. Creates a Lasting Focal Point in Any Room

Used around fireplaces, hallways, or living areas, Clayburn Brick creates a grounded focal point that draws attention. Its natural finish introduces visual weight and character without overwhelming the space, making it perfect for minimalist or styled interiors.

4. Adds Character Without Overcomplicating the Design

For those seeking a quiet statement, Clayburn Brick offers character and charm without excessive detailing. Its warm tones and soft finish introduce style and personality while keeping the overall design clean, simple, and easy to live with.

5. Suits Both Residential and Commercial Interiors

Clayburn Brick transitions easily between residential and commercial environments. Whether in a home, café, or boutique showroom, its charm, resilience, and understated elegance make it a functional and design-driven material for feature applications.

How Clayburn Brick Performs on External Walls and Façades

How Clayburn Brick Performs on External Walls and Façades

To create an exterior that feels enduring and designed with purpose, your walling material must perform in every season. These qualities make Clayburn Brick ideal for outdoor architectural use.

1. Ideal for Façades, Fences, Garden Walls, and Piers

Clayburn Brick can be used across full front elevations or as accents in boundary walls, fencing, or garden bed features. Its refined colour and consistent finish suit both residential streetscapes and contemporary outdoor architecture.

2. Withstands Harsh Climates and Seasonal Shifts

Made to endure Australia’s unpredictable weather, Clayburn Brick resists damage from moisture, heat, wind, and cold. Its fired surface maintains strength through long summers and wet winters, without cracking, shifting, or fading over time.

3. Provides UV, Fire, and Moisture Resistance

The brick’s dense structure and high-quality clay composition make it naturally resistant to environmental exposure. Clayburn performs well in bushfire zones and coastal areas alike, offering peace of mind alongside its architectural beauty.

4. Maintains Colour and Texture with Minimal Effort

Unlike painted or rendered finishes, Clayburn Brick does not peel or wear unevenly. Its raw clay surface retains its tone and texture, requiring little upkeep while preserving the façade’s character year after year.

5. Adds Thermal Mass and Insulation Benefits

Clayburn Brick supports energy efficiency by absorbing and regulating heat, helping to reduce indoor temperature fluctuations. This natural thermal mass quality enhances passive design strategies and supports sustainable home construction practices.

Clayburn Brick vs Other Brick Types

Clayburn Brick vs Other Brick Types

Clayburn Brick offers a refined and natural finish, but what makes it different from other bricks commonly used in Australian projects? Here’s how it compares in performance, aesthetics, and long-term appeal:

1. Outperforms Recycled Brick in Consistency and Finish

While recycled bricks offer charm, they often lack uniform sizing, structural integrity, and surface consistency. Clayburn Brick maintains quality across every piece, giving designers better control and builders easier installation with fewer irregularities.

2. Superior to Pressed Brick in Natural Texture and Tone

Pressed bricks tend to appear more rigid and formal, with smoother faces and sharper edges. Clayburn’s earthy tones, irregular texture, and handcrafted character create a warmer, more relaxed aesthetic suited to timeless designs.

3. Offers Greater Design Flexibility Than Wirecut Brick

Wirecut bricks are often uniform and functional but lack depth and surface interest. Clayburn’s slight surface variation allows for creative applications in both modern and traditional spaces, with more visual movement across the wall.

4. Delivers Better Long-Term Performance in Harsh Environments

Standard bricks can be prone to fading, moisture absorption, or salt damage over time. Clayburn Brick is fired for durability and weather resistance, offering low porosity and strong colour retention across decades of use.

5. Creates a More Refined Look Than Painted or Bagged Brick

Unlike bricks that rely on surface treatments like paint or bagging for aesthetic effect, Clayburn Brick delivers raw, baked-in colour and texture that lasts. Its natural look evolves beautifully without peeling, staining, or uneven wear.

How to Incorporate Clayburn Brick into Your Project

How to Incorporate Clayburn Brick into Your Project

Whether you’re creating an interior feature or a full outdoor façade, thoughtful placement and finishing details can elevate your final outcome. Here are practical ways to bring out the best in Clayburn Brick:

1. Use Classic or Creative Layout Patterns

Clayburn Brick can be laid in traditional running bond or stacked for a clean, modern finish. For added visual interest, try herringbone or vertical soldier courses to highlight design features or frame architectural details.

2. Pair with Stone Pavers or Walling Stone

Using Clayburn Brick alongside natural stone creates a layered texture across surfaces. Whether matching earthy tones or creating contrast, this pairing reinforces a cohesive material story across alfresco areas, courtyards, and feature entryways.

3. Choose the Right Grout Colour and Joint Style

Mortar colour significantly affects the finished look. For a blended effect, match the grout to the brick tone. For contrast, opt for lighter joints. Recessed or flush finishes can also influence the wall’s depth and detail.

4. Reference Product Galleries for Inspiration

Before finalising your design, browse real-life projects to visualise how Clayburn Brick works in different settings. Image galleries can reveal layout combinations, material pairings, and styling techniques that align with your project goals.

5. Work with a Designer or Builder Familiar with Brickwork

Engaging a professional who understands how to handle natural clay bricks will ensure precision and longevity. An experienced builder can advise on bond patterns, mortar types, and finishing touches that enhance Clayburn’s character and performance.

How to Maintain Clayburn Brick for Lasting Performance

How to Maintain Clayburn Brick for Lasting Performance

Clayburn Brick requires very little upkeep, but regular care helps preserve its natural texture and appearance. Here are the best practices to keep your brickwork looking its best over time:

  • Clean Gently with Water and a Soft Brush: Avoid harsh chemicals or pressure washers. Use a hose or bucket of water with a soft-bristled brush to remove dust, cobwebs, or surface dirt without affecting the brick’s finish.
  • Inspect Mortar Joints Annually: Mortar can degrade over time, especially in exposed areas. Check for cracks or erosion once a year and touch up joints as needed to maintain structural integrity.
  • Avoid Using Sealers Unless Specified: Clayburn Brick is naturally breathable and doesn’t usually require sealing. If sealant is applied, make sure it’s suitable for clay-based bricks and allows vapour permeability.
  • Allow Natural Weathering for Character: One of Clayburn’s strengths is how it ages. The surface develops subtle changes over time, enhancing its rustic charm rather than diminishing its value or look.
  • Monitor High-Exposure Areas for Efflorescence: In spots exposed to water or humidity, white salt deposits can occasionally appear. These can be brushed off easily with a dry cloth or diluted vinegar solution.

Final Thoughts

Clayburn Brick delivers timeless warmth, texture, and character for both indoor and outdoor spaces. Splendour in Stone proudly supplies reclaimed Clayburn Brick, perfect for creating authentic feature walls and façades. 

Visit our showroom or speak with our expert team to request samples, explore design options, and get professional advice and installation support tailored to your architectural vision.

How to Seal Paving Stones for Outdoor Conditions

Outdoor paving stones are constantly exposed to rain, sunlight, and dirt, all of which can dull their natural beauty and weaken their structure over time. When left unsealed, stone surfaces are more vulnerable to stains, fading, moisture absorption, and wear. 

Sealing your paving stones helps protect their appearance, prolong their lifespan, and reduce ongoing maintenance. It also enhances the colour and texture of the stone. 

This article explains why sealing matters, what materials and tools you’ll need, and how to apply the right sealer for outdoor paving conditions.

Tools and Materials You’ll Need

  • pH-neutral cleaner: Safely removes dirt, grime, and organic residue from stone surfaces without damaging the natural finish or altering colour.
  • Pressure washer: Provides a deep clean by lifting stubborn stains, moss, and debris from textured or porous surfaces before sealing.
  • Stiff-bristle brush: Ideal for scrubbing dirt from rough or hard-to-reach surfaces where a pressure washer may not be suitable.
  • Masking tape: Helps protect surrounding areas such as walls, borders, or garden edges from accidental sealer application.
  • Paint roller or sprayer: Used to apply the sealer smoothly and evenly across wide surfaces for a consistent finish.
  • Protective gloves: Shields hands from chemical exposure during cleaning and sealing processes.
  • Sealer product: The main protective coating, chosen based on stone type and desired finish.
  • Safety gear (mask and eyewear): Ensures safe application, especially when working with sprayers or strong chemical products.

Step-by-Step Guide to Sealing Paving Stones

Step-by-Step Guide to Sealing Paving Stones

A flawless finish starts with a clean, dry surface and the right technique. These simple steps will help you apply sealer effectively for long-lasting outdoor protection.

1. Sweep and rinse the surface thoroughly

Remove all visible debris, leaves, soil, and dust using a stiff broom. Then rinse the area with clean water or a pressure washer to lift any remaining grime. A spotless, residue-free surface ensures the sealer properly bonds to the stone.

2. Allow complete drying for 24 to 48 hours

Let the surface dry thoroughly before sealing. Moisture trapped in the stone can prevent proper adhesion and result in blotchy, uneven finishes. Allow at least 24 to 48 hours of drying time, depending on weather conditions and stone porosity.

3. Apply the sealer evenly with a roller, sprayer, or brush

Use a sprayer for large areas or a roller for precise coverage. Apply the sealer in thin, even layers. Make sure each stroke overlaps slightly to ensure consistent application, avoiding streaks or gaps in the protective coating.

4. Avoid pooling and overlap marks

Pooling causes the sealer to cure unevenly and may leave glossy, sticky spots. To prevent this, work in small sections with consistent pressure, keeping a wet edge and overlapping strokes to blend each area into the next seamlessly.

5. Allow curing time as per product instructions

Each sealer has a specific curing timeline. Always follow the manufacturer’s guidance, which often ranges from 24 to 72 hours. Disregarding this step can weaken the protective layer and reduce the product’s ability to withstand weather and foot traffic.

6. Apply a second coat if needed

Some sealers perform best when layered. If a second coat is recommended, wait for the first to cure completely. Apply the next layer using the same tool and method to maintain a uniform, well-protected surface with enhanced durability.

7. Keep the surface free from foot traffic and water until cured

Prevent anyone or anything from stepping on the sealed area until fully cured. Introducing water, dust, or movement too early can damage the finish, trap imperfections, and lead to expensive rework or reduced performance of the sealer.

Choosing the Right Sealer for Natural Stone

Choosing the Right Sealer for Natural Stone

Making the right choice starts with understanding your stone and its environment. These key considerations will help you select a sealer that protects, enhances, and lasts.

1. Select the appropriate sealer type

Choose between penetrating, surface, or enhancing sealers depending on your needs. Penetrating sealers soak into the stone and offer invisible protection. Surface sealers form a film over the stone, while enhancing sealers bring out the natural colour and texture.

2. Match the sealer to the stone

Not all stones are created equal. Dense stones like granite benefit from enhancing sealers, while porous stones such as limestone and travertine require breathable, penetrating sealers to prevent moisture from becoming trapped and causing long-term damage or discolouration.

3. Ensure the sealer is breathable

Breathability is critical for outdoor paving, where water exposure is frequent. A breathable sealer allows moisture vapour to escape, helping prevent issues like flaking, salt build-up, or mould growth beneath the surface of the stone over time.

4. Choose your desired finish

The right finish influences the look and feel of your hardscape. Gloss finishes give a rich, wet look. Matte finishes are more subtle, while natural-look sealers preserve the stone’s raw appearance without compromising on protection or performance.

5. Verify UV protection levels

Sunlight can fade and weaken stone over time. UV-resistant sealers help preserve the natural colour and surface strength of your paving, making them essential for outdoor areas that receive prolonged or intense sun exposure throughout the year.

Tips for Long-Term Sealer Maintenance

Tips for Long-Term Sealer Maintenance

Preserving the look and performance of your paving requires more than one good application. These essential maintenance tips will help your sealed stone stay protected and looking its best over time.

  • Reapply sealer regularly: Most sealers require reapplication every 2 to 5 years. Check the product label, consider exposure and traffic, and recoat when needed to maintain protection and visual quality.
  • Watch for sealer wear signs: Fading colour, increased water absorption, or visible stains are indicators that your sealer is no longer effective and should be reapplied to prevent surface damage.
  • Use stone-safe cleaning methods: Clean with pH-neutral solutions, soft brooms, or low-pressure hoses to avoid damaging the sealed surface or wearing away the protective layer prematurely.
  • Avoid harsh cleaning products: Bleach, ammonia, and solvent-based cleaners can degrade sealers. Always choose cleaning products designed specifically for sealed natural stone to preserve durability and appearance.
  • Protect paving from heavy furniture: Use pads or mats under furniture legs to prevent scuffing, cracking, or abrasion that can wear down the sealer and expose the stone beneath.
  • Address spills and stains promptly: Clean up oils, acids, or coloured liquids right away. This helps prevent them from soaking into compromised areas and causing permanent marks or deterioration.

Aftercare and Maintenance Tips

Aftercare and Maintenance Tips

Maintaining your sealed paving doesn’t stop after the first few weeks. These aftercare habits will help protect the finish, reduce wear, and extend the time between resealing.

  • Check for moss or algae growth after rainy periods: Regularly inspect shaded areas where moisture lingers. Moss and algae can break down sealant layers and become slippery if not addressed early.
  • Store leftover sealer correctly for future touch-ups: Keep any unused sealer sealed tightly in a cool, dry place. Proper storage allows for quick reapplication of small patches without needing to recoat the entire surface.
  • Schedule a yearly professional inspection if unsure: If you’re uncertain about the sealer’s condition, a yearly check by a stone specialist ensures problems are caught early before they require costly fixes.
  • Avoid placing metal pots or rust-prone items directly: Metal objects can leave rust stains on sealed stone, especially during rain. Use protective trays or pads to prevent permanent surface discolouration.
  • Limit use of high-pressure washers on sealed stone: Excessive pressure can strip sealer prematurely. Use only when necessary and with appropriate settings suited for sealed surfaces to maintain integrity.
  • Monitor changes after extreme heat or heavy storms: Intense weather can degrade sealers faster than normal. Always check for surface dullness, spotting, or water absorption following such events.

Final Thoughts

Sealing your paving stones is key to protecting their beauty and ensuring they last in outdoor conditions. From product selection to aftercare, every step matters. 

At Splendour in Stone, we offer premium natural stone pavers and expert advice to help you get the best results. Contact us today for tailored solutions that suit your project and environment.

How to Maintain Stone Paving in Australia: Weatherproof Tips That Work

Stone paving looks stunning when freshly laid, but Australia’s harsh sun, sudden downpours, and coastal air can wear it down fast if you’re not careful. 

Whether it’s a sandstone courtyard in Sydney or a bluestone path in Melbourne, keeping your pavers in top nick isn’t just about looks, it’s about longevity. The good news? A few smart maintenance habits can save you thousands in repairs. Let’s walk through the essentials every homeowner should know.

1. Clean Regularly to Avoid Buildup

Regular cleaning is the first and most important step in keeping your stone paving looking its best. In Australia’s outdoors, leaves, dirt, and dust build up quickly, especially after windy days or storms. Left unattended, that debris can trap moisture and lead to stains, mould, or moss, particularly on porous stones like sandstone and limestone.

Use a soft-bristled broom to sweep your paving weekly and a low-pressure hose to rinse off grime. For deeper cleans, stick to pH-neutral detergents that won’t strip the stone’s natural finish. Avoid harsh chemicals like bleach or acidic cleaners, which can etch and dull the surface over time.

It’s also wise to steer clear of high-pressure washers unless you know your stone can handle it, too much force can chip edges or wear away sealant. A little elbow grease and gentle care go a long way toward keeping things fresh and tidy.

2. Reseal Periodically to Block Moisture and UV

Reseal Periodically to Block Moisture and UV

Australia’s intense sun doesn’t just warm your patio, it slowly fades the natural colours in your stone. Add in heavy rain, morning dew, or coastal salt spray, and you’ve got the perfect recipe for staining, mould growth, or salt efflorescence. That’s where resealing comes in.

A good quality stone sealant acts like sunscreen and waterproofing combined. It helps protect the surface from UV rays, repels water, and makes cleaning much easier. For high-traffic areas or porous stones like travertine and limestone, resealing every 1–2 years is a safe bet. Denser stones like granite or quartzite can go a bit longer, around every 3 years.

You’ll know it’s time when water stops beading on the surface or when stains start soaking in more easily. Always clean thoroughly before resealing, and choose a sealant suitable for outdoor Australian conditions, especially one that offers UV resistance and breathability.

3. Tackle Stains Promptly

Spills happen, whether it’s red wine at a backyard BBQ, oil from the grill, or rust from outdoor furniture. But when it comes to natural stone, timing is everything. The longer a stain sits, the deeper it seeps into the surface, especially on porous stones like sandstone, limestone, or marble.

Act quickly by blotting (not scrubbing) the area with a clean cloth. Then reach for a stone-safe cleaner, look for products specifically labelled for natural stone, as these are pH-neutral and won’t degrade the surface. Steer clear of acidic cleaners like vinegar or lemon juice, which can cause permanent etching, particularly on limestone and marble.

For stubborn marks like rust, a poultice made from a specialised rust remover and an absorbent powder can help draw it out without damaging the stone. The key is to always check your cleaner’s compatibility first and test it in a small, hidden spot before going all in.

4. Choose the Right Cleaning Tools

Choose the Right Cleaning Tools

Using the wrong cleaning gear can do more harm than good, even if your stone looks tough. Natural stone surfaces need a gentle approach, especially when dealing with softer varieties like travertine or sandstone.

Stick to non-metallic brushes or soft scrubbing pads that won’t scratch or wear down the stone’s surface. When it comes to cleaning products, always go for a pH-neutral solution designed for natural stone. These cleaners lift grime without reacting chemically with the stone itself.

Avoid harsh chemicals like bleach, ammonia, or vinegar. Although they may work well on tiles or concrete, they can strip sealants, discolour the surface, or cause etching. This is particularly risky with calcium-based stones like limestone and marble.

If you’re unsure, test any product or tool in a discreet corner before applying it across your paved area. When in doubt, less is more; gentle, regular care always wins out over heavy-duty fixes later.

5. Prevent Weeds and Ants in the Joints

Weeds sprouting between your pavers and ants building nests beneath them can quickly ruin the look and structure of your paved space. The good news? A bit of preventative maintenance goes a long way.

Start by brushing in polymeric sand or a quality jointing compound between your pavers. These products harden slightly when set, locking out weeds and deterring ants from digging through. Over time, weather and foot traffic can wear them down, so it’s worth topping them up every year or two, especially in high-use areas.

Drainage plays a big role, too. If water tends to pool or sit in joints, it creates the ideal environment for weeds to thrive. Make sure your paving slopes slightly away from buildings and drains freely after rain. The combination of tight joints and good runoff keeps your paved area cleaner, safer, and far less inviting to nature’s little invaders.

6. Protect Paving from Furniture Damage

 Protect Paving from Furniture Damage

Outdoor furniture looks great on stone paving until it starts leaving behind scratches, rust marks, or worn patches. The everyday drag of chair legs, especially during gatherings or rearranging, can scuff the surface over time. To avoid this, fit your furniture with non-rubber leg caps or gliders made from plastic, felt, or Teflon. 

Rubber may seem safe, but in hot Aussie weather, it can break down and leave stubborn black stains on natural stone. Always lift, never drag, when moving heavy tables, lounges, or barbecues. For added protection, place rugs or outdoor mats in high-traffic areas like under dining sets or seating arrangements. 

Just make sure they’re breathable and quick-drying to avoid trapping moisture underneath. These simple precautions can help preserve the clean, unblemished look of your stone, so your paving stays as polished as your patio style.

7. Watch for Salt or Pool Chemical Exposure

If your stone paving sits near a pool or along the coast, it’s under extra pressure. Salt from the ocean breeze or chlorine from pool splashes can break down sealants, cause discolouration, or even lead to surface erosion over time.

To stay ahead of the damage, give your paving a light rinse with fresh water every week, especially during summer when exposure is highest. This simple step helps wash away salt and chemicals before they start seeping in.

It’s also worth investing in a high-quality, salt-resistant sealant. These are designed to create a stronger barrier against corrosive elements without compromising the stone’s breathability. Reapply as recommended for your specific stone type and conditions, usually every 1–2 years for poolside or seaside locations.

Regular upkeep here isn’t just for looks. It protects your investment and keeps your stone paving strong and vibrant, even in the toughest Aussie environments.

8. Inspect for Damage After Extreme Weather

Inspect for Damage After Extreme Weather

Australia’s weather can turn on a dime, from torrential rain to scorching heat in a matter of days. While your stone paving is built tough, extreme conditions can still take a toll. After major storms or prolonged heat waves, it’s wise to give your paved areas a once-over.

Look out for signs of movement like uneven surfaces, widened joints, or loose pavers. Heavy rain can wash away bedding sand and cause minor sinking, while extreme heat may cause expansion that loosens the joints. If left unchecked, these small issues can quickly turn into trip hazards or larger structural problems.

If caught early, the fix is often simple: a quick rebedding, joint refill, or spot reseal might be all that’s needed. Regular inspections after wild weather not only maintain the safety and appearance of your paving but also help you avoid the headaches and costs of major repairs down the track.

Bonus Tip: One Size Doesn’t Fit All, Know Your Stone

Different stones react differently to Australia’s wild weather, and treating them all the same can lead to early wear or costly damage. Knowing what you’re working with means you can tailor your maintenance and get the best out of your paving.

  • Bluestone: Naturally durable with a clean, modern look. But over time, UV exposure can cause fading. Reseal every 1–2 years to preserve colour and protect against surface wear.
  • Quartzite: Hard and highly stain-resistant, ideal for outdoor spaces. However, it can still absorb moisture. Apply a breathable sealant to guard against water damage and help with easier cleaning.
  • Limestone: Softer and more porous, it’s easily marked by acidic cleaners and harsh scrubbing. Use gentle, pH-neutral products and seal frequently for added protection.
  • Travertine: Beautiful but thirsty, it absorbs liquids fast. Clean spills immediately and seal well to prevent staining and discolouration.

By matching your maintenance to the specific stone, you extend its life, preserve its natural beauty, and avoid unnecessary repairs. Treat it right, and it’ll stand up to the Aussie elements for years to come.

Keep It Beautiful Year-Round

A little regular care goes a long way when it comes to stone paving. Small steps make a big difference, from cleaning and sealing to watching for wear after wild weather. By matching your maintenance to your stone type, you’ll keep it looking sharp and lasting longer.

For quality natural stone built for Australian conditions and expert advice to match, visit Splendour in Stone. We’re here to help you get the most out of every paved surface.

Low-Maintenance Paving Options for Outdoor Spaces

Aussies spend an average of 8 hours a month on outdoor cleaning. That’s nearly a full day lost to scrubbing pavers and removing grime!

Constant upkeep can detract from the joy of your outdoor space. Stains, weeds, and uneven wear are more than just an eyesore; they’re a headache.

It doesn’t have to be this way. In this guide, we’ll walk you through the best low-maintenance natural stone paving options that look stunning and require minimal fuss.

Why Choose Low-Maintenance Paving?

Low-maintenance paving is the ideal choice for anyone who wants to enjoy their outdoor space without the need for constant upkeep. With Australia’s changing weather and dusty conditions, choosing a paving option that resists stains, erosion and weed growth makes life a whole lot easier.

It saves time, reduces long-term costs and keeps your patio, pathway or driveway looking great year-round. Whether you’re a busy homeowner or managing a commercial site, less maintenance means more time to relax and enjoy your surroundings.

Low-maintenance paving also supports durability. Materials like bluestone, granite, and travertine are not only hard-wearing but also retain their colour and texture with little effort. These stones age beautifully and require only occasional sweeping, sealing and washing.

When done right, low-maintenance paving still delivers on style. You don’t have to sacrifice design for function. It’s about working smarter, not harder, in your landscaping. Choose paving that performs well and always looks the part.

What Makes a Paving Material Low-Maintenance?

What Makes a Paving Material Low-Maintenance?

Not all pavers are created equal. The best low-maintenance materials share key features that make cleaning and care a breeze.

  • Low Porosity: Materials with low porosity absorb less water and resist staining. This reduces the chance of mould, moss, and discolouration. Granite and dense bluestone are excellent options with low porosity.
  • Hard Surface Strength: A hard-wearing surface resists scratches, chips, and everyday wear and tear. Strong materials like granite or porphyry maintain their finish for years. Less damage means fewer repairs and touch-ups.
  • UV and Weather Resistance: UV-stable materials won’t fade under Australia’s harsh sun. Weather-resistant stones withstand rain, wind, and temperature fluctuations. They keep their colour and structure with minimal maintenance.
  • Stain Resistance: Some stones naturally repel oils, dirt, and spills better than others. Less absorption means easier clean-up with fewer long-term marks. Sealing can improve this even further.
  • Minimal Jointing Requirements: Paving options with fewer or tighter joints reduce weed growth and movement. Large-format or interlocking patterns help with this. Less joint space means less upkeep over time.
  • Compatible with Sealants: Stones that work well with modern sealers enjoy added protection from wear and tear. This compatibility extends their lifespan and keeps them looking fresh. Maintenance becomes occasional, not constant.

Best Low-Maintenance Natural Stone Pavers

Best Low-Maintenance Natural Stone Pavers

Want beauty without the burden? These natural stone pavers are durable, stylish, and designed to withstand Australian conditions with ease.

1. Granite

Granite is one of the toughest stones available, making it a standout choice for high-traffic areas. Its dense surface resists stains, scratches, and weather damage. 

With minimal porosity and a hard-wearing finish, granite stays looking sharp with little upkeep. Available in various colours and textures, it offers both timeless style and long-term reliability for driveways, paths, and patios.

2. Bluestone

Bluestone combines modern appeal with serious durability. Its smooth surface is easy to clean and resists both water absorption and surface wear. 

With a dense composition, it handles foot traffic and the Aussie climate with no fuss. Whether sealed or left natural, bluestone delivers a clean, classic look that requires minimal attention to keep it performing beautifully year after year.

3. Porphyry

Porphyry

Porphyry is a volcanic stone known for its incredible density and resilience. It naturally resists staining and requires little sealing, making it ideal for busy outdoor areas. 

Its rough texture also makes it slip-resistant, while its rich colour variations give it a timeless appearance. Perfect for laneways, alfresco zones, and courtyards, porphyry offers strength and simplicity in one elegant package.

4. Limestone (Dense Varieties)

Dense limestone pavers offer soft, neutral tones with surprisingly low-maintenance needs when appropriately sealed. Their smooth texture makes cleaning easy, and their light colour reflects heat in sunny spots. 

Ideal for patios, walkways, and Hamptons-style exteriors, limestone strikes a balance between beauty and practicality. It’s a great choice if you want a calm, coastal feel without committing to constant cleaning or upkeep.

5. Travertine (Tumbled Finish)

Travertine in a tumbled finish offers a rustic, non-slip surface that easily conceals marks and scuffs. Its naturally low-maintenance character is enhanced when sealed, making it perfect for pool surrounds and entertaining areas. 

Travertine ages gracefully and blends beautifully with a variety of landscapes. It’s a top pick for homeowners wanting warmth, charm, and easy care all in one.

Tips to Keep Your Pavers Low-Maintenance Long Term

Tips to Keep Your Pavers Low-Maintenance Long Term

Low-maintenance starts with smart choices and simple habits. These practical tips will help your pavers stay clean, strong, and hassle-free.

  • Seal Your Pavers Properly: Applying a quality sealer helps protect the surface from stains, moisture, and discolouration. Select a sealer specifically designed for your stone type. Reapply as recommended to maintain protection over time.
  • Ensure Good Drainage During Installation: Poor drainage leads to pooling water, moss growth, and erosion. A well-prepared base with a slight slope allows water to flow away. This one-time step makes a significant difference in the long term.
  • Sweep Regularly to Prevent Build-Up: Leaves, dirt, and debris can break down into grime if left untouched. A quick weekly sweep keeps your pavers looking fresh and clean. It also stops weeds from taking hold in joints.
  • Clean Spills Promptly: Oil, wine, and other spills can stain natural stone if left too long. Quick clean-ups help maintain the original finish. Use pH-neutral cleaners for safe, effective results.
  • Use Jointing Sand That Locks In Place: Polymeric or stabilised sand reduces weed growth and joint washout. It hardens slightly, helping to lock the pavers and block water entry. This means fewer weeds and more stability over time.
  • Choose Stain-Hiding Colours and Textures: Mid-tone or patterned pavers are more forgiving than plain, light options. They help disguise dust, dirt, and wear marks. That means less cleaning and less visible grime between washes.

Why Choose Splendour in Stone for Low-Maintenance Paving Solutions?

Why Choose Splendour in Stone for Low-Maintenance Paving Solutions?

At Splendour in Stone, we recognise the importance of creating beautiful outdoor spaces that are also easy to maintain. That is why we offer a carefully selected range of low-maintenance natural stone pavers that combine durability with timeless appeal. 

Our products are selected for their strength, weather resistance, and low maintenance, making them ideal for both busy homeowners and commercial projects.

We work closely with landscapers, designers and homeowners to recommend stone solutions that look great with little effort. Whether you are paving a poolside, courtyard or driveway, our stones resist stains, discolouration, and wear over time.

From dense bluestone to low-porosity granite, we offer only materials proven to withstand the Australian climate. With expert advice, fast service and reliable quality, Splendour in Stone helps you create outdoor areas that are both functional and low-fuss. Enjoy your space more and maintain it less, with our trusted paving options.

Final Thoughts

Less scrubbing, more living, that’s the beauty of low-maintenance paving. With the right stone, you can enjoy stunning outdoor spaces without the fuss. Whether it’s granite, bluestone, or porphyry, these options bring long-term ease and timeless appeal. 

At Splendour in Stone, we offer premium, easy-care pavers made to handle Australia’s harshest conditions. Ready to upgrade your outdoors without the upkeep? Chat with our team and find your perfect paving solution today.

How to Clean & Maintain a Beautiful Hardscape

Hardscapes are the backbone of any outdoor space, offering structure, function, and visual appeal. Whether you’ve installed natural stone, concrete pavers, or a blend of materials, ongoing care is essential to keep them looking their best. 

Regular maintenance protects your investment, preserves the stone’s finish, and extends its life through seasonal wear and tear. 

In this guide, we’ll walk you through the tools, techniques, and expert tips needed to clean and maintain your hardscape. From everyday upkeep to tackling stains, it’s all about doing it right from the start.

Material Matters: A Guide to Hardscape Types

Not all hardscapes are made the same, and understanding your surface material is the first step to proper care. Natural stone, such as bluestone, granite, or travertine, offers timeless beauty but requires gentler, more specific maintenance due to its porosity and sensitivity to harsh chemicals. 

Concrete pavers are more uniform and durable, but can show wear over time if not sealed and cleaned regularly. Brick, while charming, is prone to moss and staining in damp areas. Each material responds differently to weather, stains, and foot traffic, making material-specific care essential. 

What works on concrete could etch or dull natural stone, and aggressive cleaners may permanently discolour your surface. Knowing what your hardscape is made from will help you choose the right cleaning solutions, tools, and long-term care strategies to keep it looking pristine throughout every season.

Tools and Cleaning Solutions You’ll Need

Tools and Cleaning Solutions You’ll Need

Using the right tools ensures your hardscape stays clean without risking damage. These essentials offer safe, effective care for everything from light debris to stubborn grime and stains.

  • Protective gloves: Essential for safe handling of tools and chemicals. Keeps hands protected from abrasives, cleaners, and sharp debris during maintenance work.
  • Stiff-bristle broom: Clears surface debris like leaves, soil, and dust. Regular use prevents staining and helps keep textured stone and joints free from build-up.
  • Buckets: Useful for mixing solutions and rinsing tools. Designate separate buckets for clean and dirty water to avoid spreading grime while cleaning.
  • Measuring jug or dilution bottle: Helps you mix cleaning solutions accurately according to product directions. Prevents overuse of chemicals and ensures safe application, especially when working with concentrated stone cleaners.
  • pH-neutral cleaner: Designed for natural stone. Cleans effectively without harming the surface or reacting with the sealer. Always check for stone-safe certification.
  • Soft-bristle brush: Gently removes dirt, moss, and mildew from delicate surfaces. Ideal for natural stone, where harder brushes could scratch or damage the finish.
  • Garden hose with spray nozzle: Ideal for rinsing surfaces post-cleaning. A controlled spray removes loosened dirt without disturbing jointing sand or stone placement.
  • Pressure washer: Effective for deep cleaning on durable surfaces. Use correct PSI to lift grime and algae without etching or cracking stone or pavers.

Regular Cleaning Techniques for a Spotless Finish

Regular Cleaning Techniques for a Spotless Finish

A clean hardscape is about more than looks. These simple techniques remove buildup, prevent staining, and protect your surfaces through changing seasons and daily foot traffic.

1. Sweep regularly to remove surface debris

Frequent sweeping prevents leaves, dirt, and grit from breaking down and staining your hardscape. It also helps preserve the integrity of joints by stopping fine particles from settling between the stones or pavers.

2. Rinse with a controlled water flow

Using a garden hose with a spray nozzle allows you to rinse away loose debris without disturbing jointing sand or compacted material. Rinsing is best done after sweeping or post-scrubbing for a clean finish.

3. Pressure wash with care

Use pressure washers only on sealed or non-porous surfaces. Keep PSI low and maintain distance to avoid damaging the stone’s surface. Always test a small hidden area before cleaning wide sections.

4. Scrub with the right tools

A soft-bristle brush paired with a pH-neutral cleaner is ideal for delicate surfaces like natural stone. This method removes grime, algae, and organic buildup without stripping away sealers or altering the stone’s finish.

5. Dry the surface when needed

After cleaning, allow hardscape surfaces to dry fully, especially before sealing or applying treatments. Proper drying prevents water spots, avoids slipping hazards, and helps you assess if further cleaning or spot treatment is needed.

Tackling Common Stains and Blemishes

Tackling Common Stains and Blemishes

Stains are inevitable in outdoor spaces. Knowing how to treat stains quickly and correctly can save your hardscape from lasting damage or costly restoration work down the track.

1. Organic stains (leaves, moss, algae)

Organic stains occur from decaying leaves, moss, or algae. Remove using a pH-neutral cleaner or diluted vinegar with a soft brush. Prevent regrowth by sweeping regularly and improving sun exposure in shaded zones.

2. Oil and grease stains

Oil and grease often build up in BBQ areas and driveways. Blot spills early, then use an absorbent powder. Follow with a stone-safe degreaser and rinse thoroughly to prevent permanent dark patches.

3. Rust and mineral deposits

Rust marks and efflorescence should be treated with specialty stone-safe removers. Avoid acidic products. For stubborn deposits, consult a professional to prevent surface etching or discolouration on natural stone and pavers.

4. Food and drink stains

Food and drink spills, like wine or sauces, can soak into porous surfaces. Blot immediately and scrub gently with warm soapy water or a pH-neutral cleaner approved for use on natural stone.

5. Paint and sealant overspray

Paint splashes or leftover sealant can be removed with a plastic scraper and solvent approved for stone. Always test a small spot first to avoid damaging the surface or existing sealer.

When and How to Seal Your Outdoor Surfaces

When and How to Seal Your Outdoor Surfaces

Sealing your hardscape is one of the most effective ways to protect it from stains, moisture, and weather-related wear. Natural stone and pavers both benefit from sealing, particularly in high-traffic areas or regions with frequent rainfall. 

A quality sealer acts as a barrier, reducing water absorption, enhancing colour, and making future cleaning easier. There are two main types of sealers: penetrating sealers, which absorb into the stone and preserve a natural look, and topical sealers, which sit on the surface and offer a glossier finish. The choice depends on the material, location, and desired aesthetic. 

Sealing should be done only when the surface is clean and completely dry, ideally in mild weather conditions. As a general guide, resealing is recommended every two to five years depending on usage and climate. 

Applying the correct sealer with proper technique ensures long-term protection, better durability, and a consistently beautiful hardscape finish throughout the seasons.

Seasonal Hardscape Maintenance Tips

Your hardscape faces different challenges throughout the year. Adjusting your care routine to suit each season keeps your stone surfaces strong, clean, and looking their best all year round.

1. Autumn

Falling leaves break down and leave organic stains if not removed regularly. Sweep frequently, clear debris from joints, and check for signs of water build-up. It’s also the right time to prepare surfaces for the wet months ahead.

2. Winter

Cold weather combined with rain can lead to water pooling and frost damage, especially on unsealed or porous stone. Avoid salt-based de-icers, keep surfaces clear of ice and debris, and inspect drainage systems to prevent freeze-related expansion or cracks.

3. Spring

Use spring’s dry, mild weather to deep clean your hardscape. Refill washed-out joints, scrub off algae or moss, and inspect stones for movement caused by winter ground shifts. Resealing is best done in spring when surfaces are fully dry.

4. Summer

Summer heat and increased foot traffic can stress even well-maintained surfaces. Rinse regularly to prevent dirt build-up, inspect for UV wear, and top up sealer where fading occurs. Address loose stones early to avoid accidents or further deterioration.

Preventative Maintenance for Long-Term Beauty

Preventative Maintenance for Long-Term Beauty

Prevention is always better than repair. These proactive habits protect your hardscape from early deterioration and help maintain a fresh, polished look all year long.

  • Install proper drainage systems: Standing water weakens stone over time and encourages moss, mould, and algae growth. Ensure water flows away from paved areas by grading surfaces correctly or installing trench drains to direct runoff effectively.
  • Use jointing sand or stone-safe grouts: Filling joints with stabilised sand or appropriate grouts helps reduce weed growth and surface shifting. These materials keep pavers tightly locked in place and prevent erosion between stones during heavy rains or pressure cleaning.
  • Address water pooling and shifting early: Uneven surfaces and low spots trap water, which leads to staining, weed growth, or frost damage. Level sunken areas promptly and reinforce base layers to preserve the structure and safety of your hardscape.
  • Create a maintenance calendar: Regular care prevents major damage. Set reminders to sweep, inspect joints, rinse, and reseal when needed. This routine approach protects the appearance and durability of your stonework across all seasons.
  • Protect high-traffic zones with mats or paver sealers: Entryways, BBQ zones, and pool surrounds face constant wear. Use protective mats or apply an extra coat of sealer in these areas to shield the stone from grease, dirt, and heavy foot traffic.

When to Call a Professional

While regular cleaning and maintenance can be done yourself, certain situations benefit from professional expertise. Deep stains like rust, oil, or mineral deposits often require specialised treatment to avoid damaging the surface or affecting the stone’s finish. 

Regrouting, resetting loose pavers, and restoring uneven surfaces also demand proper tools and knowledge to achieve lasting results. Incorrect use of pressure washers or harsh chemicals can cause more harm than good, especially on sensitive natural stone. 

A professional can assess the condition of your hardscape, recommend the safest and most effective methods, and carry out precise repairs that preserve the integrity of the surface. 

Whether you’re dealing with structural issues, embedded staining, or long-term wear, calling in a professional ensures your hardscape remains both beautiful and safe for years to come.

Conclusion

Maintaining your hardscape ensures it remains both functional and visually appealing for years to come. With the right approach, your stonework will stand the test of time. 

For high-quality natural stone products that elevate outdoor spaces, visit Splendour in Stone. Our expert team can guide you in selecting the perfect materials for lasting beauty and performance.

Landscape Advantages of Permeable Pavers in Rainy Climates

Persistent rainfall can turn beautiful outdoor spaces into soggy, uninviting areas prone to flooding, erosion, and damage. 

For many homeowners, water runoff and soil erosion present ongoing challenges that ruin garden beds, compact soil, and leave driveways dangerously slippery. As climate patterns shift and rainfall becomes less predictable, the need for smarter drainage solutions has never been greater. 

That’s where permeable pavers come in. Designed to handle water efficiently, these innovative surfaces offer a sustainable, attractive, and highly practical solution for managing wet conditions in residential landscapes.

What Are Permeable Pavers and How Do They Work

Permeable pavers are specially engineered paving materials designed to let water flow through their surface and into the ground below. Unlike traditional paving, which creates a sealed barrier, permeable systems support natural drainage by reducing surface runoff. 

These pavers are typically made from natural stone, porous concrete, or open-cell interlocking grids. Their design features wider joints or textured gaps filled with gravel or sand to facilitate water infiltration. Beneath the surface lies a layered system consisting of bedding, base, and sub-base layers. 

Each layer plays a critical role in capturing, filtering, and slowly releasing stormwater into the surrounding soil. The system not only handles rainfall efficiently but also supports the structural integrity of the paved surface. 

Permeable pavers offer a smart and eco-friendly solution for driveways, garden paths, patios, and other outdoor areas affected by frequent or heavy rain by mimicking how natural ground absorbs water.

Key Landscape Benefits in Rainy Climates

Key Landscape Benefits in Rainy Climates

Persistent rain doesn’t need to ruin your landscape. These practical benefits will help you manage water effectively while keeping your outdoor spaces visually appealing.

1. Reduces surface water runoff

Permeable pavers allow rainwater to filter directly into the soil rather than pooling on the surface. This reduces localised flooding and keeps your driveways and paths clear, providing a practical, visually appealing solution for areas that receive frequent heavy rainfall.

2. Controls soil erosion

Permeable pavers slow down water flow across your outdoor spaces, reducing soil displacement during rain. This protects your garden beds, retaining walls, and sloped areas from erosion while maintaining the stability and structure of your landscape even in wet climates.

3. Prevents waterlogging in gardens and lawns

Permeable pavers drain water effectively, reducing puddling and soil compaction in your gardens and lawns. This helps keep your plants healthier, prevents damage to grass and beds, and ensures your outdoor areas remain usable and attractive during rainy seasons.

4. Improves safety on wet surfaces

Permeable pavers help prevent slippery conditions by allowing water to drain away quickly. This reduces pooling and puddles on driveways, paths, and entrances, making your outdoor areas safer for everyday use, even during periods of persistent rainfall.

5. Protects long-term structural integrity

Permeable paving systems protect the sub-base from erosion and washout, extending the lifespan of outdoor areas. They help preserve the structural integrity of your driveways, patios, and garden paths, ensuring your outdoor spaces remain stable in rainy climates.

Environmental and Regulatory Advantages

Environmental and Regulatory Advantages

Meeting environmental standards starts with choosing the right materials and design. These key benefits show how permeable pavers support compliance while enhancing your outdoor spaces sustainably.

1. Supports Sustainable Urban Drainage Systems (SuDS)

Permeable pavers enable natural water absorption, supporting Sustainable Urban Drainage Systems (SuDS). This helps reduce flood risk and eases pressure on stormwater infrastructure by allowing rainwater to filter through, protecting local waterways and the surrounding environment.

2. Meets green building standards

Using permeable pavers contributes towards green building certifications by reducing surface runoff and improving drainage. This helps your project align with sustainable design principles, meeting environmental requirements for residential and commercial developments in rain-prone areas.

3. Uses eco-friendly material options

Permeable pavers can be made from recycled aggregates or natural stone, lowering embodied energy compared to conventional paving. Choosing these materials supports environmentally responsible landscaping while maintaining durability and aesthetic appeal for your outdoor spaces.

4. Reduces heat island effect

Permeable pavers allow water to evaporate naturally, helping cool outdoor surfaces. This reduces heat retention around buildings and paved areas, contributing to a more comfortable microclimate, especially important in urban or heavily built-up environments.

5. Improves local groundwater recharge

By allowing rainwater to infiltrate the soil, permeable pavers enhance groundwater recharge. This supports natural water cycles, reduces dependence on stormwater systems, and maintains healthier water tables in regions with frequent or heavy rainfall.

6. Minimises stormwater pollution

Permeable paving helps filter pollutants by letting water pass through porous surfaces instead of flowing over impervious ones. This reduces contaminants entering waterways, protecting local rivers and creeks and preserving overall water quality in your area.

Ideal Applications for Permeable Pavers in Residential Landscapes

Ideal Applications for Permeable Pavers in Residential Landscapes

Permeable pavers fit perfectly in many outdoor spaces. These key uses highlight where they improve drainage, safety, and durability while enhancing your home’s outdoor areas.

  • Driveways and carports: Provide strong, permeable surfaces that withstand vehicle weight while allowing rainwater to drain naturally, reducing flooding risk and protecting the soil structure beneath over time.
  • Garden paths and patios: Create attractive, slip-resistant walkways and outdoor seating areas that remain dry and safe, promoting comfort and reducing cleanup or maintenance after rainfall events.
  • Courtyards and outdoor entertaining areas: Keep social spaces free from puddles and excess moisture, improving usability, comfort, and enjoyment during and after wet weather conditions.
  • Pool surrounds and water-sensitive zones: Improve drainage around pools to reduce slippery surfaces and standing water, enhancing safety and protecting poolside plants and landscaping features.
  • Walkways and entryways: Minimise water pooling and slippery conditions in high foot traffic zones, ensuring safe, easy, and dry access to your home in all weather conditions.
  • Drive-through and service areas: Offer durable permeable paving able to support heavy loads while efficiently managing stormwater to prevent surface damage, pooling, and soil erosion in high-use zones.

Choosing the Right Permeable Paver for Your Climate

Choosing the Right Permeable Paver for Your Climate

Selecting the right permeable paver ensures durability and performance. These key considerations will help you make informed choices suited to your local rainfall, soil, and landscape conditions.

1. Assess rainfall volume

Understanding your area’s average rainfall helps determine the permeability needed. Higher rainfall requires pavers with greater infiltration capacity to manage water efficiently and avoid surface pooling or flooding.

2. Analyse soil type

Soil composition affects drainage rates beneath permeable pavers. Sandy soils drain quickly, while clay soils hold moisture longer, so choose pavers and base materials that complement your soil for optimal water flow.

3. Evaluate slope and grading

Proper slope and grading promote effective water runoff and infiltration. Ensure your landscape design directs water towards permeable surfaces, preventing erosion and pooling in less permeable areas.

4. Select natural stone options

Choose natural stones like granite or limestone that perform well in wet conditions. Their durability, texture, and non-slip properties make them ideal for maintaining safety and aesthetics in rainy climates.

5. Consider surface finishes

Opt for non-slip finishes and textured surfaces to enhance safety on wet pavers. These finishes also add visual interest while reducing the risk of slips and falls in outdoor areas.

6. Plan for maintenance needs

Consider the maintenance requirements of different paver types. Some materials need regular cleaning or joint refilling to maintain permeability, so select options that fit your upkeep preferences and local climate challenges.

Installation Tips for Rain-Prone Areas

Installation Tips for Rain-Prone Areas

Proper installation is essential to maximise the benefits of permeable pavers in wet climates. These tips help ensure durability, drainage efficiency, and long-term performance for your outdoor spaces.

  • Prepare a stable sub-base: Ensure a well-compacted and adequately thick sub-base to support heavy loads and prevent shifting, settling, or washout during heavy rainfall or flooding events.
  • Grade the site correctly: Establish proper slope and grading to direct water toward permeable areas, preventing unwanted pooling and ensuring effective drainage throughout your landscape.
  • Use appropriate bedding materials: Select permeable bedding layers like clean, washed gravel to support pavers and facilitate water infiltration while maintaining structural integrity.
  • Hire professional installers: Experienced professionals understand local conditions and can install systems that meet drainage and structural requirements, reducing the risk of costly mistakes.
  • Implement regular maintenance: Schedule routine cleaning and joint refilling to preserve permeability and prevent clogging, ensuring your pavers continue to manage water effectively in rainy conditions.

Conclusion

Permeable pavers offer practical, durable solutions for managing water in rainy climates while enhancing your outdoor spaces’ beauty and safety. 

Future-proof your landscape with expert advice and premium stone selections from Splendour in Stone. Contact us today to discuss the perfect permeable paving options for your home and enjoy lasting performance and style.

Stone Cladded Fireplace Request

At Splendour in Stone, we specialise in supplying and installing natural stone cladded fireplaces that bring warmth, beauty, and character to your home. Each piece is crafted with precision and presence, ensuring a timeless centrepiece built to last.

Planning a new fireplace or upgrading an existing one? Complete the form below and receive your personalised quote within 24 hours.
Share anything about your vision, home style, or needs
Important Installation Note
The fireplace unit must be installed prior to our stonework.
This ensures proper fitting and a seamless final result. If you need help coordinating this, we’re happy to assist. Just mention it in your message.
In SQM?

Please fill your details to download.


      Request Callback


        Enquiry Form


        Please fill your details to download.