
Retaining walls are essential for stabilising sloped gardens, preventing erosion and giving outdoor spaces structure. Many homeowners worry about collapse, poor drainage, or difficult excavation, which can make the project feel intimidating at first.
With proper planning and a clear understanding of footing depth, drainage requirements and safe construction practices, most small to medium retaining walls are completely achievable for beginners. The key is to follow each stage carefully and choose reliable materials.
This guide walks you through every step, building your confidence to create a strong, long-lasting retaining wall at home.
Tools and Materials You Will Need for a Safe and Stable Retaining Wall
Here are the essential tools and materials every homeowner needs to build a strong, durable retaining wall with confidence.
- Shovel: Used for digging the trench, shaping the footing, and moving soil or crushed rock so the wall sits on a secure, well-formed base.
- String line and stakes: Helps you map out the wall path accurately, maintain straight alignment, and keep every course positioned correctly from start to finish.
- Spirit level: Ensures each block sits perfectly level, preventing leaning or uneven pressure that could weaken the wall over time.
- Hand tamper or compactor: Compresses the crushed rock base firmly, creating the stable foundation needed to keep the retaining wall from shifting or settling.
- Crushed rock: Forms the strong structural base beneath the wall, improving drainage and supporting long-term stability under soil pressure.
- Drainage gravel: Allows water to flow freely behind the wall, reducing moisture buildup and preventing hydrostatic pressure that can cause structural failure.
- Geofabric: Keeps soil out of the drainage system while allowing water to pass through, preventing pipe blockages and improving long-term performance.
- Perforated drainage pipe: Redirects water away from the wall, protecting the structure from internal pressure and moisture-related weakening.
- Retaining wall blocks or natural stone: The main building material that forms the visible structure, providing strength, height control, and the final aesthetic.
- Safety gear: Gloves, boots, and eye protection keep you safe during excavation, lifting, and compacting work.
Step-by-Step Guide to Building a DIY Retaining Wall
Building a stable retaining wall becomes far more achievable when you follow a clear, structured sequence from planning to final capping. Here’s how.
Step 1: Plan the Wall and Check Local Regulations
Planning ensures your wall is safe and compliant. Check council height limits, required approvals and underground utilities before starting. This preparation prevents legal issues, avoids costly changes later and helps you design a wall that performs well on your site.
Step 2: Mark Out the Wall and Excavate the Footing Trench
Mark the wall line using stakes and string, then excavate a trench wide and deep enough for your base layers. Creating accurate dimensions at this stage supports structural strength, proper block placement and long-term stability across varying soil conditions.
Step 3: Lay the Compacted Base Layer for Structural Support
Fill the trench with crushed rock and compact it firmly to form a stable base. A solid foundation prevents future sinking or shifting, improves drainage and ensures every block sits level so the wall remains strong under soil pressure over time.
Step 4: Install Geofabric and Position the Drainage Pipe Correctly
Lay geofabric behind the wall, then set the perforated pipe with a slight fall to direct water away. This prevents clogging, reduces moisture pressure and protects the structure from water-related movement, which is vital for long-lasting stability.
Step 5: Lay the First Course of Blocks or Stone with Perfect Level
Place the first course carefully on the compacted base, checking each piece with a spirit level. A perfectly level first row supports the entire structure, prevents leaning and ensures every layer above aligns correctly without future adjustments or issues.
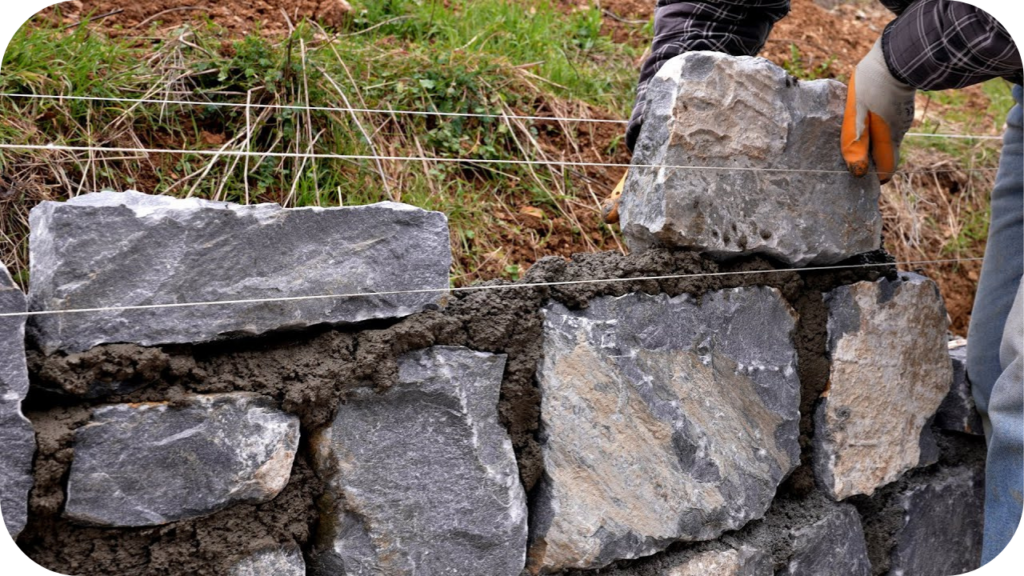
Step 6: Build the Wall Upwards With Proper Setback and Staggered Joints
Add each new course with a slight setback for strength, keeping joints staggered so the wall interlocks firmly. This improves resistance against soil pressure, enhances stability and creates a cleaner finish that remains secure through seasonal ground movement.
Step 7: Backfill and Compact as You Build Each Layer
As you build each course, add drainage gravel behind the wall and compact it gently. Alternating between building and backfilling reduces gaps, prevents soil displacement and ensures the structure remains evenly supported from base to top over time.
Step 8: Install the Final Course and Finish the Top of the Wall
Place cap blocks or flat stones to complete the top course, ensuring a neat and sealed finish. Add a slight slope for water runoff and tidy the surrounding soil to protect the structure and improve its overall appearance.
Recommended Stone Options for Easy DIY Retaining Walls
Choosing the right stones makes DIY retaining walls easier to build, more stable, and far more durable, giving homeowners reliable results every time. Here’s how.
1. Granite
Granite delivers exceptional strength and density, making it ideal for long-lasting retaining systems. Its consistent structure supports tall or curved walls with confidence. Options such as Buffalo Granite and Hotham Granite offer dependable durability and a bold, natural visual finish in garden landscapes.
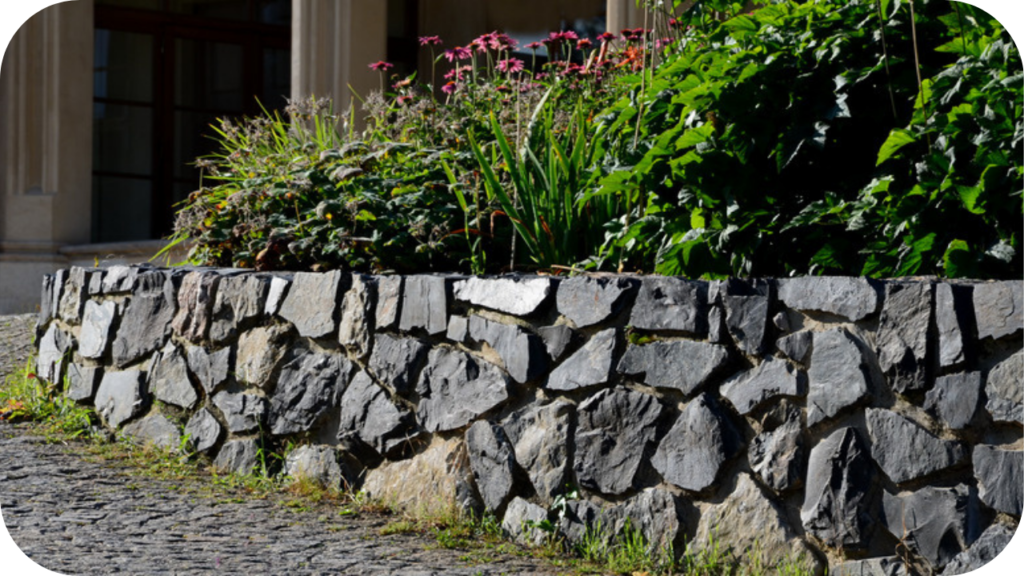
2. Limestone
Limestone provides steady performance and a uniform block shape, helping beginners achieve clean, level courses. Its lighter tones brighten outdoor spaces while remaining structurally reliable. Examples like Jasper Limestone and Jamieson Limestone give homeowners an approachable material with consistent handling and refined character.
3. Sandstone
Sandstone offers warm, earthy textures and is easier to shape, making it well-suited to curved walls and stepped garden terraces. When chosen in stronger grades, it balances appearance with reliable support. Options such as Charlotte Sandstone and Australiana Sandstone offer natural colour depth and practical stability.
4. Quartz
Quartz stands out for its high density and impressive durability, giving DIY builders strong structural reliability on moderate to steep slopes. Its crystalline grain adds a premium appearance. Examples like Como Quartz and Kakadu Quartz create crisp, modern retaining walls with long-term resilience.
5. Travertine
Travertine works well for decorative retaining walls on gentle slopes, offering soft veining and a refined finish. Its manageable weight makes placement easy. Options such as Classic Travertine and Silver Travertine provide elegant colour movement while remaining suitable for low to mid-height landscape walls.
Maintenance Tips to Keep Your Retaining Wall Strong and Secure
Keeping your retaining wall well-maintained ensures long-term stability, prevents unnecessary movement and protects the structure from moisture issues. Here are the simple habits that keep everything performing reliably.
- Inspect for movement regularly: Check for leaning, shifting blocks or surface cracks so you can address early signs of stress before they develop into larger structural concerns that affect long-term stability.
- Keep drainage paths clear: Ensure ag pipes, gravel zones and surface channels stay free of debris so water can escape properly, reducing pressure behind the wall and preventing long-term base erosion.
- Remove weeds and organic buildup: Pull out weeds, roots and moss that grow between stones, as they create unwanted pressure, hold moisture and slowly weaken joints, especially during wet seasons.
- Recompact loose soil where needed: Check the backfill zone for settling and lightly recompact any soft patches so the wall stays properly supported and maintains its original alignment through changing weather conditions.
- Patch small gaps early: Fill minor voids or shifted joints as soon as you notice them so the structure remains tight and secure, preventing moisture entry and larger long-term movement.
- Clean stone surfaces when required: Wash away dirt, stains, and grime to preserve each stone’s natural finish, keeping the wall visually consistent while helping prevent build-up that can hold moisture.
- Reseal natural stone when appropriate: Apply breathable sealers to recommended stone types to protect against moisture, staining, and weathering, extending longevity and preserving the colour and quality of the wall’s finish.
Build a Secure DIY Retaining Wall With Confidence
Building a retaining wall with confidence starts by understanding how strong foundations, proper drainage, and careful planning determine the stability of the entire structure. Each step contributes to a wall that performs well across changing weather conditions.
Taking your time through the process, choosing reliable materials and maintaining the wall regularly ensures long-term strength. Small checks made throughout the year help prevent movement and preserve the wall’s appearance.
If you want retaining wall materials that balance natural beauty with dependable performance, contact Splendour in Stone for quality stone options that support lasting results.

Why Granite Is Ideal for High Heat and Harsh Australian Climates
Australia’s climate can be harsh on outdoor surfaces, with extreme summer heat, sudden temperature shifts, and long periods of intense sun. Choosing materials that can
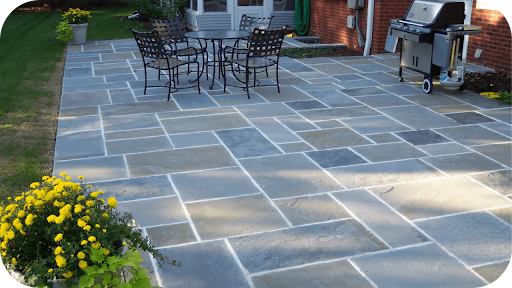
Is Bluestone Good for Outdoor Paving in Australian Homes?
Outdoor spaces across Australia face sun, rain, and constant foot traffic, so choosing the right paving material makes a genuine difference to long-term performance. Many
