Register your Information for Free Stone Samples Sent Express to You!

Search
Close this search box.

Porcelain Tiles in Australia: Where to Buy the Best Quality at Affordable Prices?

If you are renovating or building a new home, porcelain tiles are the perfect wall and floor covering.

Finding high-quality porcelain tiles at affordable prices in Australia can be challenging.

With so many options available, it’s easy to feel overwhelmed and end up with tiles that don’t meet your expectations or budget. Poor-quality tiles can lead to frequent repairs and additional costs.

In this article, we’ll guide you through the best places to buy top-quality porcelain tiles at affordable prices in Australia, ensuring you get the best value for your money and beautiful, durable results for your home.

What Makes Porcelain Tiles Unique?

Due to several unique characteristics, porcelain tiles stand out in the flooring and wall coverings world. 

Firstly, they are crafted from a fine-grained clay called kaolin, which, when fired at extremely high temperatures (over 1,200 degrees Celsius), creates a dense, vitrified material. This high firing temperature results in a hard and durable tile with a low porosity, making it resistant to water and stains.

One of the critical attributes of porcelain tiles is their remarkable durability. Their dense composition allows them to withstand heavy foot traffic and resist chipping and cracking, making them ideal for indoor and outdoor applications. 

Moreover, porcelain tiles are renowned for their water resistance. The low water absorption rate makes them perfect for moisture-prone areas, such as bathrooms, kitchens, and outdoor patios.

Porcelain tiles also offer aesthetic versatility. They can mimic the look of natural stones, wood, and even concrete, providing homeowners with a wide range of design options. The tiles come in various finishes, including glossy, matte, and textured, catering to different stylistic and functional needs.

Additionally, porcelain tiles contribute to healthier indoor environments. Their moisture resistance prevents the growth of mould, mildew, and bacteria, which is particularly beneficial in kitchens and bathrooms.

This hygienic quality, combined with ease of maintenance, makes porcelain tiles a practical choice for modern homes.

Benefits of Using Porcelain Tiles

Porcelain tiles are an excellent choice for residential and commercial spaces, offering a range of benefits that make them highly desirable. Here’s why porcelain tiles are a smart investment:

Durability

Porcelain tiles are fired at extremely high temperatures, making them harder and denser than standard ceramic tiles. This results in a robust surface that can withstand heavy foot traffic and resist chipping and cracking, making them ideal for high-traffic areas like kitchens and hallways.

Water and Stain Resistance

With a water absorption rate of less than 0.5%, porcelain tiles are highly resistant to moisture and stains. This makes them perfect for bathrooms, kitchens, and outdoor areas where water exposure is frequent.

Their non-porous nature also prevents the growth of mould and mildew, contributing to a healthier living environment.

Low Maintenance

Porcelain tiles are straightforward to clean and maintain. Regular sweeping and occasional mopping with water is usually sufficient to keep them looking new. They also resist most household chemicals, allowing for thorough cleaning without damage.

Design Versatility

One of the standout features of porcelain tiles is their ability to mimic the appearance of other materials, such as natural stone, wood, or even concrete. This versatility allows homeowners to achieve the desired aesthetic without compromising on porcelain’s practical benefits.

Fire Resistance

Porcelain tiles do not burn or emit toxic fumes, making them a safe choice for areas prone to high temperatures, such as kitchens.

Longevity

High-quality porcelain tiles can last for decades, making them a cost-effective option in the long run. Their durability ensures they remain in good condition with minimal maintenance, providing excellent value for money.

Factors to Consider When Buying Porcelain Tiles

When purchasing porcelain tiles, several crucial factors should guide your decision to ensure you choose the best option for your needs:

  • Tile Size and Shape: Porcelain tiles come in various sizes and shapes. Larger tiles can create a seamless look and reduce grout lines, while smaller tiles are ideal for intricate patterns or smaller spaces. Consider the room’s dimensions and layout when selecting.
  • Durability and PEI Rating: Porcelain tiles are rated for durability using the Porcelain Enamel Institute (PEI) scale. Choose tiles with a higher PEI rating (IV or V) for high-traffic areas to ensure they can withstand heavy use without wear.
  • Water Absorption Rate: The effectiveness of porcelain tiles in wet environments depends on their water absorption rate. Opt for tiles with a low absorption rate (less than 0.5%) for moisture-prone areas, such as bathrooms and kitchens.
  • Finish and Texture: Porcelain tiles are available in various finishes, including matte, gloss, and texture. Glossy finishes are easier to clean but slippery when wet, while matte or textured tiles provide better traction.
  • Colour and Pattern: Consider the aesthetic impact of the tile’s colour and pattern on your space. Lighter colours can make small rooms appear larger, while darker shades add warmth and depth. Patterns can enhance visual interest or mimic natural materials like stone or wood.
  • Cost and Quality: While price is a factor, balance cost with quality. Higher-priced tiles often offer better durability and design options. Assess the cost per square metre and compare it with the tile’s quality and features.

Read more about the factors to consider when or before buying tiles.

Top Places to Buy Porcelain Tiles in Australia

For those seeking high-quality porcelain tiles at competitive prices, consider these top Australian suppliers:

  1. Splendour in Stone
    Splendour in Stone is a premier choice for luxury porcelain tiles. They offer a wide range of high-end tiles with unique textures and designs, perfect for adding elegance to any space. Known for their superior quality and expert customer service, they provide contemporary and classic options to suit various styles and preferences.
  2. Bunnings Warehouse
    Bunnings Warehouse offers an extensive selection of porcelain tiles at affordable prices. Their inventory includes various styles and sizes, catering to different project needs. With numerous locations across Australia and a comprehensive online store, Bunnings makes it easy to find tiles that fit your budget and design requirements.
  3. Tile Factory Outlet
    Tile Factory Outlet provides a diverse range of porcelain tiles at competitive prices. They offer discontinued lines and current collections, allowing you to find high-quality tiles at discounted rates. Their website features a wide selection of styles and sizes, making finding the right fit for your project easy.

Tips for Getting the Best Deals

Securing the best deals on porcelain tiles in Australia requires strategic shopping and awareness of various discount opportunities. Here are some valuable tips to help you get the most value for your money:

  • Shop Around and Compare Prices: Take the time to shop around and compare prices from different retailers. Online price comparison tools can help you find the best deals, but visiting stores in person can also reveal unadvertised discounts. By comparing prices, you can ensure you get the best value for your money.
  • Bulk Purchasing Discounts: Buying in bulk can lead to significant savings. Many suppliers offer discounts for large orders, making it a cost-effective option for tiling a large area or multiple rooms. Always inquire about bulk pricing, as the savings can be substantial compared to purchasing tiles individually.
  • End-of-Line Sales: End-of-line sales are an excellent opportunity to buy high-quality porcelain tiles at reduced prices. Retailers often clear out discontinued lines to make way for new stock, offering these tiles at a fraction of their original cost. Keep an eye on your preferred tile suppliers for these sales, which can provide excellent bargains.
  • Negotiating with Suppliers: Be bold and deal with suppliers, especially if you’re making a large purchase. Many suppliers are willing to offer discounts or price matches to secure your business. Building a good relationship with suppliers can also lead to future discounts and preferential treatment.
  • Sign Up for Newsletters and Alerts: Subscribe to newsletters from tile retailers and suppliers to stay informed about upcoming sales, promotions, and exclusive discounts. Many retailers offer first-time subscriber discounts or special deals to their mailing list, ensuring you’re among the first to know about savings opportunities.
  • Utilise Social Media and Forums: Follow tile retailers on social media and join home improvement forums. These platforms often share sales announcements, discount codes, and user reviews, providing valuable insights and additional savings opportunities.

Conclusion

Australia offers a wealth of options for high-quality, affordable porcelain tiles. Suppliers like Splendour in Stone and Bunnings Warehouse provide excellent choices, whether you seek luxury or budget-friendly choices. Explore their websites to find the perfect tiles for your project and elevate your space with style and durability. 

How to Choose the Right Grout Colour for Your Porcelain Tiles?

Choosing the right grout colour for your porcelain tiles can feel as important as selecting them. 

The right choice can disrupt your tile design, making your space look cohesive and appealing. 

This guide will help you navigate the options and select the perfect grout colour, ensuring your tiles look cohesive and stylish. We’ll cover key factors, grout colour options, and practical tips to make the decision process more manageable.

Factors to Consider

Finding the ideal grout colour for your porcelain tiles can transform your space’s look and feel. 

Here are the main grout colour factors to consider:

Tile Colour and Pattern

The grout colour should complement the tile colour and pattern. Choose a grout colour that closely matches the tiles for a seamless look. For patterned or mosaic tiles, a neutral grout can help highlight the intricate designs without overwhelming the overall look.

Room Size and Lighting

The size of the room and the lighting conditions play a crucial role in grout colour selection. In small rooms or spaces with limited natural light, lighter grout colours can help make the area feel larger and brighter. Conversely, darker grout can add depth and contrast in larger rooms with ample light, creating a more defined look.

Style and Design Preferences 

Your style and design preferences should also influence your grout choice. Consider using matching or slightly contrasting grout for a modern, sleek look. For a more traditional or rustic style, a contrasting grout can emphasise the tile layout and add character to the space. Additionally, consider how the grout colour will age and whether it aligns with your long-term design vision.

Tile Placement and Function

Consider where the tiles will be placed and their function. A grout colour that resists staining and mould is essential in high-moisture areas like bathrooms and kitchens. For floors, durability and ease of maintenance might take precedence over aesthetic considerations.

Overall Room Colour Scheme

The room’s overall colour scheme should harmonise with the grout colour. Ensure that the grout complements the tiles, wall colours, cabinetry, and other elements in the room.

Future Design Changes

Consider potential changes in the room’s decor. A neutral grout colour might offer more flexibility if you plan to redecorate or change tile patterns, ensuring the grout remains compatible with different designs.

Grout Colour Options

Perfecting the grout colour for your porcelain tiles can dramatically enhance your space’s overall look and feel. Here are the main grout colour options to consider:

Neutral Grout 

Neutral grout colours, such as beige, grey, or off-white, offer versatility and balance. They can complement various tile colours and patterns without overpowering the overall design. Neutral grout is a practical choice for areas with high traffic or where you might change decor frequently, as it adapts well to various styles and colour schemes.

Coloured Grout

For a unique and creative look, consider using coloured grout. This option can add a fun and personalised touch to your tiling project. Bright or unconventional grout colours can create a specific theme or accentuate particular design features, making the tiles stand out.

Dark Grout

Dark grout colours, such as charcoal or black, are excellent for hiding dirt and stains, making them a practical choice for high-traffic areas or spaces prone to spills, like kitchens and entryways. Dark grout can contrast with lighter tiles, creating a sophisticated and contemporary look.

Matching Grout

Choosing a grout colour that closely matches your porcelain tiles creates a seamless and uniform appearance. This option is ideal for a minimalist or modern design, as it allows the tiles to blend smoothly, making the surface look more extensive and cohesive. Matching grout works particularly well with large-format tiles or when you want the tiles themselves to be the focal point.

Contrasting Grout

Opting for a contrasting grout colour can make your tile layout stand out, highlighting the shape and pattern of each tile. This approach adds visual interest and can create a bold, dramatic effect. Contrasting grout is especially effective with geometric or patterned tiles, as it emphasises the design elements and adds depth to the space.

Effects of Different Grout Colours

Choosing the right grout colour can dramatically influence the overall appearance of your porcelain tiles. Here’s how different grout colours can affect your space:

Seamless and Unified Look

Matching the grout colour to your tiles creates a seamless and unified look. This approach makes the tiles appear as one continuous surface, making a room feel larger and more cohesive. It’s especially effective with large-format tiles or in minimalist designs where a clean, uninterrupted appearance is desired.

Bold and Dramatic Effect

Contrasting grout colours can create a bold and dramatic effect. This method highlights the shape and pattern of each tile, adding depth and interest to the space. It’s ideal for geometric or mosaic tile designs, where the tile layout is a prominent feature. Dark grout with light tiles or vice versa can make the tile design pop and create a striking visual statement.

Subtle and Elegant Finish

Neutral grout colours, such as beige, grey, or off-white, offer a subtle and elegant finish. They blend well with most tile colours and patterns, providing a balanced and harmonious look. Neutral grout is a versatile choice that complements various design styles without overpowering the tiles or other elements in the room.

Enhanced Patterns and Textures

Coloured grout can enhance patterns and textures in your tile design. For instance, using a grout colour that complements a specific hue in the tiles can tie the design together and highlight intricate details. This technique can add a unique and personalised touch to your space.

Practical Considerations

Darker grout colours are more forgiving of stains and dirt, making them practical for high-traffic areas and spaces prone to spills, like kitchens and bathrooms. Lighter grout can brighten a space but may require more frequent cleaning to maintain its appearance.

Practical Tips for Choosing Grout Colour

Selecting the right grout colour for your porcelain tiles can significantly impact your space’s overall look and feel. 

Here are some practical tips to help you make the best choice:

  • Testing with Tile Samples: Before making a final decision, test grout colours with your tile samples. Create small mock-ups using different grout shades to see how they interact with your tiles in various lighting conditions. This hands-on approach lets you visualise the final result and choose the colour that best complements your tiles.
  • Considering Grout Maintenance: Maintenance is an essential factor when choosing grout colour. Lighter grout colours can show dirt and stains more quickly, requiring frequent cleaning. Darker grout can be more forgiving but may fade over time, especially in areas exposed to a lot of sunlight or heavy foot traffic. Choose a grout colour that aligns with your maintenance preferences and lifestyle.
  • Impact of Grout Colour on Room Aesthetics: The colour of your grout can influence the aesthetics of your entire room. Matching grout creates a seamless, cohesive look, ideal for modern or minimalist designs. Contrasting grout highlights the tile pattern and adds depth, making it suitable for decorative or geometric layouts. Neutral grout offers versatility and can blend effortlessly with various design styles, providing a balanced and elegant finish.
  • Grout Type and Quality: Consider the type and quality of the grout itself. Epoxy grout, for example, is more resistant to stains and moisture than cement-based grout, which can influence your colour choice. Higher-quality grout can also maintain its colour better over time, reducing the need for touch-ups or replacements.
  • Future Design Changes: Consider potential changes in your room’s decor. A neutral grout colour might offer more flexibility if you plan to redecorate or change tile patterns, ensuring the grout remains compatible with different designs.
  • Seek Professional Advice: Consult with a tile professional or interior designer. Their experience and expertise can provide valuable insights and recommendations based on your specific project, helping you avoid common pitfalls and make the best choice.

Common Mistakes to Avoid

Nailing the perfect grout colour for your porcelain tiles is essential for creating the ideal look. Avoid these common mistakes:

  • Ignoring Room Lighting: One of the biggest mistakes is ignoring the impact of room lighting on grout colour. Natural and artificial lighting can dramatically alter the appearance of grout. Always test grout samples in the room under different lighting conditions to ensure the colour complements the tiles and overall space.
  • Overlooking Grout Maintenance: Grout maintenance is often overlooked. Lighter grout colours can highlight dirt and stains, requiring frequent cleaning. Darker grout, while more resistant to visible dirt, can fade over time, especially in high-traffic areas. Choose a grout colour that aligns with your maintenance capabilities and the room’s usage.
  • Not Testing Grout Colours: Not testing grout colours with your tile samples can lead to disappointing results. Create small mock-ups to see how various grout colours interact with your tiles. This will help you visualise the final look and ensure the chosen grout enhances your design.
  • Ignoring Room Size and Layout: The size and layout of the room can influence your grout choice. Lighter grout can make small rooms feel more spacious, while darker grout can add depth and definition to larger rooms. Consider how the grout colour will affect the perception of space.
  • Refrain from considering Long-Term Design Flexibility: Choosing a grout colour without considering future design changes can be a mistake. Neutral grout colours offer more flexibility and adaptability to various design updates, ensuring your tiles remain stylish.
  • Neglecting Professional Advice: Failing to seek professional advice can lead to suboptimal choices. Consult with a tile expert or interior designer to get valuable insights and recommendations tailored to your project.

Conclusion

Selecting the perfect grout colour enhances the beauty of your porcelain tiles and elevates your space. Visit Splendour In Stone today for expert advice and a vast selection of quality tiles and grout. Transform your home with the perfect finishing touch. Ready to get started? Explore our range now!

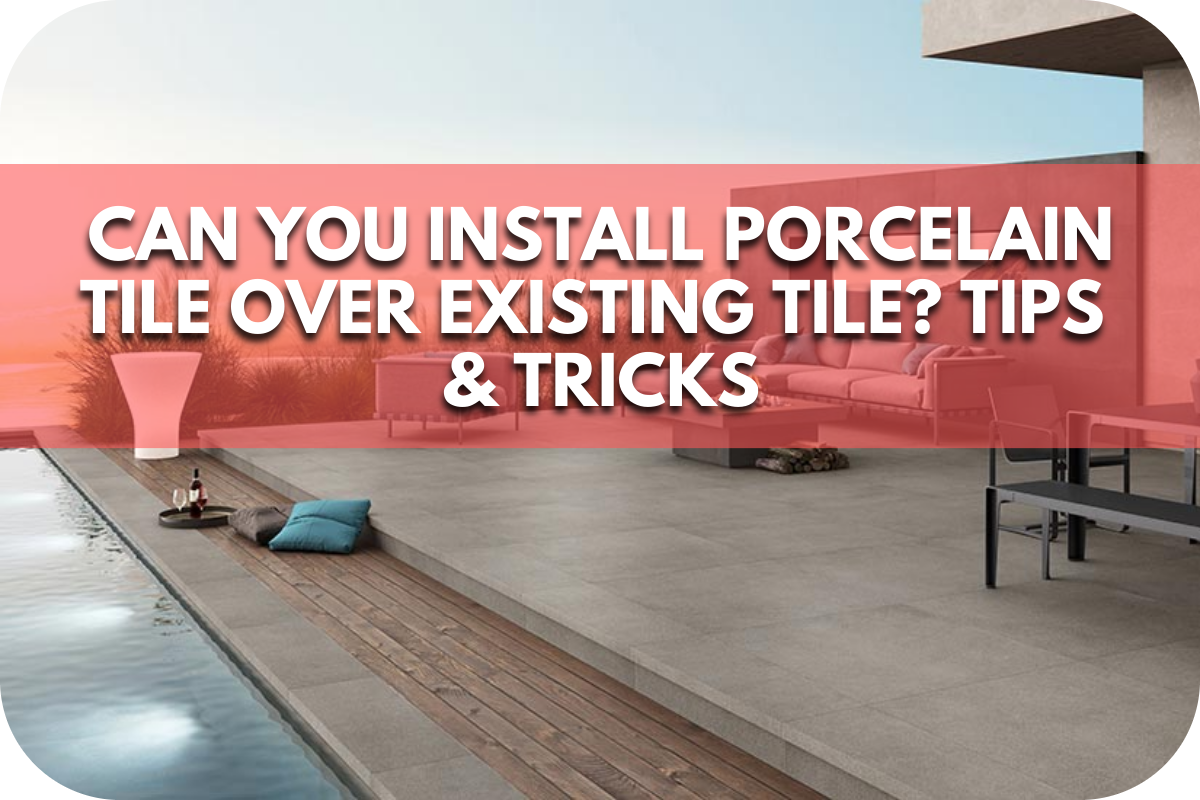
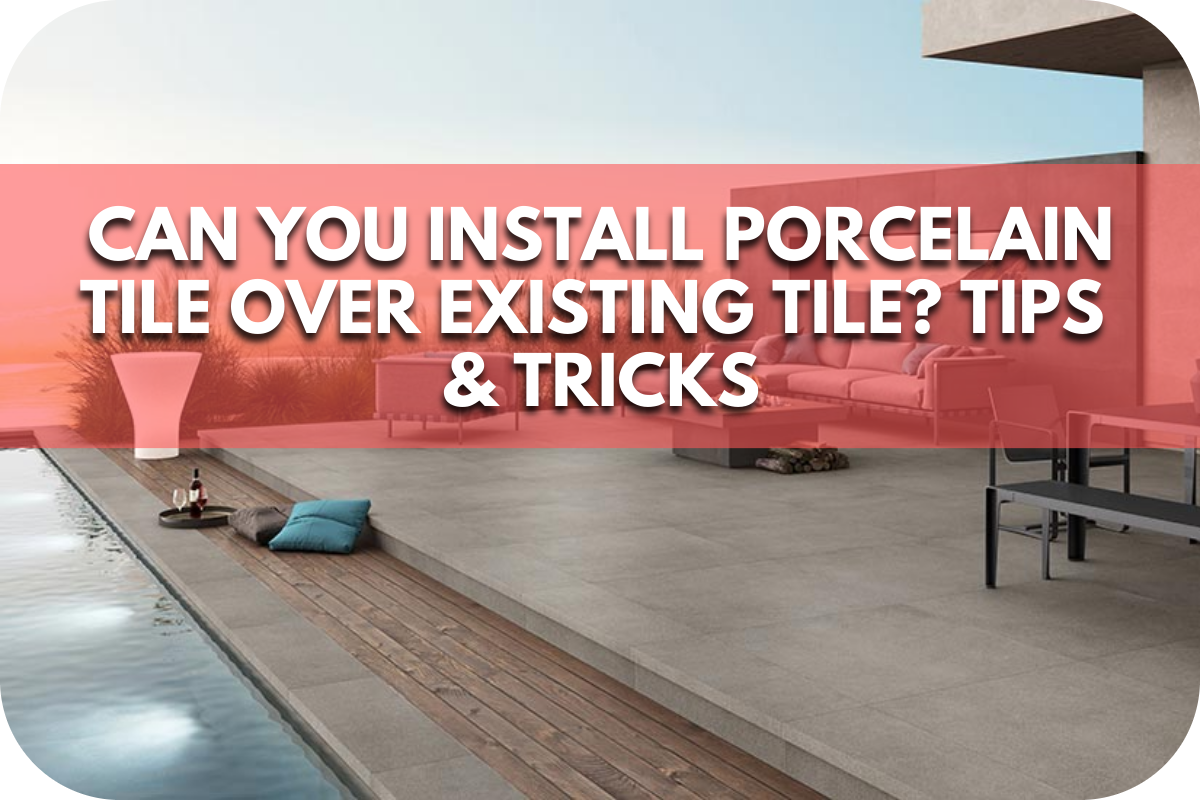
Can You Install Porcelain Tile Over Existing Tile? Tips & Tricks

Want to upgrade your flooring but dread the messy and time-consuming tile removal process?

Tearing out existing tiles can be daunting, leading to extensive clean-up, potential damage, and high costs.

Discover how to install porcelain tiles over existing tiles with our expert tips and tricks. Learn how to achieve a stunning, durable finish without the hassle of tile removal. Read a step-by-step guide to simplifying the process and ensuring professional results.

Assessing the Existing Tile Surface

Before installing new porcelain tiles over existing ones, it’s crucial to thoroughly assess the current tile surface to ensure a successful installation. 

Begin by inspecting the tiles for any signs of damage. Check for loose, cracked, or uneven tiles, as these can compromise the stability of the new layer. If you find any damaged tiles, replace them or repair the surface to create a solid foundation.

Next, ensure the existing tiles are clean and free from grease, grime, or any residue that could prevent proper adhesion

Use a strong tile cleaner and allow the surface to dry completely. For glazed or glossy tiles, roughen the surface with sandpaper or an abrasive pad to enhance the bonding of the new adhesive.

Additionally, consider the overall flatness of the tile surface. Any protrusions or uneven areas can cause problems during the installation of the new tiles. Use a levelling compound to smooth out any irregularities, ensuring a flat and even surface for the new tiles.

Finally, the moisture levels in the area should be evaluated. Ensure there are no underlying moisture issues, which can lead to long-term problems such as mould growth or tile detachment. 

Preparing the Surface

Proper surface preparation is crucial when installing porcelain tiles over existing tiles to ensure a solid and lasting bond. Here are the essential steps to prepare the surface effectively.

  • Cleaning the Existing Tiles: First, thoroughly clean the existing tiles to remove all dirt, grease, and residues. Use a heavy-duty tile cleaner or a mixture of water and mild detergent. Scrub the surface with a stiff brush and rinse well to ensure no cleaning agents remain, as they can interfere with the adhesion.
  • Roughening the Surface: The surface must be roughened to enhance the bond between the existing tiles and the new adhesive. Use an electric sander or angle grinder with a diamond grinding wheel to scuff the glaze of the existing tiles. This creates a textured surface, allowing the new adhesive to grip more effectively.
  • Applying a Primer or Bonding Agent: After roughening the surface, apply a primer or bonding agent specifically designed for tiling over tiles. These products help improve adhesion and create a strong bond between the old tiles and the new adhesive. Follow the manufacturer’s instructions for application and drying times.
  • Repairing Any Imperfections: Inspect the surface for any remaining imperfections. Fill gaps, cracks, or uneven areas with a suitable filler or levelling compound. Ensure the surface is smooth and level before proceeding with the tile installation.

Choosing the Right Adhesive

The right adhesive is essential for a successful tile-over-tile project. The glue holds everything together, ensuring your porcelain masterpiece lasts for years. Here’s what you need to consider:

  • Strength and Flexibility: Porcelain tiles require a strong adhesive due to their weight and density. Opt for a high-performance adhesive specifically designed for porcelain. Look for an S1-rated adhesive, indicating its deformability and suitability for tile-over-tile applications. This flexibility helps prevent cracks and breakages caused by movement.
  • Setting Time: Choose an adhesive with a setting time that suits your skill level. Faster-setting adhesives are ideal for experienced tilers while slower-setting ones provide more wiggle room for adjustments if you’re a DIY enthusiast.
  • Colour: Adhesives are typically available in white or grey. Choose a colour that complements your grout for a seamless finish.
  • Coverage: Calculate the area you need to cover and purchase enough adhesive for the entire project. It’s better to have a little extra than to run out halfway through.
  • Brand Reputation: Stick with reputable brands known for producing quality tile adhesives. This ensures you’re getting a product that has been tested and proven to work.

Laying the New Porcelain Tiles

Properly laying the new porcelain tiles over existing tiles is crucial for achieving a professional and long-lasting finish. Here are the essential steps to follow.

  • Planning the Layout: Before you start, prepare the tile layout to ensure an even and aesthetically pleasing design. Dry-lay the tiles to see how they fit and make adjustments as needed. Begin from the centre of the room or a key focal point and work your way out to avoid narrow cuts at the edges.
  • Cutting Tiles to Fit: Use a wet saw or a tile cutter to make precise cuts for tiles that need to fit around obstacles, such as corners, fixtures, and edges. Measure and mark the tiles carefully to ensure accurate cuts. Always wear safety gear when cutting tiles to protect yourself from dust and debris.
  • Applying Adhesive: Spread the adhesive on the prepared surface using a notched trowel. Apply the glue evenly, working in small sections to prevent it from drying before the tiles are placed. Ensure complete coverage to avoid air pockets that can weaken the bond.
  • Placing the Tiles: Press each tile firmly into the adhesive, using a slight twisting motion to ensure a good bond. Use tile spacers to maintain consistent gaps between the tiles for even grout lines. Regularly check the alignment and level of the tiles as you work to ensure a smooth and professional finish.
  • Final Adjustments: Once all the tiles are laid, allow the adhesive to cure for the time specified by the manufacturer. To prevent any displacement, avoid walking on the tiles during this period.

Grouting and Sealing

Grouting and sealing are the final steps in installing porcelain tiles over existing tiles, ensuring a polished and durable finish. Here’s how to do it right.

  • Selecting the Appropriate Grout: Choose a high-quality grout suitable for porcelain tiles. Epoxy grout is popular due to its durability and resistance to stains and moisture. For areas prone to movement or moisture, flexible grout can help prevent cracks.
  • Applying the Grout: Once the adhesive has fully cured, use a rubber float to apply the grout. Spread the grout diagonally across the tiles, pressing it into the gaps between them. Ensure all joints are filled to avoid voids that can weaken the structure. Wipe away excess grout with a damp sponge, rinsing it frequently to keep the tiles clean.
  • Cleaning the Tiles: A haze may form on the tile surfaces after grouting. Once the grout has set, use a grout haze remover or a mixture of vinegar and water to clean the tiles. This ensures a spotless finish and prevents any residue from dulling the tiles.
  • Sealing the Grout: To enhance the durability and longevity of your installation, apply a grout sealer. This helps protect the grout from stains, moisture, and mildew. Use a small brush or applicator to apply the sealer evenly along the grout lines. Allow it to dry according to the manufacturer’s instructions before using the tiled area.
  • Final Inspection: Inspect the entire installation for any gaps or imperfections. Address any issues promptly to ensure a flawless finish.

Tips for a Successful Installation

Successfully installing porcelain tiles over existing tiles requires careful planning and attention to detail. Here are some essential tips to ensure a flawless finish.

  • Work in Small Sections: Work in small sections when applying adhesive and laying tiles. This prevents the adhesive from drying out before the tiles are set, ensuring a solid bond. It also allows you to adjust and maintain alignment and level.
  • Ensure Even Adhesive Application: Use a notched trowel to apply the adhesive evenly across the surface. This helps prevent air pockets and ensures complete coverage, which is crucial for the tiles to adhere correctly and stay in place.
  • Maintain Consistent Grout Lines: Use tile spacers to maintain consistent gaps between the tiles. This not only ensures a neat appearance but also makes grouting easier. Consistent grout lines contribute to the tiled surface’s aesthetic and structural integrity.
  • Allow Sufficient Drying Time: After laying the tiles, allow the adhesive to cure for the recommended time before grouting. This ensures the tiles are securely bonded to the surface. Similarly, let the grout set entirely before sealing and using the area.
  • Regularly Check Alignment and Level: Periodically check that the tiles are aligned and level as you work. Use a spirit level to ensure the tiles are even. Making adjustments during the installation process is much easier than correcting mistakes later.
  • Clean As You Go: Keep a damp sponge or cloth handy to immediately remove excess adhesive or grout. This prevents it from hardening on the tile surface, making clean-up easier and ensuring a pristine finish.

Conclusion

Installing porcelain tiles over existing tiles is a practical and efficient way to upgrade your space. Follow our expert tips for a seamless and durable finish.

Visit Splendour In Stone Melbourne for quality materials and professional advice. Contact us to start your tile transformation today.

Natural Stone Facades: Creating a Lasting First Impression

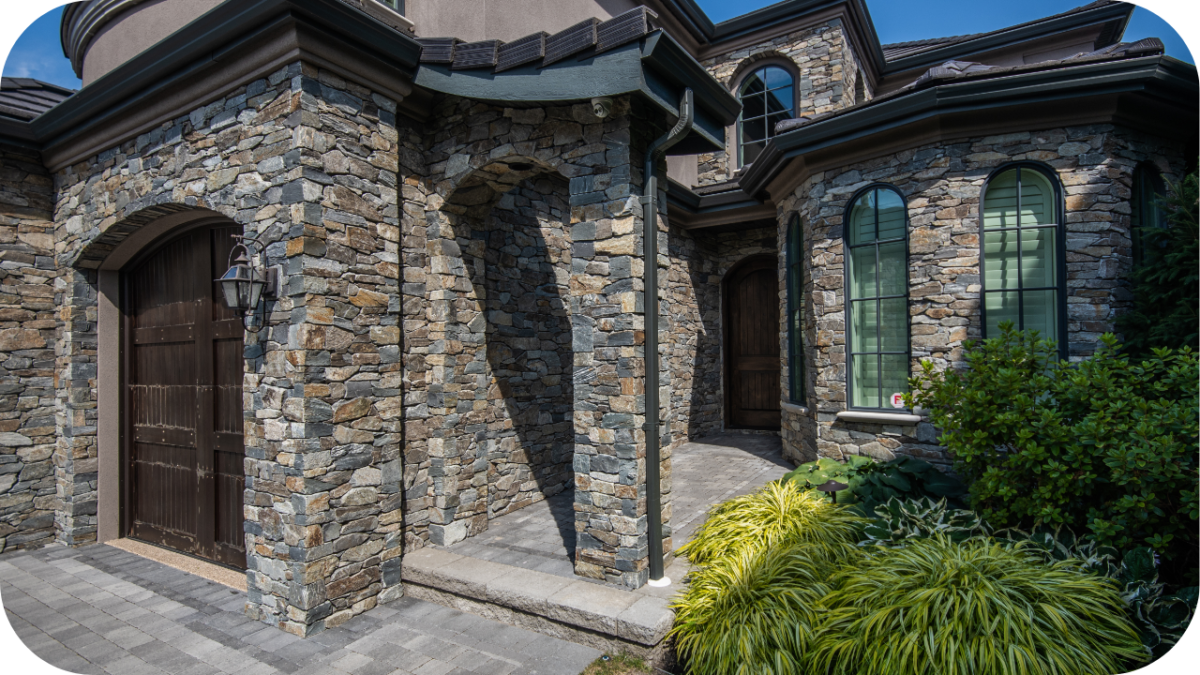
Natural stone facades are an excellent way to enhance your home’s exterior with timeless elegance, durability, and character. 

Whether you’re updating your façade, adding a new feature wall, or incorporating stone accents, natural stone offers both beauty and strength. With a variety of stone types, finishes, and colours available, it complements any architectural style, from modern to rustic. 

This article will show you how to create a lasting first impression with natural stone façades, offering practical design tips, material recommendations, and long-term value.

Why Choose Natural Stone for Your Home’s Façade

Natural stone façades offer more than just aesthetic appeal. Here’s why they’re the ideal choice for enhancing the exterior of your home.

1. Creates a Striking Visual Impact

Natural stone façades add depth, texture, and elegance to your home. The unique veining and colour variations create a bold visual presence, boosting curb appeal and making a lasting impression while elevating your property’s design.

2. Withstands Harsh Weather for Long-Term Performance

Natural stone is built to endure the toughest weather conditions. Its resistance to fading, cracking, and erosion ensures your façade remains durable and visually appealing, even in extreme Australian climates, offering reliable performance year after year.

3. Regulates Indoor Temperature with Natural Insulation

Limestone, granite, and other natural stones offer exceptional thermal insulation properties. These stones help maintain a comfortable indoor temperature by reducing reliance on heating and cooling systems, leading to lower energy costs and greater year-round comfort.

4. Requires Minimal Maintenance

Natural stone façades require very little upkeep compared to other materials. With occasional cleaning and sealing, stone retains its beauty while resisting damage from stains, dirt, and harsh weather, making it a cost-effective long-term solution.

5. Increases Property Value with Timeless Appeal

A natural stone façade significantly boosts your property’s market value. Its elegant, timeless appearance not only enhances curb appeal but also increases desirability, ensuring a high return on investment if you decide to sell.

Popular Natural Stones for Facades

Popular Natural Stones for Facades

Natural stone facades are available in various types, each offering unique characteristics and beauty. Here are some of the most popular natural stones for facades, along with ideal varieties for each.

Natural Stone Cladding Techniques

Natural Stone Cladding Techniques

Natural stone cladding techniques can transform the look of your home’s exterior. Here are some of the most popular methods for applying stone to facades, each offering a unique aesthetic and functional benefit.

1. Dry Stack Cladding: Grout-Free, Layered Stone Look

Dry stack cladding uses stone arranged without grout, creating a rustic, layered appearance. This technique enhances the stone’s natural texture, ideal for rustic, natural designs, and offers a timeless, organic look for facades.

2. Mortar-Jointed Cladding: Traditional, Visible Joins for Depth

Mortar-jointed cladding involves using visible mortar joints to secure stones, adding depth and dimension to facades. This traditional technique enhances the stone’s appearance, giving a handcrafted look that works well in both modern and classical designs.

3. Panel Cladding Systems: Consistent, Pre-Assembled Stone Panels

Panel cladding systems feature pre-assembled stone panels for consistent layouts, offering a seamless finish. This method simplifies installation and ensures uniformity, making it perfect for large facades while maintaining a sophisticated, modern aesthetic.

4. Random Ashlar and Course Patterns: Custom, Handcrafted Effect

Random ashlar and course patterns use stones of varying sizes and shapes, creating a unique, handcrafted effect. This technique adds a dynamic, textured look to facades, allowing for creative, custom designs that stand out.

Choosing the Right Finish for Aesthetic Appeal

Choosing the Right Finish for Aesthetic Appeal

Choosing the right finish for your natural stone façade is crucial for achieving the desired aesthetic. Here’s how to select the ideal finish to enhance the beauty and style of your exterior.

1. Honed: Smooth and Matte for Modern Architecture

A honed finish creates a sleek, smooth, and matte surface, ideal for modern and minimalist designs. It provides a refined, polished look, perfect for contemporary homes that favour clean lines and sophisticated finishes.

2. Tumbled: Aged and Softened for Rustic or Provincial Homes

The tumbled finish gives stone an aged, weathered look, softening the edges and offering a rustic, organic appeal. Ideal for traditional or provincial homes, it adds warmth and character to façades or garden walls.

3. Split-Face: Textured Finish for Bold Character and Shadows

Split-face finishes provide a rugged, textured look, ideal for creating bold, eye-catching façades. The uneven surface enhances natural light and shadow play, perfect for making a statement in both modern and rustic designs.

4. Sandblasted or Brushed: Subtle Texture for Minimalistic Designs

A sandblasted or brushed finish adds subtle texture to the stone, providing a soft, matte appearance. It’s ideal for minimalistic or contemporary designs, where understated elegance and smooth surfaces are key to the aesthetic.

Design Considerations for Maximum Curb Appeal

Design Considerations for Maximum Curb Appeal

Natural stone façades can transform your home’s exterior, but thoughtful design choices are essential for achieving maximum curb appeal. Here are key considerations to elevate your home’s look and make a lasting impression.

1. Coordinate Stone Tones with Roof Tiles and Windows

Ensure the tones of your stone façade complement the roof tiles and window frames. Harmonising colours between these elements creates a cohesive look, highlighting the stone’s beauty and tying the entire exterior together.

2. Strategically Use Stone as an Accent

Rather than covering the entire façade, consider using stone as an accent around entrances, windows, or chimneys. This focused approach showcases the stone’s beauty without overwhelming the design, providing a balanced, sophisticated look.

3. Combine Stone with Timber, Metal, or Glass for Balance

Combine natural stone with materials like timber, metal, or glass for an appealing contrast. This fusion of textures and finishes adds visual interest while maintaining a harmonious balance, which is ideal for modern and traditional designs.

4. Integrate Lighting to Highlight Stone Texture and Features

Use strategic lighting to highlight the natural texture of your stone façade. Accent lighting or recessed lights can emphasise the stone’s details, creating dramatic shadows and depth, and enhancing the overall curb appeal of your home.

5. Create a Focal Point with Stone Features

Make a statement by using stone to create a focal point, such as a grand entrance or a feature wall. This draws attention to the unique beauty of the stone, enhancing the overall visual impact of your façade.

Maintenance and Care Tips

Maintenance and Care Tips

To keep your natural stone façade looking pristine and ensure its longevity, regular care is essential. Here are simple tips to preserve both the beauty and durability of your stone exterior.

  • Wash Surfaces Periodically with Water: Use water and a soft broom or cloth to remove dust and debris. This helps prevent dirt buildup, keeping your stone looking fresh and vibrant for longer.
  • Reapply Sealant as Needed: Periodically apply a high-quality stone sealant to protect the surface from stains and weathering, especially in coastal or high-rainfall areas where moisture exposure is higher.
  • Remove Organic Growth: Algae, moss, or lichen can develop on stone surfaces, particularly in shaded or damp spots. Use stone-safe cleaning solutions to eliminate organic growth and prevent staining or damage.
  • Avoid Acidic or Abrasive Cleaners: Avoid using harsh or acidic cleaners that could damage the stone’s surface. Stick to pH-neutral, stone-safe cleaners to maintain the integrity and appearance of your façade.
  • Check for Cracks or Damage: Inspect your stone façade for cracks or wear regularly. If any damage is found, have it repaired promptly to prevent further deterioration and ensure long-lasting performance.

Conclusion

A natural stone façade is a timeless and elegant choice that enhances your home’s exterior with durability and sophistication. With minimal maintenance and a lasting aesthetic appeal, stone façades provide long-term value and curb appeal. 

Whether you’re building or upgrading, incorporating natural stone guarantees a premium look and increased property value. Contact Splendour in Stone today for expert advice and premium stone solutions.

Stone Cladded Fireplace Request

At Splendour in Stone, we specialise in supplying and installing natural stone cladded fireplaces that bring warmth, beauty, and character to your home. Each piece is crafted with precision and presence, ensuring a timeless centrepiece built to last.

Planning a new fireplace or upgrading an existing one? Complete the form below and receive your personalised quote within 24 hours.
Share anything about your vision, home style, or needs
Important Installation Note
The fireplace unit must be installed prior to our stonework.
This ensures proper fitting and a seamless final result. If you need help coordinating this, we’re happy to assist. Just mention it in your message.
In SQM?

Please fill your details to download.


      Request Callback


        Enquiry Form


        Please fill your details to download.