Register your Information for Free Stone Samples Sent Express to You!

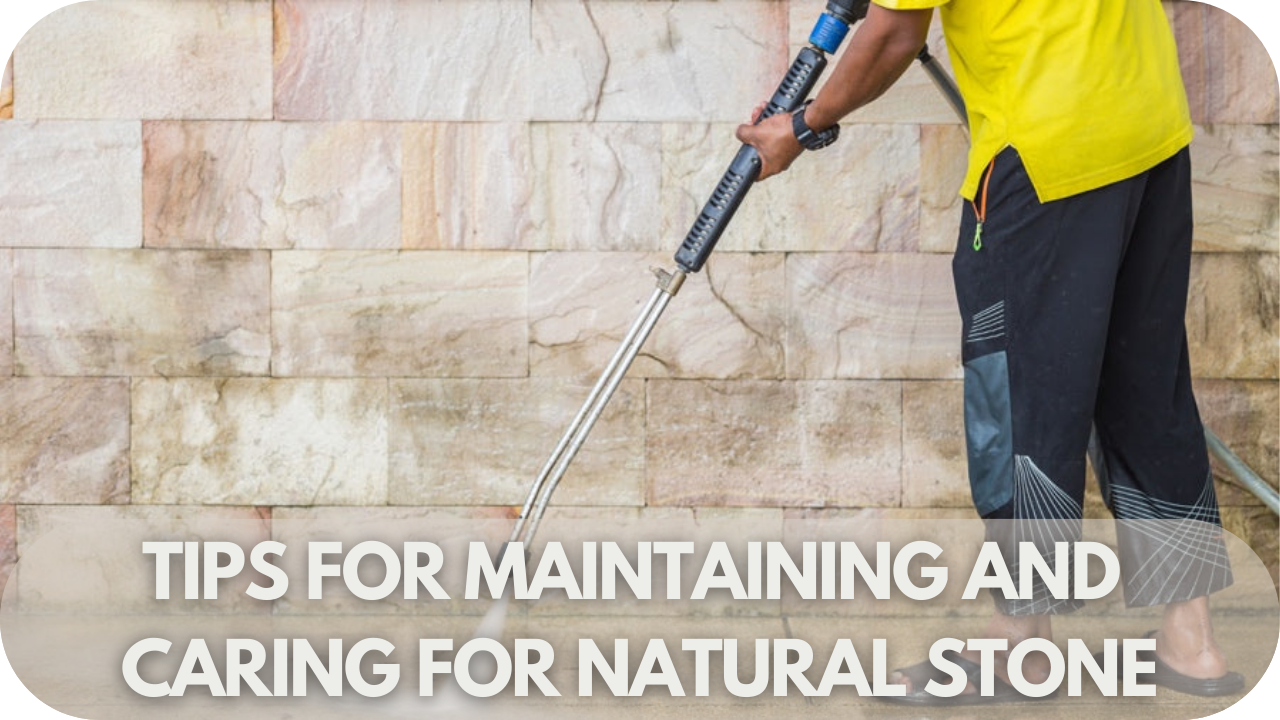
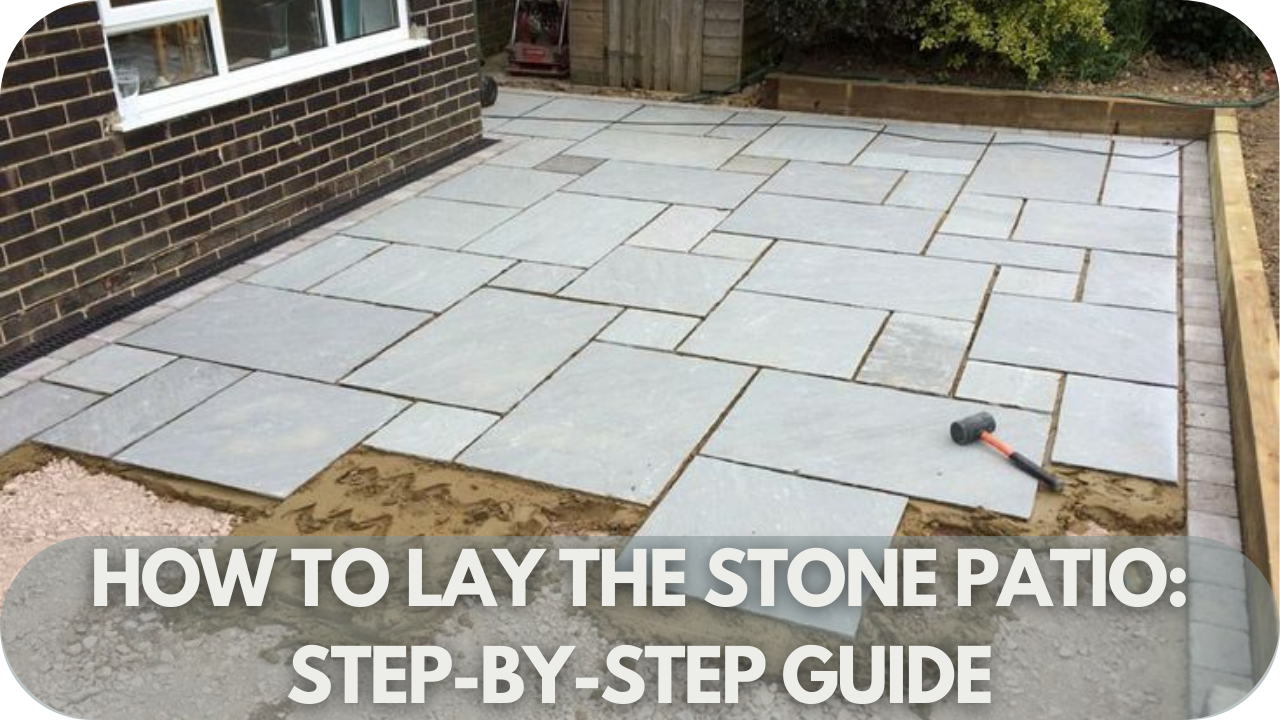
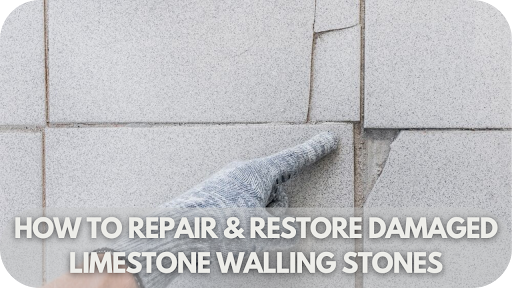
How to Repair & Restore Damaged Limestone Walling Stones

Limestone walling stones bring timeless elegance to any space, but even the most durable surfaces can suffer damage over time. 

Whether it’s from harsh weather, accidental impact, or natural wear, restoring your limestone can seem daunting. But fear not – with the right tools and techniques, you can bring your stones back to life. 

In this guide, we’ll walk you through the essential steps to repair and restore damaged limestone walling stones, ensuring they look as beautiful and sturdy as the day they were installed. Let’s get started!

Common Causes of Damaged Limestone Walling Stones

Understanding common causes of limestone wall damage for effective repair.

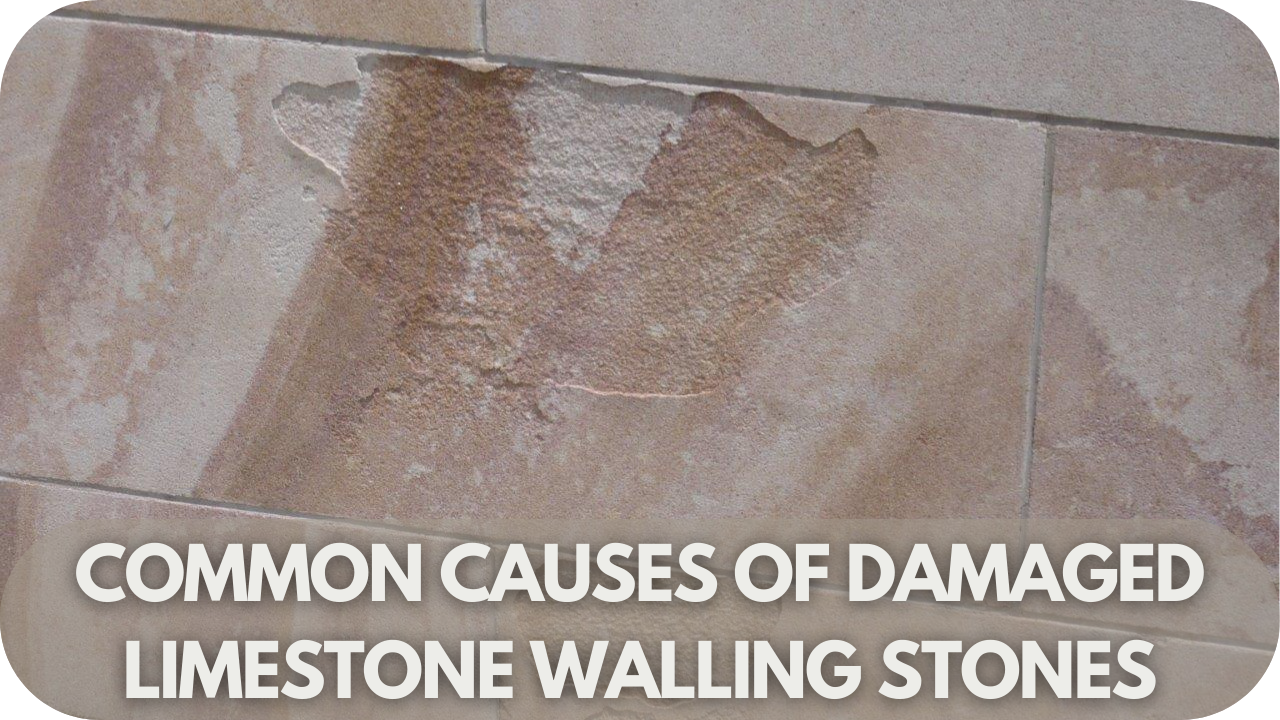
Limestone walling stones are renowned for their durability, but even the most resilient stone can succumb to damage over time. Understanding the most common causes of wear and tear can help you protect your investment. Here are the most common causes:

1. Weathering and Erosion

Exposure to the elements—wind, rain, and frost—can slowly erode limestone over time. This constant wear makes the surface rougher, more porous, and vulnerable to further damage. 

The freeze-thaw cycle, where water penetrates the stone, freezes, and expands, causes cracks, worsening the deterioration.

2. Staining and Discolouration

Limestone can easily become stained or discoloured due to organic growths such as moss, algae, and lichen or by external pollutants like rust, mineral deposits, and environmental pollution. 

If left untreated, these stains can be permanent, affecting the stone’s appearance and long-term durability.

3. Cracks and Chips

Limestone is vulnerable to physical impact, whether from heavy objects, settling foundations, or shifting ground. 

Natural expansion and contraction of the stone due to temperature fluctuations can also cause cracks and chips. Over time, these minor damages can worsen, leading to significant structural issues if not addressed promptly.

4. Algae, Moss, and Lichen Growth

Algae, moss, and lichen can thrive on limestone, particularly in damp, shaded areas. 

These biological growths damage the stone’s surface by infiltrating it with their root systems. Over time, they contribute to stone erosion and accelerate the breakdown of the material.

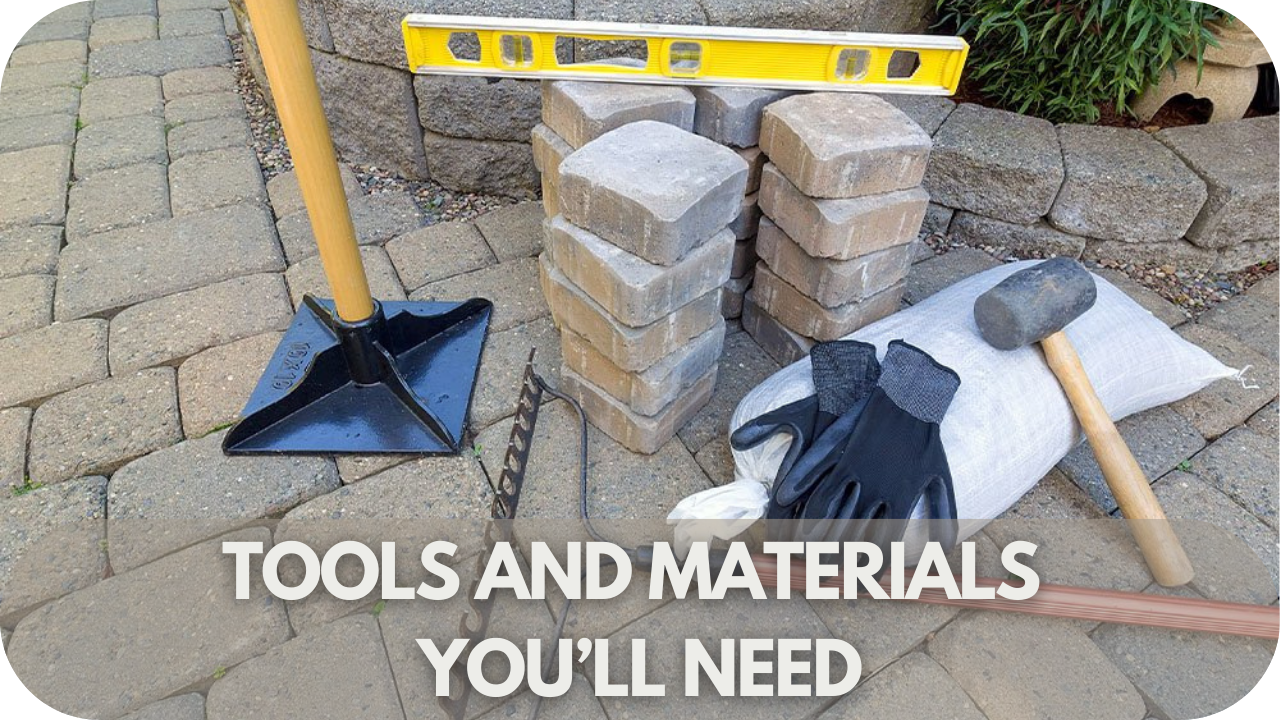
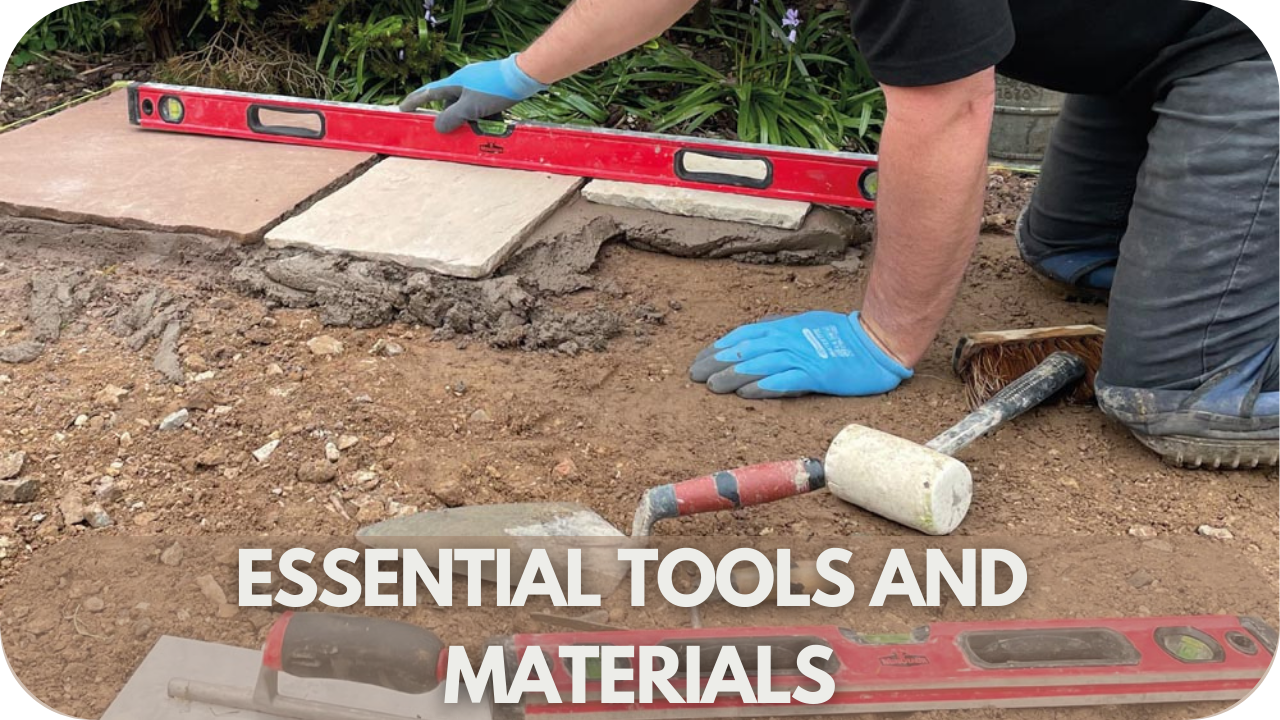
Tools and Materials Required for Repairing Limestone Walling Stones

Essential tools and materials for limestone wall restoration.

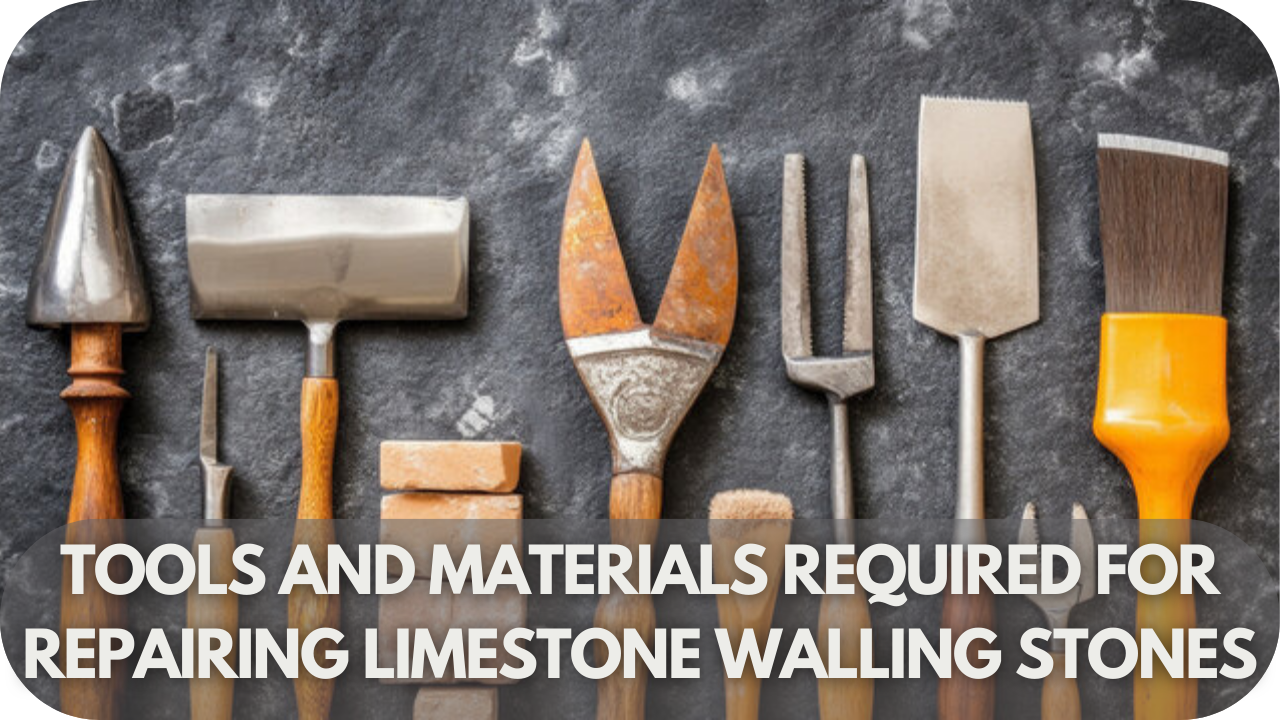
When repairing and restoring damaged limestone walling stones, having the right tools and materials is essential for achieving a professional and durable result. Here’s what you’ll need:

  • Chisels and Hammers: For minor chips and cracks, stone chisels and a masonry hammer are essential to carefully remove damaged areas and create a clean surface for repair.
  • Angle Grinder or Handsaw: If you need to shape or cut the stone, an angle grinder with a diamond blade is often the best choice, but if you’re looking for a more accessible option, a manual handsaw or wet stone cutter can also work for small repairs.
  • Stone Repair Filler: A high-quality stone filler or epoxy resin is critical for filling cracks and chips. Choose a filler that matches the limestone’s colour and texture for seamless restoration.
  • Brushes: A soft bristle brush is useful for cleaning the stone’s surface before repairs. A wire brush may also be needed to remove stubborn dirt or old sealant.
  • Protective Gear: To ensure safety, always wear gloves, safety glasses, and a dust mask when handling tools and working with stone.
  • Stone Sealer: After repairs, a stone sealer is essential to protect the stone from future damage and stains. Opt for a high-quality, breathable sealer for optimal results.

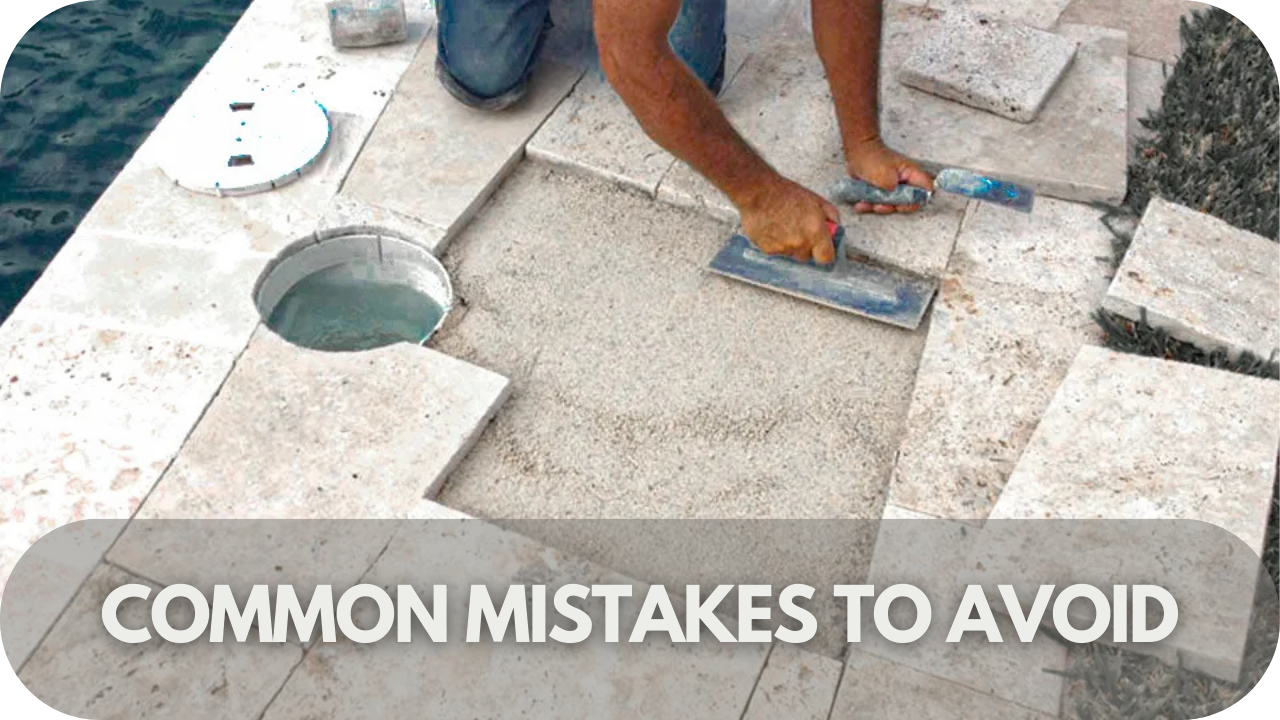
Step-by-Step Guide to Repairing Damaged Limestone Walling Stones

Easy step-by-step guide to restore damaged limestone walls.

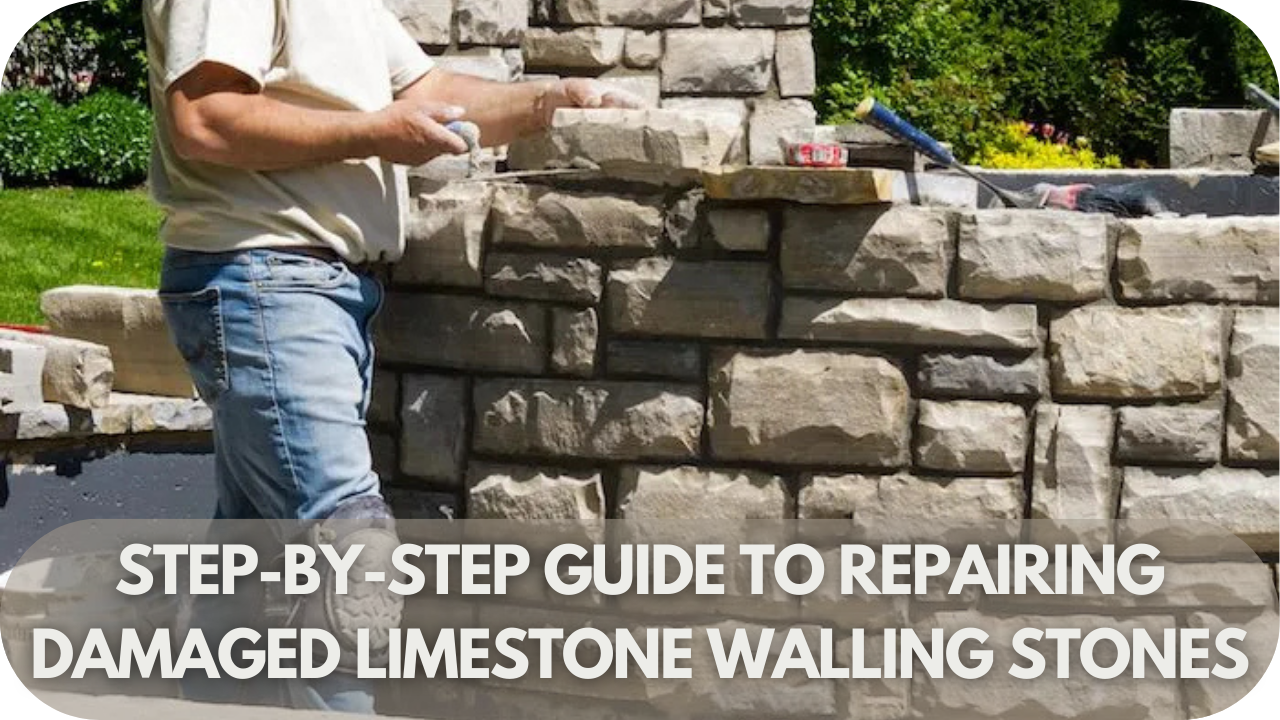
Restoring damaged limestone walling stones may seem daunting, but with the right approach, you can achieve stunning, long-lasting results. Follow these easy steps to bring your limestone back to life!

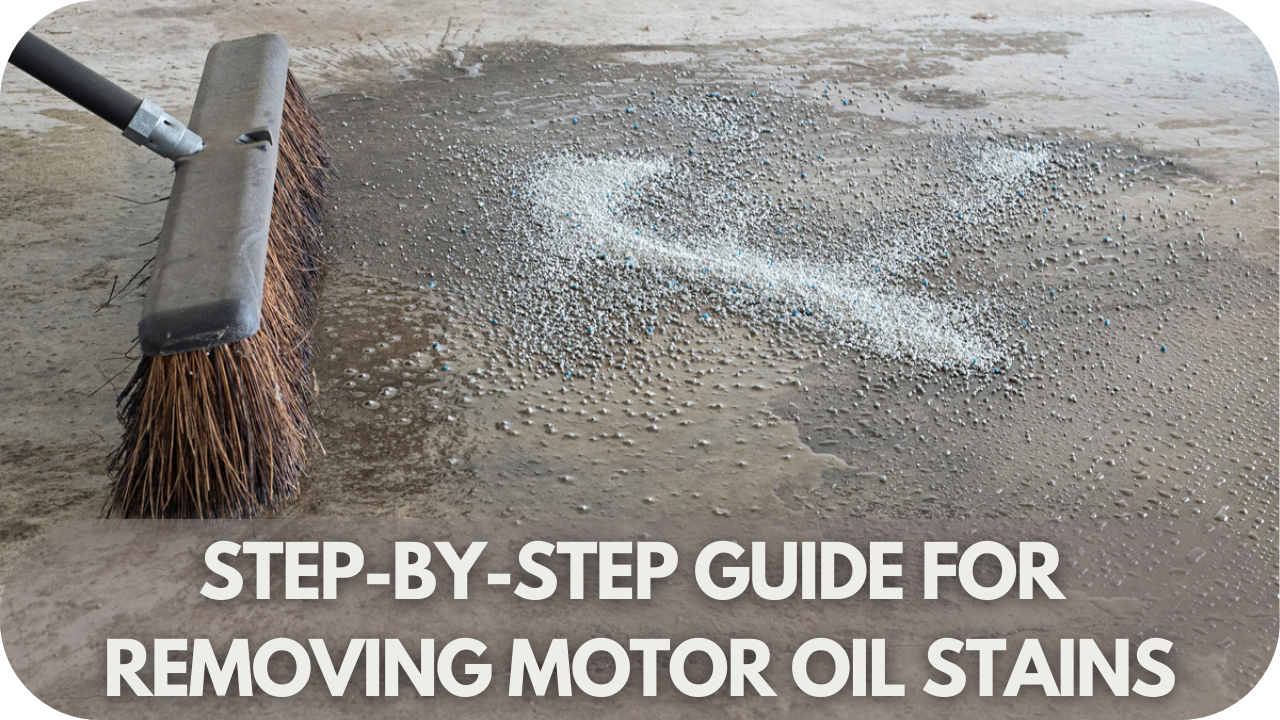
Step 1: Clean the Damaged Area

Start by removing dirt, debris, and any biological growth from the damaged area using a soft brush. Then, wash the surface with a mild detergent or stone-safe cleaner. Rinse thoroughly with clean water to ensure no residue remains, leaving a clean, smooth surface for repairs.

Step 2: Treat Stains and Discolouration

Identify the type of stain affecting the limestone—organic, rust, or mineral. Apply a suitable cleaner or poultice to the stained area and allow it to sit for the recommended time. Scrape off the poultice and rinse thoroughly with water. Repeat if necessary to remove stubborn stains.

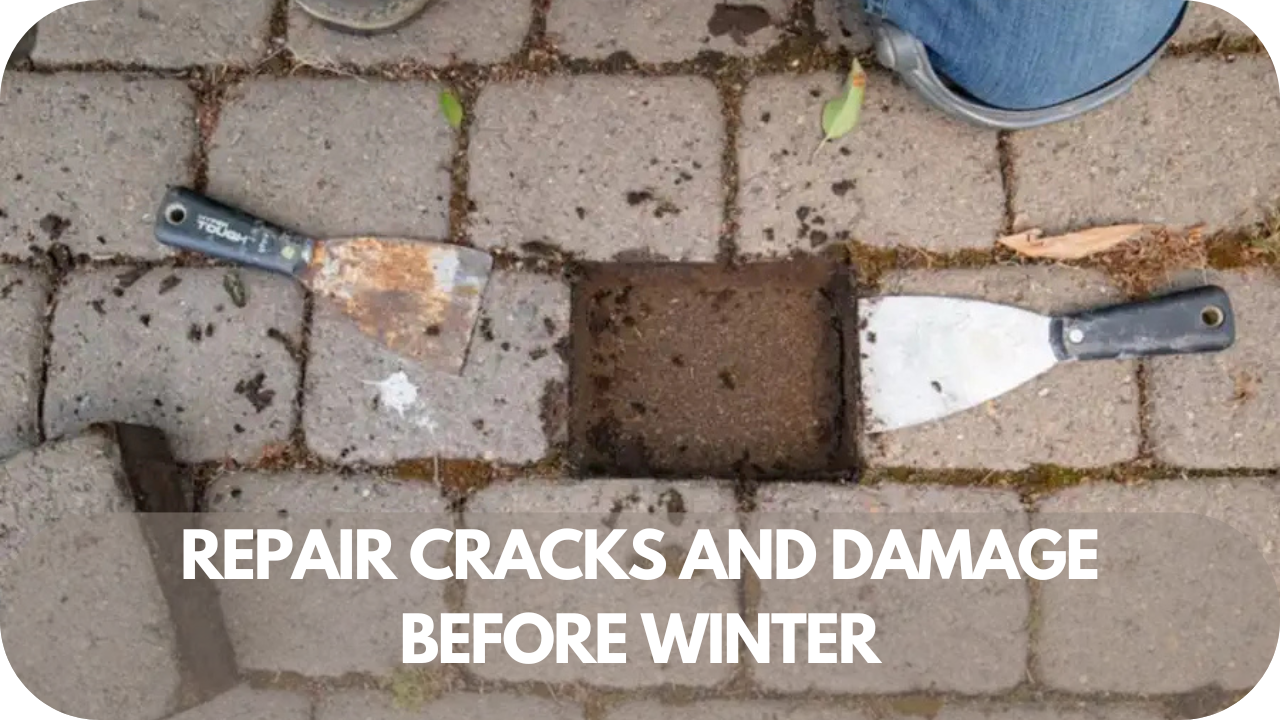
Step 3: Fill Cracks and Chips

Mix a stone repair compound according to the manufacturer’s instructions. Use a putty knife or spatula to fill the cracks or chips with the compound, smoothing it out so it blends with the surrounding stone. Allow the compound to cure fully, then gently sand the repaired area to match the texture.

Step 4: Restore the Texture and Colour

Assess whether the stone needs texture restoration or colour correction. Use a grinder or sandpaper to restore the texture if necessary. For colour issues, apply a tinted stone repair compound and blend it seamlessly into the surrounding stone for a uniform look. Finish by buffing the area for a smooth, even surface.

Step 5: Seal the Limestone

Select an appropriate stone sealer (either penetrating or surface sealer) and apply it with a clean cloth or brush. Allow the sealer to absorb as per the manufacturer’s instructions. Wipe away any excess to prevent streaking or glossiness. Reapply periodically to maintain long-lasting protection and prevent further damage.

Pro Tips for Preventing Further Damage to Limestone Walling Stones

Expert tips to protect limestone walls from future damage.

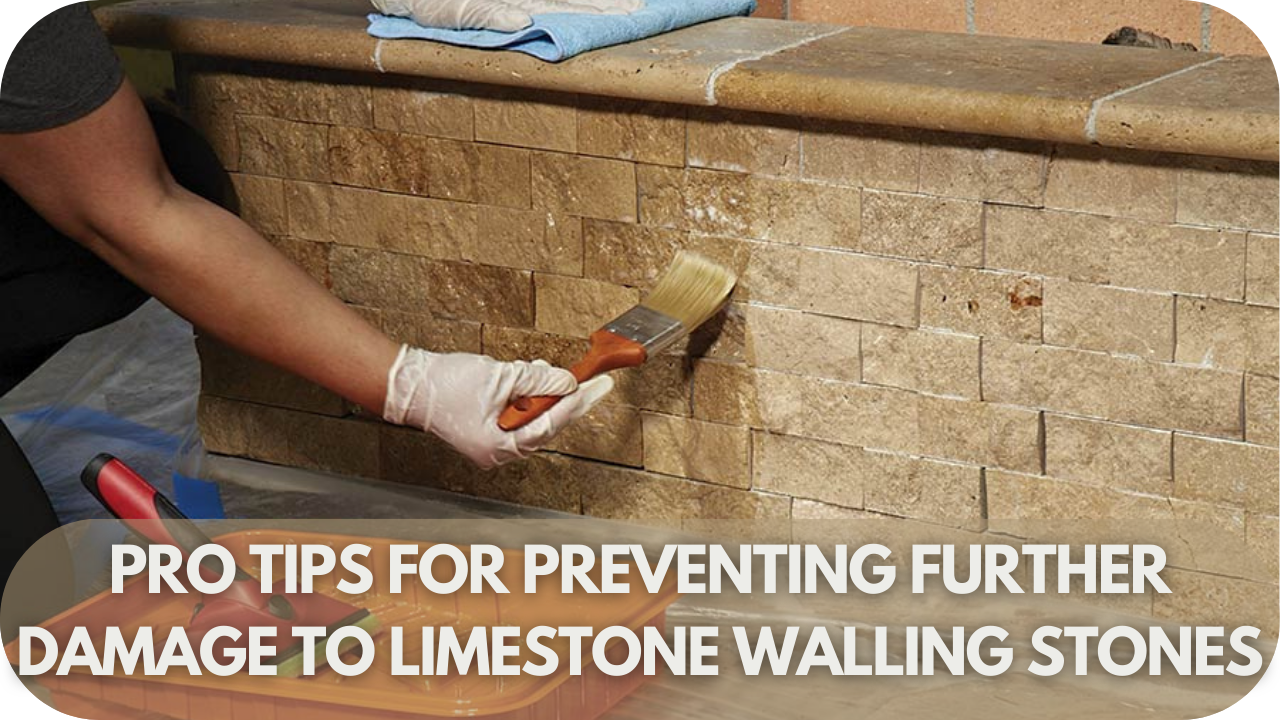
Preventing further damage is key to preserving the integrity of your limestone walling. Follow these essential tips to keep your stone looking its best and lasting for years to come:

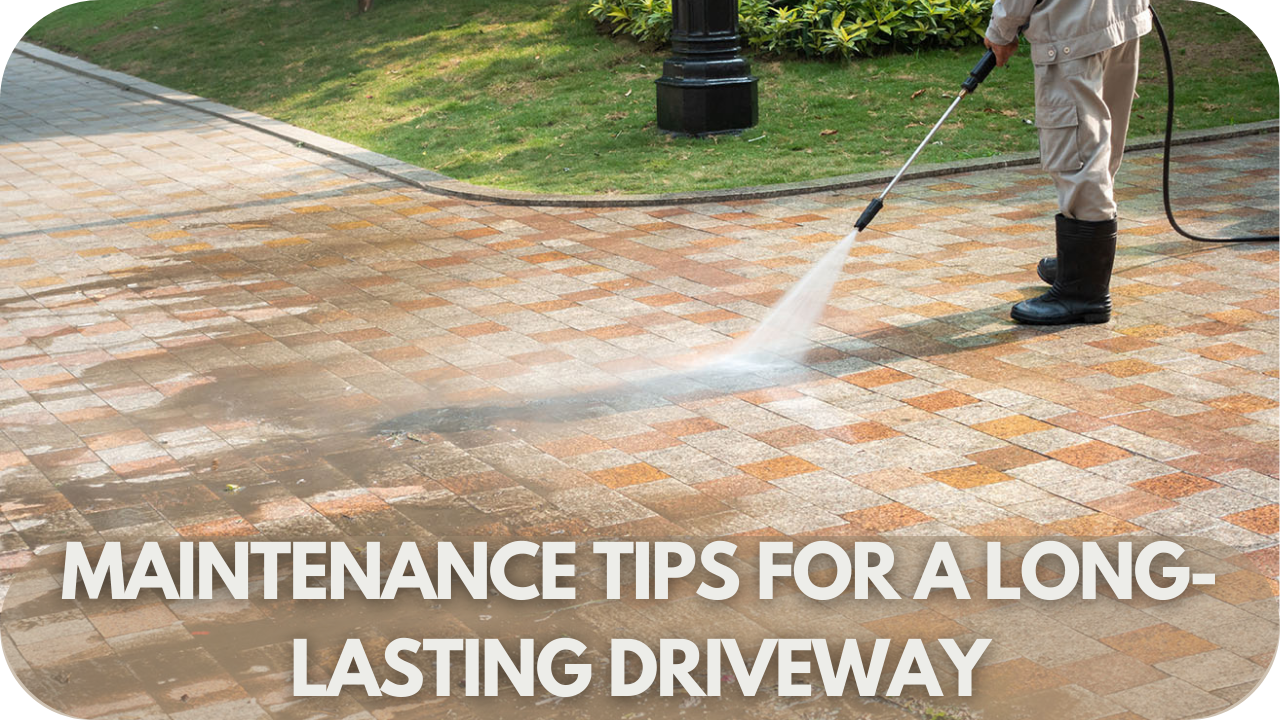
  • Regular Cleaning: Use a soft brush and a stone-safe cleaner to remove dirt, moss, and debris, preventing moisture buildup that can lead to erosion or staining. Avoid harsh chemicals that can weaken the stone.
  • Apply a High-Quality Stone Sealer: Protect your limestone by applying a breathable stone sealer. Sealing will protect the stone from moisture, stains, and pollutants while allowing trapped moisture to escape. Reapply periodically for lasting protection.
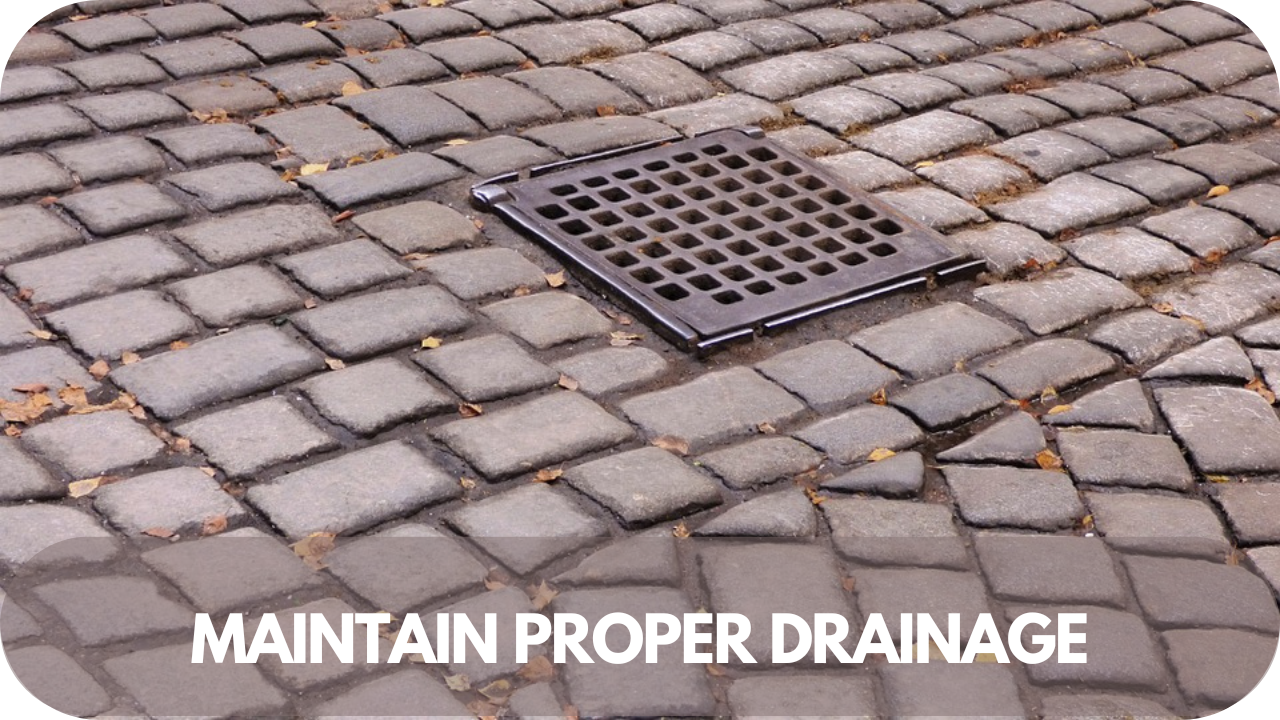
  • Ensure Good Drainage: Make sure water flows away from the limestone wall by maintaining gutter systems and downpipes. Poor drainage can cause water to pool at the base, leading to cracks and stone erosion.
  • Inspect Regularly: Conduct regular checks for minor cracks or chips. Address any issues early before they develop into more significant damage, saving time and money on repairs.
  • Avoid Direct Contact with Harsh Materials: Keep acidic substances such as vinegar, citrus, and cleaning agents away from the limestone, as these can cause etching and discolouration. Use stone-safe cleaning products instead.
  • Limit Exposure to Extreme Weather: If possible, protect your limestone walling from prolonged exposure to extreme temperature fluctuations or harsh winds, which can cause expansion and contraction, leading to cracks. Use appropriate covers or shielding for vulnerable areas.

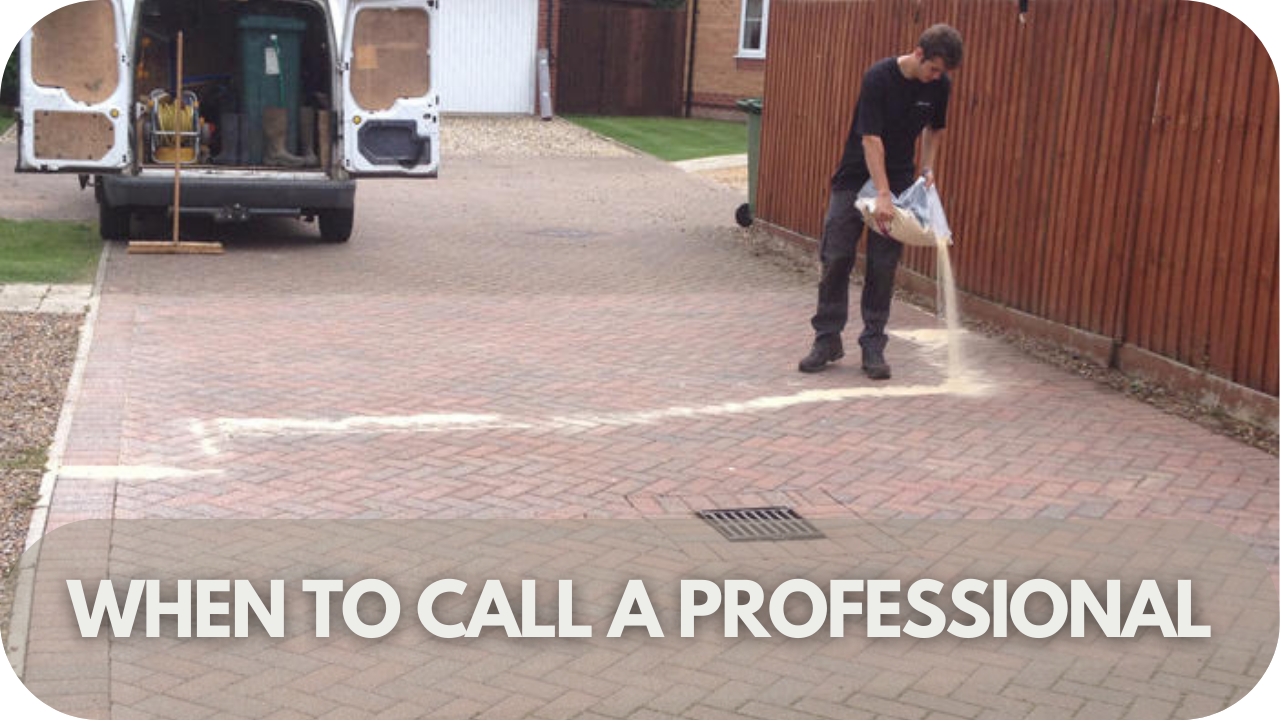
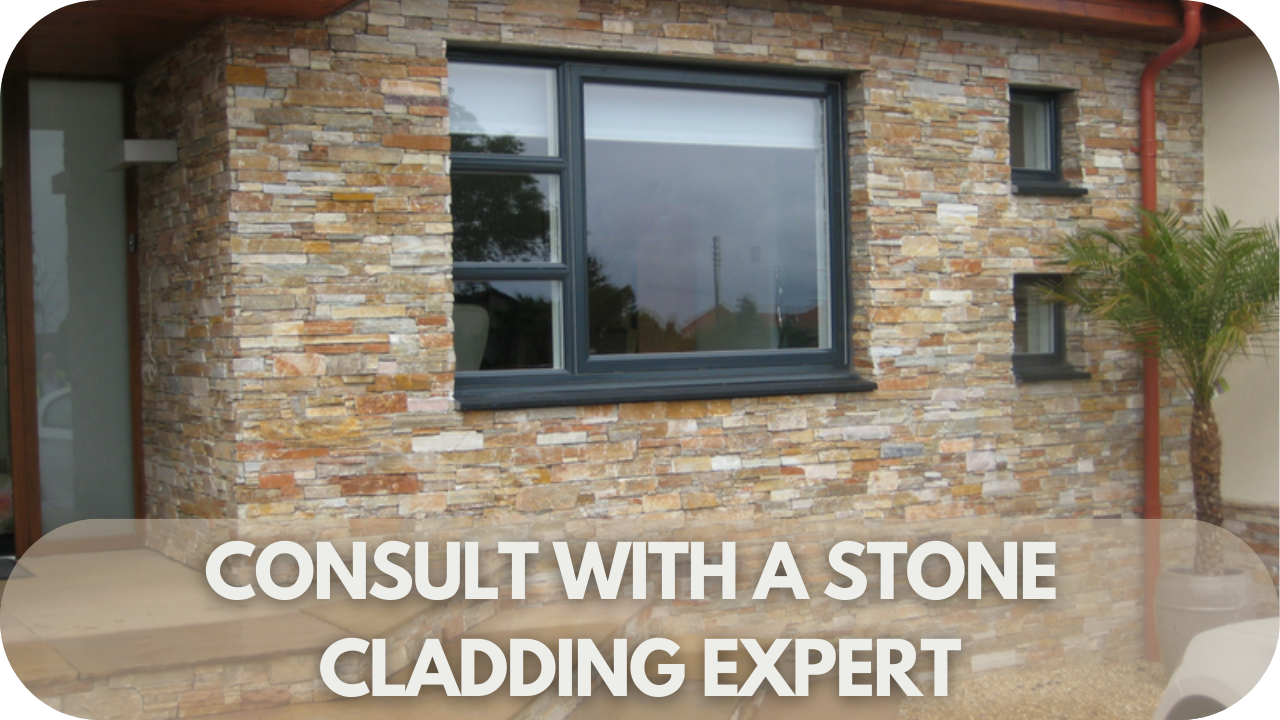
When to Call a Professional for Limestone Restoration

Know when to seek professional help for limestone restoration.

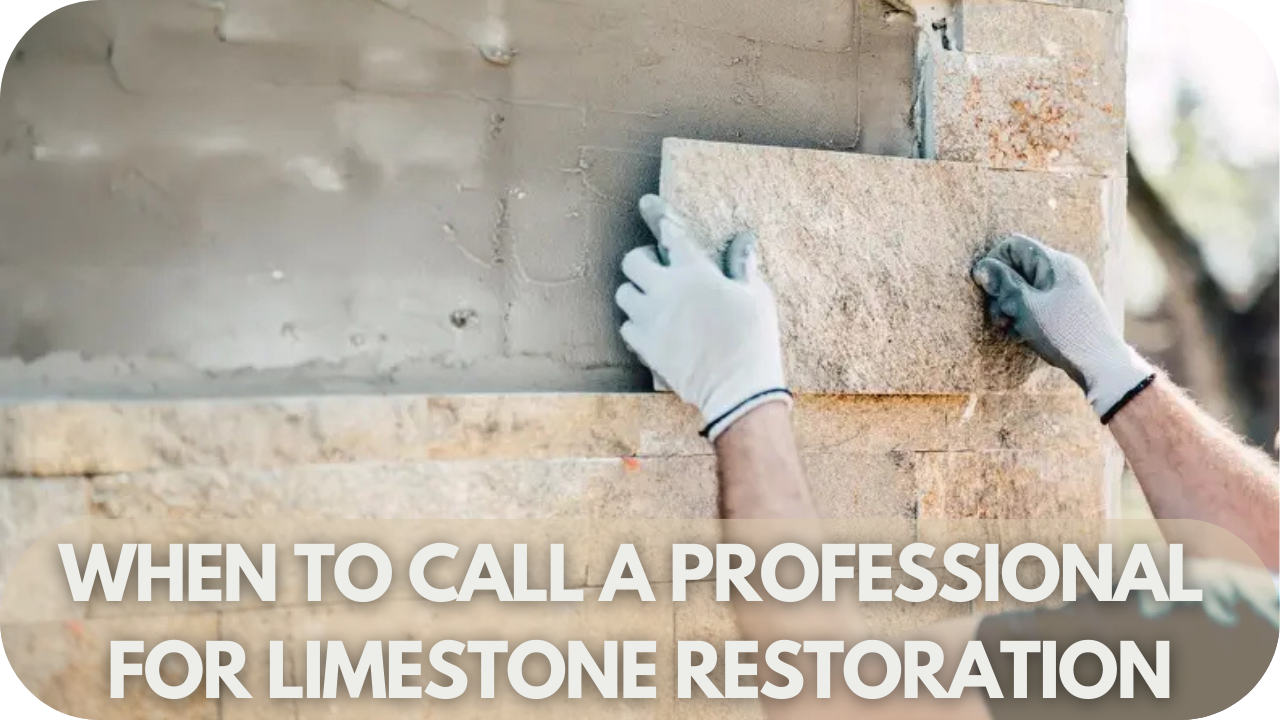
While many limestone repairs can be tackled DIY, some issues are best left to the experts. If the damage is extensive or beyond your skills, professional restoration ensures the job is done right. Here are the key situations when calling a professional is the smartest choice.

1. Extensive Cracks or Structural Damage

Large cracks or structural damage in limestone walls require professional expertise. Experts can assess the underlying issues and use specialised tools to stabilise and repair the stone, ensuring a durable, long-lasting restoration that prevents further deterioration.

2. Severe Biological Growth

When moss, mould, or lichen has deeply penetrated the stone, professionals can safely remove it without damaging the surface. Their specialised cleaning methods eradicate root systems effectively, preventing future growth and preserving the integrity of the limestone.

3. Persistent Staining or Discolouration

Stains from rust, minerals, or organic growth that don’t respond to DIY cleaning should be treated by a professional. Experts use poultices and specialised cleaners to remove deep-set stains without compromising the stone’s natural colour or structure.

4. Complex Texture or Colour Restoration

For significant texture or colour restoration, professionals have the skills and materials to match the stone’s original appearance. This ensures repairs are seamless, maintaining the uniformity and aesthetic value of your limestone wall.

5. Large-Scale Repairs

For extensive damage, professionals bring the right tools and expertise to handle large-scale repairs efficiently, ensuring both aesthetic and structural integrity.

Conclusion

Restoring damaged limestone walling stones requires the right techniques, tools, and care. Whether you’re tackling small repairs or needing professional help for large-scale restoration, addressing damage early ensures your limestone remains strong and beautiful. 

For expert advice or high-quality limestone materials, contact Splendour in Stone today. Our team is ready to help you restore your stone’s natural beauty and durability for years to come.

Safe De-icing Solutions for Paving Stones

Winter can be tough on outdoor spaces, especially when it comes to keeping your paving stones safe from ice and snow. 

While traditional de-icers might seem like a quick fix, they often cause lasting damage—staining, erosion, and cracks. But what if there’s a way to keep your surfaces pristine without the risk? 

In this guide, we’ll explore safe and effective de-icing solutions that protect your paving stones through the harshest months. Ready to learn the secrets to winter-proofing your outdoor areas? Let’s dive in!

Why De-icing Is Necessary for Paving Stones

Snow-covered paving stones in winter highlighting the importance of de-icing for safety and longevity.

From preventing dangerous slips to maintaining the long-term integrity of your surfaces, de-icing is an essential part of winter maintenance. Here’s why it matters.

1. Enhances Safety

De-icing is essential for creating safe, slip-free surfaces during winter. It prevents ice build-up on paving stones, reducing the risk of accidents and falls. Safe de-icing solutions ensure safer walkways and driveways for family members, visitors, and vehicles.

2. Prevents Damage from Freeze-Thaw Cycles

Water that seeps into paving stones can freeze and expand during cold weather, causing cracks and surface erosion. De-icing helps prevent this freeze-thaw cycle by keeping moisture from freezing on the stone, ultimately preserving the integrity and lifespan of your paving stones.

3. Reduces Maintenance and Repair Costs

By preventing ice accumulation and minimising damage, de-icing helps extend the life of your paving stones. This reduces the need for frequent repairs or replacement, saving you money in the long run. Regular de-icing maintenance keeps your outdoor surfaces in top condition.

4. Maintains Aesthetics

Ice and snow can leave behind unsightly stains, especially when melted by traditional salts. Safe de-icing solutions are designed to protect your paving stones, preserve their appearance, and prevent long-term discolouration or damage so your outdoor spaces stay attractive all winter long.

5. Improves Functionality

De-icing ensures that paving stones remain functional throughout the winter season. It prevents dangerous ice build-up, ensuring driveways, walkways, and patios remain accessible for vehicles and pedestrians. It also maintains your outdoor areas’ usability despite harsh weather conditions.

Safe De-Icing Solutions for Paving Stones

A close-up of paving stones treated with safe de-icing solutions, ensuring a clear and protected walkway.

Winter can be tough on your paving stones, but with the right approach, you can keep them safe and pristine. Here are safe, effective de-icing solutions to protect your paving stones this winter.

1. Calcium Magnesium Acetate

Calcium Magnesium Acetate (CMA) is an environmentally friendly alternative to traditional de-icers. It is less corrosive to both concrete and vegetation, making it safe for paving stones. 

CMA works by preventing ice from bonding to surfaces, making it easier to remove. Its mild nature makes it ideal for areas sensitive to harsh chemicals.

2. Potassium Acetate

Potassium Acetate is another eco-friendly de-icing option that works well in low temperatures. It is less corrosive than rock salt and is non-toxic to plants and animals. 

This solution is often used in commercial settings, such as airports, for its fast-acting properties and minimal impact on paving stones and surrounding environments.

3. Sand

Sand doesn’t melt ice but provides traction, reducing the risk of slipping on icy surfaces. It’s safe for paving stones and doesn’t cause damage or corrosion. 

Sand is best used in areas where traction is needed immediately, but it doesn’t solve the problem of ice buildup long-term, so it’s often used in combination with other de-icers.

4. Gravel

Like sand, gravel provides additional traction on icy surfaces. It’s a natural and non-corrosive material that doesn’t damage paving stones or harm plant life. 

Gravel is ideal for areas with heavy foot traffic or where immediate traction is needed, though it may require frequent replenishment and clean up after it settles.

5. Baking Soda

Baking soda sprinkled on icy paving stones as a natural de-icing alternative.

Baking soda is a gentle yet effective de-icer. It works by lowering the freezing point of water, preventing ice from bonding to surfaces. 

It’s non-corrosive and safe for paving stones, plants, and pets. However, it is best suited for smaller areas or light snow and ice conditions, as it can be less effective in extreme cold.

6. Vinegar and Water Solution

A mixture of vinegar and water can be used as a mild de-icer for light snow or ice. Vinegar’s acidity helps break the bond between ice and surfaces, allowing for easier removal. 

This solution is eco-friendly and safe for paving stones but may require reapplication in extreme conditions or prolonged cold weather.

7. Urea

Urea is commonly used as a fertiliser but can also be an effective de-icer. Compared to traditional salts, it’s safer for plants and animals and less harmful to paving stones. 

Urea works by accelerating the melting of snow and ice, but excessive amounts can lead to soil contamination over time.

8. Beet Juice-Based Solutions

Beet juice-based de-icers are gaining popularity for their eco-friendly properties. These solutions combine beet juice with salt or other substances to enhance melting efficiency at lower temperatures. 

The natural sugars in beet juice help keep the ice from refreezing. It’s safe for paving stones, reduces corrosive effects, and is biodegradable, making it a green alternative.

Best Practices for De-icing Paving Stones

A person applying de-icing material on paving stones with care, following best practices for safety and durability.

Maintaining your paving stones during winter doesn’t have to be complicated. Follow these best practices for safe, effective de-icing and protect your outdoor surfaces while ensuring optimal performance all season long.

1. Choose Stone-Safe De-Icers

Select non-corrosive, eco-friendly de-icers like Calcium Magnesium Acetate (CMA) or Potassium Acetate to protect your paving stones from damage while effectively melting ice and snow.

2. Apply Evenly and Sparingly

When applying de-icer, spread it evenly across the surface to avoid overuse. A thin, uniform layer is sufficient to prevent staining and erosion, ensuring optimal results without harming your paving stones.

3. Use the Right Tools

Avoid metal shovels or tools that can scratch and damage your paving stones. Opt for plastic shovels, snow blowers, or brooms to gently remove snow and ice, preserving your pavers’ surface.

4. Time Your Application

Apply a de-icer before snow accumulates too heavily, allowing it to work effectively before ice bonds to the stones. This makes removal more manageable and reduces the chances of long-term damage to the stone surface.

5. Remove Residual Product

After de-icing, always clear any leftover product from your paving stones. This helps prevent the build-up of harmful chemicals and ensures your paving stones remain in good condition throughout the winter.

How to Clean and Maintain Paving Stones After De-Icing

Cleaning off residue after de-icing to maintain their appearance and integrity.

Once winter is over, it’s time to give your paving stones some TLC. Follow these simple steps to clean and maintain them, ensuring they stay in excellent condition and last for many seasons.

  • Remove Excess De-Icer: Use a broom or plastic shovel to clear any leftover de-icer from the surface. This prevents the residue from soaking into the stone and causing long-term damage.
  • Clean with Mild Detergent: Use a gentle solution of warm water and mild detergent to clean your paving stones. Avoid harsh chemicals, as they can damage the stone’s finish over time and affect its appearance.
  • Rinse Thoroughly: After cleaning, rinse the paving stones thoroughly with clean water to remove any remaining cleaning solution or residue. This helps prevent any build-up that could stain or damage the surface.
  • Inspect and Reapply Sealant: Check the condition of the sealant on your paving stones. Apply a fresh coat if the sealant shows signs of wear or damage. Sealing creates a protective barrier that shields the stone from moisture and future de-icing chemicals.
  • Check for Cracks and Damage: After cleaning and re-sealing, inspect your paving stones for any signs of cracks or damage caused by the winter freeze-thaw cycle. If needed, repair the damaged stones promptly to prevent further deterioration and ensure long-lasting durability.

Preventing Future Damage: Proactive Care Tips

Well-maintained paving stones with no cracks, showcasing the results of proactive care to prevent future damage.

Protecting your paving stones starts long before winter arrives. Following these simple yet effective care tips, you can safeguard your stones against harsh weather and ensure they stay in top condition for years.

  • Resand the Joints Between Pavers: Reapply sand to joints to prevent weed growth and maintain stability. Use polymeric sand for added durability and to reduce erosion over time.
  • Apply Joint Stabilisers: Joint stabilisers lock sand in place, preventing erosion and enhancing the longevity of paving stones, especially in areas with heavy rainfall or freeze-thaw cycles.
  • Ensure Proper Drainage: Paving stones should be laid with a slight slope to direct water away. Proper drainage prevents water from pooling on the surface, reducing the risk of freeze-thaw damage and maintaining the structural integrity of your stones.
  • Protect with Edge Restraints: Install edge restraints around your paving stones to prevent shifting during freeze-thaw cycles. This ensures the integrity of the stone layout and keeps them securely in place.
  • Maintain Vegetation Around Pavers: Trim plants and trees near pavers to prevent root damage and reduce debris that could stain or degrade the stone over time, ensuring long-lasting, pristine surfaces.

Conclusion

At Splendour in Stone, we believe in keeping your outdoor spaces beautiful and durable through every season. You can protect your paving stones from long-term damage by choosing safe, eco-friendly de-icing solutions and following proper maintenance practices. 

Don’t wait for the damage to appear – invest in the right products today and ensure your paving stones remain pristine for years.

How to Remove Motor Oil from Pavers

Motor oil stains on pavers can be a real headache, whether it’s from an accident while changing the oil or a slip-up in the garage. 

But all is not lost—there are simple, effective methods to restore your pavers to their original beauty. Picture those stubborn stains disappearing, leaving your driveway or patio looking as good as new. 

In this guide, we’ll walk you through the best techniques to remove motor oil from pavers so your outdoor space stays clean and welcoming. Read on.

Why Motor Oil Stains on Pavers Are Problematic

Close-up of motor oil stains on pavers highlighting the damage and unsightly appearance.

Motor oil stains on pavers are not just unsightly—they can cause long-term damage. The oil seeps into porous surfaces, making them harder to clean and weakening the pavers over time. 

This can lead to slippery areas, increasing the risk of accidents. Additionally, untreated oil stains can wash into drainage systems, harming the environment by contaminating water supplies. 

Prompt removal is essential to maintain the beauty and safety of your outdoor spaces while preserving the integrity of your pavers. Act quickly to keep your surfaces looking pristine and protect the surrounding environment.

Tools and Materials Needed

Essential tools and materials neatly arranged for removing motor oil from pavers.

To effectively remove motor oil stains from pavers, having the right tools and materials on hand is essential. Gathering everything before you start will make the process smoother and more efficient. Here’s what you’ll need:

  • Absorbent Material (e.g., cat litter, baking soda or sand): This will help soak up excess oil from the surface, preventing it from spreading further.
  • Dish Soap or Degreaser: A powerful degreaser will break down the oil, making it easier to lift from the pavers. Dish soap, with its grease-cutting properties, can also be effective.
  • Broom or Scrub Brush: A stiff-bristled broom or scrub brush is essential for scrubbing away the oil and detergent solution.
  • Hot Water: Hot water helps activate cleaning agents and will make scrubbing more effective.
  • Bucket: A sturdy bucket is necessary to mix your cleaning solution and water.
  • Protective Gloves: Motor oil can irritate the skin, so gloves protect your hands during cleaning.
  • Pressure Washer (optional): A pressure washer can provide extra cleaning power, especially for large areas with tougher stains.

Step-by-Step Guide for Removing Motor Oil Stains

Hands demonstrating step-by-step techniques to remove motor oil stains from pavers.

Motor oil stains can be a nuisance, but they’re easy to remove with the proper steps. Follow this guide to learn how to effectively clean motor oil stains and restore your pavers, keeping your outdoor surfaces looking pristine.

Step 1: Blot the Stain Immediately

Act quickly to blot up the excess oil with absorbent materials like paper towels or a cloth. The faster you remove the spill, the less time the oil has to penetrate the paver surface. 

Be sure to avoid rubbing, as this can spread the stain further. The goal is to soak up as much oil as possible before it sets.

Step 2: Apply Absorbent Powder (Baking Soda or Cat Litter)

Once the excess oil is blotted, cover the stain with an absorbent material such as baking soda or cat litter. These materials help draw out any remaining oil from the paver. 

Leave it to sit for 15-30 minutes, allowing it to fully absorb the oil. Afterwards, sweep or vacuum the powder off the surface, revealing a cleaner paver.

Step 3: Scrub the Area

Prepare a mixture of warm water and a degreasing cleaner or dish soap. Use a stiff brush to scrub the oil stain, applying pressure to lift the oil from the pavers. 

Scrubbing the surface thoroughly will work the solution into the paver’s porous material, effectively breaking down and lifting the oil. Focus on areas with the most staining.

Step 4: Rinse and Repeat

Once you’ve scrubbed the stain, rinse the area with clean water to remove any leftover cleaner or residue. Assess if the stain has completely gone. 

If the oil stain remains, repeat the process. Some stains may require multiple rounds of scrubbing or additional absorbent material to remove the oil entirely.

Step 5: Use a Pressure Washer (Optional)

A pressure washer can help remove deep-set oil stains on larger or more stubborn pavers. The high-pressure water forces oil out of the paver’s surface, cleaning stubborn stains

Use the washer on a low setting to avoid damaging the pavers. Sweep the nozzle across the area for an even, thorough clean.

Additional Tips for Stubborn Stains

Expert tips and tricks for tackling stubborn motor oil stains on pavers.

For stubborn motor oil stains that won’t budge after the initial cleaning, try these additional tips to get your pavers back to their original condition.

  • Try a Commercial Degreaser: If soap and water aren’t enough, a commercial degreaser can break down tough grease and oil stains. Apply the degreaser, let it sit, and scrub with a stiff-bristled brush for deeper cleaning.
  • Use a Poultice for Deep Stains: For oil that has soaked into porous pavers, a poultice made from baking soda and water can draw out the oil. Apply a thick paste, cover with plastic, and leave it for 24-48 hours. The poultice absorbs the oil, making it easier to clean off.
  • Try an Oxygen Bleach Solution: Oxygen bleach (like sodium percarbonate) is an eco-friendly alternative for tough stains. Mix with warm water, apply to the stain, and let it sit for 15-30 minutes before scrubbing. It’s gentle on pavers but effective on deep stains.
  • Use a Scraper for Residue: If sticky residue remains, gently scrape it off with a plastic scraper. Be careful not to scratch the surface, working in small sections for the best results.
  • Apply a Commercial Concrete Cleaner: For persistent stains, use a commercial concrete cleaner designed for heavy-duty cleaning. Follow the manufacturer’s instructions, scrub, or pressure wash for a thorough clean.

When to Call a Professional

Professional assessing motor oil stains on pavers for advanced cleaning solutions.

While many motor oil stains can be tackled with DIY methods, there are situations where it’s best to call in a professional to ensure the job is done right.

1. Persistent Stains

If the oil stain remains after several cleaning attempts, it may have soaked deeply into the pavers. A professional can use industrial-grade cleaning agents and specialised equipment to tackle even the most stubborn stains without damaging the surface.

2. Large Areas or Heavy Spills

For extensive spills covering large areas or hard-to-reach spots, DIY cleaning can be overwhelming. Professionals can handle large-scale clean-ups efficiently, ensuring consistent results across the entire surface.

3. Damage to Pavers

If your cleaning attempts have caused any discolouration or surface damage, it’s time to call in an expert. Professionals can assess and restore the pavers, using the correct methods to repair damaged stones and preserve their integrity.

4. Safety Concerns

Motor oil can create a slippery surface, and using powerful cleaning equipment like pressure washers can only be safe with proper training. Professionals are equipped to handle these tasks safely, avoiding injury and damage to your property.

Conclusion

Removing motor oil from pavers doesn’t have to be a hassle. With the right techniques and tools, you can restore your outdoor surfaces to their former glory. Whether you’re dealing with a small stain or a larger spill, following the correct steps will make all the difference. 

For those stubborn stains or larger areas, professional cleaning ensures a deep, lasting clean without damaging your pavers. Ready to make your pavers look brand new again? Contact Splendour in Stone for expert advice and high-quality solutions today!

New Year, New Home: How to Upgrade Your Space with Natural Stone in 2025

With 2025 just around the corner, now is the perfect time to start thinking about upgrading your home for the New Year. Natural stone could be the answer if you’ve been looking for ways to elevate your space. 

Natural stone offers both beauty and durability, Whether adding a touch of elegance to your kitchen, transforming your bathroom, or enhancing your outdoor spaces. 

In this guide, I’ll walk you through how to upgrade your home with natural stone, helping you create a timeless, stylish look for the year ahead.

1. Evaluate Your Current Space

Reviewing your home to plan a natural stone upgrade for 2025.

Start by evaluating your space. Focus on areas that need attention—are your kitchen surfaces worn or is your bathroom missing that wow factor? Identifying rooms that would benefit most from stone will guide your renovation. 

Think about how natural stone can improve both functionality and aesthetics. High-traffic spaces like entryways or living rooms can benefit from durable materials. Careful evaluation ensures your upgrades will add long-term value and visual impact.

2. Choose the Right Type of Natural Stone

Choosing the right natural stone for your renovation depends on the unique qualities each stone offers. Bluestone is highly durable and versatile. Its elegant blue-grey tones and slip-resistant surface make it ideal for outdoor areas like patios and pool surrounds.

Marble exudes luxury with its beautiful veining and polished finish, making it perfect for kitchens, bathrooms, and feature walls, though it requires regular maintenance. 

Granite is incredibly durable, resistant to scratches and stains, and perfect for high-traffic areas such as kitchen countertops and outdoor paving. 

Limestone provides soft, neutral tones that create a warm, inviting atmosphere, ideal for floors, walls, and paths, but it requires proper sealing to prevent moisture damage. 

Finally, Travertine offers a rustic, earthy aesthetic with its porous surface and aged look, making it a popular choice for Mediterranean-style designs in both indoor and outdoor spaces, though it also needs sealing for protection.

3. Incorporate Natural Stone in Key Areas

Highlighting key areas for natural stone upgrades in your home.

Natural stone is a versatile material that can elevate key areas of your home, both indoors and outdoors. In the kitchen, granite or marble works beautifully for surfaces like worktops or bar areas, offering both elegance and durability. 

Natural stone can also be used for splashbacks and kitchen islands, adding a luxurious touch while remaining highly functional. Whether for a modern or traditional style, stone enhances both the aesthetic and usability of your kitchen.

Stone, with its luxurious texture and timeless appeal, creates a spa-like atmosphere in the bathroom. Stone tiles on the floors and walls, along with marble, limestone, or travertine for shower enclosures and vanity tops, bring a seamless, elegant design. The natural veining and textures of stone create a serene retreat.

In the living room, a natural stone feature wall or fireplace becomes a striking focal point, adding warmth, character, and texture. Whether indoors or outdoors, stone brings sophistication, making your living spaces more inviting and valuable.

4. Combine Natural Stone with Modern Design Trends

Blending natural stone with 2025's modern design trends.

Natural stone can be seamlessly integrated into modern design trends, adding timeless appeal to contemporary spaces. 

In minimalist interiors, materials like marble or granite in neutral tones enhance the clean lines and simplicity of the design. Polished stone countertops or splashbacks complement sleek cabinetry, creating an uncluttered, refined look. 

Pairing natural stone with contrasting textures, such as exposed wood or metal, adds depth and character, especially in living rooms or outdoor areas. The mix of smooth stone surfaces with tactile elements creates balance and sophistication. 

Another popular trend is combining light and dark tones, where dark stones like granite or slate contrast with light wood or soft furnishings to create a bold, modern atmosphere. 

Natural stone is also perfect for feature walls, adding texture and depth to open-plan living spaces. Large-format stone tiles with minimal grout lines enhance spaciousness and flow, making the space feel luxurious and contemporary.

5. Incorporate Bold Patterns and Textures

Using bold patterns and textures to enhance natural stone designs.

Bold patterns and textures are a growing trend in interior design. Natural stone is perfect for creating striking visual interest through patterns like herringbone, chevron, or geometric shapes. 

These patterns can be used in floor tiles, backsplashes, or feature walls, offering a unique, contemporary feel. Stones like marble, limestone, or travertine can create natural veining, which adds organic texture and character. 

Alternatively, angular cuts of stone lend themselves to geometric patterns that create clean, sharp lines. Whether in kitchens, bathrooms, or living spaces, bold patterns make a space dynamic and full of personality.

6. Embrace Sustainable Design with Natural Stone

Sustainability is an important trend, and natural stone is an eco-friendly material. Stone is natural, non-toxic, and long-lasting, making it a sustainable choice for home upgrades. 

It requires minimal maintenance, reducing the need for frequent replacements, and is fully recyclable. By choosing locally sourced stone, you can reduce the carbon footprint of your renovation. 

Additionally, natural stone doesn’t rely on synthetic materials or harmful chemicals, making it a healthier option for your home. Incorporating sustainable design with stone creates beautiful, responsible spaces that remain stylish for years.

7. Embrace Warm, Earthy Tones

Adding warmth with earthy tones in natural stone upgrades.

In 2025, warm, earthy tones will dominate interior design. Stones like travertine, limestone, and sandstone offer rich, organic colours that bring a grounded, calming atmosphere to any room. 

These earthy tones work well with natural wood furniture, creating a balanced, inviting space. Unlike cooler tones, these warm hues make spaces feel more intimate and welcoming. 

Whether used on floors, walls, or countertops, warm tones in natural stone add richness and comfort. This trend transforms living rooms, kitchens, and bathrooms into serene retreats that feel natural and harmonious.

8. Create Seamless Transitions with Natural Stone

Creating seamless transitions between spaces is a popular trend, and natural stone is ideal for this. 

Large-format tiles can flow effortlessly from one area to the next, creating continuity and a sense of cohesion throughout the home. For example, stone flooring can extend from the living room into the kitchen or hallway, visually unifying the spaces. 

This technique works particularly well with versatile stones like limestone, granite, or bluestone, which can be used indoors and outdoors. Seamless transitions enhance the flow of the space, making it feel expansive and harmonious.

Tips for Maintaining and Caring for Natural Stone

Simple tips for maintaining and caring for natural stone surfaces.

Natural stone is a beautiful and durable addition to your home, but proper care is essential to keep it looking its best. Here are some helpful maintenance tips to ensure your stone surfaces last:

  • Clean Regularly with pH-Balanced Cleaners: Use stone-specific, pH-neutral cleaners that won’t damage the stone’s surface or strip away its natural finish. Avoid harsh chemicals and acidic cleaners that can etch or discolour the stone. 
  • Seal the Stone Periodically: Most natural stones are porous and can absorb moisture or oils, leading to stains. To protect against this, apply a high-quality stone sealant every 1-2 years, ensuring the stone retains its beauty.
  • Avoid Harsh Chemicals and Abrasives: Always avoid harsh chemicals like bleach or ammonia and abrasive scrubbing pads. These can scratch or dull the surface of your stone, ruining its finish. Stick to mild, stone-friendly cleaners to preserve its appearance and longevity.
  • Protect High-Traffic Areas: High-traffic areas such as entryways or hallways can cause wear and tear over time. Protect these spaces by placing rugs or mats in front of stone surfaces. This helps prevent dirt and grit from scratching or damaging the stone.
  • Prevent Scratches and Heat Damage: Never cut directly on stone surfaces or place hot pots and pans on them. Sharp knives can scratch the surface, while heat can cause discolouration or even cracking. Always use cutting boards and trivets to protect your stone surfaces.

Conclusion

Upgrade your home with the timeless elegance and durability of natural stone this New Year. From luxurious kitchens to serene bathrooms and stunning feature walls, natural stone transforms any space into a masterpiece of style and functionality. 

With the right care and design, your stone features will add value and sophistication for years to come. Ready to begin your transformation? Explore Splendour in Stone’s expert advice, products, and services to bring your 2025 home upgrade vision to life!

How To Use Polymeric Sand When Installing Pavers

A stunning patio can quickly lose its charm with weeds sprouting or pavers shifting out of place. 

Polymeric sand is the solution—locking pavers securely, preventing weed growth, and ensuring long-term stability. This special sand helps keep your patio looking pristine, season after season. 

Want to learn how to use polymeric sand for a flawless finish? Keep reading to find out how this simple yet effective material can transform your outdoor space.

What is Polymeric Sand?

Polymeric sand is a specially engineered mixture of sand and polymers designed for use between pavers. 

When activated with water, the polymers bind the sand particles together, creating a strong, durable bond that locks the pavers in place. This unique composition helps prevent weed growth, reduce shifting, and minimise erosion. 

It also allows water to flow through the joints while maintaining the integrity of the paver structure. Polymeric sand is commonly used in patios, driveways, and walkway installations, providing enhanced stability and longevity for outdoor spaces.

Tools and Materials You’ll Need 

Essential tools and materials for using polymeric sand with pavers.

To achieve a flawless paver installation with polymeric sand, having the right tools and materials is crucial. These essential items will make the process smoother and ensure long-lasting results. Here’s what you’ll need:

  • Polymeric sand: Choose high-quality, moisture-resistant sand suitable for your pavers and joint size.
  • Broom: To sweep sand into the joints between pavers.
  • Leaf blower: To clear excess sand off the paver surface without disturbing the joints.
  • Plate compactor or rubber mallet: To compact the sand into the joints and ensure a firm bond.
  • Sprayer or watering can: To activate the polymeric sand by wetting it.
  • Level: To ensure the pavers are laid flat and even.
  • Edging materials: Such as plastic or metal strips, to secure the patio perimeter.

Step-by-Step Guide on How to Use Polymeric Sand for Pavers

Clear steps to apply polymeric sand for perfect pavers.

Achieving a perfect patio starts with the right application of polymeric sand. Follow these step-by-step instructions to keep your pavers securely locked in place, preventing shifting, weeds, and erosion for years.

Step 1: Clean and Dry the Paver Surface

Before applying polymeric sand, ensure the paver surface is clean and completely dry. Remove dust, dirt, debris, and moisture to allow the sand to bond effectively. 

Check that the joints between pavers are 1/8″ to 1/4″ deep. Proper surface preparation ensures optimal adhesion, preventing uneven settling and poor bonding, which can lead to long-term issues such as shifting pavers.

Step 2: Apply Polymeric Sand

Select the correct polymeric sand for your climate and paver type. Spread the sand evenly over the surface and use a broom to sweep it into the joints. Ensure the joints are completely filled without overfilling. 

Properly filling the joints creates stability, reduces weed growth, and helps to prevent the pavers from shifting. This step is crucial for long-term durability and maintaining the overall appearance.

Step 3: Compact the Sand into the Joints

Use a plate compactor to compact the sand into the joints, moving in multiple directions, both side-to-side and diagonally. Compaction is vital to secure the sand and ensure the pavers stay stable. 

Compacting the sand properly prevents future shifting or unevenness in the pavers. Avoid disturbing the pavers while compacting to maintain a smooth, level surface for the final installation.

Step 4: Activate the Polymeric Sand

Lightly mist the sand with water after compacting to activate the polymeric sand. Be cautious not to use excessive water, as this can cause washout and improper curing. 

The correct moisture level allows the sand to bond and lock the pavers into place. Allow the sand to cure for 24-48 hours before using the area, ensuring a firm, stable surface that will last for years.

Step 5: Remove Excess Sand and Inspect the Joints

Once the polymeric sand has cured, remove any excess sand from the surface using a leaf blower or a soft broom. Inspect the joints to ensure they are properly filled. 

Refill any gaps with additional sand, if necessary, to maintain stability and prevent weed growth. This final step ensures that your pavers are secure, neat, and long-lasting.

Benefits of Polymeric Sand Over Traditional Sand

Discover why polymeric sand outshines traditional sand.

Polymeric sand offers numerous advantages over traditional sand, providing enhanced durability, weed prevention, and reduced maintenance. Here is why it’s the superior choice for long-lasting, stable, and beautiful paver installations.

  • Superior Durability: Polymeric sand is more durable than traditional sand, as it binds together when activated with water. This prevents erosion and washouts, offering long-lasting stability for your paver installation.
  • Weed Prevention: Polymeric sand forms a strong, hardened surface that blocks weed growth, unlike traditional sand. It prevents weeds from sprouting between pavers, reducing the need for constant maintenance or chemical treatments.
  • Reduced Maintenance: Polymeric sand requires significantly less maintenance over time due to its resistance to shifting and erosion. It ensures that your paver joints remain intact and reduces the need for frequent repairs.
  • Prevents Ant Colonies: The hardened surface created by polymeric sand deters ants from building colonies between pavers. This helps maintain the integrity of your patio or driveway and reduces the likelihood of pest problems.
  • Enhances Drainage: Polymeric sand allows water to flow through the joints while maintaining joint stability. This helps to reduce the risk of water pooling or erosion, improving the overall drainage of your paved area.

Common Mistakes to Avoid When Using Polymeric Sand

Key mistakes to avoid for successful polymeric sand application.

While polymeric sand offers numerous benefits, applying it incorrectly can lead to costly mistakes. Avoid these common errors to ensure your paver installation stays strong, stable, and long-lasting.

1. Applying Polymeric Sand in Wet Conditions

Using polymeric sand in wet or rainy weather can interfere with its proper activation, preventing it from binding effectively. For optimal results, ensure the surface is completely dry, as moisture can lead to uneven hardening and a weakened bond.

2. Over-Wetting the Sand

Applying too much water to polymeric sand can cause it to become overly saturated, washing away or not setting properly. This can lead to ineffective joint filling and ultimately reduce the sand’s ability to prevent shifting or weed growth.

3. Not Compacting the Sand Properly

Insufficient compaction of polymeric sand can result in loose, uneven pavers. If the sand isn’t compacted well, the pavers may shift over time, causing instability. Be sure to compact in multiple directions to ensure the sand fills all joints evenly and securely.

4. Using the Wrong Type of Polymeric Sand

Choosing the wrong type of polymeric sand for your specific paver installation can cause issues like improper joint filling or reduced durability. For best results, select the correct sand based on factors such as joint width, paver material, and your local climate.

How to Maintain Pavers Installed with Polymeric Sand

Tips to keep your polymeric sand pavers looking great.

Maintaining your pavers installed with polymeric sand is key to preserving their longevity and appearance. Follow these simple tips to keep them looking great and functioning perfectly for years.

  • Clean the Pavers Regularly: Sweep the surface to remove dirt, leaves, and debris. Use a pressure washer on a low setting to clean without disturbing the polymeric sand in the joints.
  • Replenish Polymeric Sand: Over time, polymeric sand may settle or wear away. Reapply and compact sand in the joints to maintain stability and prevent weed growth.
  • Protect from Water Damage: Ensure proper drainage and clear gutters and drains. Consider using a water-repellent sealer to prevent erosion and moisture damage to the pavers.
  • Inspect the Joints: Regularly check the joints for signs of sand erosion or gaps. Refill any areas that have lost sand to maintain paver stability and prevent weeds from growing through.
  • Seal the Pavers: Apply a protective sealant to prevent stains, fading, and moisture penetration. Sealing helps preserve the appearance of your pavers and extends their lifespan.
  • Avoid Heavy Loads: Be mindful of heavy furniture, equipment, or vehicles placed on the pavers. Excessive weight can cause shifting or cracking over time, potentially damaging the polymeric sand joints.

Conclusion

Incorporating polymeric sand into your paver installation ensures a stable, long-lasting surface that resists weeds and shifting. By following the right application steps and maintenance tips, you can enjoy a flawless patio or driveway for years. 

Ready to enhance your outdoor space? Explore our range of high-quality polymeric sands at Splendour in Stone and make your paver installation project a success today.

How to Protect Your Pavers During Winter Weather

Winter weather can damage your pavers, leading to cracks, shifting, or discolouration. Preventative measures are essential to protect your investment. 

From cleaning and sealing to maintaining proper drainage, there are several steps you can take to safeguard your pavers against frost, snow, and ice. 

This guide will share the best practices to ensure your pavers stay intact and look great during harsh winter.

1. Clean Your Pavers Before Winter

Thoroughly cleaning pavers before winter helps prevent stains and damage from ice and snow.

As winter approaches, cleaning your pavers is an essential first step in protecting them from damage. Over time, dirt, leaves, and organic debris can accumulate on the surface and joints, trapping moisture. This moisture can lead to staining, algae growth, and even paver deterioration.

Use a pressure washer to clean your pavers. This is the most effective way to remove dirt, leaves, and grime from the surface. 

Be sure to use a wide-angle nozzle to prevent any damage to the pavers. To remove stubborn debris and stains, a stiff brush can help loosen dirt and algae, especially between joints.

Additionally, check and remove moss or lichen growing on the pavers before winter. If left untreated, these can trap moisture and exacerbate potential damage. Regular cleaning is key to maintaining the appearance and integrity of your pavers during the colder months.

2. Seal Your Pavers for Extra Protection

Sealing your pavers adds an extra layer of protection against harsh winter conditions and moisture.

Sealing your pavers before winter is crucial in safeguarding them against harsh weather. A high-quality paver sealer forms a protective barrier that helps prevent moisture from penetrating the surface, significantly when temperatures fluctuate between freezing and thawing.

The freeze-thaw cycle can lead to cracks, shifting, and general wear and tear on the pavers. Sealing pavers helps prevent moisture damage by reducing the risk of cracks caused by freezing and thawing, protects against stains from dirt, leaves, and snow-melting chemicals, and enhances durability by making the pavers more resistant to environmental damage.

Sealing can significantly extend the life of your pavers, ensuring they stay looking their best and perform well through the colder months.

3. Use a Protective Covering for Snow and Ice

When a snowstorm or ice storm is on the horizon, covering your pavers effectively prevents damage from harsh weather. Protective covers like tarps, plastic sheeting, or specialised covers are ideal for shielding your pavers from snow and ice.

Select the proper covering, such as tarps or breathable covers designed for outdoor use, to protect your pavers. Ensure the cover is tightly secured to prevent it from being blown away by strong winds, and consider weighing it down with bricks or securing it with ropes.

After the storm, it’s important to remove the covering promptly to avoid trapping moisture underneath, which could cause damage to the pavers. By taking these precautions, you can help preserve the integrity of your pavers throughout winter.

4. Avoid De-Icing Salt or Chemicals

Avoid using de-icing salts or chemicals to prevent paver damage and discoloration during winter.

While de-icing salt is commonly used to melt ice, it can harm your pavers over time. Salt and other chemical de-icers can seep into the pores of your pavers, leading to deterioration, discolouration, and surface damage. The effects are especially noticeable during freeze-thaw cycles, which can cause cracks and shifting in the pavers.

Safer Alternatives: Use sand for traction or Calcium Magnesium Acetate (CMA) instead of salt for safer ice control. Both are gentle on your pavers and effective in winter conditions.

If Using De-Icers, always check the label to ensure they’re safe for your paver material. Avoid over-applying chemicals to prevent potential damage and preserve the integrity of your pavers.

5. Repair Cracks and Damage Before Winter

Fixing cracks and damage before winter helps prevent further deterioration from freeze and thaw cycles.

Before the cold weather sets in, addressing any existing cracks or damage in your pavers is crucial. While small cracks may seem harmless, they can worsen during the freeze-thaw cycle as water seeps in and freezes, causing them to expand.

Left untreated, it can lead to more significant damage and costly repairs. To prevent this, thoroughly inspect your pavers for any visible cracks, chips, or gaps between the joints. For minor cracks, use a paver repair compound to fill them in.

These products bond with the surface, providing long-lasting repairs. However, for larger cracks or severely damaged pavers, replacement may be necessary to maintain the integrity of the surface. Taking these steps before winter arrives will help protect your pavers from further damage and extend their lifespan.

6. Maintain Proper Drainage

Ensure proper drainage to prevent water buildup, which can cause pavers to shift or crack during winter.

Ensuring proper drainage is essential to protect your pavers during winter. Water pooling on the surface or between the pavers can freeze in cold temperatures, causing expansion and contraction that may damage the paver structure. Your pavers should be installed with an adequate drainage system to prevent this.

Before winter, check that water flows freely from the paver area, as pooled water can lead to freezing and cracking. If necessary, add jointing sand between the pavers to fill gaps and improve drainage, allowing water to pass through more easily.

For more severe drainage issues, consider installing a drainage system beneath the pavers, such as a French drain or surface drainage system, to direct water away and prevent ice formation. Proper drainage can significantly reduce the risk of damage to your pavers throughout winter.

7. Use a Paver Joint Stabiliser

Applying a paver joint stabilizer helps keep joints intact and prevents shifting or erosion during winter weather.

Using a paver joint stabiliser is crucial to protecting your pavers during winter. The stabiliser locks the sand between the joints, preventing it from washing away during heavy rain or snowmelt. The sand can erode without this protection, causing gaps that may lead to shifting or misaligning the pavers over time.

Applying a paver joint stabiliser helps maintain the integrity of your paved surface by reducing shifting, enhancing durability, and ensuring the pavers remain firmly in place. 

To apply, clean your pavers and their joints thoroughly to remove any debris. Next, apply the stabiliser according to the manufacturer’s instructions, ensuring it is evenly distributed.

Finally, seal the pavers to ensure the stabiliser bonds effectively with the sand, providing long-lasting protection. By following these steps, your pavers will be better equipped to withstand the harsh winter conditions and maintain their appearance and stability.

8. Protect Your Pavers from Heavy Loads

Protect your pavers from heavy loads like snowplows or vehicles to prevent cracking or shifting during winter.

To protect your pavers from heavy loads during winter weather, it’s essential to consider both the weight and the conditions that could cause damage. 

Heavy snow, ice, and the stress from vehicles or equipment can crack or shift pavers if not properly supported. Start by applying a protective layer, such as sand or a specialised paver stabiliser, to help distribute weight evenly across the surface. 

When using heavy machinery, avoid direct contact with the pavers by using plywood or mats to distribute the load. If snow and ice accumulation is a concern, use a shovel or broom to remove the bulk of snow to prevent it from compacting into the surface. 

Avoid using harsh chemicals like rock salt that can erode the surface over time. Regular inspection during the colder months will also help identify any signs of stress or damage, allowing you to address them before they worsen.

9. Regular Snow Removal Tips

Use a plastic shovel or broom for snow removal to avoid damaging pavers, and clear snow promptly to prevent ice buildup.

Proper snow removal is crucial for protecting your pavers during the winter months. Early snow removal helps prevent ice formation, which can damage the surface of your pavers. Here’s how to remove snow without compromising the integrity of your paved surfaces:

  • Start Early: Begin clearing snow as soon as it starts accumulating. This helps prevent the snow from compacting into ice, which is harder to remove.
  • Use the Right Equipment: Invest in quality snow removal tools like a snow blower, a sturdy shovel, or a snow plough (for larger areas). Make sure the equipment is in good working condition before winter starts.
  • Shovel in Layers: Don’t try to remove all the snow at once. Shovel in layers to avoid straining yourself and to make the task more manageable.
  • Push, Don’t Lift: If you’re using a shovel, push the snow to one side rather than lifting it. This reduces strain on your back.
  • Clear Around Obstacles: Remove snow from around obstacles like trees, posts, and curbs. This improves visibility and prevents ice buildup in those areas.
  • Use Ice Melt Wisely: Once you’ve cleared the snow, apply a thin layer of ice melt or salt to prevent refreezing. Be mindful of the environment—consider pet-safe and eco-friendly options.
  • Create a Snow Pile: Designate a snow pile area away from walkways and driveways. Avoid piling snow in places where it could block traffic or pedestrian access.
  • Take Breaks: Snow removal can be physically demanding. Take regular breaks to prevent overexertion, primarily if you work long periods.
  • Clear the Roof: If there’s heavy snowfall, clear your roof or gutters to prevent ice dams or roof damage. Use a roof rake or hire a professional for higher areas.
  • Stay Safe: Be aware of slippery surfaces. Wear non-slip footwear, and be careful not to rush. If you have health concerns, consider hiring a professional service.

Conclusion

Taking the time to protect your pavers during winter can save you from costly repairs. You can keep your pavers in excellent condition by cleaning, sealing, maintaining drainage, and using the proper snow removal techniques.

Act now to preserve the beauty and durability of your outdoor surfaces — start with these simple winter care steps today!

How to Select Stone Cladding for Your Home

Choosing the right stone cladding for your home can seem daunting. With so many options available, it’s easy to get lost in the details.

But what if I told you that the perfect stone could elevate your home’s aesthetic and longevity? Imagine the sleek elegance of granite, sandstone’s timeless warmth, or limestone’s natural beauty—all available at your fingertips.

Stick with us; I’ll guide you through the key factors to ensure you choose the perfect stone for your space.

1. Consider Your Home’s Architectural Design

Match stone cladding to your home's style for a seamless look

When selecting stone wall cladding for your home, the material must complement your home’s architectural design. 

Modern homes often benefit from sleek stones like granite or quartz, which offer a polished, contemporary look. On the other hand, traditional homes may be better suited to classic stones like limestone or sandstone, which add warmth and timeless appeal. 

The right stone should enhance your home’s aesthetic and create a cohesive, harmonious appearance that adds value and charm.

2. Understand the Different Types of Stone

Each type of stone cladding offers unique characteristics that affect both its look and functionality. Granite, for instance, is a durable, low-maintenance stone that adds sophistication to any home, making it ideal for modern exteriors.

Limestone’s natural, soft texture perfectly suits rustic or traditional designs. Sandstone’s warm tones and earthy appeal bring a welcoming feel to both interiors and exteriors.

Quartz, a sleek, engineered stone, offers a contemporary, low-maintenance option for those looking for a refined finish. Understanding these materials will help you choose the best stone for your aesthetic and practical needs.

3. Take the Local Climate into Account

Choose stone cladding that suits your local weather conditions for lasting durability.

The local climate should influence your choice of stone cladding. Durable stones like granite or travertine are ideal in areas with high humidity or rainfall as they can withstand moisture and harsh weather conditions.

Limestone and sandstone, being more porous, may require regular sealing to prevent water damage. Granite is an excellent choice if you live in a colder climate because it can resist freeze-thaw cycles without cracking.

Choose a material well-suited to your region’s specific weather conditions to maintain beauty and durability.

4. Consider Maintenance and Longevity

Different stones require different maintenance levels, so it’s essential to consider how much upkeep you’re willing to commit to.

Granite and quartz are incredibly low-maintenance options, requiring minimal attention to keep their surfaces looking pristine. In contrast, limestone and sandstone, while stunning, need regular sealing to protect them from stains and moisture.

Travertine, with its porous nature, also requires sealing to maintain its appearance. Consider your lifestyle and how much time you’re willing to invest in the upkeep of your stone cladding to ensure long-term beauty and performance.

5. Stay Within Your Budget

Find the perfect stone cladding that fits your style and budget.

Stone cladding can be a significant investment, but there are options for every budget. Granite and quartz tend to be on the higher end of the price spectrum, while limestone and sandstone are often more affordable options that still provide a luxurious finish. 

Travertine can offer an outstanding balance of cost and style, giving you the look of high-end stone without the hefty price tag. Be sure to factor in the cost of the stone and the installation and choose a material that fits your budget while still delivering the look you desire.

6. Visualise How the Stone Will Look on Your Home

Before making your final decision, take time to visualise how the stone cladding will look on your home. Think about the stone’s colour, texture, and finish in relation to your exterior design.

For instance, quartz’s sleek, refined finish can create a modern look, while sandstone or limestone’s natural, earthy tones provide a more traditional feel.

Travertine’s warm, textured surface suits Mediterranean or rustic styles. Make sure the stone complements the colour of your roof, windows, and landscaping to achieve a cohesive, polished look.

7. Consult with a Stone Cladding Expert

Get professional advice to choose the best stone cladding for your home.

Choosing the right stone cladding can be challenging, and consulting with an expert can help you navigate the process.

A professional can provide recommendations based on your home’s architecture, local climate, and maintenance preferences. They will also advise on proper installation techniques to ensure the cladding is applied correctly and performs well over time.

A stone cladding expert will also help you choose a material that fits your style and budget, making the entire process easier and more efficient.

8. Think About Environmental Impact and Sustainability

Selecting an eco-friendly stone for your cladding can significantly contribute to the sustainability of your home.

Natural stones like limestone, sandstone, and granite are durable and long-lasting, reducing the need for frequent replacements and minimising waste.

Sourcing stone locally can further enhance sustainability by reducing transportation-related carbon emissions. Travertine is another environmentally friendly option with its relatively low energy requirements during extraction and processing.

By choosing sustainable materials, you will help reduce your carbon footprint and ensure that your home remains beautiful and environmentally responsible for years to come.

How to Maintain and Care for Stone Cladding

Keep your stone cladding looking great with simple maintenance tips.

Keep your stone cladding looking pristine with simple maintenance tips. Regular cleaning, sealing, and proper drainage can preserve natural beauty and ensure long-lasting durability. Here’s how to care for it.

  • Clean Regularly: Remove dust and dirt with a soft brush or broom to keep your stone cladding looking its best. Use a mild, pH-neutral cleaner and warm water. Avoid harsh chemicals or abrasive substances that can damage the surface.
  • Seal and Protect: Apply a high-quality sealer every 1-2 years to protect your stone cladding from moisture and stains. This helps maintain the stone’s pristine appearance and extends its lifespan, especially in high-traffic or weather-exposed areas.
  • Repair Damage Promptly: Inspect your stone cladding regularly for signs of chips or cracks. Quickly address any damage with professional repairs to prevent further deterioration and preserve the stone’s aesthetic appeal.
  • Prevent Staining: Wipe up spills from acidic substances, such as wine, coffee, or juice, immediately. Place mats or coasters in high-use areas to prevent staining and help maintain the stone’s natural beauty.
  • Maintain Proper Drainage: Ensure proper drainage around your stone cladding to prevent water accumulation. Effective water flow helps avoid staining, moss growth, and moisture-related damage over time.
  • Avoid Harsh Scrubbing: Avoid abrasive scrubbing pads or wire brushes when cleaning your stone cladding. These can scratch and damage the surface. Use a soft cloth or sponge for gentle cleaning to preserve the texture and finish.
  • Inspect for Moss or Algae Growth: Regularly check for moss, algae, or lichen growth, especially in shaded or damp areas. Remove any growth promptly with a soft brush and a mild cleaning solution to prevent lasting damage to the stone surface.

Conclusion

Choosing the right stone cladding for your home is a decision that blends style, functionality, and durability.

By considering key factors like your home’s design, stone type, and budget, you can achieve a stunning, long-lasting finish. Ready to enhance your home with beautiful stone cladding?

Contact Splendour in Stone today for expert advice and high-quality materials tailored to your needs. Let us help you bring your vision to life.

How to Install Natural Stone Pavers for a Durable Driveway

A driveway crafted from natural stone pavers perfectly blends timeless elegance and enduring strength. This stunning addition enhances any home, offering both aesthetic appeal and practical durability. 

However, achieving a driveway that stands the test of time requires precise installation and careful planning. Each step is vital, from preparing the ground to selecting the right materials and sealing for protection. 

This guide provides all the essential tips for creating a durable, professional-grade driveway that will combine beauty with resilience for years to come.

Materials and Tools You’ll Need

Essential materials and tools for installing natural stone pavers.

The foundation of a durable stone driveway lies in the right materials and tools. Each element ensures stability, longevity, and style. Here’s what you need for a lasting, stunning driveway:

Key Tools And Materials

  • Shovel: Essential for excavation and preparing the base, a shovel helps you move and distribute materials with ease.
  • Tamper: Used to compact the base layers, ensuring a stable foundation for your driveway. Proper compaction is crucial in preventing future settling or shifting.
  • Level: Ensures the surface is even and helps maintain the correct slope for proper drainage. A level is crucial for a professional, smooth finish.
  • Rubber Mallet: Used to gently tap pavers into place without damaging them, a rubber mallet ensures your materials are secure but not harmed.
  • Measuring Tape: Vital for accurate layout and spacing of pavers. A measuring tape helps ensure precision in your design.
  • Plate Compactor: Compacting both the base layers and the pavers themselves, a plate compactor helps create a solid, long-lasting surface that can handle heavy traffic.
  • Geotextile Fabric: A must-have for preventing weed growth and base shifting. This fabric helps enhance the longevity of your driveway by keeping the base layers intact.
  • Quality Stone Slabs: Durable materials like granite, limestone, bluestone, travertine, quartzite, and porphyry ensure longevity and enhance the aesthetic appeal of your driveway.
  • Joint Fillers: These materials help secure the pavers and prevent weed growth or water infiltration, ensuring the stability of your driveway. Options include polymeric sand, gravel, and mortar.

Step-by-Step Guide to Installing Natural Stone Pavers

Clear step-by-step process for installing durable natural stone pavers.

You can create a durable, stunning driveway with careful planning and precision. Follow this guide for professional results that combine timeless beauty with lasting functionality. Here’s how to get started:

1. Plan and Design

Begin by measuring the area for your driveway and sketching a detailed layout. Consider the type, colour, and finish of the stone pavers to complement your home’s style. 

Proper drainage is crucial; plan the design to avoid water pooling, which can damage the structure over time.

2. Prepare the Site

Clear the driveway area of grass, roots, and debris to ensure a clean workspace. Excavate the site to a 25-30 cm depth, allowing enough room for the necessary base layers. 

Compact the soil thoroughly to create a stable foundation that will support the pavers and prevent shifting.

3. Build the Base

Lay a geotextile fabric over the excavated area to prevent weed growth and shifting. Spread a 10-15 cm layer of gravel evenly and compact it firmly to provide a solid sub-base. 

Add a 5-7 cm layer of sand on top, levelling it carefully to create a smooth and stable surface for the pavers.

4. Lay the Pavers

Properly laying natural stone pavers for a durable driveway.

Start placing the pavers at one edge of the driveway, working outward in your chosen pattern. Use a rubber mallet to gently tap each paver into place, ensuring they are secure. 

Regularly check the alignment and level of the pavers to maintain a consistent, professional finish.

5. Fill the Joints

Depending on your preference, fill the gaps between the pavers with polymeric sand, gravel, or mortar. 

Sweep the filler into the joints until they are tightly packed. Lightly mist the surface with water to set the filler, following the manufacturer’s instructions for best results.

6. Seal and Finish

Apply a high-quality sealant to protect the pavers from stains, weathering, and wear, enhancing their longevity. Clean the surface thoroughly to remove any dust, sand, or residue. 

Install edging along the driveway to secure the pavers in place and provide a polished, finished look.

Common Mistakes to Avoid

Key mistakes to avoid when installing natural stone pavers.

Even the best materials and tools can fall short if key installation steps are overlooked. Avoid these common pitfalls to ensure your natural stone driveway remains durable and visually flawless for years to come:

1. Skipping Excavation

Failing to excavate to the proper depth weakens the foundation, compromising the driveway’s stability. A shallow base cannot support the weight of vehicles, leading to shifting and cracking over time.

2. Improper Levelling

Uneven surfaces not only disrupt the visual appeal but also create tripping hazards and allow water to pool. Proper levelling ensures a smooth, functional, and aesthetically pleasing driveway.

3. Neglecting Drainage

Inadequate drainage causes water to accumulate, leading to erosion and displacement of the pavers. 

Incorporating proper slopes and drainage systems prevents long-term damage and maintains the driveway’s durability.

4. Using Weak Fillers

Low-quality joint fillers compromise stability, allowing weeds and loose stones. Paver filling is important to maintain structure and durability. 

Using polymeric sand ensures secure pavers, enhancing the driveway’s longevity and preventing long-term issues.

5. Rushing the Installation Process

Speeding through steps like compaction, alignment, or joint filling compromises the quality of the installation. Taking the time to follow each step carefully ensures a long-lasting and professional finish.

Maintenance Tips for a Long-Lasting Driveway

Practical maintenance tips for a durable and long-lasting stone driveway.

Keeping your natural stone driveway in top condition requires regular care and attention. These simple yet effective maintenance practices will ensure your driveway remains durable, beautiful, and functional for years to come:

  • Sweep Regularly: Regular sweeping removes debris like dirt, leaves, and grit that can scratch or stain the pavers. Keeping the surface clean prevents build-up and helps maintain the driveway’s pristine appearance.
  • Reseal Every 2-3 Years: Apply a high-quality sealant every few years to protect the pavers from moisture, stains, and weathering. Paver sealing adds a protective barrier, preserving the stones’ natural beauty and extending their lifespan.
  • Monitor and Repair Promptly: Regularly inspect for cracks or loose pavers and address issues immediately. Prompt repairs prevent further damage and help maintain the driveway’s structural integrity and visual appeal.
  • Clean Stains Immediately: Use suitable cleaners to remove oil spills, tyre marks, or other stains. Timely cleaning prevents permanent discolouration and keeps the surface looking fresh and well-maintained.
  • Protect from Heavy Loads: Avoid parking overly heavy vehicles or equipment on the driveway for extended periods. Excessive weight can cause pavers to shift or crack, compromising the driveway’s durability and overall appearance.

Conclusion

Installing natural stone pavers for a driveway offers timeless beauty and exceptional durability, enhancing any home’s curb appeal. A driveway can be crafted to last for decades with proper techniques and high-quality materials. 

Regular maintenance ensures it stays both stunning and functional. Splendour in Stone provides premium natural stone and expert guidance for achieving professional-grade results. Contact Splendour in Stone today to transform any driveway into a long-lasting and elegant feature.

How to Lay a Stone Patio That Will Last for Decades

A stone patio can transform any outdoor space into a timeless and durable retreat. But what’s the key to ensuring it stands strong for decades? Precision, technique, and the right materials. 

Proper installation is essential for both beauty and longevity, whether it’s a space for entertaining or a quiet corner to unwind. 

This guide will walk you through each step and provide expert advice to help you create a patio that resists cracks, shifts, and wear. Ready to build a patio that lasts? 

Essential Tools and Materials

Must-have tools and materials for a durable stone patio.

Laying a durable stone patio starts with the right tools and materials. Every step of the process, from excavation to finishing, relies on proper equipment to ensure precision and durability.

Key tools

Tools are key to ensuring a smooth and successful patio installation. Here’s a quick rundown of the essential tools needed to do the job.

  • Spade or shovel: Essential for excavating the ground and preparing the base.
  • Wheelbarrow: Makes transporting heavy materials like gravel and sand more manageable.
  • Compactor or tamper: Vital for compacting the sub-base and ensuring a stable foundation.
  • Level and straight edge: Crucial for maintaining evenness and achieving a professional finish.
  • Rubber mallet: Used to gently position stones without causing damage.
  • String line and stakes: Helps to mark out the patio area and guide straight edges.

Materials required

The right materials are the foundation of a long-lasting and beautiful patio. Here are the key materials you’ll need for a perfect outdoor space.

  • Sub-base material: Crushed stone or gravel provides a strong foundation.
  • Sharp sand: Creates a smooth layer for the stone placement.
  • Quality stone slabs: Durable materials like granite, limestone, bluestone or travertine ensure longevity.
  • Jointing compound or mortar: Secures the stones and provides a polished finish.

How to Design a Durable Stone Patio

Design tips for a long-lasting and beautiful stone patio.

Creating a stone patio that lasts for decades starts with careful planning and design. Here are the essential steps to consider:

1. Choose the Right Location

Select a location that suits the patio’s purpose, whether for dining, relaxing, or entertaining. Ensure proper drainage to prevent water pooling, which can weaken the structure and cause long-term damage.

2. Select Durable Stones

Choosing the right stone is critical for longevity. Opt for durable materials like granite, bluestone, or limestone that provide both strength and aesthetic appeal. These stones can withstand the elements while adding timeless beauty to your patio.

3. Plan the Layout Carefully

Incorporate precise measurements into the design, and consider stable patterns such as interlocking designs or staggered joints. These patterns enhance structural integrity and create a visually appealing finish.

4. Match Stone Size and Thickness to Use

Select stones with a size and thickness that align with the patio’s intended use. For heavy traffic areas, thicker slabs offer additional durability and reduce the risk of damage over time.

5. Include Edge Restraints

Add edge restraints to keep the stones securely in place, preventing shifting or movement over time. This ensures the patio remains stable and maintains its shape for years.

6. Blend Functionality with Beauty

A successful design integrates functionality with aesthetics. Ensure the patio complements the surrounding landscape, balancing practicality with visual appeal to create a harmonious outdoor space.

How to Lay the Stone Patio: Step-by-Step Guide

A clear, step-by-step guide to laying a stone patio that lasts.

Creating a stone patio that combines timeless beauty with lasting durability requires precision and attention to detail. Follow these straightforward steps to ensure your patio stands the test of time:

Step 1. Prepare the Ground

Begin by marking the patio’s outline using a string line or stakes. Excavate the area to a depth of at least 150mm (6 inches) to accommodate the base layers. 

Ensure the ground is level and sloped slightly away from any structures to allow proper drainage. Compact the soil thoroughly using a plate compactor or tamper to create a stable foundation.

Step 2. Add the Base Layers

Spread a 100mm (4-inch) layer of crushed stone or gravel evenly across the excavated area. Compact it firmly to form the sub-base. 

Add a 30mm (1-2 inch) layer of sharp sand over the gravel, levelling it carefully with a straight edge to create a smooth, stable surface for the stones.

Step 3. Lay the Stones

Tips for properly laying stones for a stable, long-lasting patio.

Start placing your chosen stone slabs, beginning at one corner and working outward. Use a rubber mallet to position the stones securely, maintaining even spacing between each slab. Check alignment and levels regularly using a spirit level.

Step 4. Fill the Joints

Fill gaps with high-quality jointing compound or mortar to secure stones and prevent shifting. Paver filling ensures stability, prevents erosion, and enhances durability. Properly filled joints also improve appearance and protect against water damage and temperature-related cracking.

Step 5. Seal and Protect Your Patio

Apply a high-quality sealant to protect the stones from stains, moisture, and weathering. Sealing enhances the patio’s durability and preserves the stone’s natural beauty for years to come.

Maintenance Tips for a Lifetime of Enjoyment

Essential maintenance tips to keep your stone patio looking great for years.

A well-laid stone patio is a lasting investment, but regular maintenance ensures it remains stunning and functional for decades. Protecting it from weather extremes is crucial to maintaining its durability and beauty. Follow these essential tips:

  • Keep the Surface Clean: Sweep regularly to remove dirt and debris that could stain or scratch the stone. For deeper cleaning, use a mild detergent and water, avoiding harsh chemicals.
  • Seal the Stones: Apply a high-quality sealant every few years to protect the patio from moisture, stains, and weather damage, preserving its natural beauty and longevity.
  • Inspect for Damage: Check periodically for cracks, loose stones, or eroded joints. Address these issues promptly to prevent them from worsening and compromising the patio’s structure.
  • Maintain Joints: Reapply jointing compound or mortar when necessary to keep the stones in place and prevent movement or water ingress.
  • Protect from Furniture Scratches: Use furniture pads under outdoor furniture to avoid scratches, and never drag heavy items across the patio surface.

Why Splendour in Stone Is Your Go-To Source for Stone Patios

Why choose Splendour in Stone for expert, lasting stone patio installations.

Splendour in Stone is the trusted choice for crafting long-lasting stone patios. Here’s why homeowners turn to them for exceptional products and services:

1. Unmatched Selection of Premium Stones

Splendour in Stone offers extensive high-quality materials, including granite, bluestone and limestone. Their diverse collection caters to various design styles, from modern minimalism to classic sophistication, ensuring the perfect match for any project. 

Each stone is chosen for its durability and timeless appeal, guaranteeing a patio that endures both time and trends.

2. Commitment to Quality and Sustainability

Every product from Splendour in Stone meets the highest quality standards, ensuring lasting strength and beauty. Additionally, they prioritise sourcing environmentally sustainable materials, allowing homeowners to create patios that are as eco-friendly as they are stunning.

3. Expert Guidance and Support

Splendour in Stone stands out for its personalised service. Their team provides expert advice on selecting the ideal stone and offers guidance throughout installation. This commitment ensures customers achieve professional results and a patio that’s built to last.

4. Focus on Customer Satisfaction

Splendour in Stone values every customer, offering tailored solutions to meet unique needs. From initial consultations to aftercare tips, their dedication to satisfaction ensures a seamless experience from start to finish.

Conclusion

A well-laid stone patio adds timeless beauty and durability to any outdoor space, becoming a feature to enjoy for decades. By following the right techniques, using quality materials, and maintaining it properly, you can ensure lasting elegance and functionality. 

Splendour in Stone offers premium stones and expert guidance to help you achieve exceptional results. Contact Splendour in Stone today for high-quality materials and professional advice, and start creating a patio that transforms your outdoor living space.

How & Where To Use Crazy Pavers?

Tired of plain, predictable paving? Traditional paths, driveways, and patios often lack character and charm.

If you’re looking for something that stands out, you know how hard it can be to find the perfect design. Conventional options just don’t cut it—they’re dull and uninspired.

Enter crazy pavers! These irregular, natural stones can transform your outdoor spaces, adding a unique touch that’s both functional and eye-catching. Let’s explore precisely where and how to use them to bring your garden or patio to life!

What Are Crazy Pavers?

Discover the unique charm of Crazy Pavers and what makes them a standout choice for your outdoor spaces.

Crazy pavers, known for their distinctive and irregular patterns, offer a unique aesthetic appeal that sets them apart from traditional paving options. 

These pavers are typically made from natural stone, such as bluestone, sandstone, slate, or limestone, and are characterised by their random shapes and sizes. This randomness creates a mosaic-like effect, adding an element of natural beauty and charm to any outdoor space.

One key benefit of crazy pavers is their versatility. They can be used in various applications, from garden pathways and patios to driveways and pool surrounds. 

Their irregular shapes allow for creative design possibilities, enabling homeowners to craft functional and visually striking spaces.

The installation process for crazy pavers involves placing the stones together like a puzzle fitting the pieces to form a cohesive pattern. 

This can be more labour-intensive than installing uniform pavers, but the result is a bespoke and captivating surface that enhances the overall aesthetic of your property.

Additionally, crazy pavers are known for their durability and longevity. The natural stone materials are resilient to weathering and wear, ensuring that your paving will maintain its beauty and functionality for years.

How to Use Crazy Pavers

Step-by-step guide on creatively using Crazy Pavers to enhance your landscape or patio design.

Crazy pavers are a versatile and visually striking choice for various outdoor applications. They offer a natural, organic look that complements contemporary and rustic landscapes. To use crazy pavers effectively, lay them in garden pathways, where their irregular shapes can create a winding, aesthetically pleasing route through your garden or yard. 

This random arrangement adds a touch of artistry to any outdoor space. For patios, crazy pavers can create a unique surface, allowing for creative freedom in the layout while still offering durability and functionality. The pavers’ random design also works well for driveways, providing an attractive alternative to conventional paving while ensuring proper base preparation, which is crucial to supporting the weight of vehicles. 

For pool surrounds, crazy pavers are particularly useful due to their slip-resistant texture, which makes them safer than smooth paving materials. Their gaps allow water to drain quickly, preventing puddling and improving poolside safety. 

Finally, garden edging is another excellent way to incorporate crazy pavers. They create natural borders around flowerbeds, vegetable gardens, or landscaping features, adding both definition and charm to your outdoor spaces.

Where to Use Crazy Pavers

Explore the best outdoor spaces and settings to incorporate Crazy Pavers for a stylish, natural look.

Crazy pavers are irregularly shaped stones that add a unique, rustic charm to outdoor spaces. Their versatility makes them ideal for various applications, including garden paths, patios, driveways, and pool surrounds. With their natural look and ability to blend seamlessly into any landscape, crazy pavers offer a creative and functional solution for enhancing the beauty of your outdoor areas. Let us explore the best ways to use crazy pavers in your next project.

1. Crazy Pavers for Garden Paths

Crazy pavers are perfect for creating winding, organic-looking garden paths. Their irregular shapes allow for a natural, flowing design that enhances the overall aesthetics of any garden, whether you’re aiming for a rustic, woodland feel or a more modern, eclectic look. 

The gaps between the pavers also allow ground cover, such as moss, grass, or ground cover plants, to grow, adding charm and integration with the natural surroundings.

2. Crazy Pavers for Patios and Courtyards

Transform your patio or courtyard with the eclectic beauty of Crazy Pavers for a unique and inviting outdoor retreat.

Using crazy pavers in patios and courtyards offers a distinctive, textured surface that adds character and charm to your outdoor living space. Depending on your style, these pavers can be laid in a random pattern or arranged in a more controlled design. 

Their irregular edges and variety in sizes make them ideal for creating an inviting, unique outdoor space that suits a range of design aesthetics, from rustic to contemporary.

3. Crazy Pavers for Driveways

Crazy pavers can transform a standard driveway into a striking feature. Their unique, irregular shapes give the driveway an eye-catching appeal while still being durable and long-lasting. 

Proper base preparation and installation are essential for driveways to handle the weight of vehicles. When laid correctly, crazy pavers offer functionality and a distinctive design that sets your driveway apart from the typical concrete or brick alternatives.

4. Crazy Pavers for Pool Surrounds

Create a stunning poolside oasis with Crazy Pavers, offering a slip-resistant, natural aesthetic around your pool.

Due to their textured surface, crazy pavers offer excellent slip resistance around pools, making them a safe option for pool areas. Additionally, the irregular gaps between the pavers allow water to drain more effectively, reducing the risk of pooling or puddling, making surfaces slippery. 

Their natural look also complements poolside landscaping, giving the area a more integrated, rustic feel.

5. Crazy Pavers for Garden Edging

Crazy pavers are ideal for creating natural-looking garden edging. Whether outlining flower beds, vegetable patches, or landscaping features, their irregular edges blend seamlessly with the surrounding plants and soil. 

This makes them a fantastic choice for defining garden boundaries while adding a unique touch to your outdoor space. Depending on how they are laid, their appearance can complement any style, from wild and natural to structured and neat.

Benefits of Using Crazy Pavers

Discover the advantages of choosing Crazy Pavers, from durability to aesthetic appeal, for your outdoor projects.

Crazy pavers are not just a design choice; they offer numerous practical benefits, making them an excellent option for various outdoor applications. Here are the key advantages of using crazy pavers:

  • Unique Aesthetic Appeal: The irregular patterns and natural variation in stone colour create a visually striking surface that adds character and charm to any space. Each installation is unique, ensuring your outdoor area stands out.
  • Durability and Longevity: Made from robust natural stones like bluestone, sandstone, and slate, crazy pavers are highly durable. They can withstand heavy foot traffic and harsh weather conditions, making them a long-lasting investment for your property.
  • Versatility in Application: Crazy pavers can be used in various settings, including garden pathways, patios, driveways, and pool surrounds. This versatility allows for creative design possibilities, helping you enhance different areas of your property with a cohesive yet distinctive look.
  • Cost-Effectiveness: While the initial installation might be more labour-intensive, crazy pavers’ durability and low maintenance can lead to long-term cost savings. Their resilience means fewer repairs and replacements over time.
  • Environmental Benefits: Natural stone is a sustainable material, and using irregular pieces often results in less waste than uniformly cut stones. This eco-friendly aspect makes crazy pavers a responsible choice for environmentally conscious homeowners.

Crazy Pavers Maintenance and Care

Keep your Crazy Pavers looking pristine with simple maintenance tips and care advice for lasting beauty.

Maintaining crazy pavers is essential to ensure their long-term durability and aesthetic appeal. Regular cleaning is the first step—sweep away dirt, leaves, and debris to prevent build-up, and use a pressure washer on a low setting for a more thorough clean. 

For stubborn stains or algae growth, a mixture of water and mild detergent can gently scrub the pavers. Weeds can grow in the gaps between the stones, so removing them promptly is essential. You can pull them out by hand or apply a weed killer to keep your pavers neat. Installing a weed-preventing membrane beneath the pavers can help minimise future weed growth. 

Over time, the jointing material, such as sand or grout, may wear away. When this happens, it’s necessary to reapply the material to prevent the pavers from shifting. 

Sealing your crazy pavers can help protect them from stains, water damage, and fading, although it’s not always necessary. If a paver becomes cracked or damaged, replace it promptly to maintain the overall structure and design. 

Conclusion

Crazy pavers offer the perfect blend of style and durability for any outdoor space. They’ll maintain their beauty and functionality with minimal care for years to come. From creating stunning garden paths to unique patios, crazy pavers are a creative solution that will never go out of style.

They’re easy to maintain and will remain a stunning landscape featurelandscape feature. Ready to get started? Take the next step and incorporate crazy pavers into your outdoor design today!

Stone Cladded Fireplace Request

At Splendour in Stone, we specialise in supplying and installing natural stone cladded fireplaces that bring warmth, beauty, and character to your home. Each piece is crafted with precision and presence, ensuring a timeless centrepiece built to last.

Planning a new fireplace or upgrading an existing one? Complete the form below and receive your personalised quote within 24 hours.
Share anything about your vision, home style, or needs
Important Installation Note
The fireplace unit must be installed prior to our stonework.
This ensures proper fitting and a seamless final result. If you need help coordinating this, we’re happy to assist. Just mention it in your message.
In SQM?

Please fill your details to download.


      Request Callback


        Enquiry Form


        Please fill your details to download.